There is no doubt that wireless connections, especially WiFi, have become the method most used by users around the world to create computer networks and access websites and services provided on the Internet. This is mainly due to the convenience of being able to establish communication with other devices without the need for cables between them, with all the benefits that this implies.
However, on some occasions, it could happen that we do not have a Wi-FI router in the vicinity capable of offering us the possibility of being able to connect to the Internet wirelessly and that we only have an Ethernet-type connection, that is, wired, without any possibility of connecting it to a cell phone. It must also be given that we do not have a balance on the cell phone to use the Internet through its data connection.

In these cases, in the case that we have a notebook or desktop computer with a Wi-Fi network card, we can convert those computers into Wi-Fi access points, with which we would be able to share the Internet of the PC with the cell phone and other devices that use Wi-FI to connect to the Internet in the same way we would connect if we had a wireless router.
Contents
To convert a computer into a Wi-Fi access point to connect a cell phone , we will basically need a computer that has a Wi-Fi network card installed and configured, or a notebook, which generally have a Wi-Fi card. internal from its design.
In addition to the computer, we will also need the software component, that is, an application, which will be in charge of managing what is necessary so that the task of sharing the Internet from the PC to the cell phone is as simple and transparent as possible.
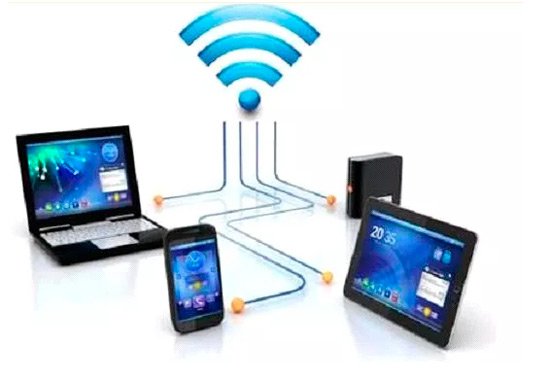
Although there are many apps that do this task, the truth is that the one we have selected for this tutorial is quite popular, especially for its ease of use and performance.
The application in question is called Free WiFi HotSpot, and it is free software with excellent behavior, stability and a really intuitive graphical interface, making it very simple and pleasant to use. It also takes security very seriously. All these points play in favor so that we cannot find even a negative comment regarding it.
How to create a Wi-Fi access point on my PC to connect my cell phone to the Internet?
Once we have collected everything we need, we can begin with the first steps of the task of sharing Wi-Fi with the cell phone and all other devices, and for this, all we have to do is follow the steps detailed below. continuation.
Step 1: The first step we have to take is to download Free WiFi Hotspot, which we can find for free by clicking on this link.
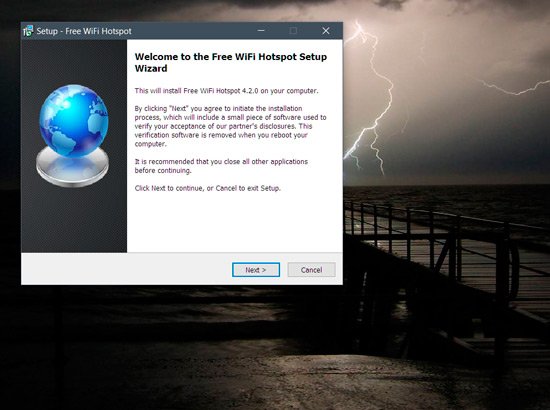
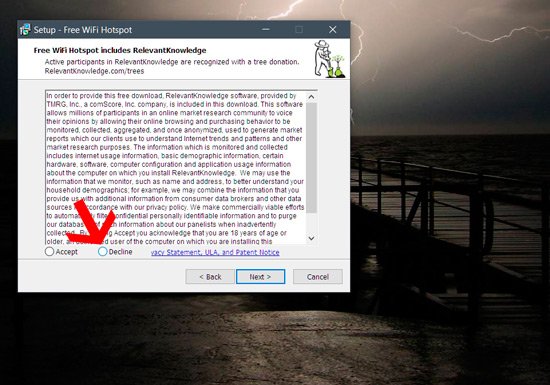
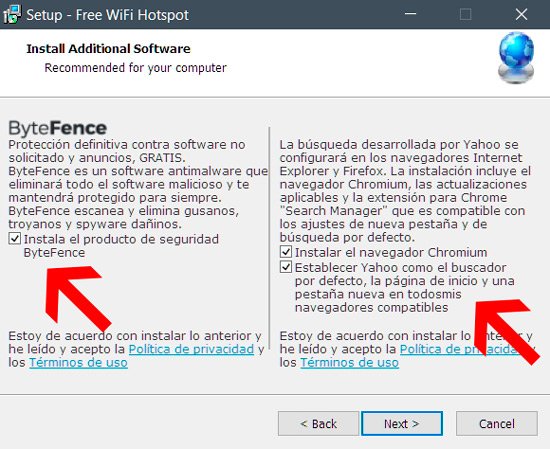
Step 2: After downloading it, we install it, but not before unchecking the third-party software that the program will try to install. At this point, as soon as the installation begins, a couple of windows will appear suggesting that we install certain software.
In order not to install them, which could become an entry point for malware and other threats, we click on the “Decline” buttons, then click on the links marked “Click here” and then uncheck the checkboxes next to the name of the software that the wizard wants to install. When we finish this step, we execute it to start sharing the Wi-FI connection of the computer with the cell phone.
Step 3: Once we have executed it, we will have to configure Free WiFi HotSpot. To do this, we will start with the first field, the name of the connection to which we will connect our cell phone. It will also be necessary to enter a password with which to protect the connection against any intruder who wants to access it without permission.
Step 4: After that, we will have to select the type of Internet connection that we want to share with the cell phone and other devices. To do this, click on the drop-down menu next to “Share” and select the appropriate option, in this case, Wi-Fi.
Step 5: When we have finished configuring Free WiFi HotSpot, to start sharing the Wi-Fi connection with other devices from our PC, all that remains is to click on the “Start” button , which will immediately implement the connection.
Step 6: Once we have completed all the necessary steps, it is time to check that the Wi-Fi connection that we have just created is available, visible and that it can be used by the cell phone and other devices without problems.

At this point it should be noted that the computer on which we create the access point to share Wi-FI with Free WiFi HotSpot will not be able to connect to that point, so it will be necessary to make these checks from a device such as a tablet or smartphone that can connect to that access point.
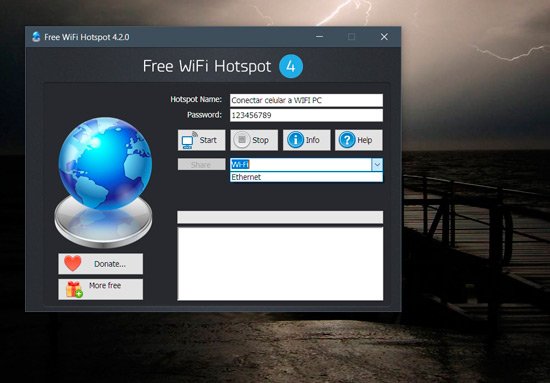
In addition to being one of the most interesting Wi-Fi access point creation tools on the market with which to turn a desktop or laptop PC into a Hotspot, Free WiFi Hotspot offers us other features that the most advanced users will appreciate. type of implementations, such as information about the IP addresses of the network , the channels used and the number of clients connected to the software, all of which can be found by clicking on the “Info” button .

Undoubtedly Free WiFi Hotspot is one of the most effective programs of its kind that we can find on the market, and also one of the simple to use, ideal for all those users who do not want to complicate their lives using the command symbol or other tools more complex.
Our cell phone is a very personal tool that we use every day to work or study, since there we usually store all kinds of data that must remain safe to keep our privacy safe. That is why practically no one allows us to even make a simple call with mobile phones. This is perfectly understandable, and it’s fair too. What right do we have to spy, even if it is not the numbers of someone else’s phone book? None. And this is why manufacturers place such an emphasis on keeping their devices safe, and we do our part to make this a general rule in our lives.

But it can happen in some scenarios that our natural reluctance to share a device has to be defeated. Imagine for example that we urgently need an Internet connection to continue with work or study on the laptop and we can not get anywhere.
In this situation, our cell phone can come for us to rescue us from such an uncomfortable situation. In what way could our smartphone be useful to us? Allowing us to use the Internet connection for data that it uses for its own operation. Although many users could argue that most of the tasks that we perform on a notebook we can also do with a top-of-the-line smartphone, the truth is that the size of the screens of this type of device is not always adequate for all applications. chores.

In order to access the Internet, cell phones use a data connection, that is, they connect to their server through a modem, which, through a few small adjustments, can be shared with other devices, including PC, Smart TV, tablets, and other devices. other cell phones and therefore have access to the Internet through the cell phone using WiFi.
In other words, if we have a cell phone, we can use it as a router to share the Internet from a cell phone to a PC, the most common scenario of all. But also as we mentioned, we can use it to share the Internet via WiFi with many other types of devices.
From this point, we explain step by step how to learn how to use Android to share the Internet from your cell phone to a PC without problems, legally and with all the speed that is possible.

If we have a recent Android cell phone, to carry out the procedure to share Internet from the cell phone to a PC we will not have to install any type of app or do any strange Android tricks.
Now if our phone is older than Froyo, the first version of Android in which this feature appeared, we respectfully recommend that you try to upgrade to a more modern version of the operating system. Recall that version 2.2 of Android dates from 2010.
If we meet the requirement of having a modern Android, we can start sharing the Internet from the cell phone to the computer. To do this, we follow the instructions detailed below.
Step 1
Click on “Settings”, and then on “Tethering and WiFi Zone”. It is possible that this last option is found in an option called “More”.

Step 2
Once in this option, click on “Zone with wireless coverage” to activate the WiFi sharing option .
Step 3
To adapt the option to share Internet from the cell phone to a PC, click on “Configure WiFi zone”.

Step 4
When the dialog box appears, we fill in the necessary fields, including the name of the network, the password and the maximum number of users we want to connect to our phone.
Step 5
When we finish configuring the items, click on the “Save” button .

Step 6
We turn on the computer that we want to link to the cell phone’s Internet connection, click on the “Wireless Networks” icon located in the notification area of most modern operating systems, and we look for the WiFi network that we have just created with the phone .

Step 7
Once the procedure is finished, we will be able to connect to the Internet on the computer through the connection offered by the cell phone. In other words, the only thing left is to connect to the WiFi network created and start enjoying the Internet.
As we mentioned throughout this post, with a few simple steps we are able to share an Internet connection using any cell phone, which is relatively modern, with which we have the advantage of having Internet access even where it is not. there is no WiFi connection point.
And the best of all is that the steps to be carried out are really simple, it is just a matter of following the instructions detailed below.
Step 1
The first thing we have to do to share an Internet connection with the cell phone is to click on the “Settings” button , and then on the item “Tethering and WiFi Zone”. We can also find this option a little more hidden depending on the version of Android that our cell phone has. Most likely you are in an option called “More”.

Step 2
Once we have reached this option, click on the item “Zone with wireless coverage”, after which we will move the slider located at the top of the screen to the “Yes” position , which will activate the option to share WiFi.
Step 3
To modify the option of sharing the Internet from the cell phone to our liking , we must click on the item “Configure WiFi zone”.
Step 4
Once the dialog box appears, we complete all the necessary data to establish a WiFi network from the cell phone, including the name that the network will have, the password and the maximum number of users that we will allow to connect to the connection of Internet from our phone.

Step 5
When we finish configuring everything necessary, click on the “Save” button .
From this point on, we will be able to access the Internet from any device through the WiFi connection that we have just created on the phone.
It should be noted that when we connect any device to the Internet connection of our phone we will be using data, that is, we will be consuming a lot of money from the telephone rate, that is, if we are users accustomed to using the Internet connection to perform very heavy tasks, such as for example uploading large files to a cloud storage service, we must be quite careful.

For this reason, either we learn to measure ourselves in the use of the Internet when we are sharing a WiFi connection with the phone, or we hire a plan that is broad enough to be able to handle ourselves without problems.