Generally, to get the WiFi signal to go further, to cover every corner of the house, or to share Internet service with the house next door, the most common solution is to buy a more “powerful” router. However, if you do not have the money or do not want to invest in other equipment, an alternative is to change the firmware or software of your current router, for one that allows you to increase the transmission power above the limit established by the manufacturer, something that It can improve download speed on connected devices.
For example, through this procedure I have been able to increase the 20 dBm of maximum power offered by my TP-Link WR940N router , by 28 dBm. This 40% increase in power has allowed me a similar signal gain on my devices and a range of five to ten meters more, considering a couple of walls in between.
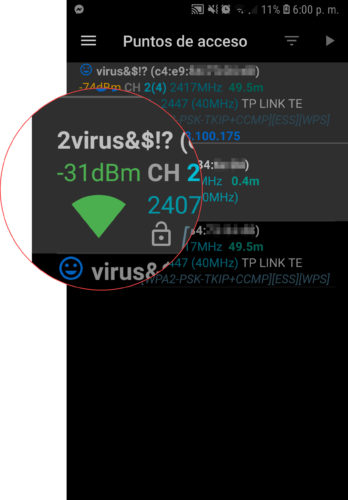

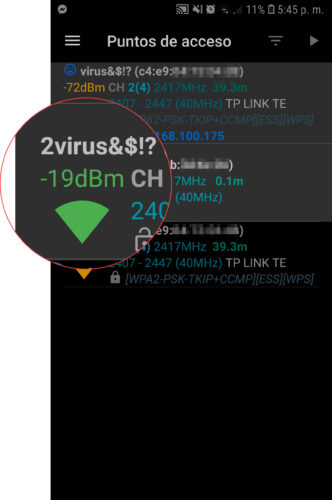
Images above: WiFi signal before and after increasing the power of my router with the firmware DD-WRT.
But the increase in power and gain of the antennas are just some advantages of this procedure. Replacing the official firmware with one like DD-WRT allows you to run the router in switch mode (adding the WAN port as one more LAN), wireless LAN client and WiFi repeater or WDS bridge with STP support (something that has prevented my connection WiFi crash with two linked routers). You get additional features like VPN, QOS Quality of Service, detailed resource monitor, router overclock, scheduled reboot, etc.
If the DD-WRT firmware does not exist for your router, other alternatives with similar advantages that you can also investigate are Tomato and OpenWRT .
DD-WRT
#gallery-2{margin:auto}#gallery-2 .gallery-item{float:left;margin-top:10px;text-align:center;width:33%}#gallery-2 img{border:2px solid #cfcfcf}#gallery-2 .gallery-caption{margin-left:0}
Some characteristics of the Firmware DD-WRT in images.
How to install
Fortunately, installing new firmware on the router is fairly straightforward. In the case of DD-WRT, there are several methods, but the easiest and recommended is from the router configuration page, option “Firmware update”. However, you must be very careful to avoid interrupting the process, because if you do, you will be left with an unusable router.
1. Reset the router to its factory settings. You should locate the “Reset” button on the back and hold it down for 10-20 seconds until all the lights come on and go off.
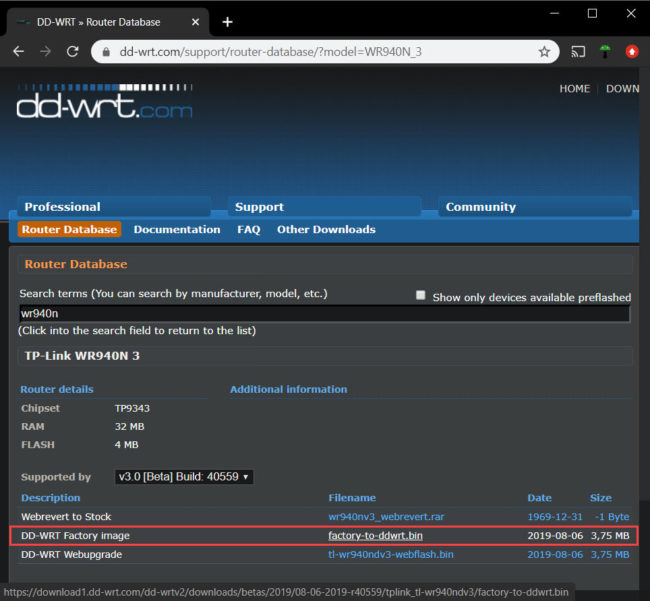
2. Download the firmware. In the case of DD-WRT, you must go to the router database and enter the model of your router. On the next screen choose the version of your router (you will find it next to the model on the label affixed on the back). Among the available files, choose the DD-WRT Factory Image file .
3. From the browser of a computer connected to the router (preferably from a PC connected by cable), enter the IP of the router and on the login screen the default username and password, which are on the label attached to its part later, or you can find them on the Internet depending on their model.
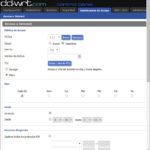
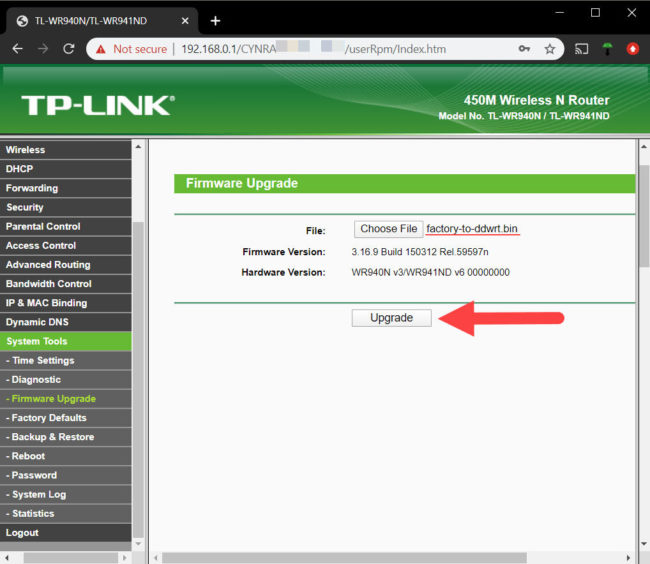
4. In the System or similar tab, you should look for the option that says « Firmware Upgrade «.
5. From the “Search” button, locate and choose the downloaded .bin file . Click on “Upgrade”. The firmware may flash immediately. If the “Continue” option appears, wait at least five minutes before clicking on it, after which the flashing should be done. Make sure you don’t interrupt the process. Do not close the browser tab, allow the router to disconnect or turn off.
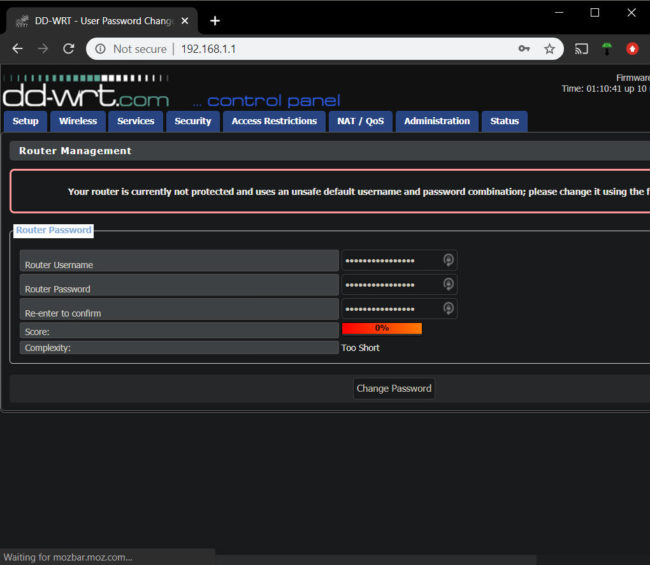
6. Once the process is complete, check that you can enter the new router configuration page. The new firmware DD-WRT will change the IP of the router to 192.168.1.1. Therefore, if you can no longer enter, on the device or PC you are using to access you will have to manually adjust its IP so that it is within the range of the IP of the router. That is to say, you must use an IP such as 192.168.1.2, or instead of the final 2 any number up to 255. In the login screen you can configure a new username and password, but you can skip this step and use the username and password by default, which is root and admin respectively.
7. Once you have verified that the new interface or firmware of the router is working, reset it again from the physical button, as in step one.
Increase power and gain in DD-WRT
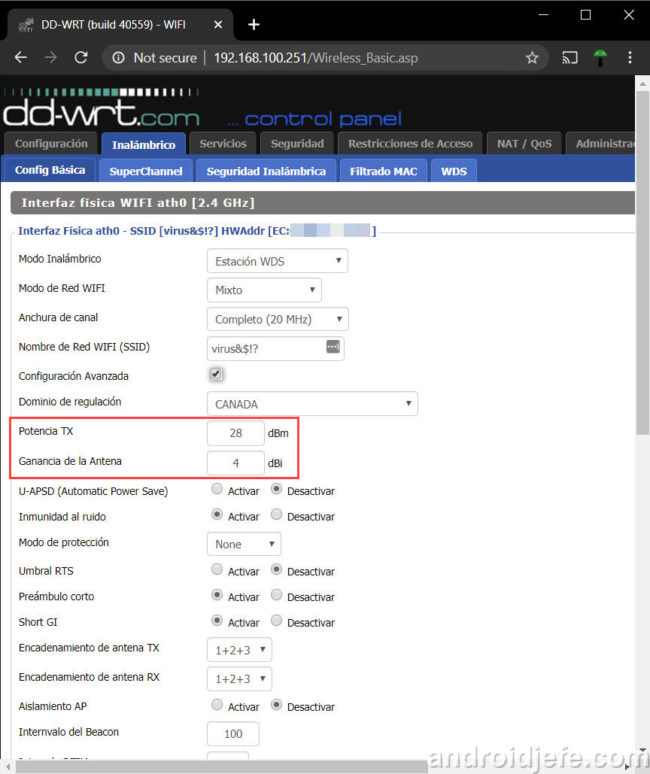
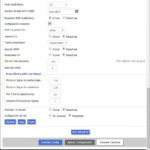
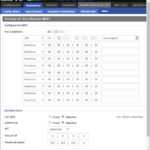
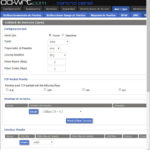
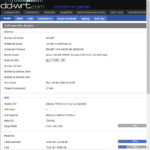
Once you have installed the DD-WRT firmware, you should go to the Wireless tab, Basic Settings. Check the box that says “Advanced Settings.” You will find the option “TX power” or transmit power, which determines the strength of the signal produced by the router when it is transmitting (eg when you are downloading something).
The maximum possible power that you can apply will be 30 dBm, as long as you configure Canada or the United States as the regulatory domain. You can set a higher value, but it will have no effect on the router. On the Wireless Information tab you will still see 30 dBm. In the case of my router, possibly due to some internal configuration of the equipment, I have not been able to configure more than 28 dBm.
Another value you can play around with is the antenna gain, which allowed me to gain an additional couple of dBm. I set 4 dBi, which is the manufacturer’s stated gain.
conclusion
The downside to this procedure is that it can be illegal. If your router came “caped” at 20 dBm of power, as in this case, it is probably due to regulations in your country. On the other hand, if the same router were sold in other countries, only without that limit, such as in Canada or the United States (where the maximum transmission power is 1000mW or 30 dBm for channels 1 to 11 in the 802.11b band) There shouldn’t be any technical (such as shorter life) or health disadvantages.
References : DD-WRT (Installation, Compatibility), TechSpot (Firmwares), TomatoUSB (TX Power), TP-Link (Gain)
How to fix a SLOW Internet service
How to open ports on your router so that you can access or “see” you from the Internet
How to know who is connected to my WiFi
Receive updates: SUBSCRIBE by email and join 10,000+ readers. Follow this blog on Facebook and Twitter.