Among the various applications created for Android by the Google company to help us improve our daily productivity, without a doubt Keep is one of the favorites of most users, and this is not a coincidence, since the truth is that it is a tool with a large number of functionalities, and at the same time it is really easy to use.
The development of Keep had its most important point in 2013, when Google finally launched the application, with the fundamental objective of competing with Evernote, and although for many the latter turns out to be a much more complete tool in the field of creation and note management, the truth is that Keep’s simplicity has made it a truly fearsome competitor.

One of the advantages of Google Keep is that it can be used both on Android smartphones and tablets, also on devices with an iOS operating system, as well as on personal computers, through the Chrome and Firefox web browsers, which include extensions for it.
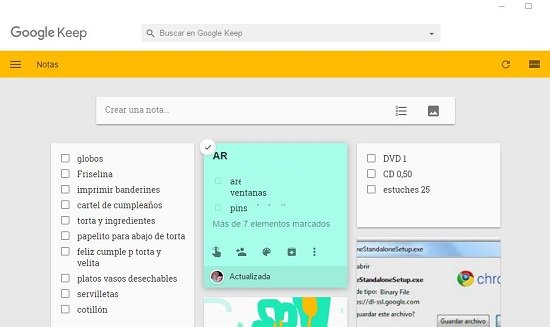
With Google Keep, in addition to being able to create and manage notes, we can also use it as a real agenda , as it includes reminders linked to locations and daily alerts. Likewise, it offers us the possibility of taking photographs and adding texts and drawings to them.
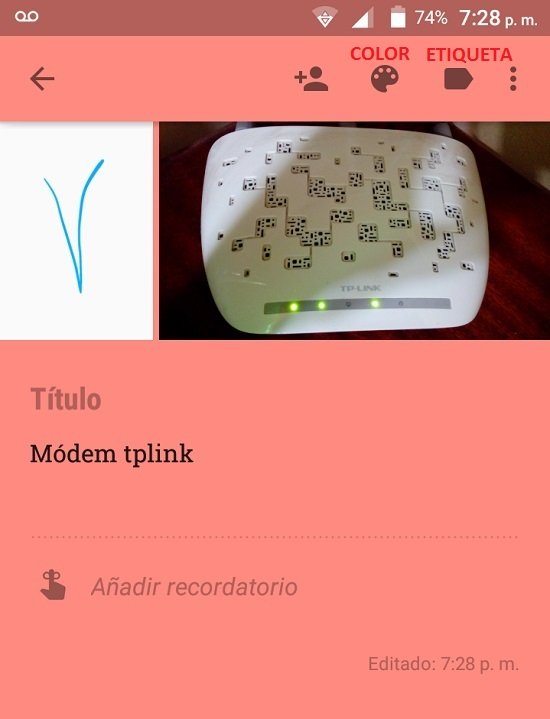
Another of the great advantages of Google Keep resides in the possibility that it offers us to share the notes that we create with other users of the application that we have as contacts. But that’s not all, and that’s why here are some tips so you can get the most out of the tool.
How to add labels and change the color of the reminders?
Once we have created a reminder in Keep, for which we must click on the “Take a note …” button, we can add tags to it or add categories to the service library.
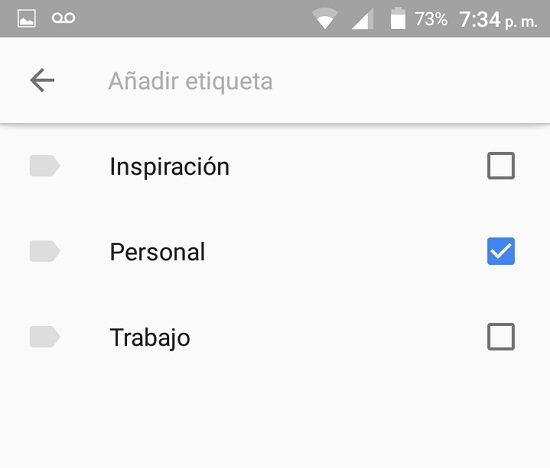
To add a label to the reminder, click on the label icon, which is located in the upper right corner of the screen, which will display a new screen that will show the labels Inspiration, Personal and Work.
After that we can also change the color with which the reminder is displayed, for which we must click on the palette icon, which is next to the labels icon. A box will be displayed in which we can choose the color.
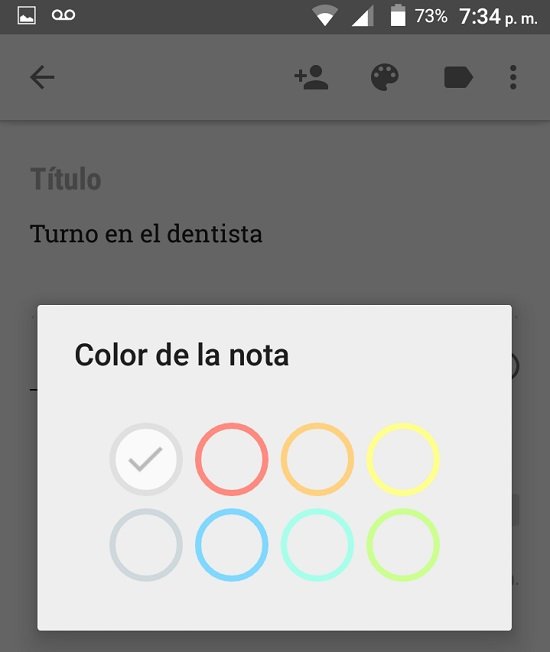
Both customization processes are applied instantly to the notes and reminders that we have created, and we can do the same with all the notes that we have previously created, opening each one of them and performing the same procedure.
How to organize the blocks on the main screen?
If what we want is to organize the order in which the blocks of the notes are displayed on the main screen of Keep to our liking, we can do it in a very simple way.
To do this, we must hold down the notes we want to move, one at a time, and drag it to where we want to place it.
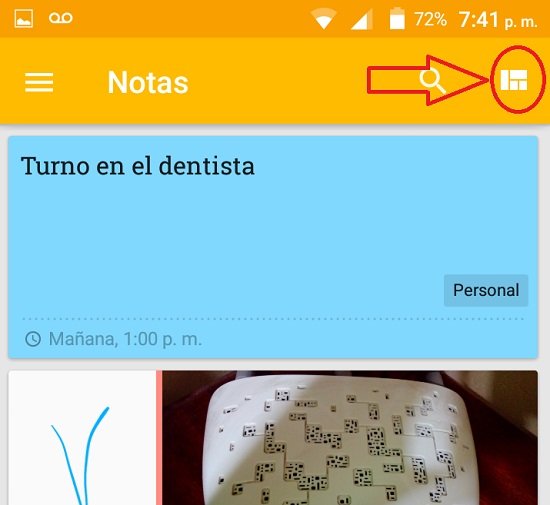
It should be noted that we can also modify the display format of the blocks in terms of their size on the screen, for which we must click on the grid icon, which is located in the upper right corner of the main screen of the application.
How to create location-linked reminders?
If we want Keep to remind us of a task that we must do when we are near the place to perform it, we can configure a reminder that is activated through the location.
To do this, once we have created the new reminder, click on the item “Add reminder”, and when the menu is displayed, click on the option “Location reminder”.
The next thing will be to tell the application to use the device’s GPS, and then we add the address of the place where we must perform the pending task. We can also enter the name of the business, the person, the office or others.
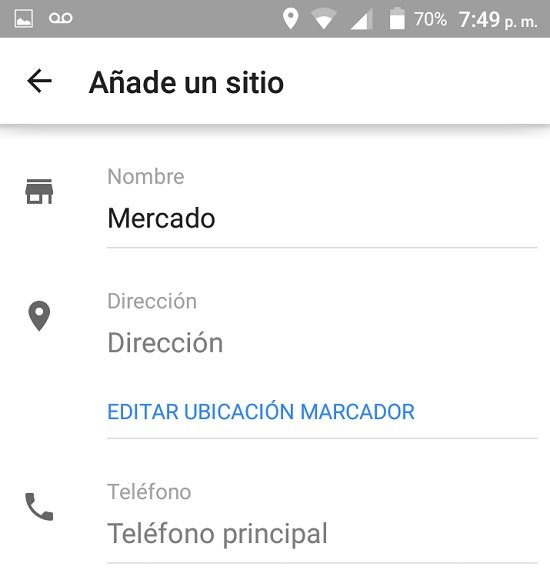
Then we select the address and click on “Next” so that it is added to the note that we have created, and once we complete the data, click on “Add”.
From the creation of this reminder with location, when we pass in front of the place that we have indicated in the note, Keep will activate an alert to remind us of the task that we must carry out in that place.
How to share notes?
Google Keep gives us the ability to share notes that we create in the application with our contacts, as long as they also use this tool.
To do this, once we create a note that we want to share, click on the icon that is represented by an individual and a “+” .
When the “Share” box is displayed, we select from the contacts or write the name of the contact that we want to have access to the note and after we have added it, click on “Save”.
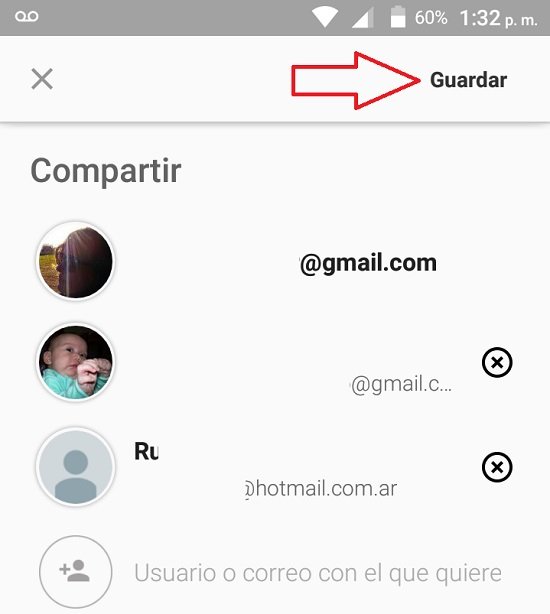
It should be noted that we can share a note with all the contacts that we want, we just have to add to each of them, which in addition to being able to view said note, can also edit it.
How to create voice memos and photo reminders?
To create voice notes in Keep, we just have to click on the microphone icon that appears in the bottom bar of the application screen.
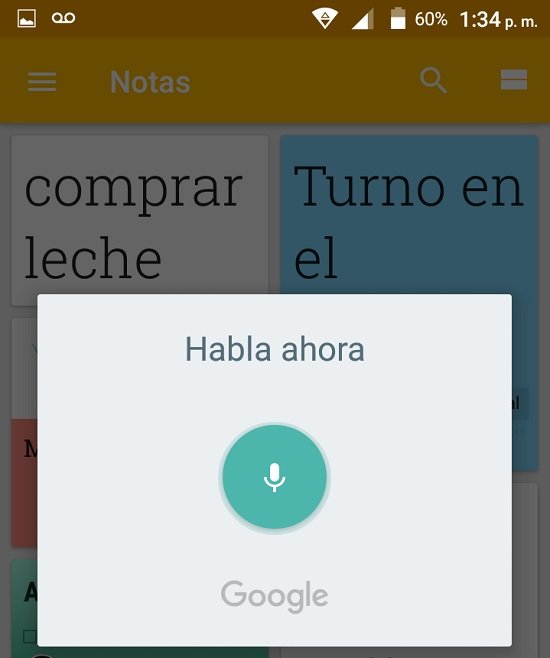
A box will be displayed indicating that we can begin to dictate, which reads “Speak now.” At the end we just have to click on the microphone icon that is shown in said box.
In the case of wanting to create a note with a photo, we must click on the camera icon that is also located in the bottom bar of the main screen of the app.
How to recover deleted notes?
Whenever we wish, we can recover notes that we have previously deleted, but at this point it is necessary to clarify that said recovery can be made within seven days after the date on which we delete said note. After that limit is passed, the note will be deleted from the system forever.
To recover a deleted note, we just have to go to Keep’s “Trash” , for which we click on the menu icon, which is located in the upper left corner of the app screen, and in the menu that is displayed, click on the item “Trash”.
We press and hold the note that we want to recover and then click on the crossed-out trash icon, so that the note is restored to the main Keep screen.
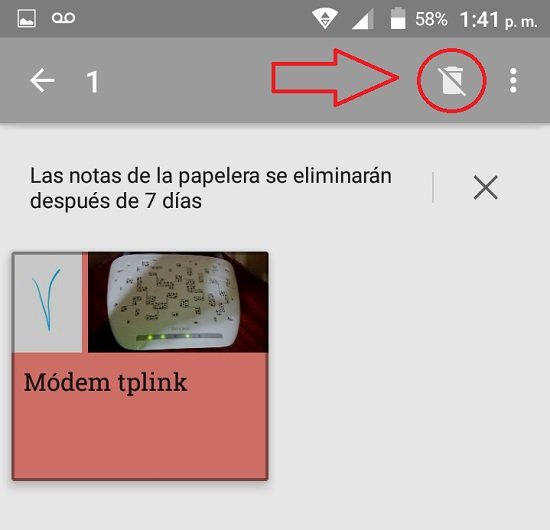
From here we can also delete a note forever, for which we select it by holding it down and then touch the three-point menu icon, and then click on the option “Delete permanently”.
How to make a copy in Google Docs?
If we want to further protect the notes that we create in Keep, we can make the application create a copy in Google Docs, for which we open the note in question and then click on the three-point menu icon.
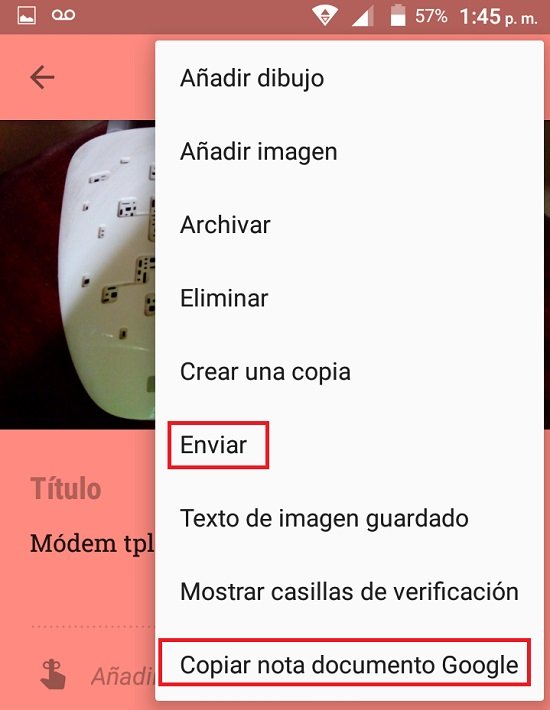
There we click on the option “Copy Google document note”, and a copy of said note will be automatically created in Google Docs.
In the same menu, if we click on the item “Send”, a box will be displayed that will allow us to share the note through social networks, email and others.