If we have an Android device, the Google company offers us a tool that gives us the possibility of finding our phone geographically, beyond where it is, which can be extremely useful in different scenarios.
The tool is currently known as Find My Phone, but perhaps its previous name is better known, which was Android Device Manager, which in Spanish means Android device manager, and as its name indicates, its function is precisely that.
The truth is that it is a free tool developed by Google that can help us find our smartphone when, for example, we have forgotten it somewhere and do not remember where, also for when we lose it, and even if the phone was stolen .
But in addition to that, it has a very interesting series of functionalities, from which we can take advantage of a lot. Therefore, here we tell you what the Android device manager is and how it works, and we explain in broad strokes how to use the tool.
Contents
What is the Android device manager?
One of the main objectives of the creation of the Android device manager by Google was specifically to provide users of the operating system with an extra security measure , through which it could be possible to locate lost or stolen phones, and even being able to block said smartphone remotely.
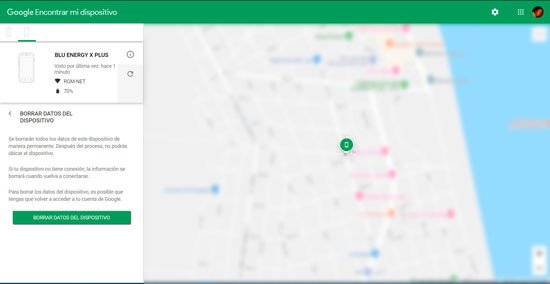
Mainly it is a web environment through which by accessing the Android device administrator page with our Google account, we can find our phone and then block it and try to recover it , as well as giving us the possibility of eliminating our data from remotely.
To be able to use this interesting service that Google offers us for free, we must have a Google account, and at the same time install the Android device manager on the phone or tablet, which is a free application that we can find at the Google Play Store, at this link .
Basically, the Android device manager allows us to geographically locate all the Android devices that we have associated with our Google account.
Among the most important functionalities that the tool offers us, we can locate devices that we have left forgotten or have lost. If, for example, we are at home and we do not remember where we left the phone, we can tell it through the Android device manager to play a sound for 5 minutes, with which we can find it without inconvenience.
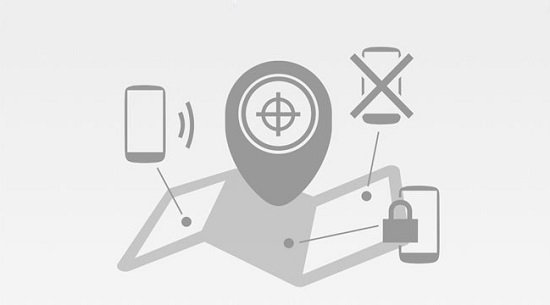
But in addition to this, the Android device manager offers us the possibility of, in the event of the theft of our phone or tablet, locate it to be able to remotely delete all the data from the Android device, as well as block its access, change the lock password of the screen, so that if the phone fell into strange hands , they do not have the possibility of accessing our private information.
To carry out any of the aforementioned procedures, the web platform that Google offers us is really easy to use, since the Android device manager has a simple and intuitive interface.
Enable Android device manager
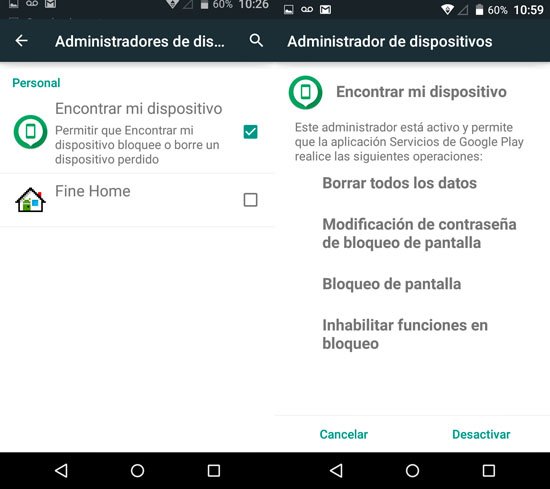
If we want to use the Find My Phone tool , that is, to take advantage of the functionalities that the Android device manager offers us , we must enable the tool, since it is optional within the operating system.
It is also important to note that in order to use the Android device manager, we must be registered with our Google account, we must remain online and also have the location function activated.
Well, then the first thing we must do is activate the location function of our smartphone or tablet as follows.
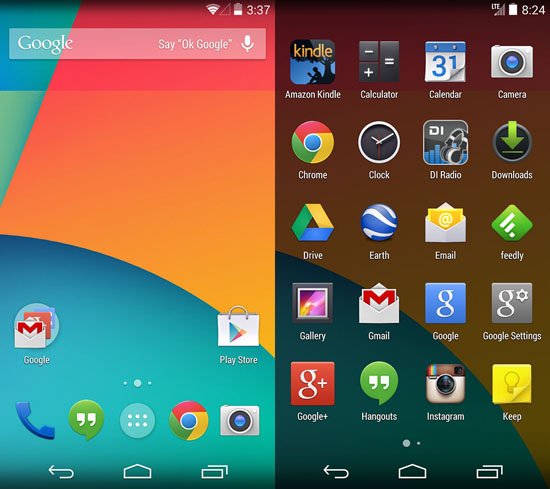
Step 1: On our Android phone or tablet we open the “Google Settings” application .
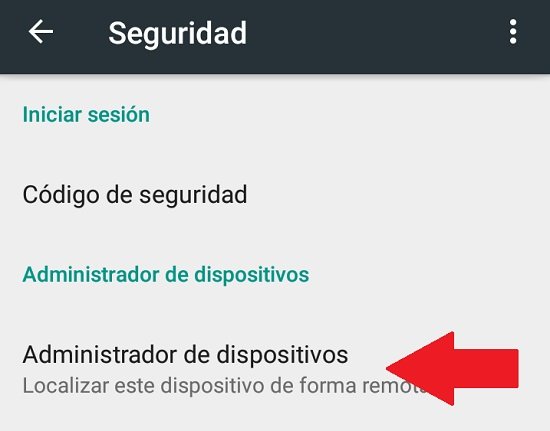
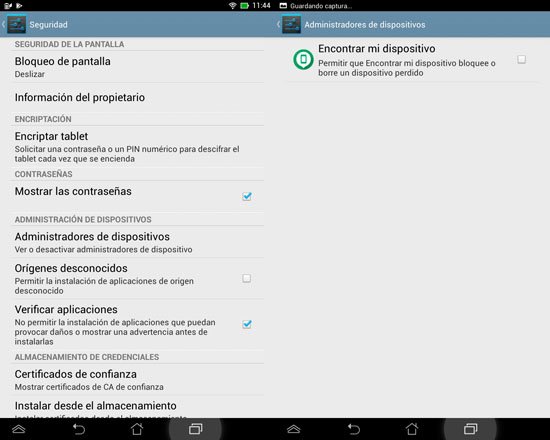
Step 2: Next, click on the “Security” section.
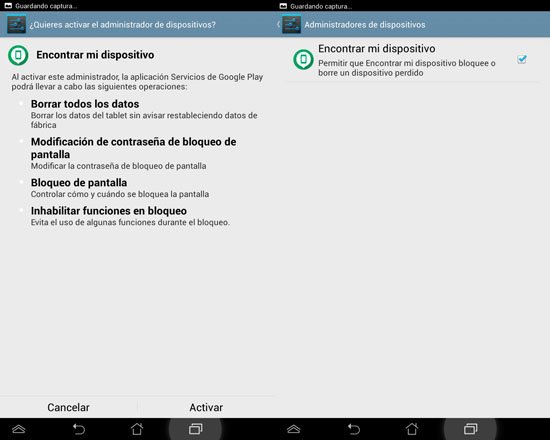
Step 3: On the next screen, click on the item “Device Manager”.
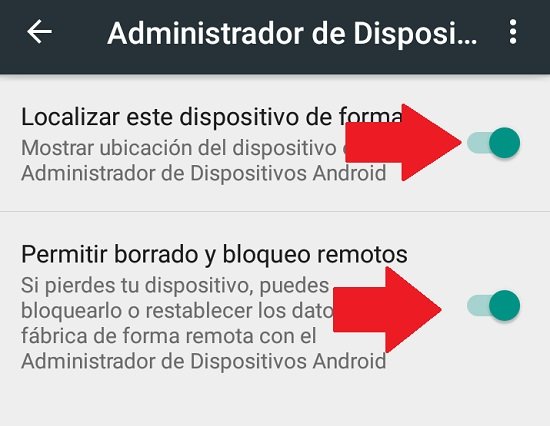
Step 4: Then we must make sure that both the option “Locate this device remotely ” and the option “Allow remote erasure and blocking” are activated .
The next thing will be to activate the location on the device, for which we must perform the following steps.
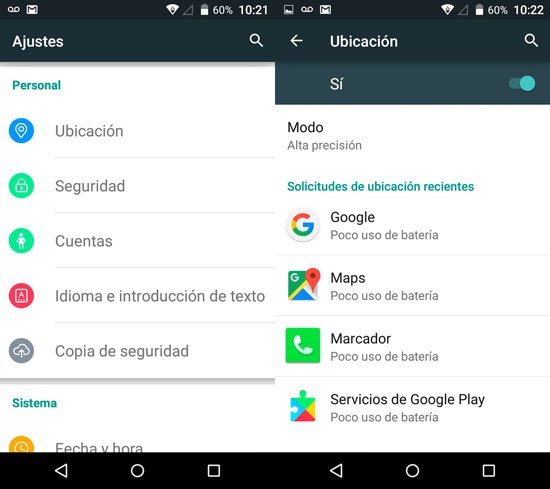
Step 1: Run the “Google Settings” application on the phone .
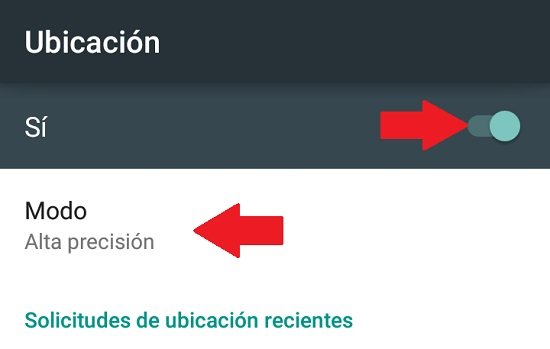
Step 2: Next, click on the item “Location”.
Step 3: On the next screen we make sure that the location option is activated and in the “Mode” section we choose “High Precision”.
Once these steps have been carried out, we must check that the phone or tablet is visible on Google Play, for which we will do the following.
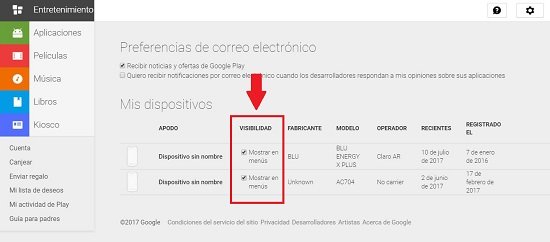
Step 1: From our computer, we open the web browser and go to the Google settings page , in this link . Remember that to access we must have logged in with our Google account.
Step 2: In the Google Play Settings window we will see that the different devices we belong to are listed, and so that the phone or tablet that we are going to use with Find My Phone can be found by the system , we must make sure that it is checked the “Visibility” option .
Once we have carried out the aforementioned steps, we must download and install the Find My Phone application, in the way that we always usually install apps on our Android device.
At this point we must bear in mind that as there are a large number of applications that have a similar name, before installing the tool we must make sure that it is the application developed by Google Inc.

Once we have the application installed on our Android phone , we can start using it, in the same way that we can use the online service of Google’s Android device manager. Here’s how to use the tool.
How to use Android device manager?
To use the Find My Phone application that we have just installed on our Android phone or tablet, we must perform the steps detailed below.
Step 1: When we run the Find My Phone application on our smartphone for the first time , it will ask us to log in, which we should do with the Google account associated with the device. To do this, it will ask us to enter our Gmail email password.
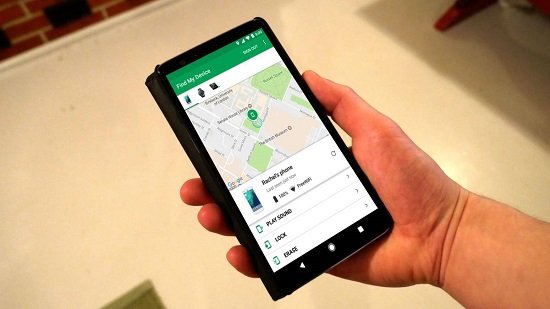
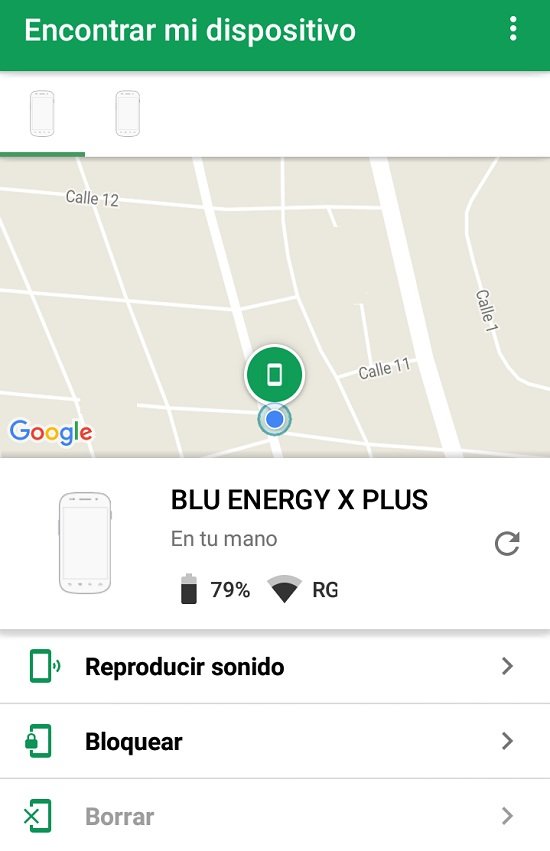
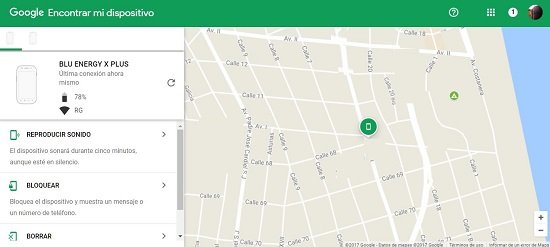
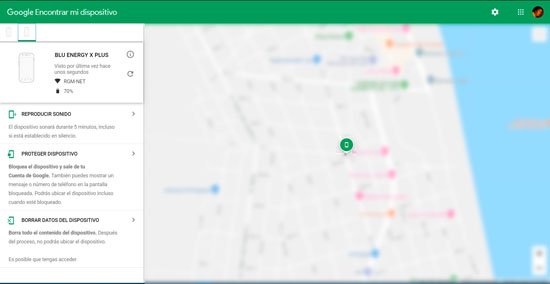
Step 2: Next, we will see that in the new screen that is displayed, a map appears first that shows the location of our Android device, below which is the device that has been located. It also shows us different options, among which we will find the option to play a sound, block or delete.
What can we do now?
In principle, with regard to the location of the Android device, the application will show a map which shows with a green symbol where the phone or tablet is located. It should be noted that we can slide the image with our fingers to zoom in on the specific location.
This section also shows the battery level that the device has, information about whether it is connected to the internet, and when it was last located.
Then we find the item “Play sound” which is a function that allows us to find our phone or tablet when it is at home but we do not know where we leave it.
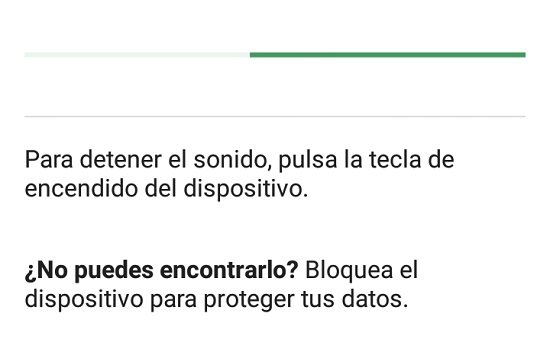
For this function to be carried out, what we have to do is click on “Play sound” and then our Android device will begin to sound for a period of 5 minutes. This sound is played at the highest volume level, regardless of whether the phone is in vibrate mode.
When we find the equipment, to stop the ringing that plays, all we have to do is press the power button on the phone.
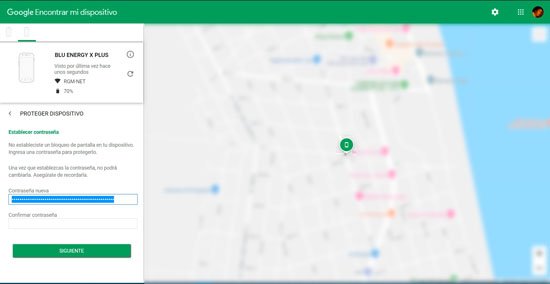
The next option that the Find My Phone application offers us is to lock the device, which can be useful when we forget our phone somewhere and want to not allow third parties access to the phone.
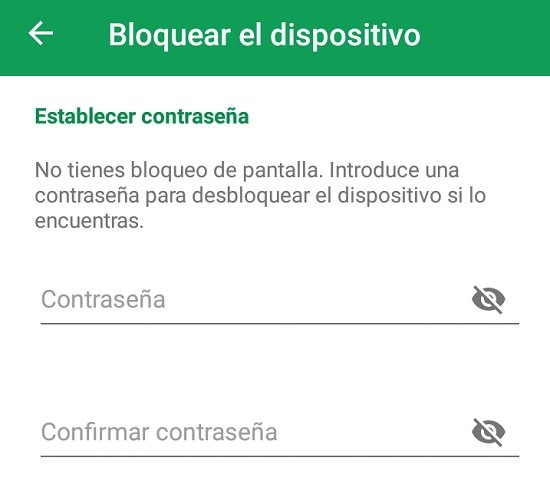
To do this, we must click on “Block”, after which the app will ask us to enter a password twice, as well as to enter a contact number. Finally, we must click on the “Block” button . It should be noted that once this option is activated, the device will be immediately locked beyond it is in use.
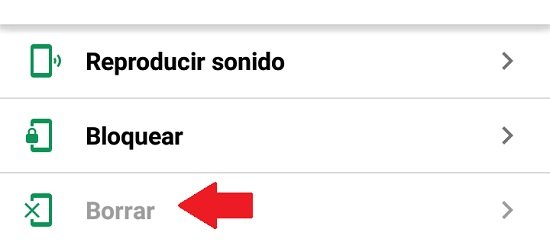
The next option that the Find My Phone application offers us is to erase the device, which can be very useful in those cases where we suffer theft of the phone and we need to remotely perform a factory reset to protect your personal data that are on the computer.
All you have to do is click on the “Delete” option , which will automatically delete all installed applications, photos, documents, music, videos and all device settings from the phone.
It is important to mention here that once we have sent the “Delete” command to the Android device, we will no longer have the possibility of accessing it from the application. We must also bear in mind that when a factory reset is performed remotely , the data stored on external memory cards is not deleted , so this information will remain in the hands of whoever stole the device from us.
On the other hand, we can perform all the aforementioned procedures through the Google website, for which we must carry out the following steps.
Step 1: On our PC we open the web browser and go to the Android device manager page , at this link , where we must log in with our Google account.
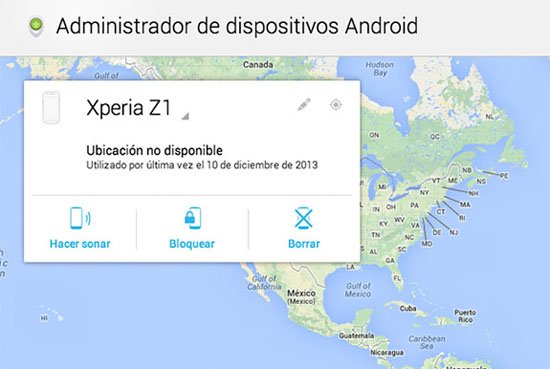
Step 2: Once in the administrator window, we will see that there we have the same options that the application includes, that is, location information, play sound, block and delete.
Solution to the problem: “Location not available”
As we could see throughout this post, the app to find a lost or stolen phone that Google offers us gives us a really important margin of safety, and it can be very useful in various scenarios.
Now, nothing is without flaws, least of all the technology. It may happen that when trying to track a lost or stolen cell phone, the notice “Location not available” appears on the web , which means in a few words that the system cannot locate the cell phone, and therefore any possibility of being able to locate the cell phone. device seems to vanish without remedy.
However, there is a solution to the problem of the “Location not available” notice , which we will be able to implement to fix this very complicated problem. To do this, all we have to do is follow the instructions detailed below.
The first thing we have to do to solve the problem of the “Location not available ” notice is to make sure that our cell phone complies with the following guidelines:
- The smartphone must be on
- Must be connected and with Internet access
- Our Google account must still be active on the phone
If any of these three conditions are not met, we may never be able to track and locate the phone successfully. Now, if our cell phone meets these three requirements, but we still cannot locate it and the annoying “Location not available” notice appears , we can do the following tests.
Check if the location must be activated: If this option is not active, we can see the message “The location is deactivated”. To solve this problem, we must scroll to “Settings”, then to “Location” and then activate it using the slider or the specific method of our version of Android or customization layer.
Check that the “Find my device” option is active: Although this option is disabled is quite rare, it can happen, especially if we let other users use our phone. To solve this problem, we must scroll to “Settings”, and then to “Security”. There we activate the option “Find my device”. It should be noted that the name or location of the options may change according to the Android version or the customization layer added by the manufacturers.
Check “Location not available” notice in old Android versions
Although the versions of Android are updated every year, and are increasingly powerful and secure, the truth is that there are still a large number of smartphones with old versions of Android . In this sense, one of the Android versions with the most presence is 4.4, which in certain situations may present the message “Location not available”.
In order to solve the “Location not available” problem in Android 4.4, we can try the following procedure.
Step 1
We scroll to “Settings”. After that, click on “Location”.
Step 2
Then we press on “Google Location Reporting”, then click on “Choose account Google” and then on “Enable Location Reporting”.
Step 3
We go back to the “Settings” option , then click on “Google”, then on the “Security” option and finally we enable the “Find my device” option .
Step 4
To finish the procedure, we reboot the device. Once this step is finished, we can now check on the map to see if the tracking system has taken the cell phone correctly.
Device Manager with Google Maps
In addition to allowing us to find a phone that has been stolen or lost, Google’s “Find my device” option offers us other very interesting features in order to keep all the data and documents that we may have stored on the cell phone safe and private . These options are more than interesting when it comes to safeguarding private information or data of our company or the company for which we work.
If we want to be sure that in case our phone is stolen or we leave it forgotten somewhere, and that no one can view the information we have stored on the cell phone, it is essential to correctly configure the Device Manager, since as we mentioned It offers a battery of features that can be operated remotely and that allows us to erase all the content of the phone even if we do not have it nearby.
To get this benefit, all we have to do is follow the instructions below.
Step 1
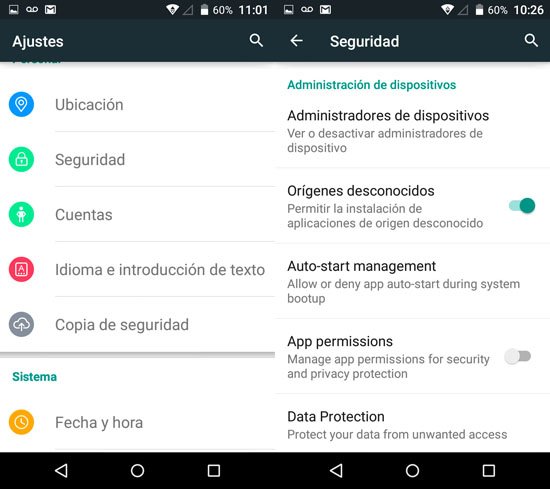
We move to the option “Settings” and then click on “Security”
Step 2
There we look for the option “Device Manager” and click it.
Step 3
Once there, click on the option “Find my device”.
Step 4
There we check that the option is activated. If the button is in the “Off” position , then the feature is on.
Step 5
In this step we are going to have to run our favorite browser on the computer and click on this link again to access the “Find my device” page, the system’s official site.
Step 6
We enter with our credentials, that is, with our username and password and we will be ready to do what we need to do with the cell phone. On this page we will find a list of actions, which can be activated simply by clicking on them.
In order to better understand how these options work from the “Find my device” page, we will explain them below:
Play sound: This option is very useful for us to find a phone that we do not remember where we left it. This will begin to sound an alarm on the device, regardless of the mode, i.e. vibrate or muted, and the audio volume the device is in.
Protect device: Without a doubt, one of the most interesting features of the system, since it allows us to remotely block the cell phone with a password, which will prevent anyone from accessing the data that we have stored in it. Very useful to protect our phone from prying eyes in the event of having forgotten the device at the house of someone we know, but we do not want them to find out what we do with the cell phone.
Delete Device Data: Without a doubt, the heaviest option of all, since this feature will allow us to completely and remotely delete all the information contained in the phone and any memory card that it has installed, including, in addition to our account from Google, the contact list, incoming and outgoing call records, emails, all applications, documents, music, photos and all other personal information that we may have stored on the cell phone. This option should only be used only in the case of being sure that we will not be able to recover the phone by any means.