Video editing is a time-consuming business, without special knowledge and skill it is not even worth talking about a serious product at the output. Professionals use specialized software for editing, which is very difficult to understand by yourself. But for ordinary people, there are simplified counterparts, one of them is Windows Movie Maker. This program is not suitable for modern special effects, but you can cut or glue the video, add simple transitions on it. Therefore, in this article, we will understand how to use Windows Movie Maker.
Contents
What is this program
Windows Movie Maker is Microsoft’s native video editor. The program is distinguished by its simplicity and ease of use, this is its main advantage. The effects of cinematic quality on it, of course, cannot be done, but building a slideshow on your knee or gluing several clips into one is the very thing. The program is preinstalled not on all operating systems, but only on three: Windows ME, Windows XP and Windows Vista. If you are not a user of one of them, then you can simply download the installation file on the Internet and install the application, since it weighs only about seven megabytes.
There is also an updated version of Movie Maker – live or Windows Movie Studio. This is a largely redesigned product that primarily focuses on ease and speed of mounting for the most inexperienced user. In this version, the timeline was removed, additional settings and individual configurations and audio settings were cut. Many users abandoned the updated interface precisely because of the lack of a timeline, it’s up to you to decide which version is right for you. Note: The application runs on operating systems no older than Windows Vista.
Interface
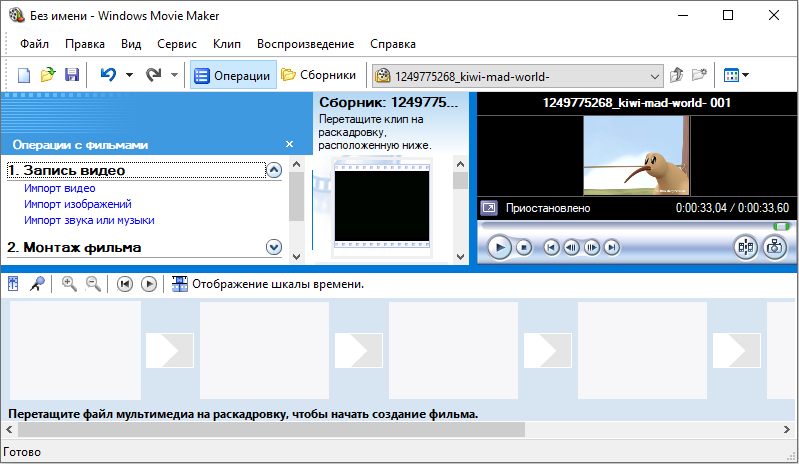
We will figure out how to work with Movie Maker a little later, but for now we will go through the interface elements. We will consider the classic interface, and all instructions will be based on it. In the live version, editing takes place in a similar way, but there are differences, and significant ones. Let’s go in order, let’s say a few words about each interface module separately.
Everything is simple here – the usual main menu bar, like any other Windows program. “File”, “Edit”, “View”, “Service”, “Clip”, “Playback”, “Help” – all these are alternative ways of interacting with the project, and not the most convenient ones. We will not dwell here for a long time and move on to the next point.

Toolbar
Let’s go through all the buttons in order, from left to right.
- Project creation.
- Opening a project.
- Saving the project.
- Action back.
- Action forward.
- Customize the display of the taskbar.
- Configuring the display of the collections panel.
- Drop-down list with the ability to switch between video transitions, video effects and collections (imported files).
- Additional navigation buttons for the list.
- Customize the display of the selected items.

Let’s move on to the most used element, which gives the program incredible convenience and ease of use.
Task bar
Using this panel, we will add new files to the project, video effects and transitions. It is not the only way to do this, but it is much easier and easier to use than looking for these functions in the main menu or on the toolbar. To add files to the project, just select “Import video” (or “Import audio”, “Import picture”). Another option is to simply drag files from Windows Explorer to any area of the Windows Movie Maker taskbar. Before adding files to the program, please note that not all file types are supported in the program. For example, with .mp4 with a modern AVC container, the application does not work correctly. Best of all, the “native” Windows files are suitable for it:
- video: wmv;
- audio: wma;
- graphics: bmp, jpg, png.
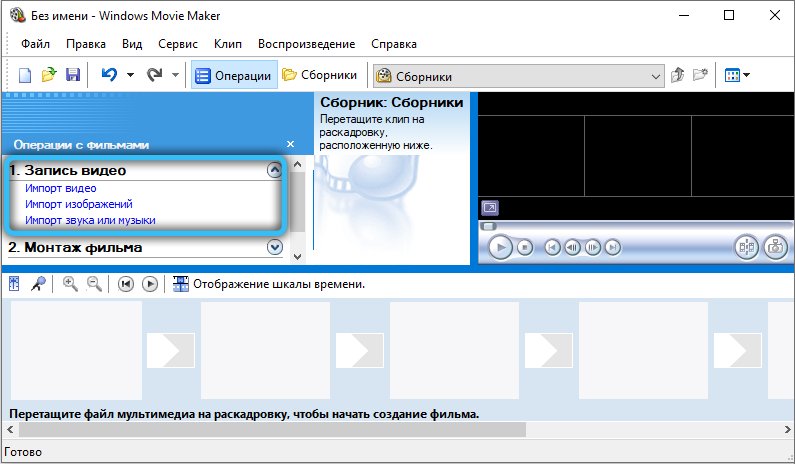
There is no official support for files with other extensions, although the application functions normally with the same AVI video or mp4 (with the .mpg4 container).
After importing, all the selected files will be added to the collections window, where we can work with them further.
- Displaying collections.
- Viewing video effects.
- Viewing video transitions.
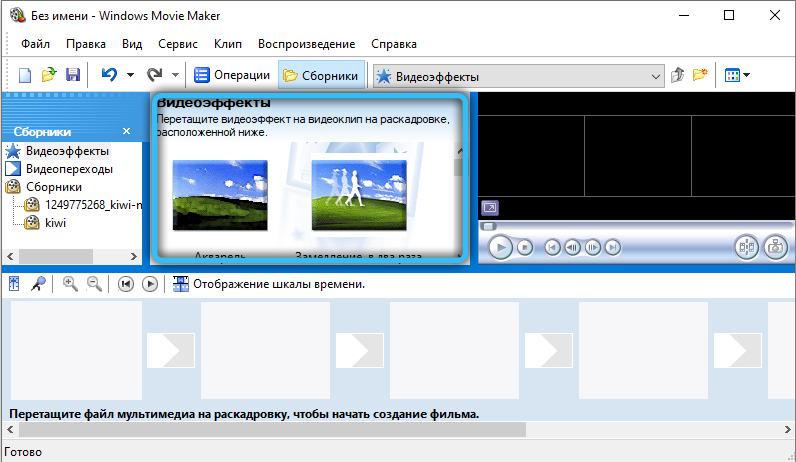
In fact, this is an analogue of the drop-down list on the toolbar, which is tossed to windows with video transitions, video effects and compilations.
- Creation of titles and credits.
- Creation of an auto film.
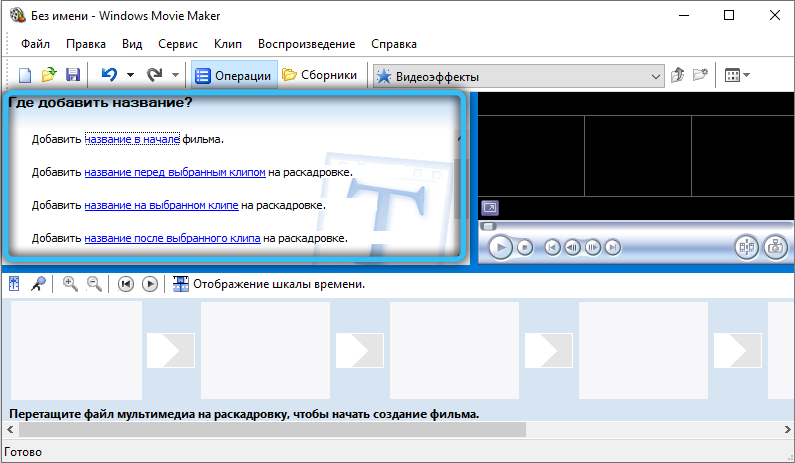
Interesting features that add beauty and convenience respectively. For a small home video, it will not be at all superfluous to add the title of the film at the beginning and credits at the end, such little things make the clip interesting and of high quality. The Auto Movie Creator loads all imported files into the video and audio tracks in order. This function is suitable if you downloaded files in the required order or their order is not important.
- Saving on a computer.
- Sending to a digital video camera.
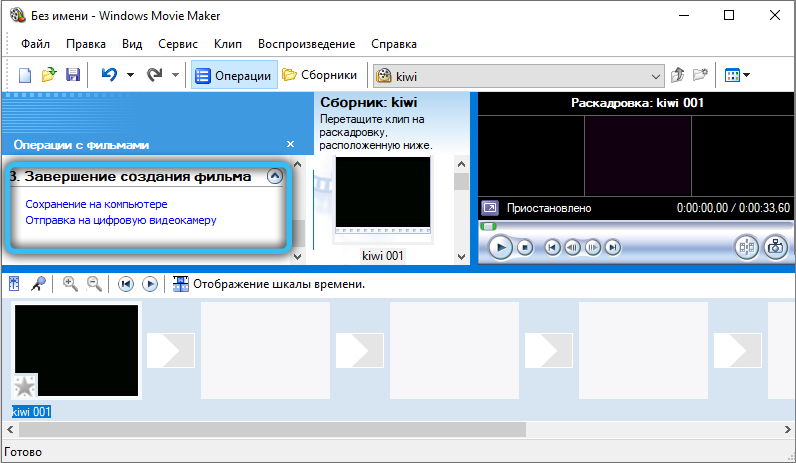
Common functions for saving and rendering a project.
Project window
All downloaded files, video effects or video transitions to choose from are displayed here. Switch through the toolbar or taskbar.
Built-in player
Everything is just like in a regular player, a very convenient preview function. You can rewind, pause and play, all actions are tied to the position of the slider on the timeline, which will be discussed below.
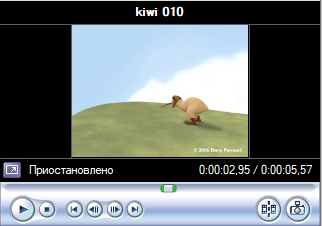
The bottom panel
The bottom panel can work in two modes – storyboard and timeline.
Storyboard mode is useful for adding transitions and video effects. The timeline allows you to trim and lengthen video fragments with high precision, which is extremely necessary for editing.

Basic Basics of Video Editing in Movie Maker
To crop a video, you must:
- enable the display of the time scale in the lower panel;
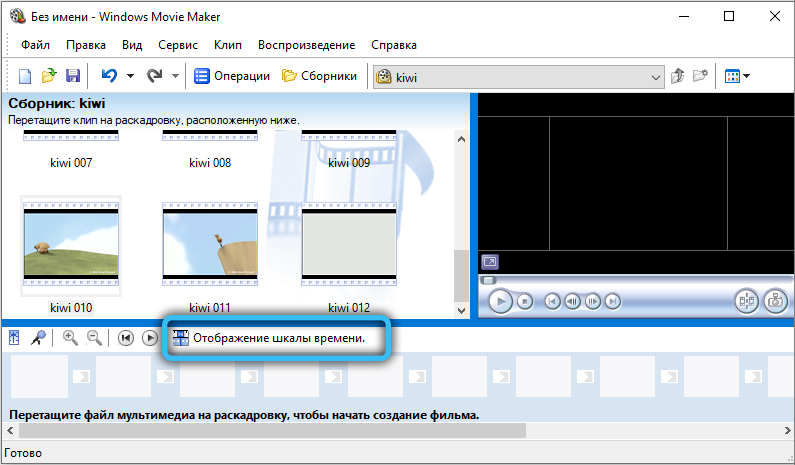
- drag video from the taskbar to the timeline;
- after moving the mouse cursor to the start or end point of the video, press the left mouse button (after the cursor changes to a vertical line) and drag left or right to the desired point of the video file.
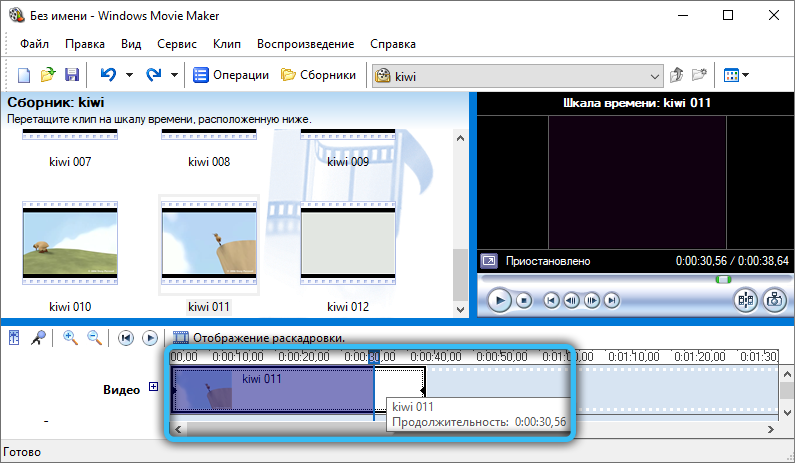
Before cropping a video in Windows Movie Maker, it is recommended to enlarge the area of the project window so that you can clearly see at which frame the cropping will stop.
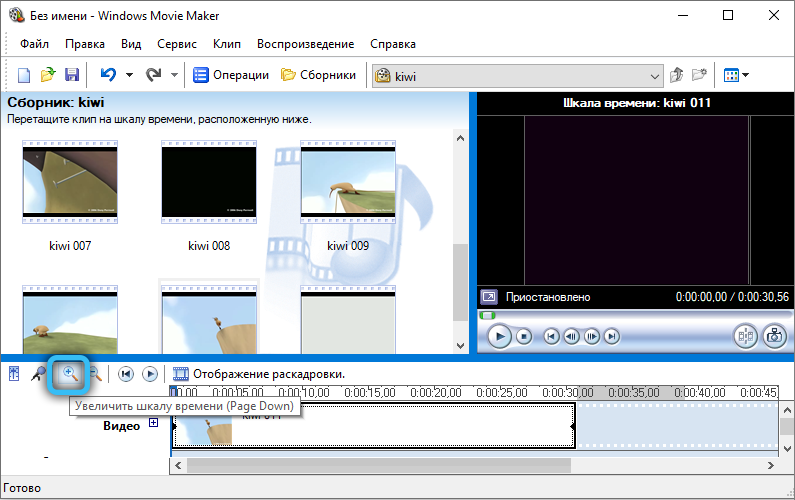
If you need to cut a fragment from the video, then it is enough to select with the cursor the part of the video file necessary for further work on the timeline (by holding down the left mouse button). Before you cut a fragment from the video, it is recommended to scale it (increase the length) on the timeline. This is done by clicking the icon with a magnifying glass and a “+” sign. Alternatively, you can simply press Ctrl on the keyboard and use the mouse wheel.
Working with sound
There are two ways to remove sound from a video:
- Right-click on the timeline on the desired video, select “Audio” – “Off”.
- In the system menu, select “Clips”, then “Audio” and click on “Disable”. In this case, the sound will be removed from the entire project located on the timeline, regardless of the number of clips and fragments added there.
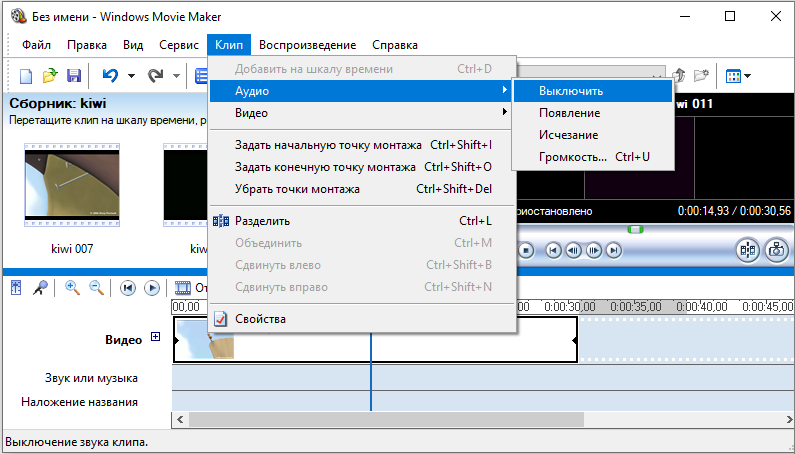
Before removing the sound from the video, it is necessary to take into account that in Movie Maker with multi-channel sound, you cannot edit each channel separately.
If you are editing a video file with the addition of an announcer’s voice to it, then you may need to mute the sound from the video itself (so that the offscreen voice is better and more clearly audible). This is done like this:
- add a video and a separate audio track to the timeline (in the “Sound or Music” line);
- click on the volume setting shortcut (located in the same place as the video scaling);
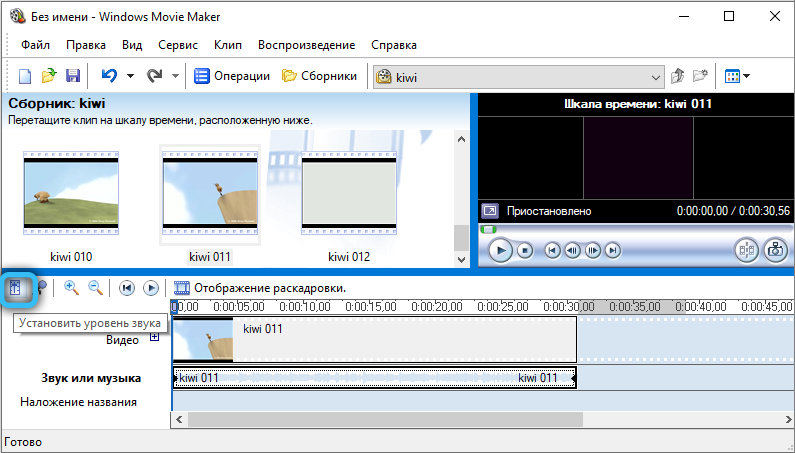
- use the slider to adjust the volume balance in favor of audio from video or added audio;
- click “Apply”.
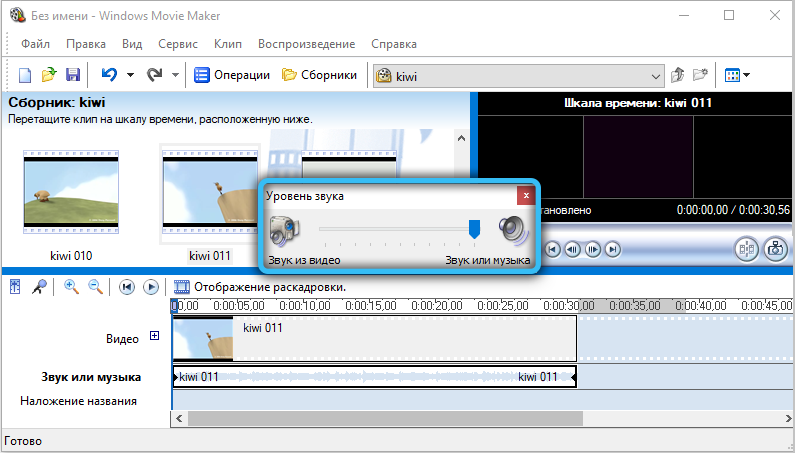
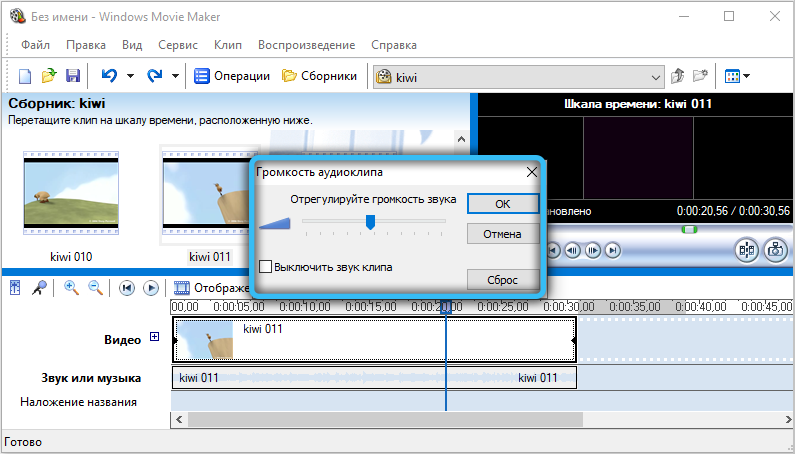
If the user is interested in how to adjust the sound volume only in a separate section of the project (and not on the entire timeline), then this is done as follows:
- select the desired fragment of the video file on the scale;
- select “Clips” in the system menu, then “Audio”, then – “Volume”;
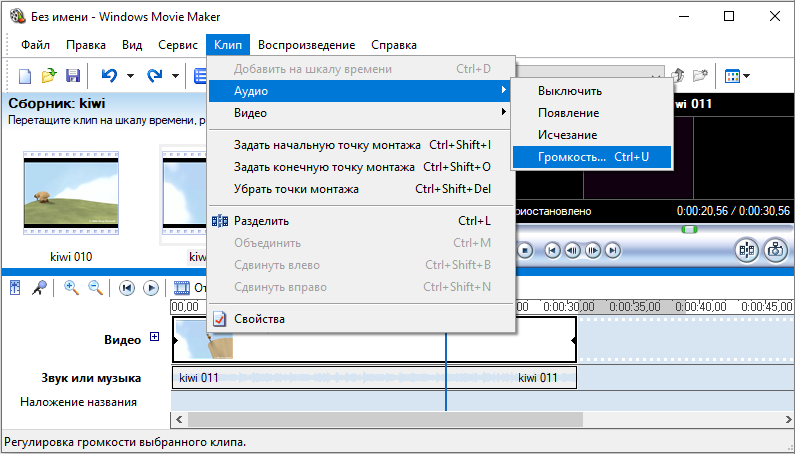
- using the slider that appears, adjust the volume to the desired level (or click on the “Mute sound” item).
And to replace the sound in the project (while removing the embedded in the video or muffling it), you just need to select the audio file in the taskbar and drag it to the “Sound or Music” scale. By the way, if necessary, the user can add several audio tracks to the project (they will be automatically mixed, the output will be stereo sound). Before adding music to a video, you can still cut it from another video. This will avoid the need to convert it with other programs. To do this, add a video to the timeline, right-click and select “split”. After that, you can edit the audio track and video separately.
If the user adds two audio files to the project at once and wants to make a smooth transition between them, then this is done as follows:
- select an audio file on the timeline;
- right-click on it;
- select the “Disappearance” item in the context menu.
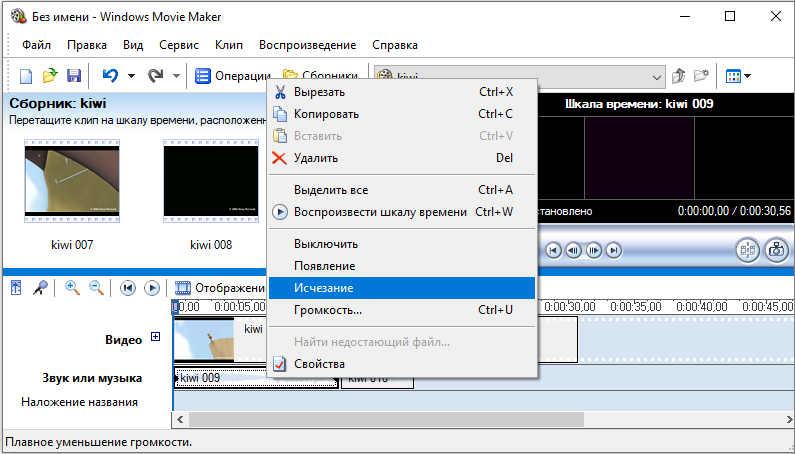
In this case, a mark will appear on the scale on the audio track – it is from this that the activation of the sound effect begins (by default – 3 seconds). If you need to increase it, that you need to move the cursor over the mark, hold down the left mouse button and drag it in the desired direction (increasing or decreasing the duration of the transition). In the future, the same operation will need to be performed with the second audio file.
Working with video
Most often, Movie Maker is used precisely for “gluing” several videos into a single file. All that is required for this is to add videos one by one to the timeline. If necessary, you can make a smooth transition between them. This is done automatically by the program, when two video fragments are superimposed on the timeline (by selecting the video and holding the left mouse button, it can be freely “moved” on the timeline). The transition effect can later be changed to any of those available in the standard Windows library. This is done like this:
- on the taskbar, open the “Editing” tab, select “View video effects”;
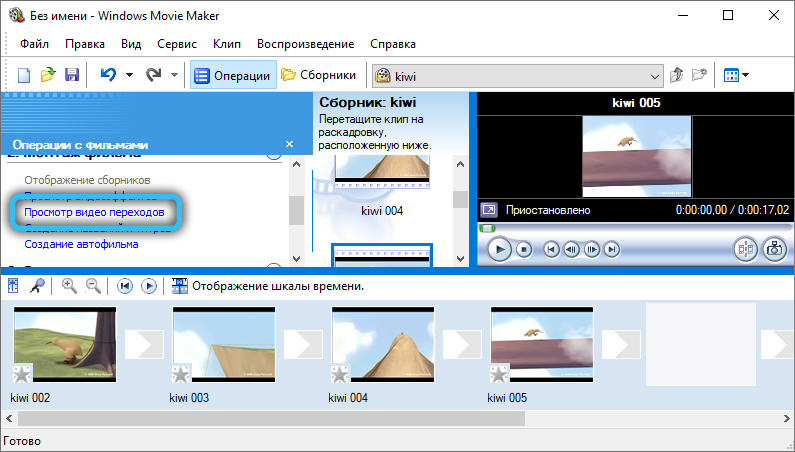
- the “Video Transitions” section will open;
- all that remains is to select the one you want and drag it with the mouse cursor onto the timeline (to the place where two video fragments touch or overlap each other).
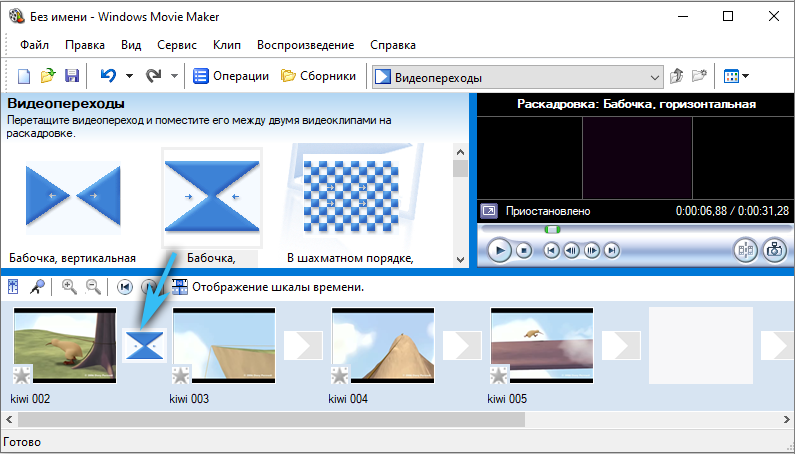
Further, the duration of the transition can be changed by simply dragging to the side the mark that appears on the timeline (or by manually entering the time code above it, but this is not always convenient).
You can also add a graphic effect to your video. For example, by increasing its sharpness or contrast. For this you need:
- click in the system menu “Service”, then “Video Effects”;
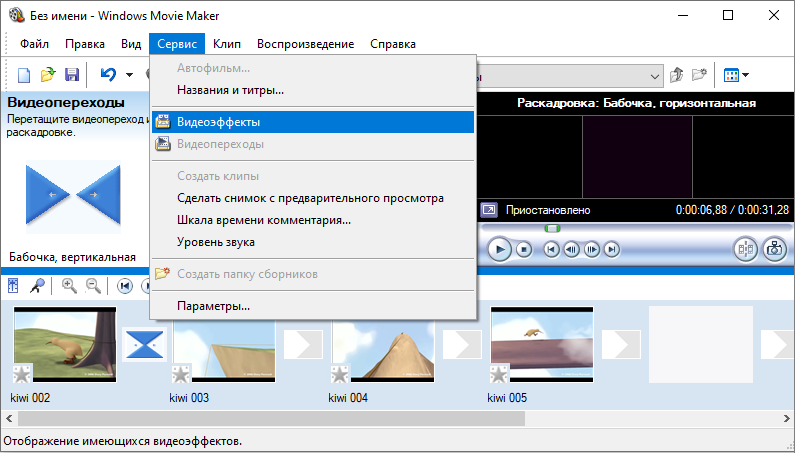
- a section with a list of available video effects will open in the taskbar;
- having selected any of them, drag it onto the video fragment of the timeline.
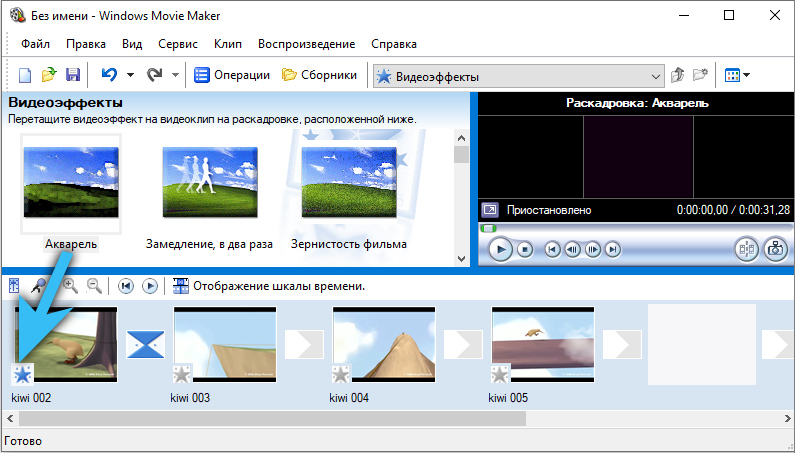
Some video effects have additional settings. A dialog box with them opens immediately after adding an effect. Similarly, you can speed up video playback – add the “Speed up by 2 times” (or “Slow down”) video effect to it.
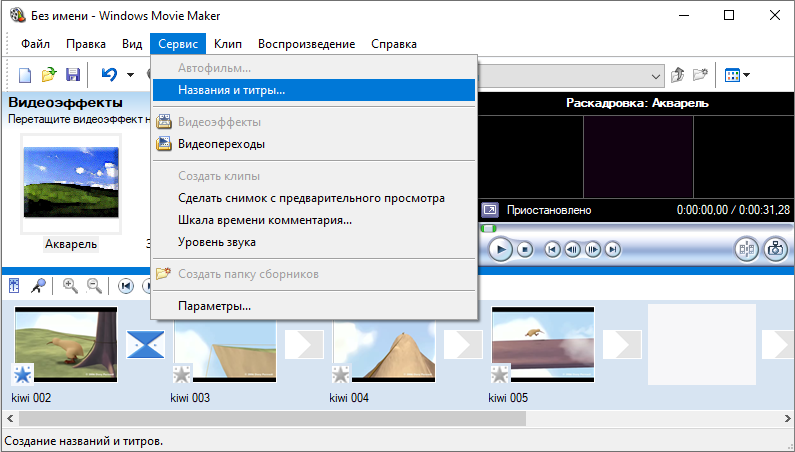
If you need to add titles to the video, you should click the “Service” item in the system menu and select “Title and titles”. A list of available options (templates) will open in the taskbar. After adding any of them to the timeline, a dialog box opens with detailed title settings. There you can change the text, adjust the duration of the display, and so on. By the way, video effects can also be separately applied to them, as to video clips.
And to save a screenshot from the video, you need to set a mark on the timeline at the desired moment, and then click the “Screenshot” button in the preview window. By default, all pictures are saved to the My Pictures folder in Documents. The format is bmp.
Export project
After editing, you can save the project (in the form of a file for use with Windows Movie Maker) or export it to a video file so that you can view it on any other device. This will require:
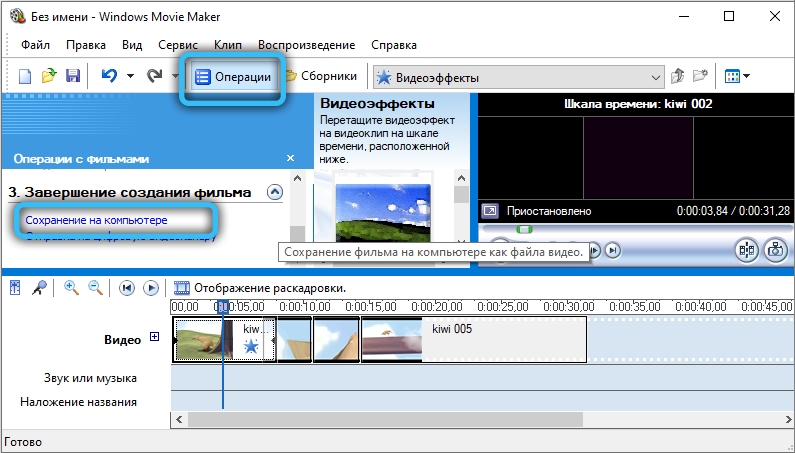
- select “Operations” in the system menu;
- click on “Finish creating a movie”;
- select “Save to Computer”.
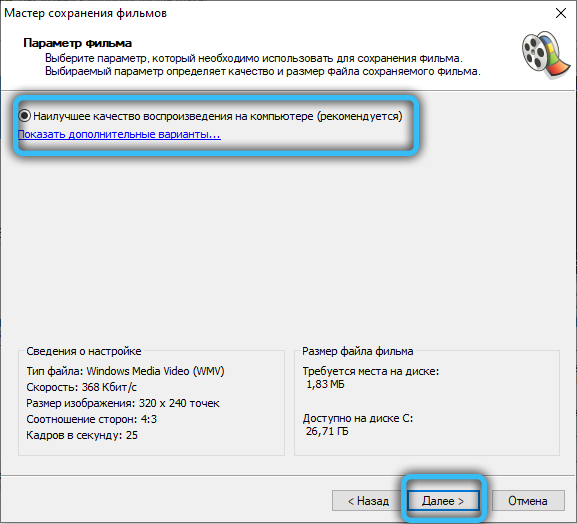
A dialog box will appear where you can fine-tune the parameters of the original video file. We recommend that you select Best Quality. Resolution and bit rate will be set automatically. The format of the exported file is wmv (as a rule, it is not supported by consumer players).
Conclusion
So, we figured out the interface of the Windows Movie Maker program, how to use it – we also understood, it remains only to gain experience, and this requires practice. Use the capabilities of the application as often as possible, and over time it will take you several minutes to edit a simple video.