Do you own a Samsung Galaxy Note 9? An extremely simple new method exists if you want to root it, whether to personalize your smartphone to the extreme or to install an alternative ROM like LineageOS, Paranoid Android or AOKP. The method we present to you in this quick tutorial is based on TWRP and Magisk.
There are millions of valid reasons to root your smartphone. The operation gives the user root rights (the highest user privileges) within the Android system, which allows all restrictions imposed by the manufacturer to be lifted. If you came across this tutorial a bit by chance and you do not understand what root is, we recently published a detailed file . First of all, for our method to work, you must have TWRP installed on your Note 9 . We explain how to do it a little further down.
Warning : the root of your smartphone is not without risks , and erases all the data it contains. It can make your smartphone completely unusable. We recommend that you back up all your data before starting and be careful. It is also recommended that you back up the manufacturer ROM you are using with TWRP so that you can restore it if something goes wrong. In addition, on Samsung smartphones, rooting your smartphone once changes the Knox counter, which voids the warranty and prevents you from using certain Samsung applications. SUMMARY
How to root the Galaxy Note 9 with Magisk
For that :
- Make sure TWRP is installed correctly: if not, go to the next section first before continuing
- Make sure all of your important data is backed up
- Download Magisk to your computer by clicking here
- Turn Note 9 off completely
- Press the On + Volume Up + Bixby buttons simultaneously to enter the recovery mode
- Select wipe data factory reset , then wipe cache partition then wipe dalvik cache
- Restart on Android
- Connect the smartphone to your computer
- Transfer the .zip file to the internal memory of your smartphone
- Unplug your smartphone when the operation is complete
- Return to recovery mode (step 5)
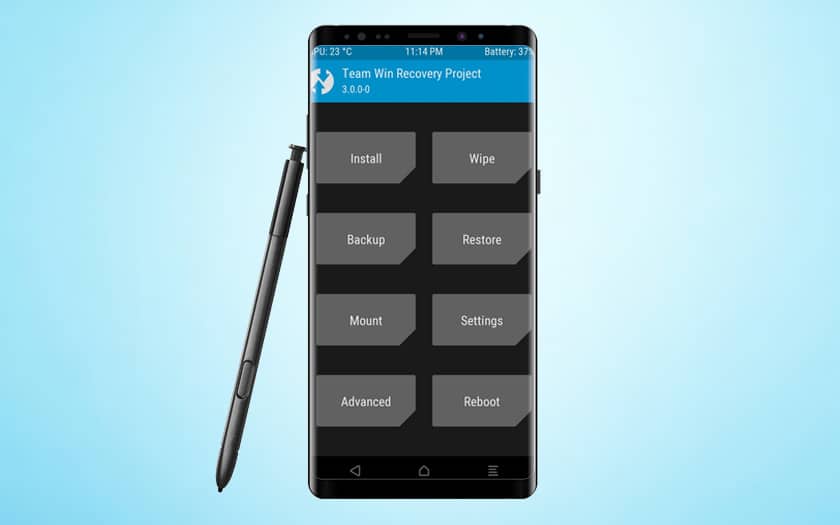
- In TRWP touch Install and choose the .zip file that you transferred
- Swipe to fire the flash
- Go back to the main menu and choose Reboot the system now
- Download and install the Magisk Manager application on your smartphone by clicking here
- Note : check that the settings on your smartphone allow the installation of programs from unknown sources
You should have root privileges. You can check this by downloading the Root Checker app from the Play Store .
How to install TWRP (if not already installed)
To do this, prepare your computer:
- Install the official KIES drivers for your Note 9 if necessary
- Download TWRP by clicking here
- Download DM Verity disabler by clicking here
- Download RMM Bypass by clicking here
- Download Odin by clicking here and install it
- Launch Odin
Put your smartphone in Download mode :
- Turn off your smartphone
- Press the On + Volume Down + Bixby buttons simultaneously
- Connect your smartphone to your PC
Then:
- If everything went well in Odin, the ID: COM field should turn yellow or blue (if there is a problem with the drivers)
- Click on AP and upload the file you downloaded for TRWP
- Deselect Re Partition and Auto Reboot
- Click on Start and wait
- When finished the ID: COM field in Odin normally turns green
- Close Odin and unplug the smartphone
- Put your smartphone in Recovery mode (step 4 and 5 of the How to root the Galaxy Note 9 with Magisk section )
- When TWRP requests Allow for system modification choose Keep Read Only
- Select wipe data factory reset , then wipe cache partition then wipe dalvik cache
- Transfer DM Verity disabler and RMM Bypass to your smartphone memory
- Restart again in recovery mode
- Flash DM Verity disabler and RMM Bypass by touching Install
- Swipe to validate and start flashing
- Restart on Android
In case of boot loop , return to recovery mode, then completely erase the device by selecting wipe data factory reset , then wipe cache partition then wipe dalvik cache .