The Android SDK (“Software Development Kit” or “Tools for software development”) is a program that is installed on the PC and is necessary for the creators of Android applications. Its installation and configuration in Windows requires some steps, although you will only have to do it once.
Once the SDK is configured, you can also use the ADB and Fastboot platform tools, very useful for things like installing apps on the SD, resetting your device when it stays on the logo, or making a backup from the PC. However, an easier and faster way to use these tools is through the third-party installer Minimal ADB and FastBoot, although you can also download the official ones from Google’s servers.
Another way to install the Android SDK is through Android Studio, a program that will allow you to download practically everything you need to start developing Android applications. If your interest is only SDK tools, let’s do it.
Part 1: Install the Android SDK Tools
1. Download the JDK (Java Development Kit) from this Oracle page.
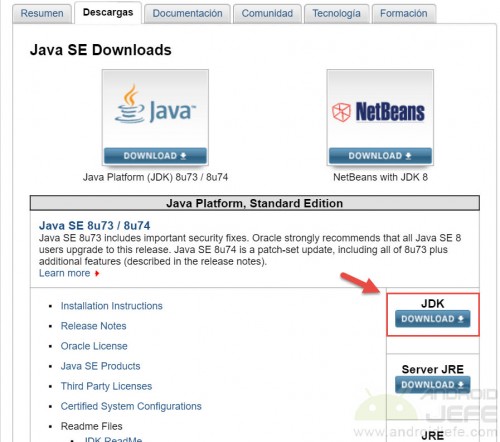
On that page, click where it says JDK Download . On the next screen, where it says something like Java SE Development Kit XuXX , select the 32-bit (x86) or 64-bit (x64) Windows operating system. Before this, it may be necessary to activate the “Accept License Agreement” box.
Double-click the downloaded .EXE file to install. Nothing needs to be changed in the installation process: simply click on “Next” or “Next” until finished.
This JDK software is an essential requirement to be able to install and use the Android SDK.
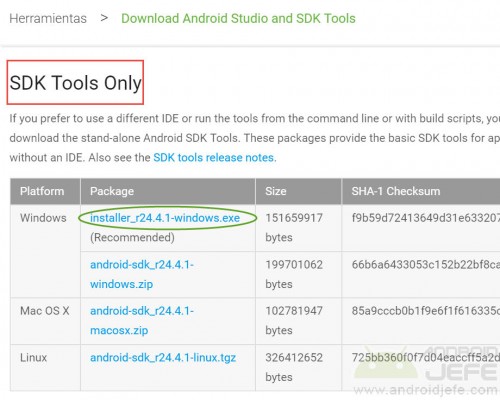
2. Download the Tools Standlone SDK from this official page. If the page appears in Spanish (somewhat different from the one shown in the image below), locate the section that says “Get command line tools only” and download the installer for the respective operating system .
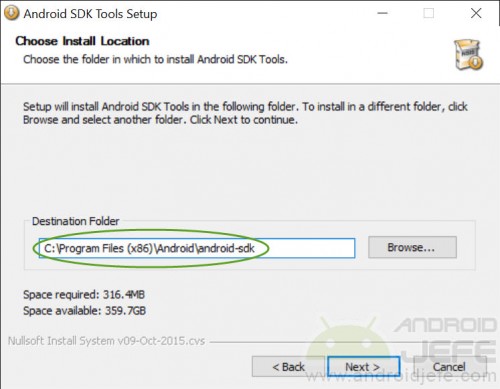
Then double click on the downloaded .EXE file to install it. During the installation process, when a screen appears saying “Destination Folder” or “Destination Folder”, note the directory that appears there (if the installation for a single user has been chosen, it will be something like, C:UsersJavierAppDataLocalAndroidandroid-sdk but if the Installation for all PC users will be something like C:Program Files (x86)Androidandroid-sdk ). This information will be used later.
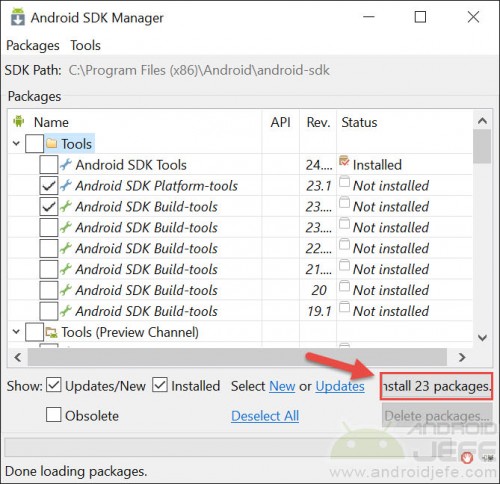
3. At the end of the SDK Tools installation, a screen will open to choose the download and installation of other components. Do not change anything there and click on the “Install XX Packages” button. On the next screen click on “Accept License” and then “Install”. Wait for the download and installation to finish successfully. After installation is complete, a very similar new screen may pop up offering installation of additional components. It is optional to install them (this may take a couple of hours). If you don’t want to install, just close the window and continue with the following.
Part 2: Configure SDK Tools
- On the Windows PC, find and right-click the “My Computer” or “This PC” icon.
- In the options on the left, click on “Advanced system settings”.
- In the window that will appear, click on the tab above that says “Advanced Options” or “Advanced”.
- At the bottom, click where it says “Environment Variables”.
- In the next window, where it says “System Variables”, select “Path” and then “Edit”.
- On the screen that will appear, the following must be added (what is in red and green varies according to the installation of each one; what is in black is the same for all cases) and click on “OK”:
Directory_of_installation_of_SD_pointed_ above tools
Directory_of_installation_of_SDK_pointed_ above platform-tools
Directory_of_installation_of_SDK_previously_posited build-tools Number_of_version_of_SDK
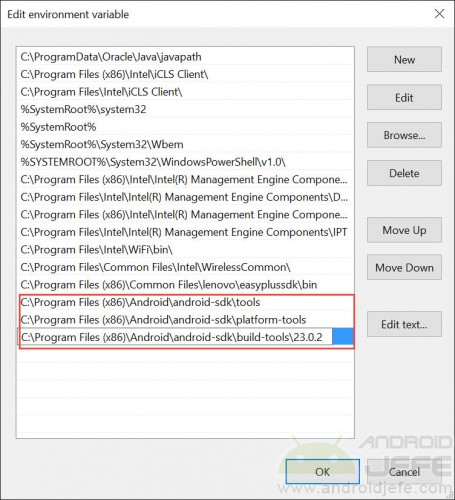
What is in red color is the directory that should have been previously noted, in my case C:Program Files (x86)Androidandroid-sdk . What is green is obtained by going to that same directory and opening the folder build tools (in my case it was 23.0.2).
In Windows 10, these options can be added one by one using the “New” button. In Windows 7, one must be added after the other, separated by a semicolon (;). Once this is added, it is recommended to restart the PC.
Part 3: Use ADB / FastBoot (optional)
In addition to having correctly configured the above, you must also install the drivers for your Android on the PC so that a correct connection to the computer is established when plugged in using the USB cable. It will also be necessary to enable USB debugging on the phone.
Once the device is successfully connected, open the Windows command line (in Windows 10, on the magnifying glass button, type cmd and press Enter), type the command adb devices and press Enter. This should return the serial number of the device that is connected. This means that the SDK (and the ADB and Fastboot) are working properly.
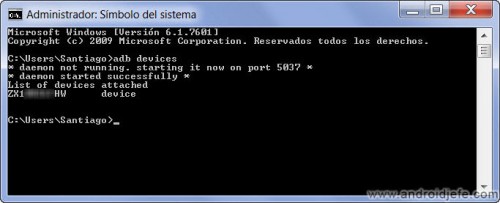
If something like 'adb' is not recognized as an internal or external command, operable program or batch file. this appears, the SDK is not correctly installed and configured on the PC, or the device is not properly connected (driver not installed or there is a connection problem).
As I said at the beginning, if you are only going to use ADB and Fastboot that are built into this SDK and that allow interesting commands to be sent to the phone, you can skip this whole process and use this ADB and FastBoot installer or download only the official platform tools.
Receive updates: SUBSCRIBE by email and join 10,000+ readers. Follow this blog on Facebook and Twitter.