The acronym MMS stands for Multimedia Messaging Service, but commonly they are used to refer to a multimedia message itself, which is capable of containing text along with an image, audio and even video.
To send MMS from an Android, you must first activate or configure the mobile internet on the device, since the MMS service works through the operator’s internet. Then you have to configure the MMS itself.
Contents
Step 1: Set up mobile internet
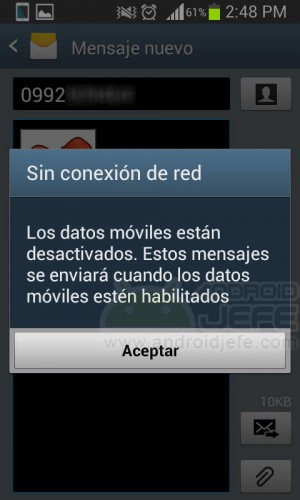
As we said, the first requirement to send MMS is to have correctly configured and activated the internet connection for mobile data on the cell phone.
If you can surf the Internet using mobile data, then you can continue to step 2. Otherwise you will have to configure the APN. After that, enable mobile data on the device and verify by opening a web page in the browser. To avoid confusion, previously disable the WiFi connection.
I insist. This is an essential requirement, since the sending and receiving of MMS is done through the internet connection by mobile data.
Step 2: Configure MMS
There are three ways to configure MMS on Android:
1. Automatic configuration
- Open the General Settings screen (slide the top bar and tap the cogwheel).
- In Wireless connections, tap on “More”.
- Tap on “Mobile Networks”.
- Tap on “Access Point Names” (or “APN”).
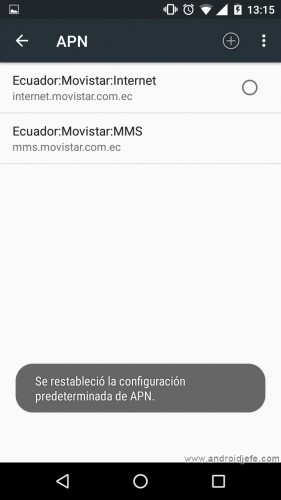
- Tap “Reset to defaults” (this option may appear by tapping the on-screen menu button at the top, or by tapping the device menu button).
Doing so will automatically download the MMS settings from the operator to which you are connected and nothing else needs to be done.
Important : This procedure will also reset the APN of the mobile internet, so after the process you have to make sure that this APN is selected (tap on the circle to your right and leave it checked).
2. Manual configuration
- Open the General Settings screen (slide the top bar and tap the cogwheel).
- In Wireless connections, tap on “More”.
- Tap on “Mobile Networks”.
- Tap on “Access Point Names” (or “APN”).
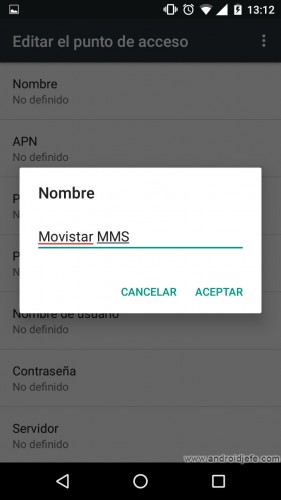
- Tap on “New APN” (possibly this option is as a “+” symbol at the top or you may have to press the menu button on the screen or on the phone).
- On the next screen you have to enter some data, which vary from one operator to another and from country to country. As an example, the following is the APN data to activate the MMS in the Movistar operator in Ecuador:
Name: Movistar MMS
APN: mms.movistar.com.ec
Username: movistar
Password: movistar
MMSC: http://mms.movistar.com.ec:8088/mms/
MMS Proxy: 10.3.5.50
MMS Port: 9001
MMC : 740
MNC: 00
Authentication
type : None APN type: mms
Carrier: Not specified
- Finally you have to save these settings by pressing the on-screen menu button (in the upper right) or the menu button of the device and tapping on “Save”.
The MMS APN data for other operators in any country will necessarily have to be found on their official websites or by calling their respective customer services.
3. Configuration by SMS
Some operators automatically send MMS and mobile internet settings in a text or SMS message when the user turns on the device or has inserted a new SIM. Once that SMS is received, you have to touch on it and “install it” (in the SMS there must be an option for this), an action that will automatically configure Android for sending and receiving MMS.
What can be done to force the sending of this configuration to the device is to turn it off, remove the SIM card and the battery if possible. Wait a few minutes, insert both and turn it on again. Within a minute or two, the SMS with MMS settings should automatically arrive. You can also try inserting a different SIM than the usual or a new one.
If no SMS arrives, you can also call the operator and request this service. Some allow to request it by sending an SMS to a special number.
Send and receive MMS
Only after you have met the above two requirements, the device is ready for MMS sending and receiving.
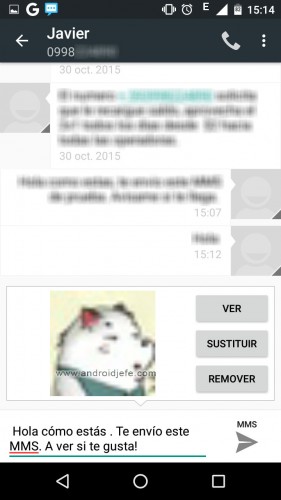
The same SMS application on the device is commonly used to send an MMS. In the message you can add text and attach an image, an audio or even a video (in fact, it is recommended to attach a file to ensure that an MMS is being sent, at least until you see that it works well. Any small size image will do. ).
It is better to use the SMS application that comes from the factory on the device for MMS. It is not a good idea to use a third party application, at least until you prove that the MMS is configured correctly.
It is important to disable the WiFi connection to send MMS. You cannot send MMS over WiFi, but you need to disable it to “force” the device to use mobile data to manage the sending of the MMS. In my case I cannot send MMS when the WiFi connection is enabled.
It should not be forgotten that MMS are sent via the internet, therefore it must be verified that there is a data packet (the so-called «Megas») or available balance. The cost of each MMS can be three, four or even five times greater than that of a conventional SMS and its maximum size cannot exceed 100 or 300 KB, depending on the operator and the device.
Receive an MMS
If the device is correctly configured to send MMS, the received MMS can be viewed directly in the messaging application. If not, you will probably receive a conventional SMS, with a link to a web page on the internet where you can see the content of the MMS.
Keep in mind that MMS may take time to arrive and some operators only allow MMS transmission between their clients (Movistar – Movistar, for example).
Ask for help from the operator
In case of problems or doubts with the MMS configuration, the best help you can get is from the operator. Virtually all operators help step by step to configure the device to their customers in this regard.