Contents
Straight to the section
Activate and activate developer options
Android Oreo changes the access to the developer options, but allows new tweaks. We will show you the latter below .
Developer options from Android Oreo
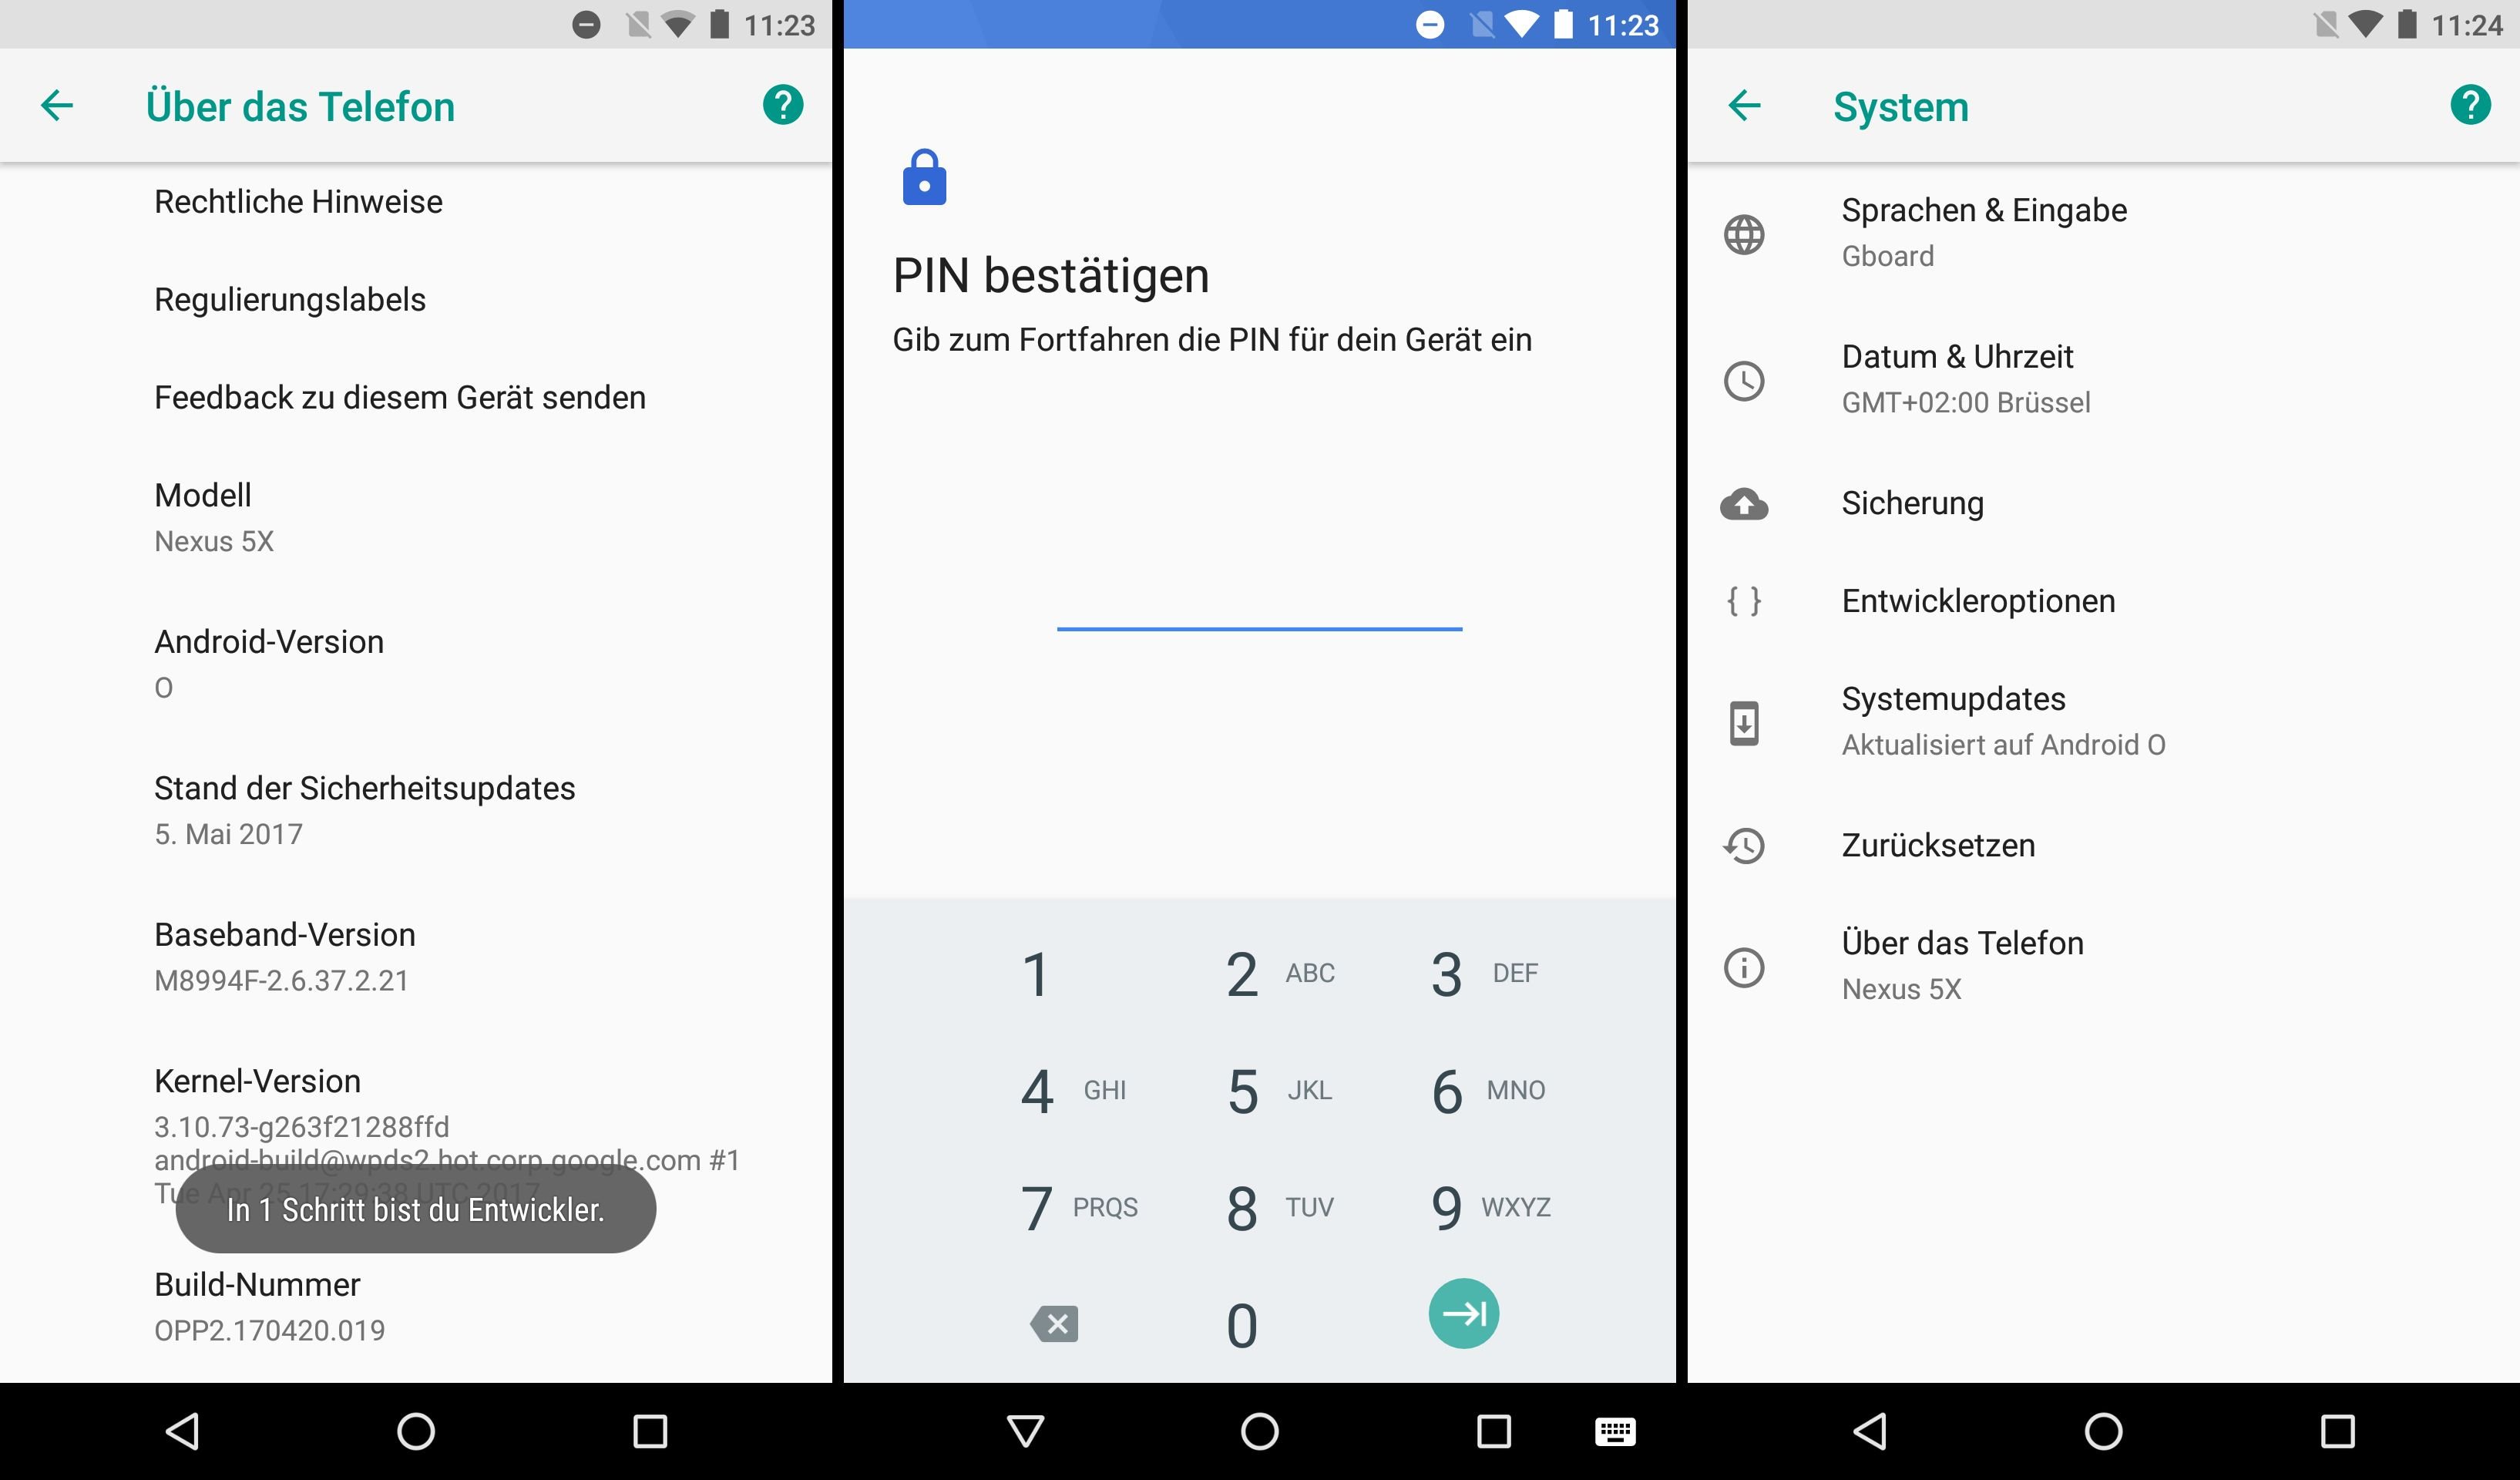
Android Oreo was last used on 22 percent of Android devices. With this version, there were two major changes that affect the activation of the developer options. Above all, you now have to confirm the activation with your lockscreen code. From Android Oreo you can unlock them as follows:
- Opens your Android’s settings.
- Tap System> Over the phone or a similarly named menu item.
- Looks for the “Build number” entry in this menu or under software information.
- Tap this menu item several times – at least seven times.
- Now Android asks for your current lock code or lockscreen pattern
- If the entry is successful, the message appears: “You are now a developer”
- The entry “Developer options” now appears in the settings, possibly under System .
- And now have fun with our tips.
If you want to hide the developer options again, you simply remove the first tick in the same.
Activate developer options until Android Nougat
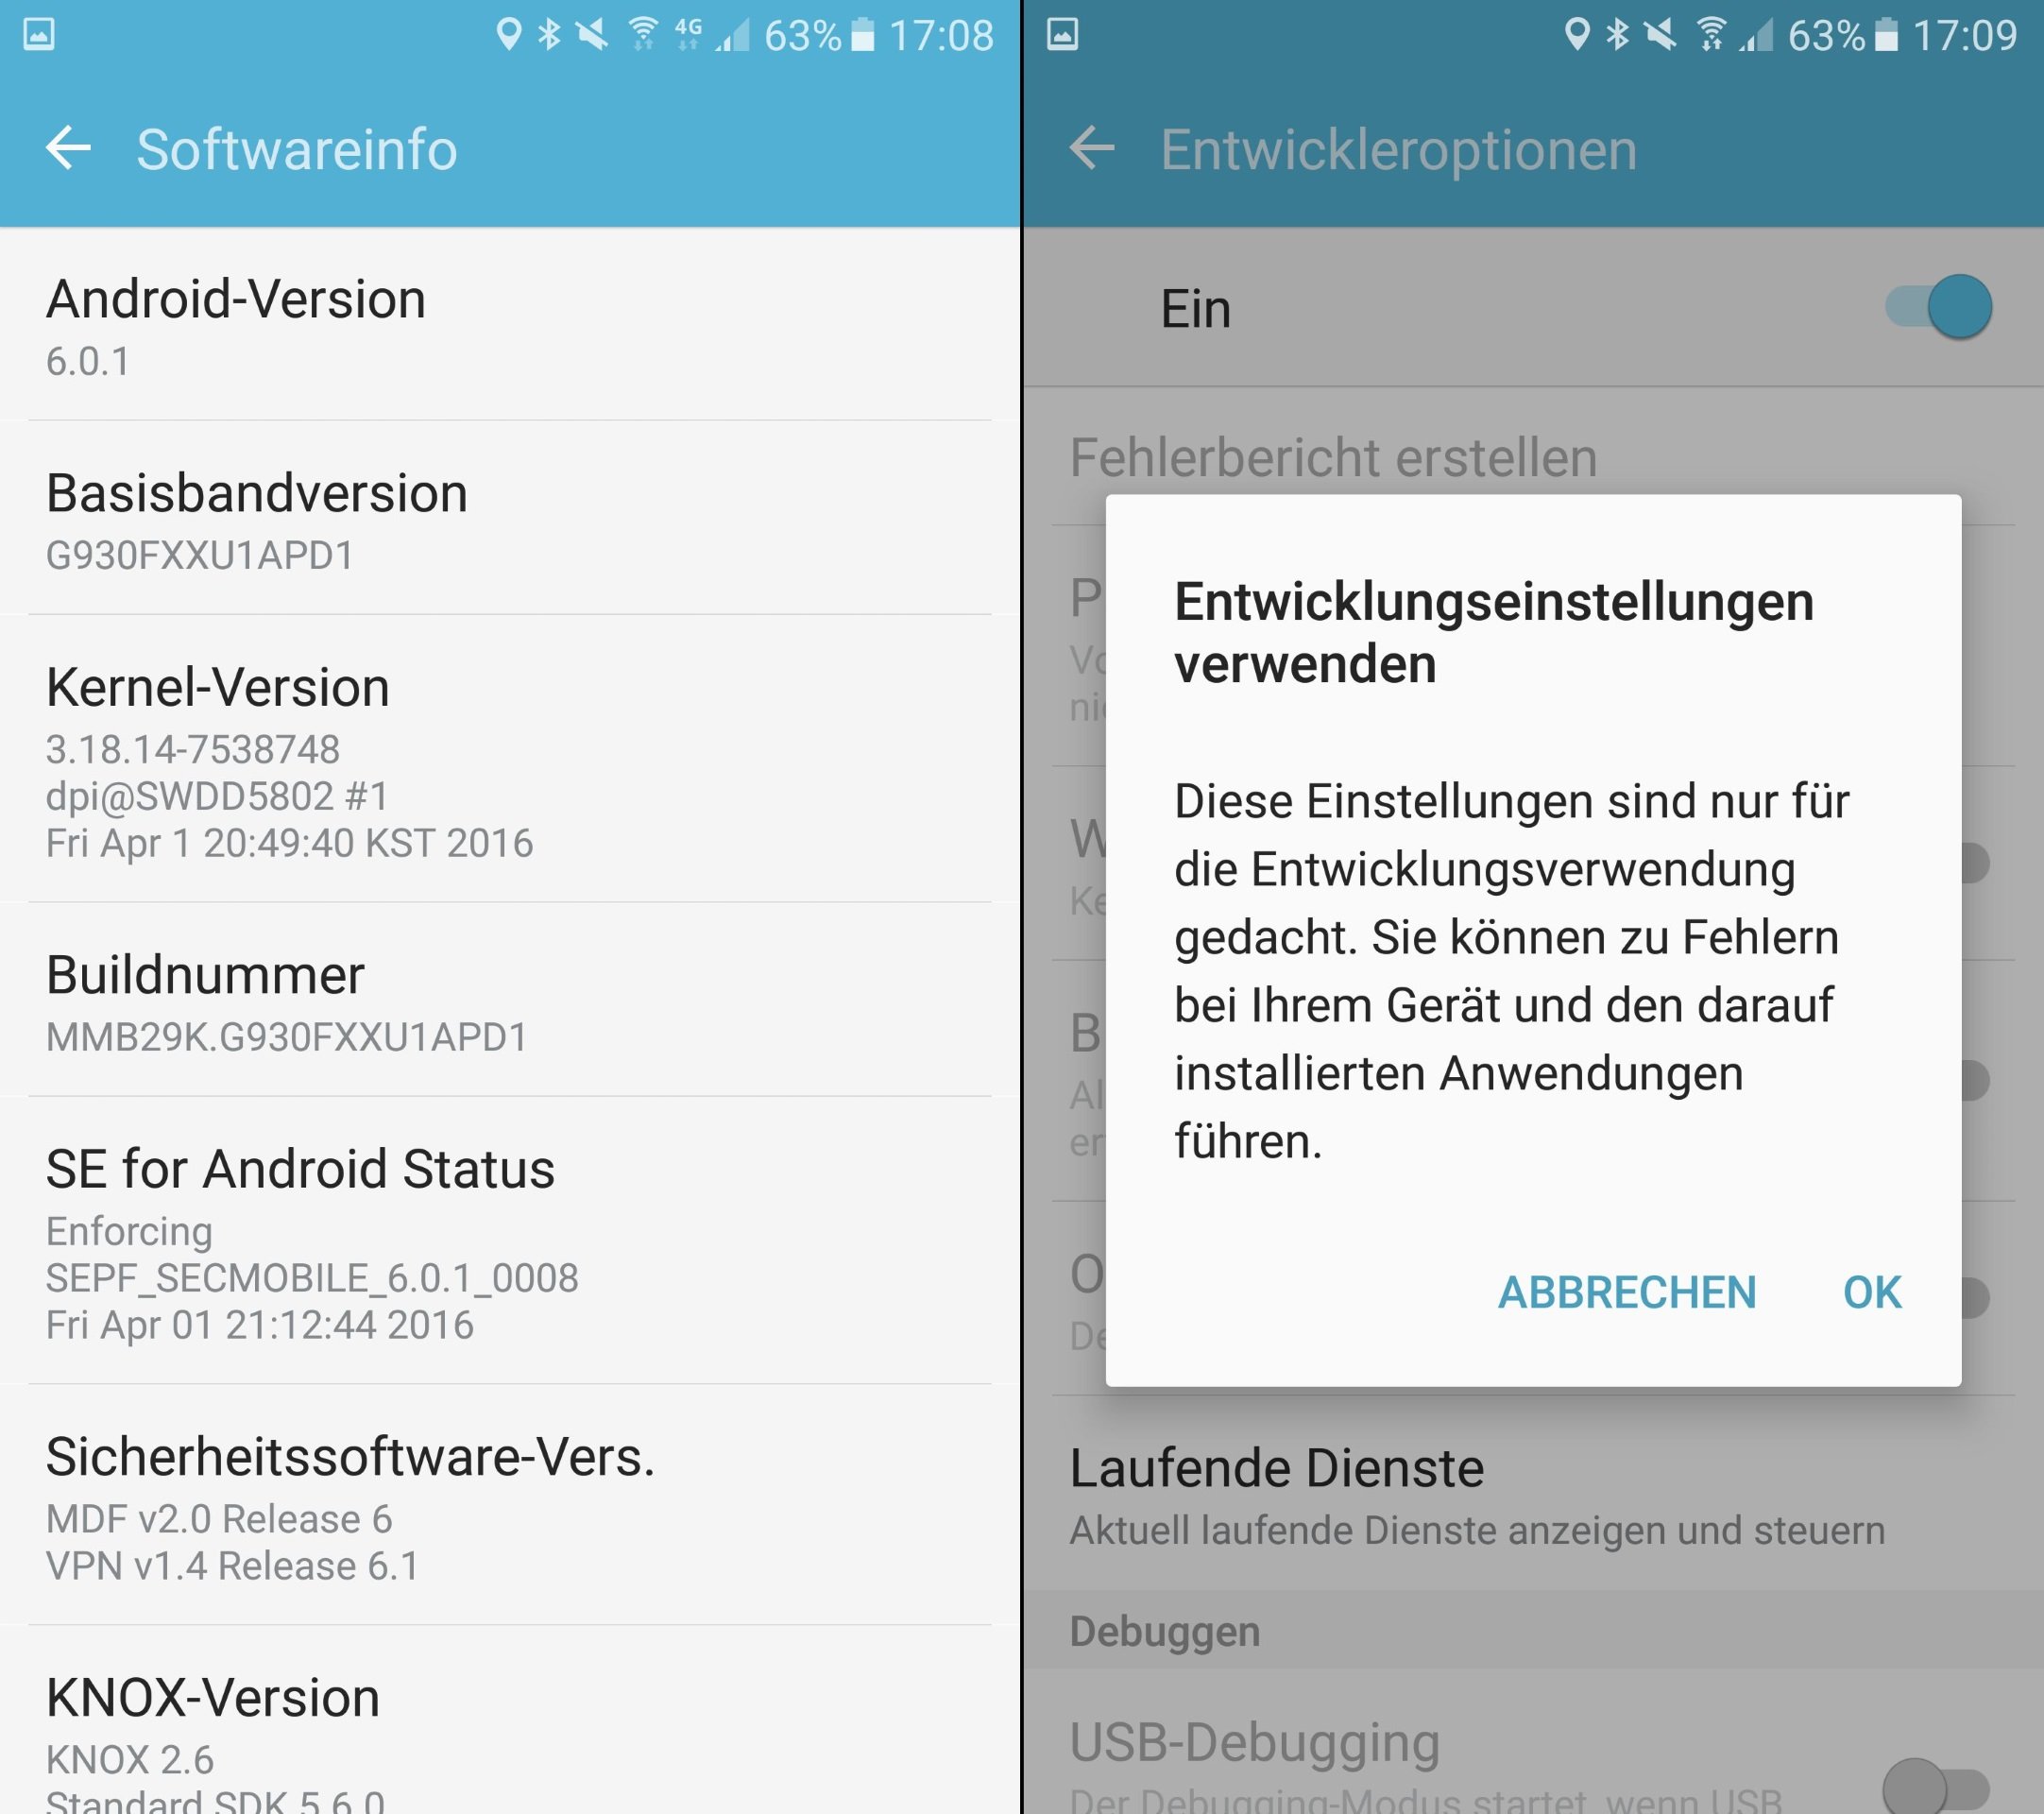
Before you can get started with our tips, you must first unlock the developer options. This works for all Android versions up to Android Nougat like this:
- Opens your Android’s settings.
- Tap “About the phone”, “About the tablet” or a similarly named menu item.
- Looks for the entry “Build number” in this menu.
- Tap this menu item several times – at least seven times.
- Android briefly pops up the message: “You are now a developer”
- The “Developer options” entry now appears in the settings.
- And now have fun with our tips.
Warning: The developer settings can have unwanted side effects. The options presented here are quite safe, many other ones not mentioned may sound interesting, but can lead to performance losses and an unstable system.
Stay awake / keep active
With this setting you determine that the display should always remain switched on when the smartphone is attached to the charger. This can be useful if you are setting up your smartphone or doing other tedious tasks.
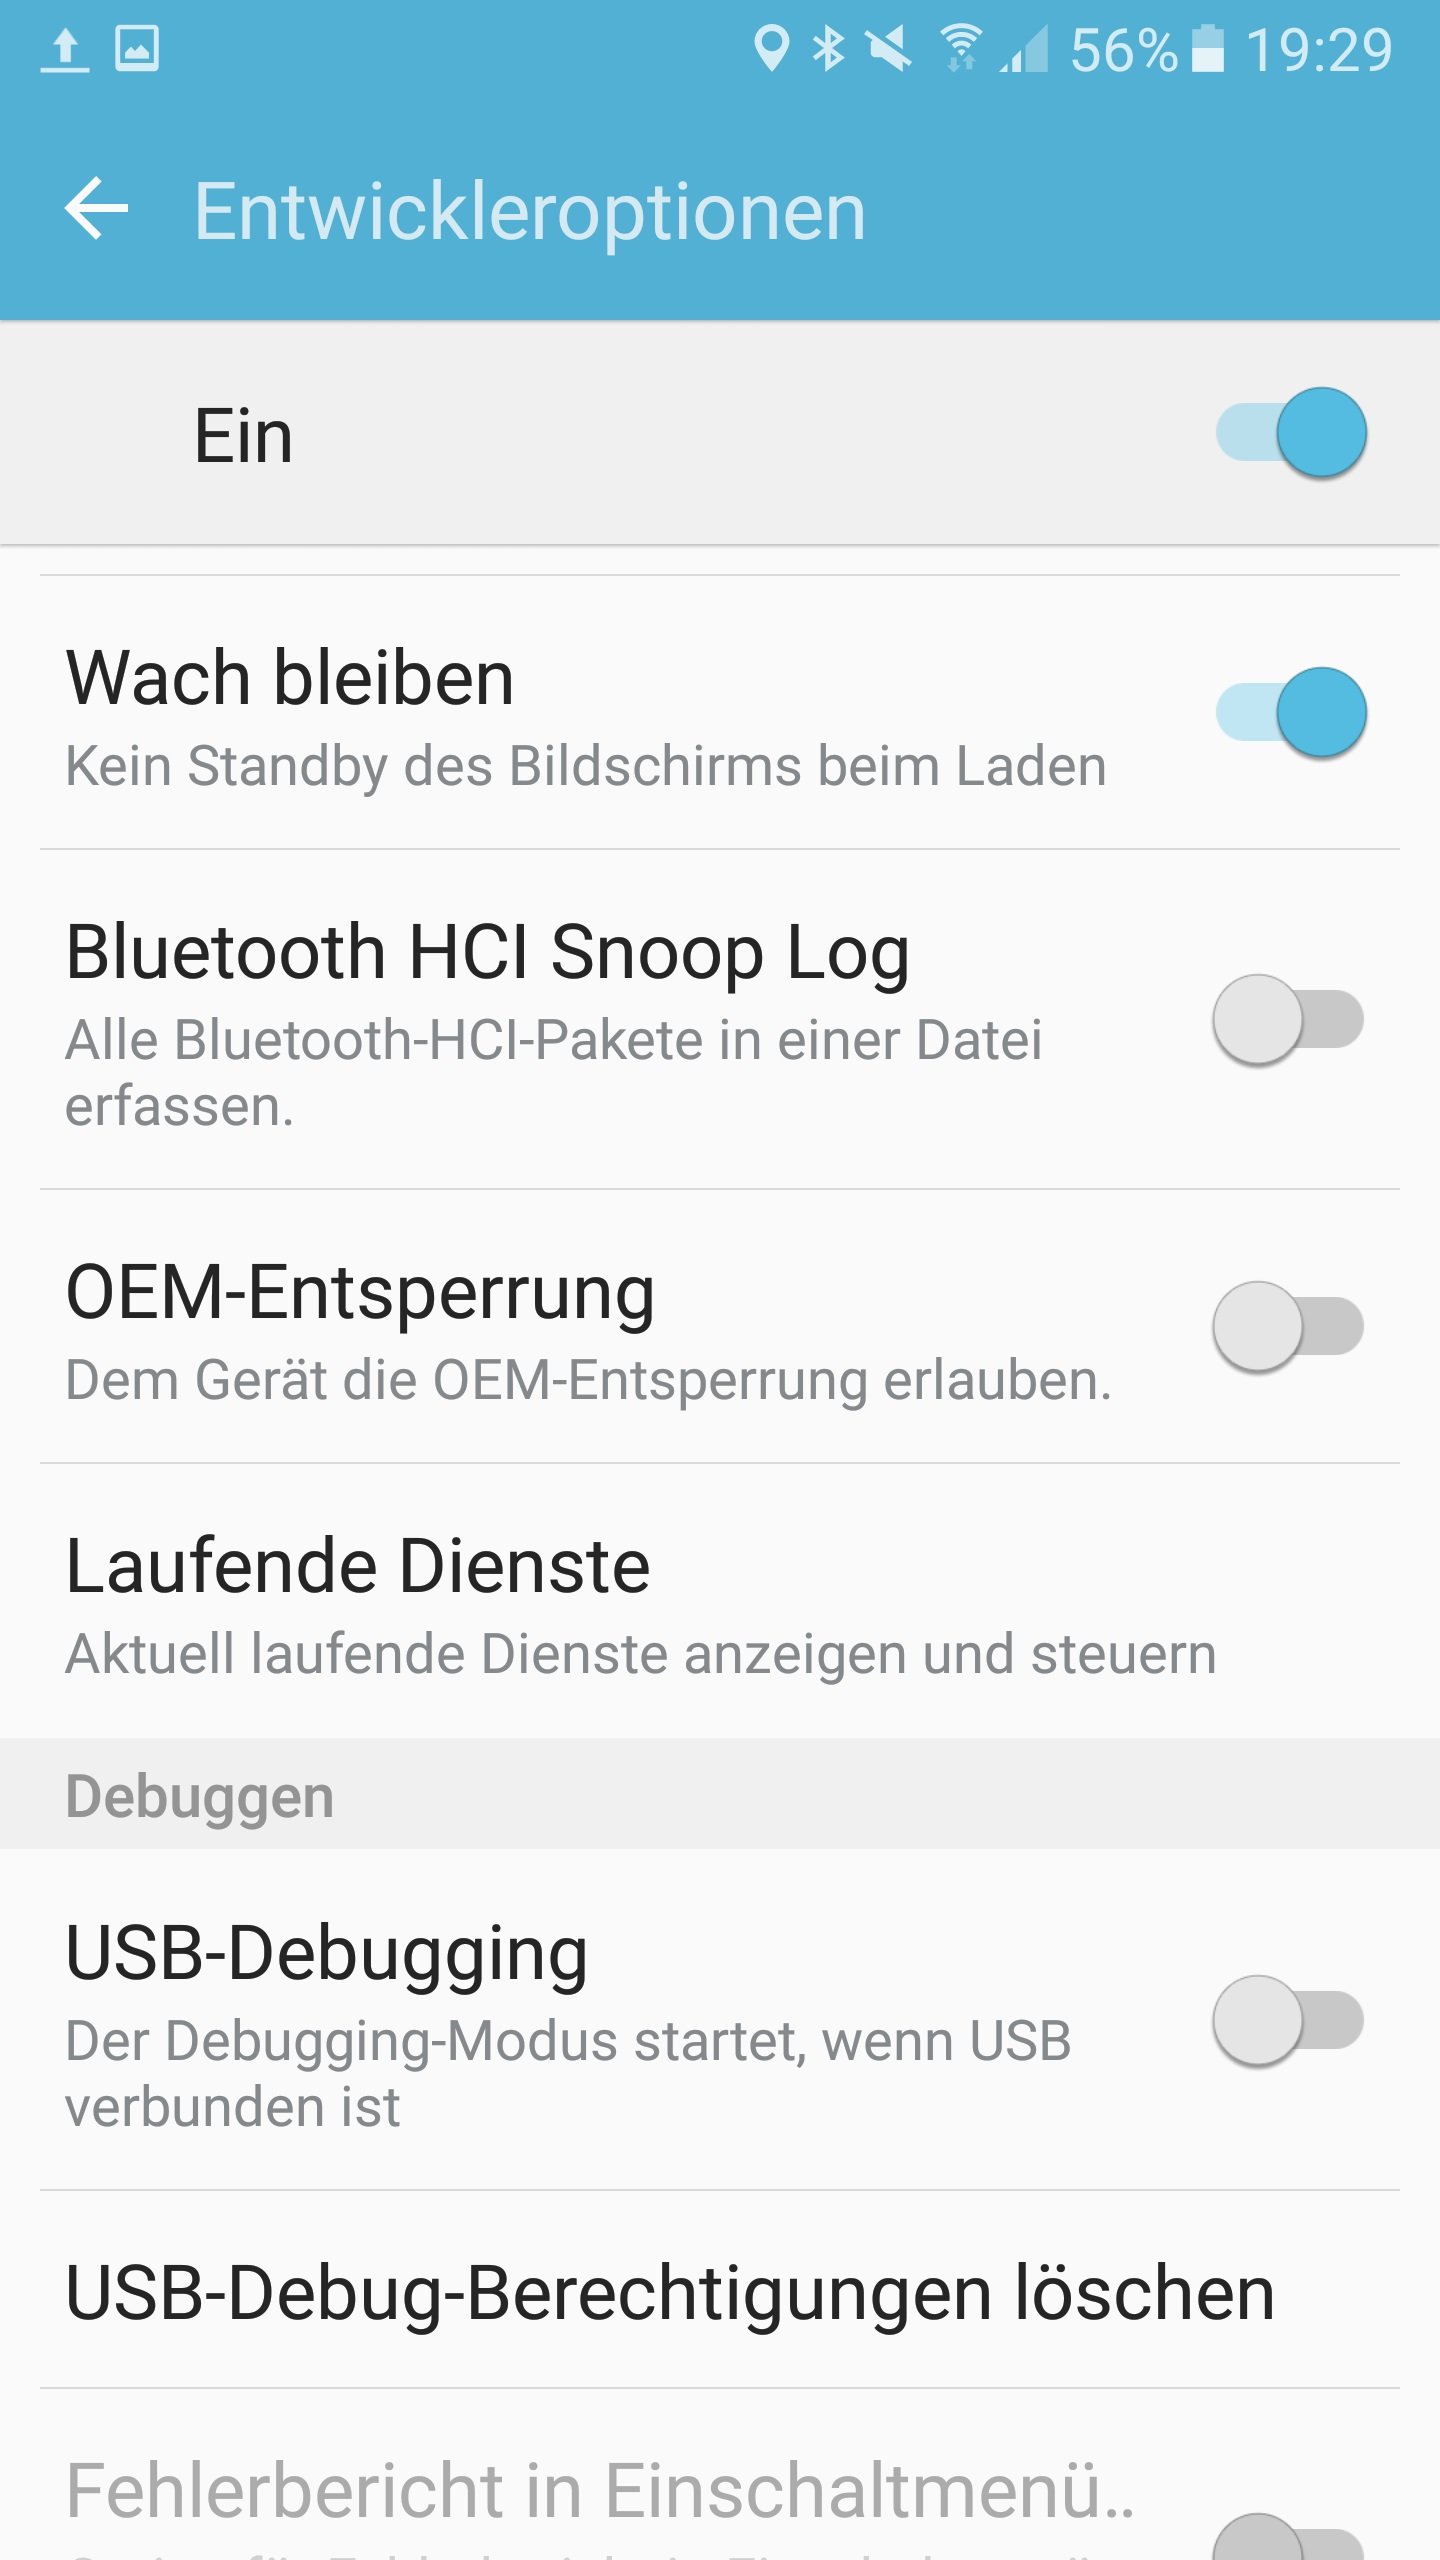
OEM unlocking
If you want to unlock the boot loader, an additional step is necessary with younger versions of Android. In the developer options there is a checkmark OEM unlock, which allows the boot loader unlock from Fastboot mode. This option is necessary, among other things, to install custom ROMs or root software on smartphones.
USB debugging
To control the smartphone from the computer, you have to activate the debugging interface. This is done on the one hand via the check mark in the developer options, on the other hand you have to allow the respective computer to debug individually after connecting the computer. We list more about debugging and the possibilities it opens up in a separate article.
Ongoing services / Active services
Select this point and Android will show you a task manager, with the help of which you can analyze the current memory consumption of apps. You will also find information about the currently free RAM here. In the top right you can switch the display to cache. Then you can see which apps Android has moved to the background.
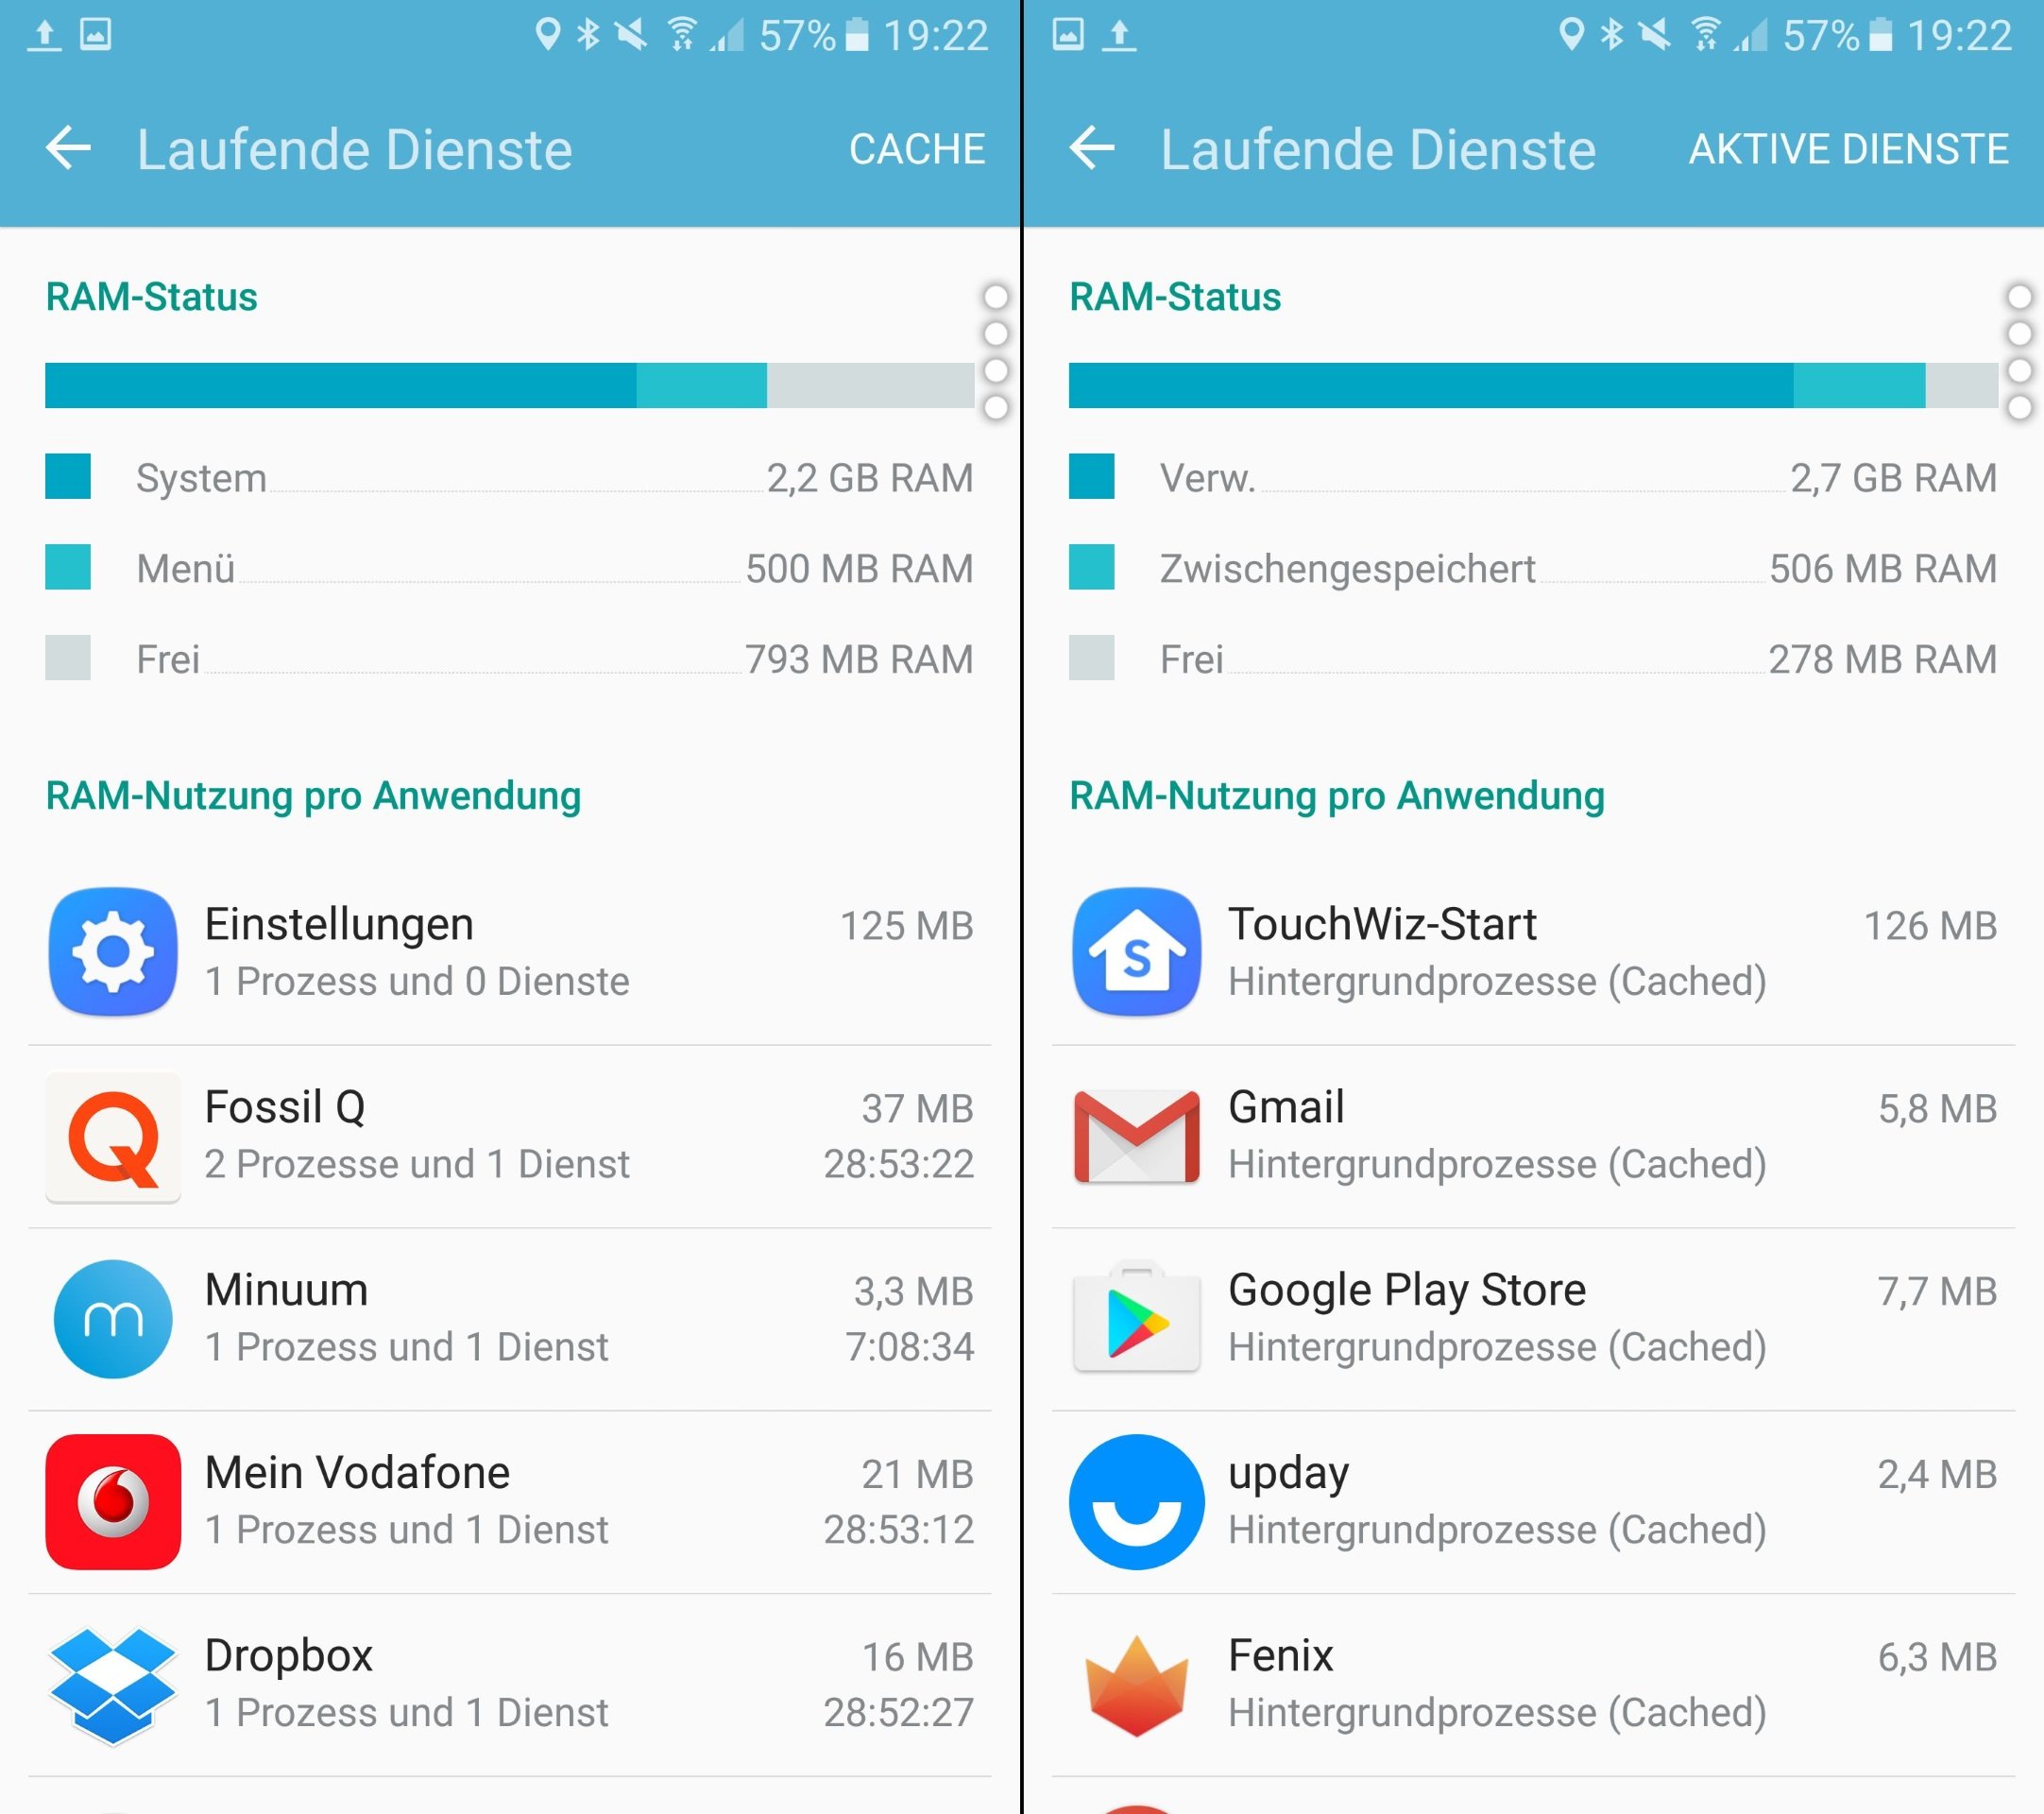
You can close the running services and apps and even report some of them. However, closing the apps is often only partially effective, since many of them will start again.
Show touches
With this setting you can take the perfect screenshots, because Android now shows a small circle under your finger – at least when you touch the touchscreen. In the screenshot you can see what it looks like.

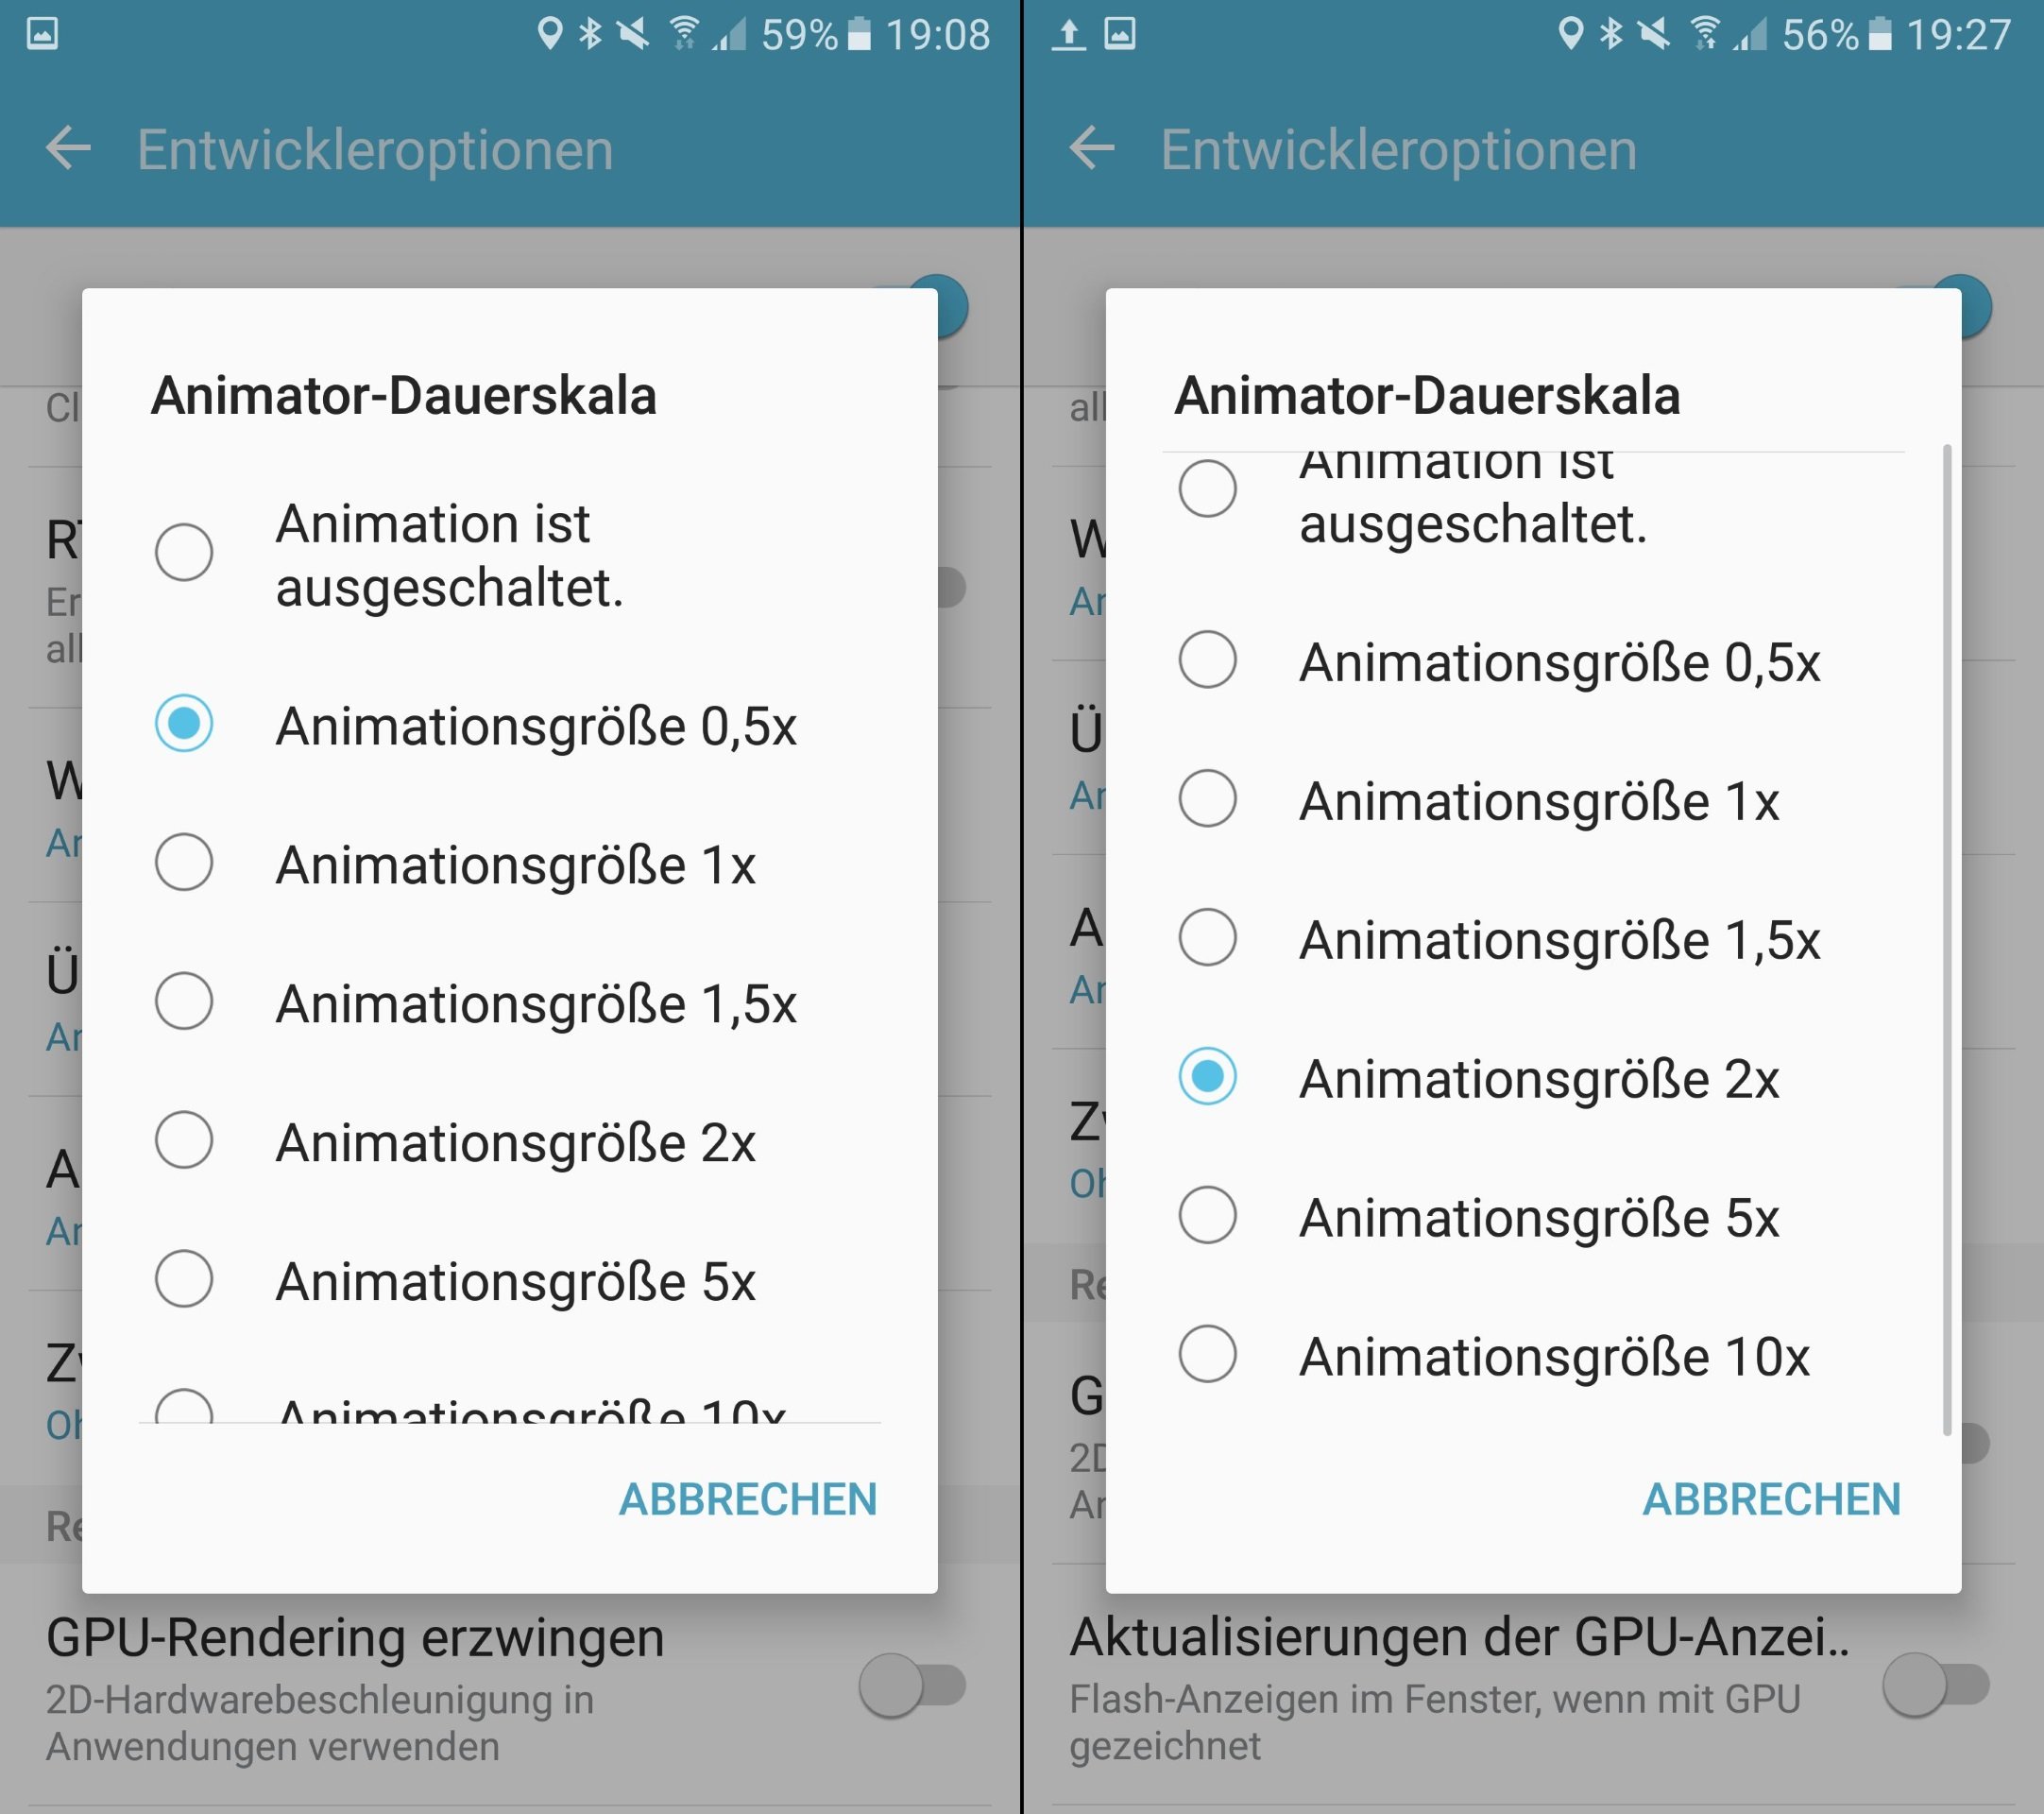
animator
Animations of the user interface should be smooth. But they shouldn’t take too long either. If you have the impression on your Android smartphone that the effects are nice to look at, but take too long, you can lend a hand here: the animator duration scale determines how long the UI animations last. A value of 0.5 speeds up the effects, while a value of 1.5 or even 2 switches the UI from your smartphone into a slow-motion view.
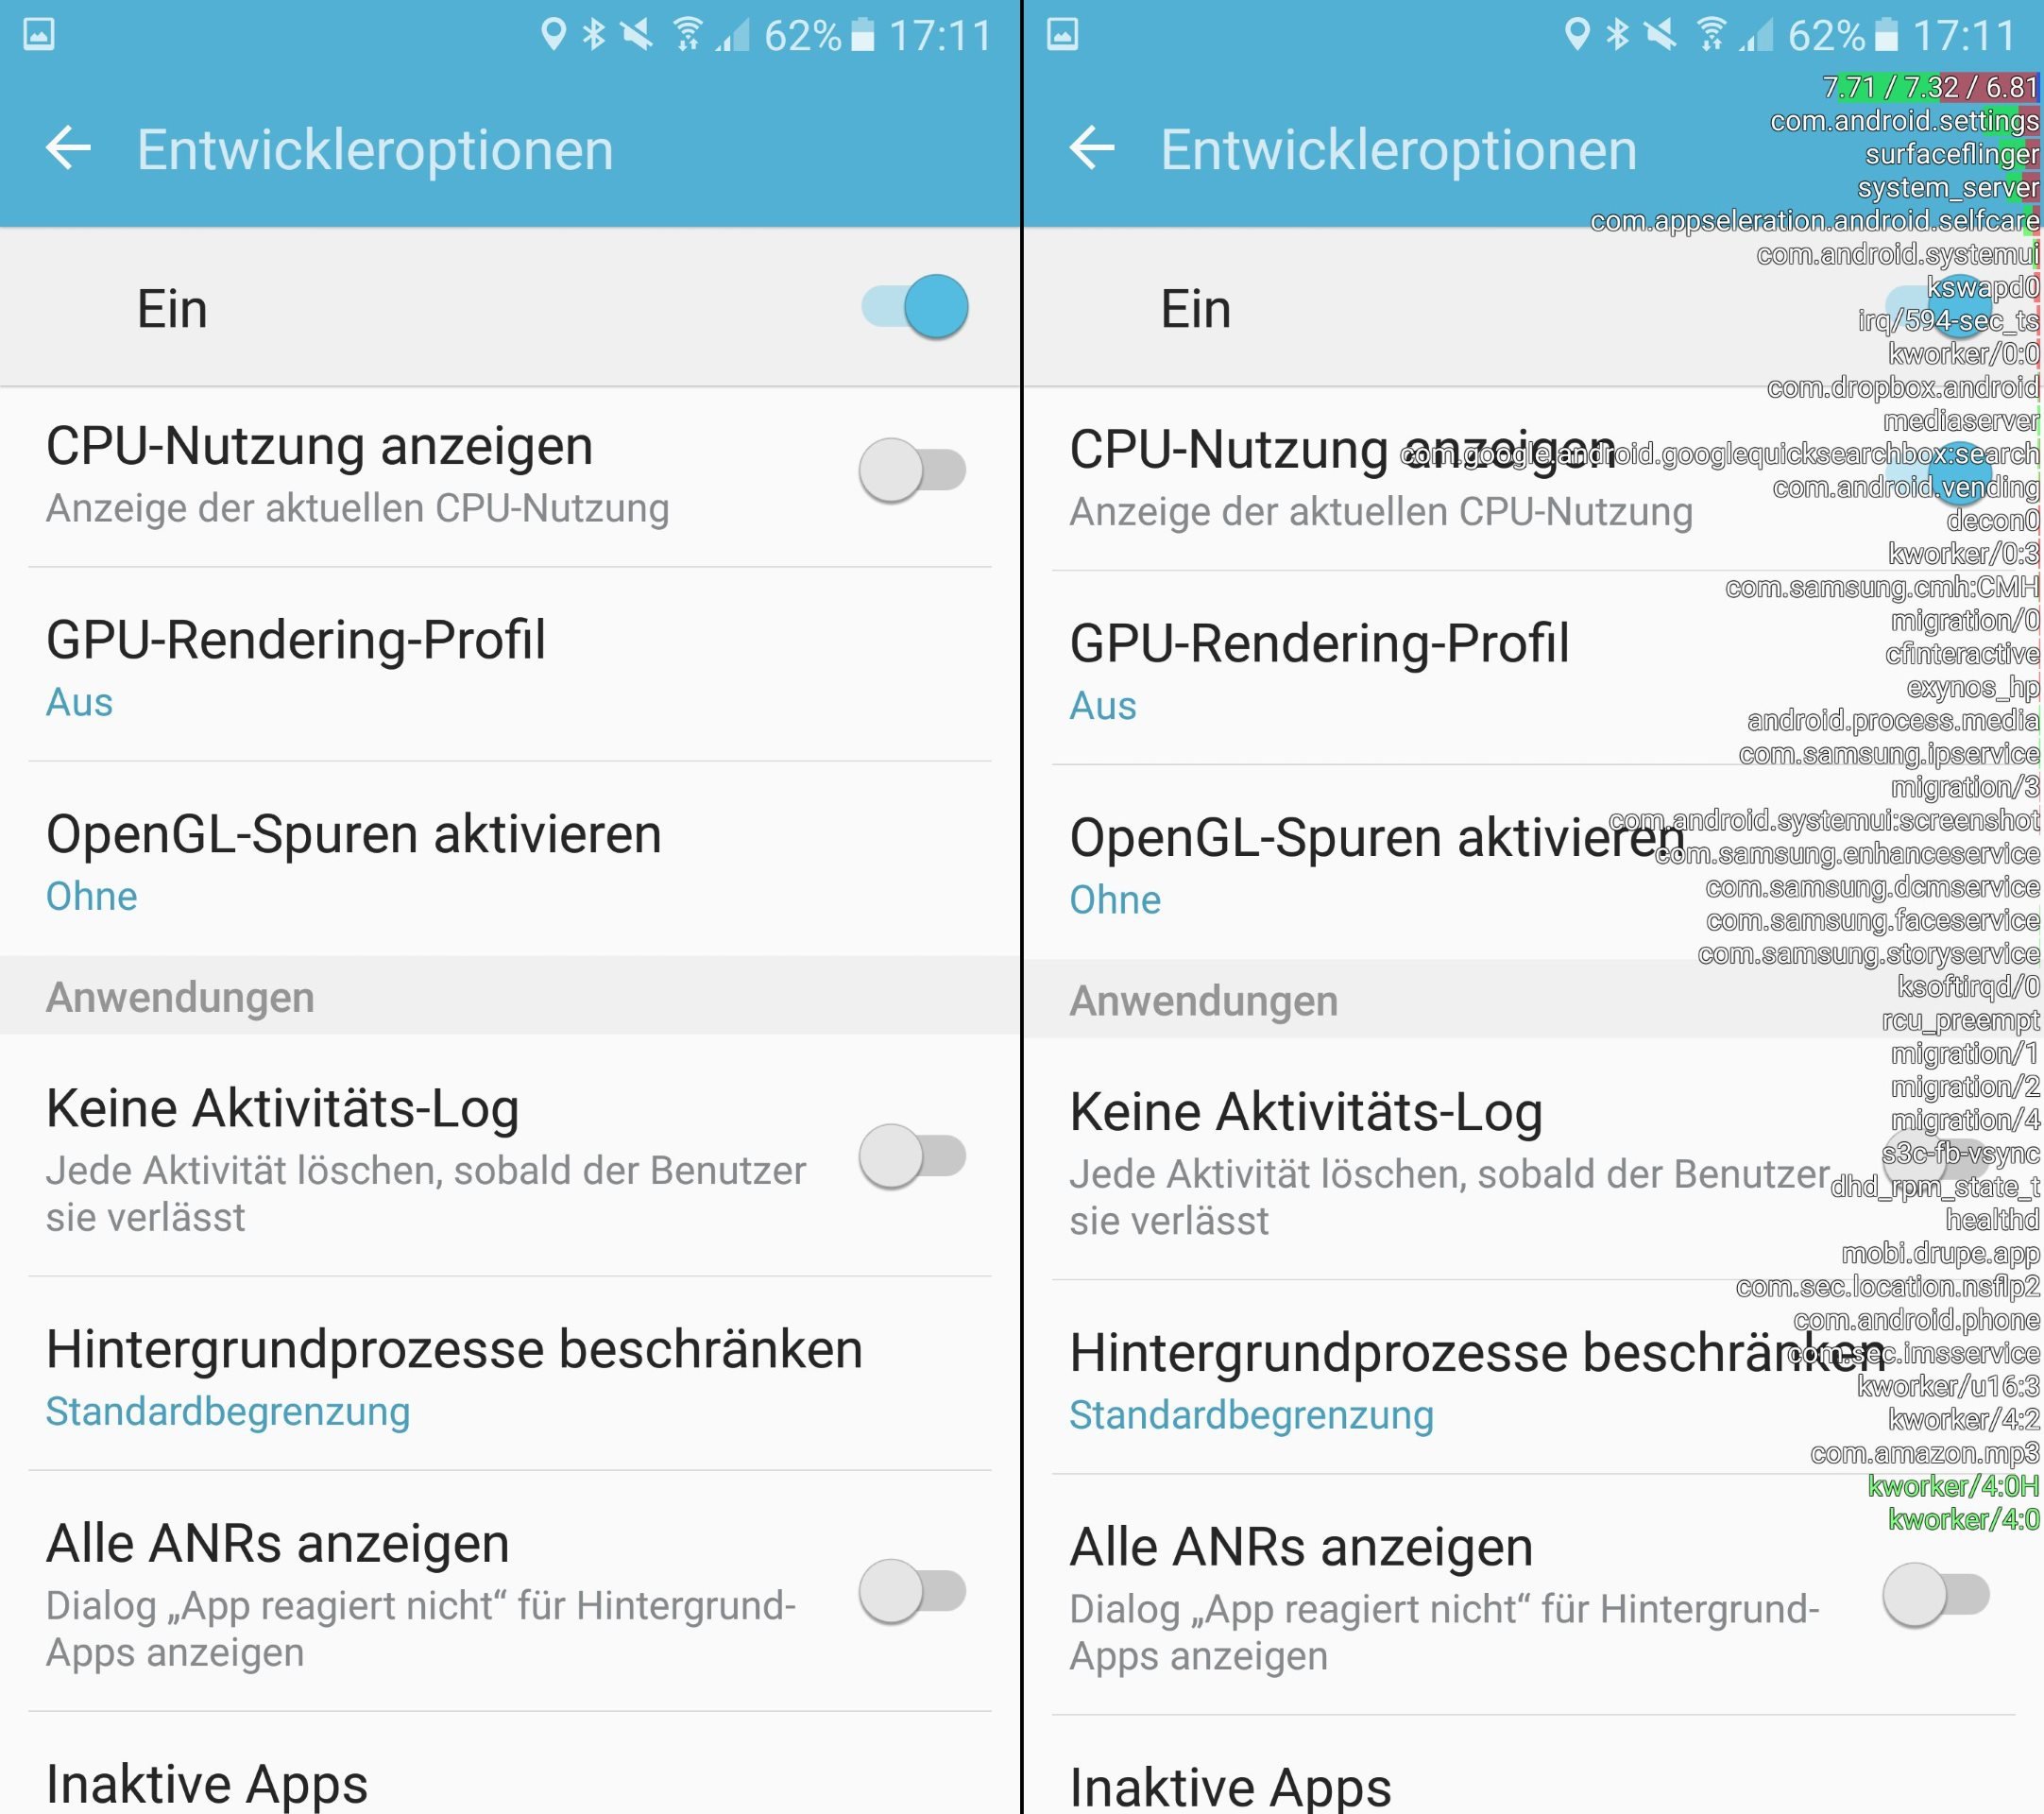
Show CPU usage
Do you want to know what’s going on on your smartphone right now? With this setting you can find out: Simply switch it on and Android will show you which processes are currently on your smartphone’s CPU. The processes are displayed there with your package names.
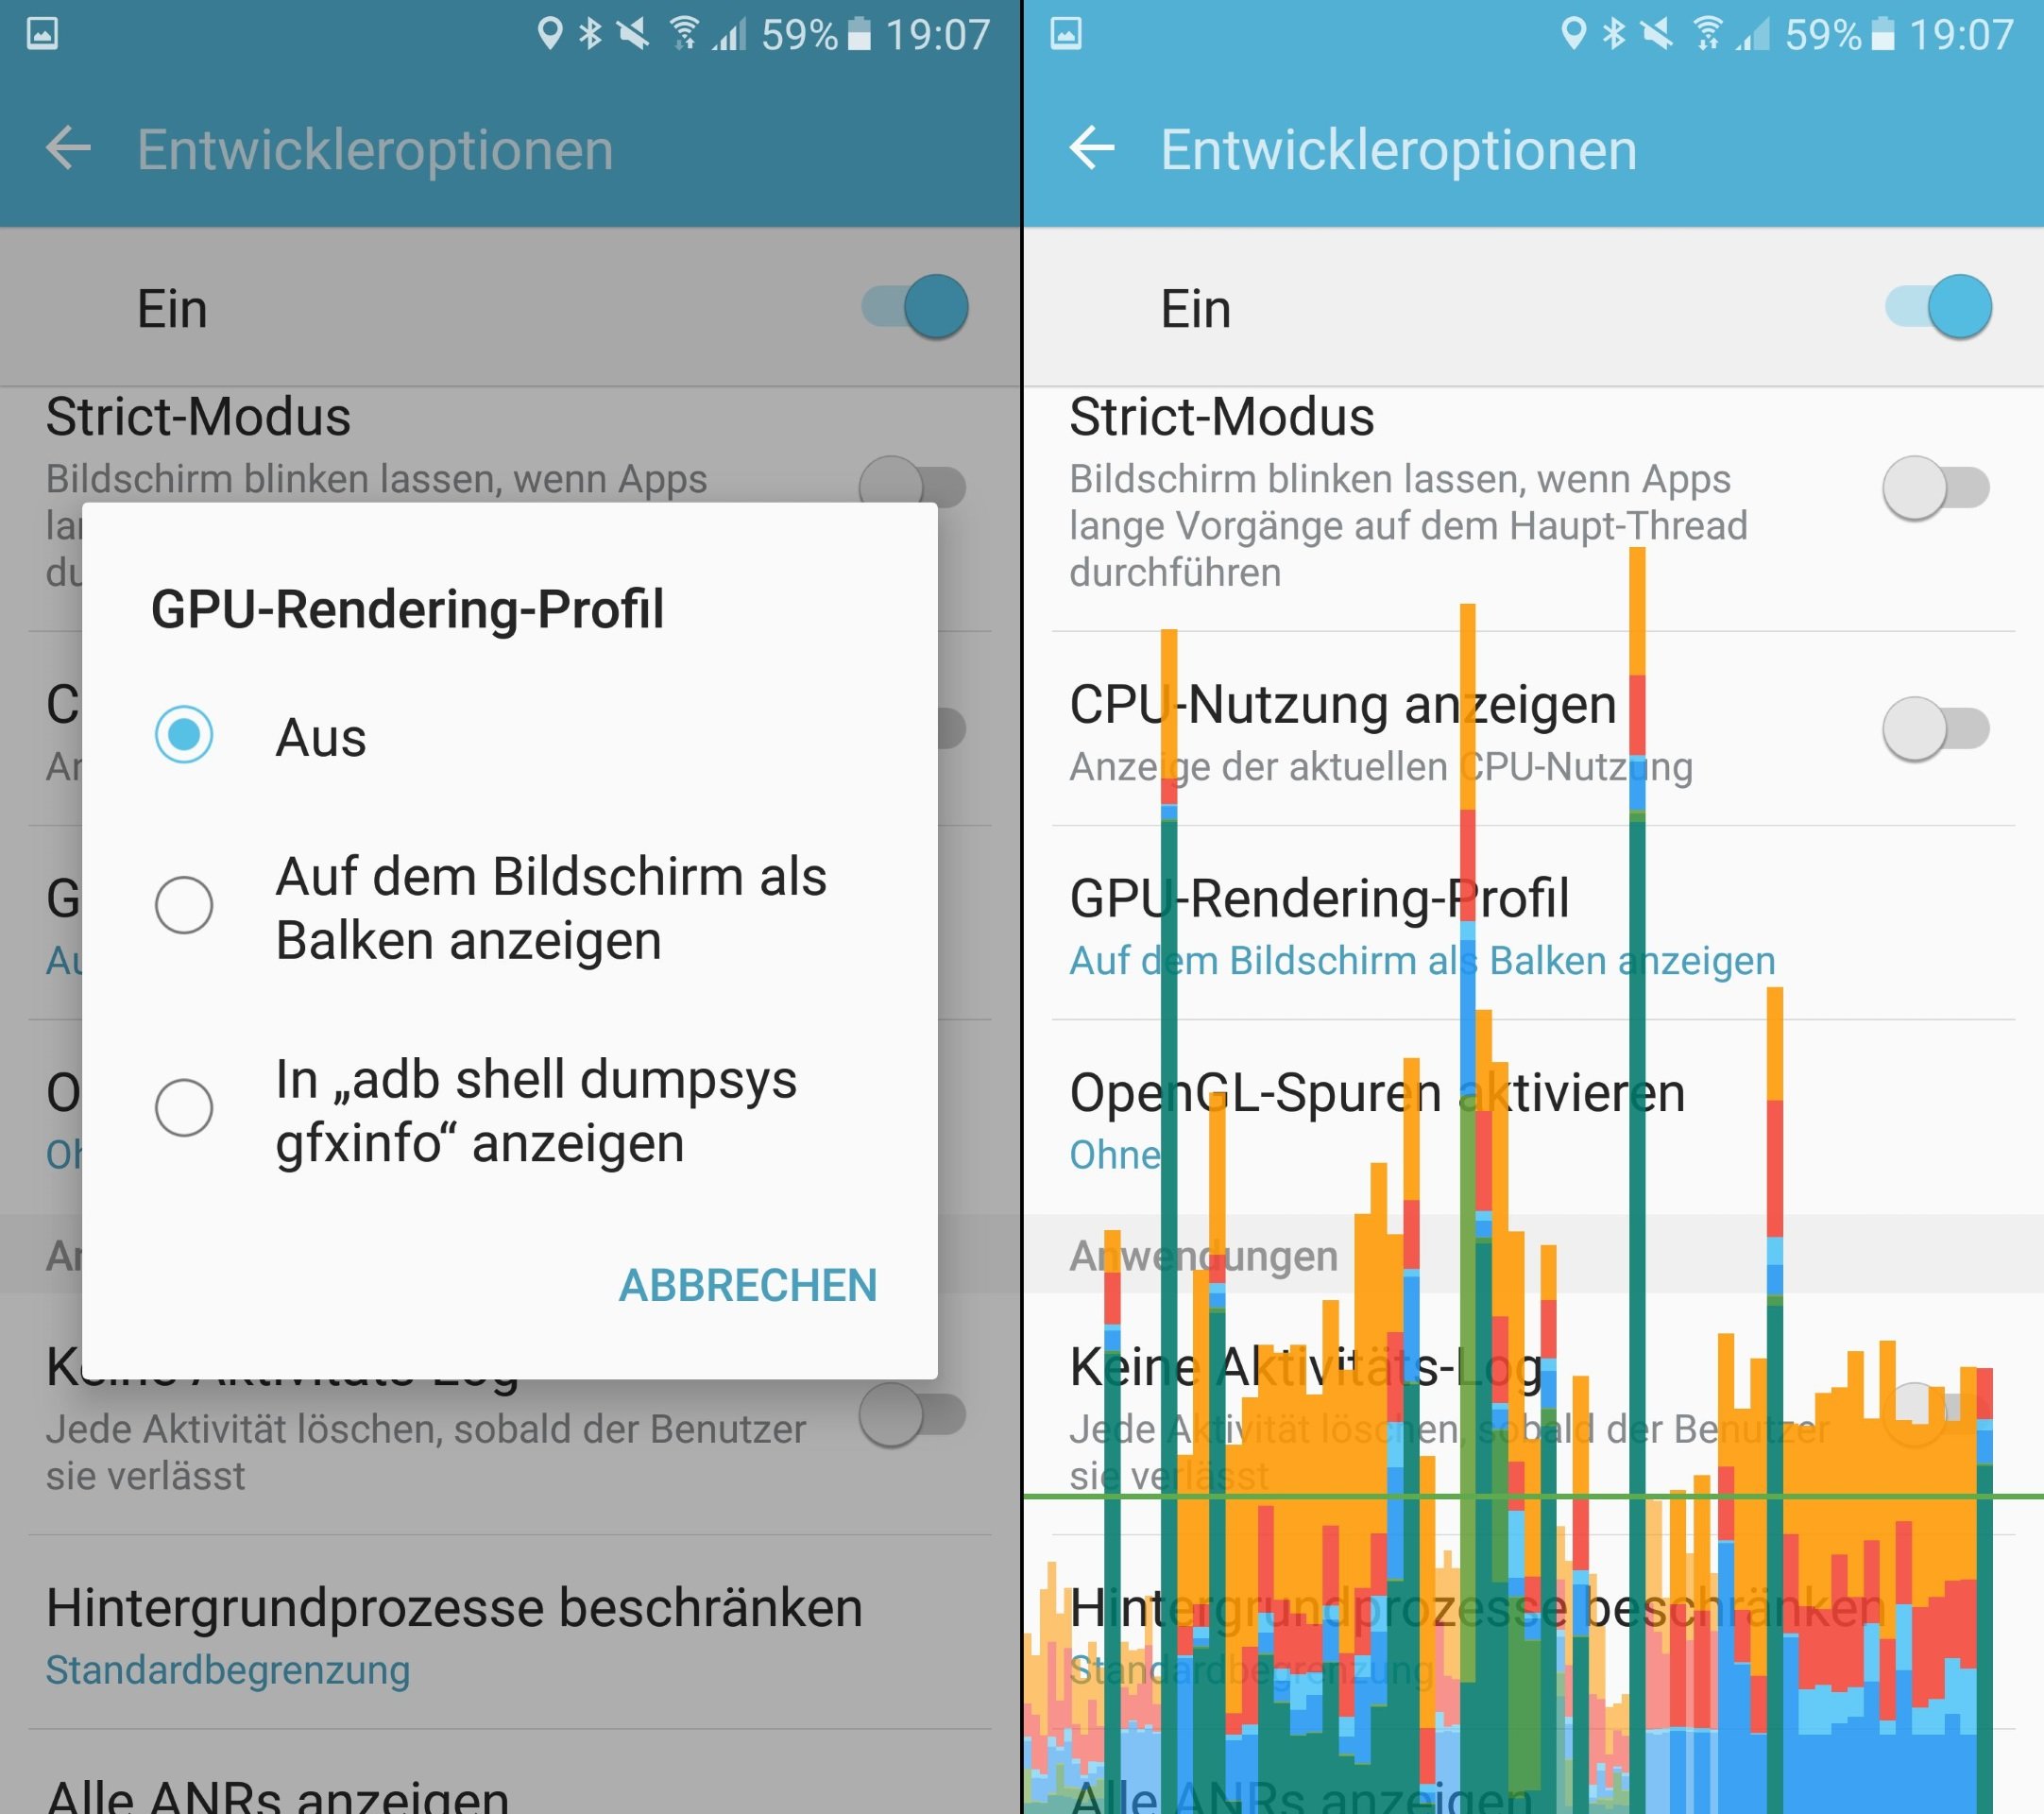
GPU rendering profile
If you want to go deep into the performance analysis of your smartphone, activate this developer option. You can choose between a log file and bars on the display. The latter is more practical because all important information can be seen on the screen immediately. The GPU rendering profile shows you graphically whether the system can display the user interface smoothly.
Each bar represents a frame and these show you how long Android took to calculate and display it. Take a look at the green line (also known as the 16 millisecond line): Android can only display 60 frames per second (fps) if the bars remain below it. If the bars protrude over the line, stuttering can hardly be avoided.
In the example below you can see that Android got a little out of step when scrolling back and forth and took more than 16 milliseconds for some frames and therefore did not reach 60 fps. From Android O there is the possibility to activate a quick setting tile for the GPU profile.
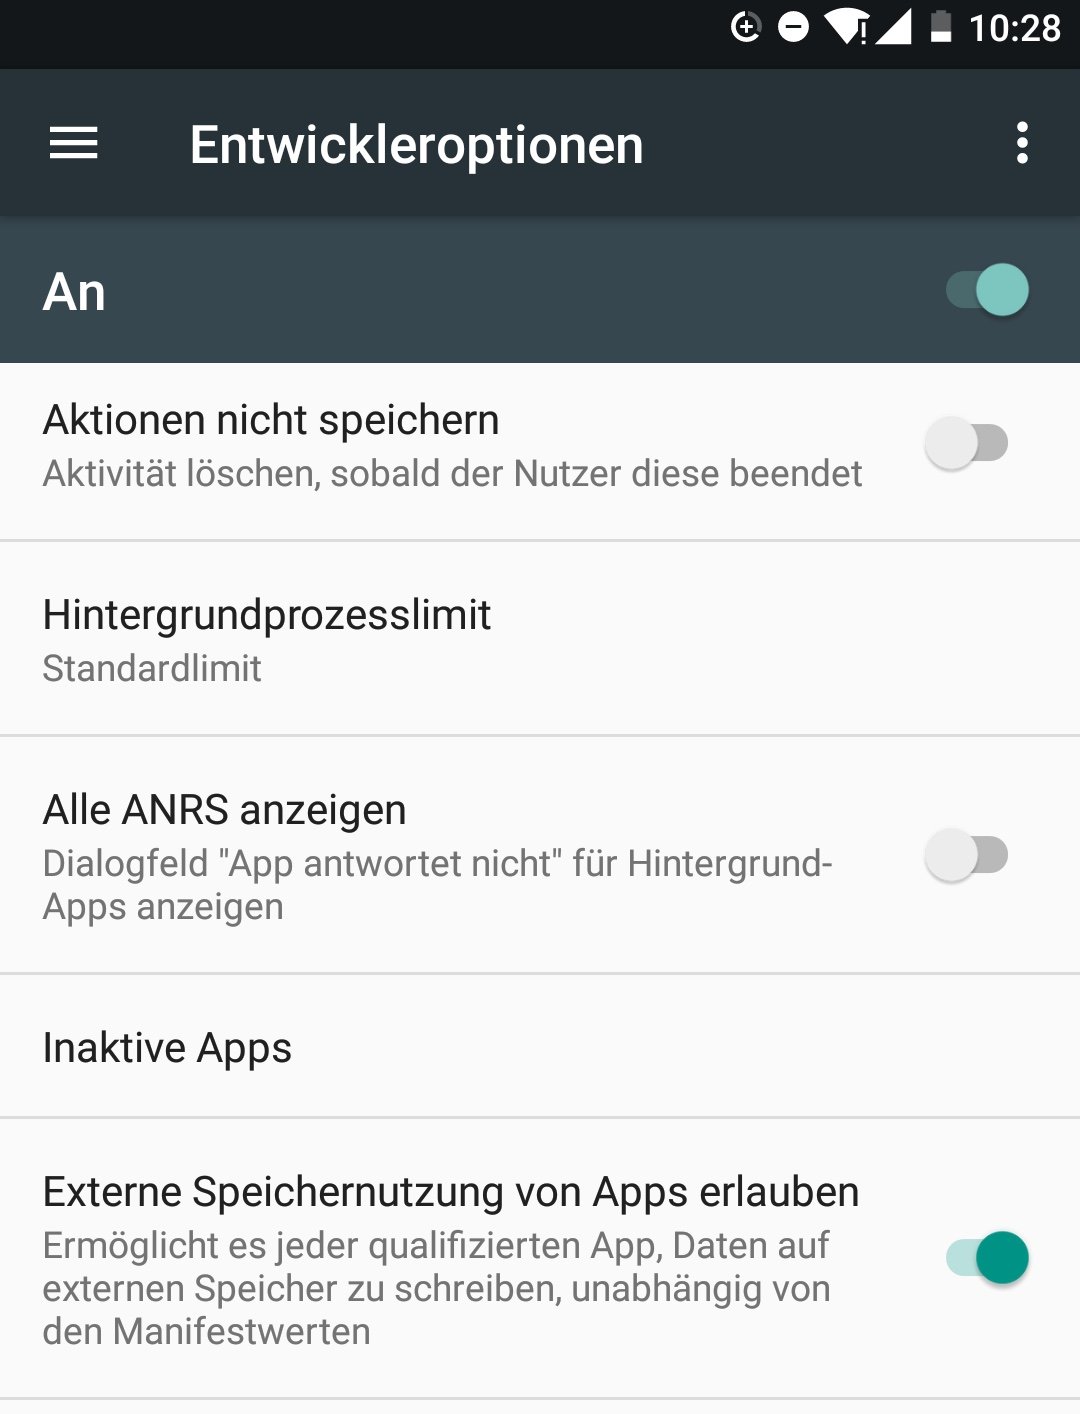
Allow external storage usage of apps
Google introduced a point in Android Nougat with which you can regain control over memory cards. Judging from the description, the memory usage from the days before Android 4.4 Kitkat could return: Because if this point is activated, Android grants all apps any write rights on your memory card. Small blemish: The option does not work with Nexus smartphones, of course, because they don’t have a memory card reader at all. However, this option has so far not been widely used.
Deactivate maximum volume
To protect your eardrum, Android covers the maximum volume for connected Bluetooth devices. However, if you use Bluetooth speakers, this well-meaning option is rather annoying. If you tick this box, you can turn up the volume to 100 percent without warning.
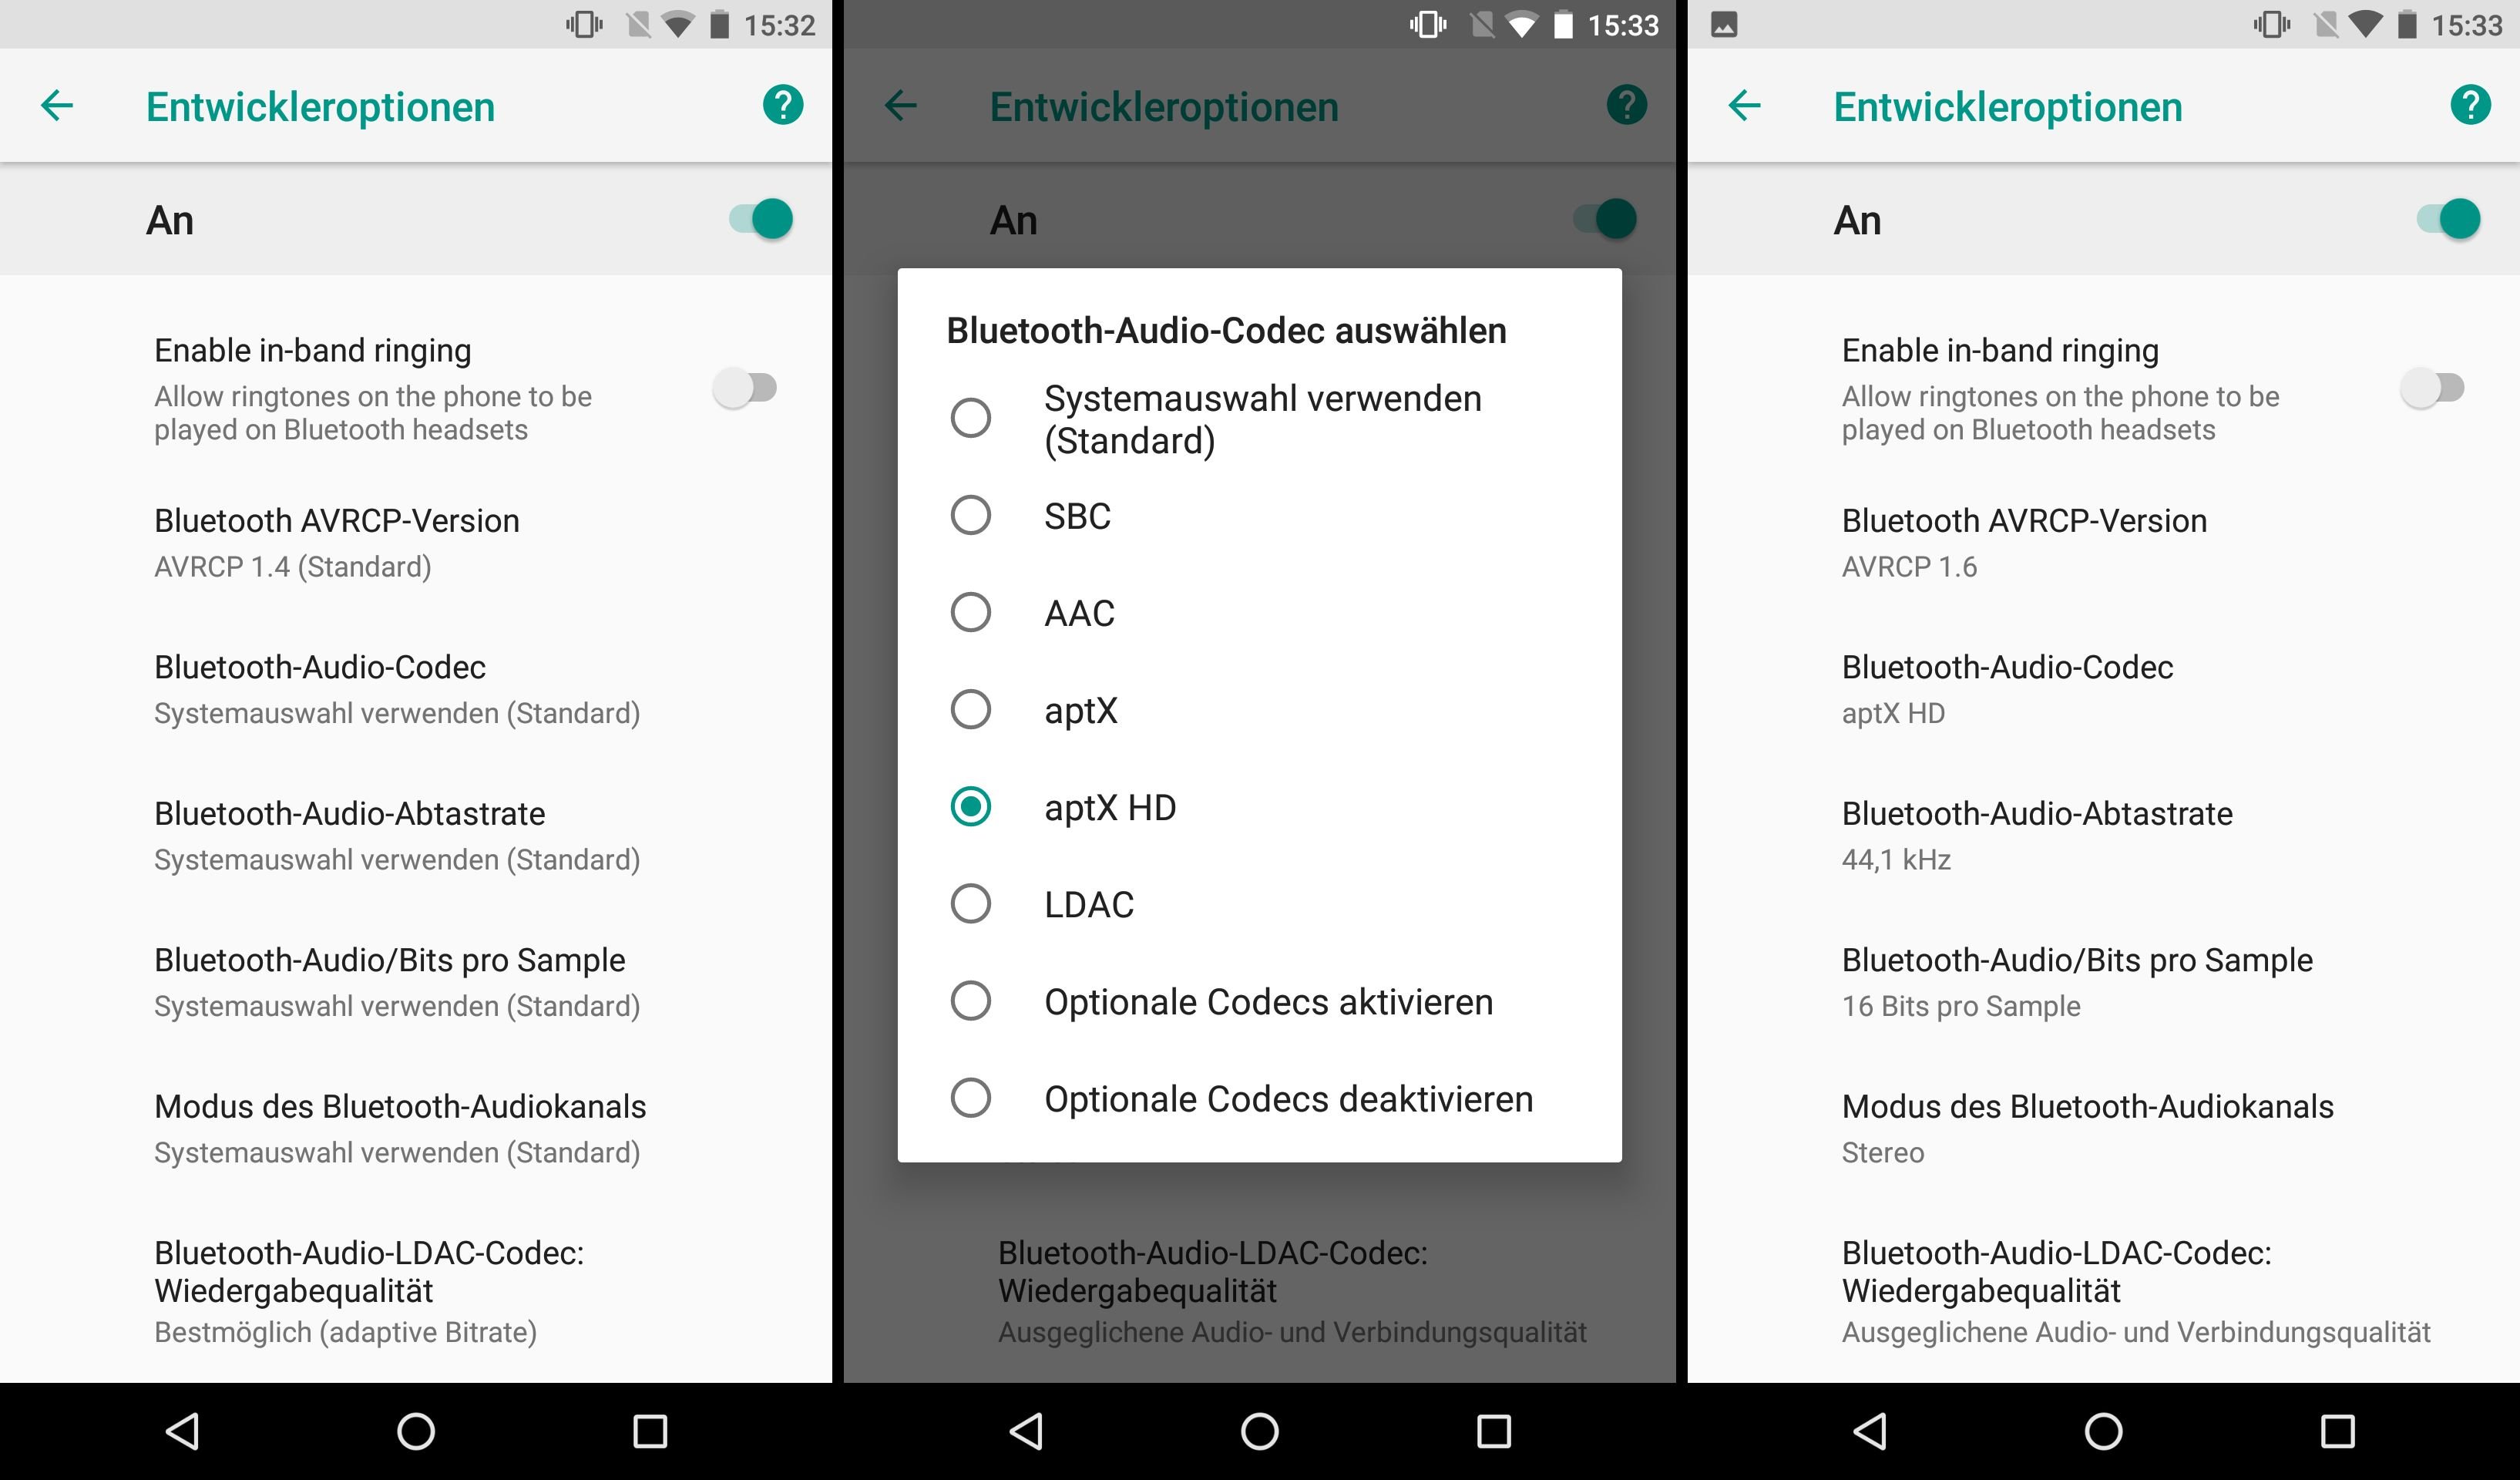
More precise control over Bluetooth audio codecs
In the developer settings of Android Oreo there are some options with which you can intervene in the details of a Bluetooth audio connection. The standard settings always determine the best selection automatically. But if you want to try different codecs, for example, you can intervene here. If something doesn’t work, you should go back to the default values.
And now it’s your turn: Which developer settings do you use in everyday life? Or do you program for Android and use some of the options for it? You can share your tips in the comments.