We all know how to take a screenshot of the cell phone. But you probably didn’t know that you can take screenshots “without touching” the mobile, remove the painted parts to reveal the data behind them, or take “clean” screenshots without having to delete your notifications.
By doing this article I have been surprised at everything I could find behind a function as simple as taking screenshots. I am pretty sure that many of the things I say below were unknown. I hope they are useful to you.
Contents
1. Various ways to capture the screen
Do you think the only way to capture the mobile screen is to press the power button and the volume up / down or start button at the same time? There are at least two other ways.
Google Assistant
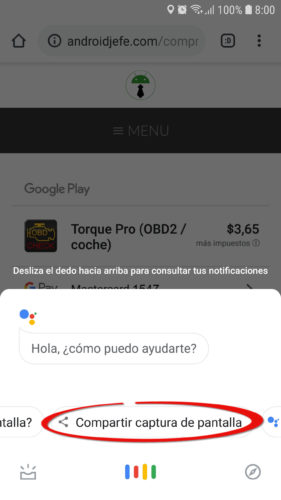
Holding down the start button will surely skip the Google Assistant screen. From there you will have the option “Share screenshot”. Yes, you have to share it, but you can get it later from where you have shared it.
ADB

You can generate a screenshot by sending the following command from the PC to your cell phone:
adb shell screencap -p /sdcard/cualquiernombre.png
Then you can download that capture to the PC with the command:
adb pull /sdcard/cualquiernombre.png
If you have trouble configuring ADB on your PC, I suggest using the “minimal ADB” installer. In Windows you must install the USB drivers and you must also enable USB debugging on your Android to send commands.
The Google Assistant option is very useful if you have trouble making a screenshot with two hands. The ADB method is required on screens that cannot be captured, such as the software update window.
Unfortunately, neither this nor a screen recorder will allow you to take screenshots where it is not allowed by Android, such as Chrome’s incognito mode or some banking applications. Obviously it is a matter of security. If you get black screen capture, black recording or invalid file it is surely due to this cause.
2. Remove “scratches” from a screenshot
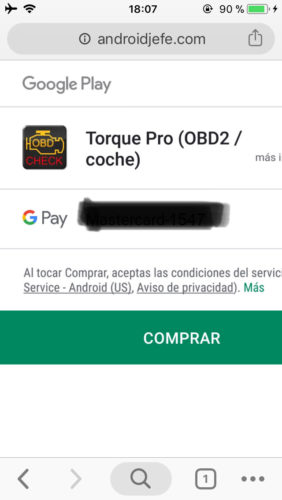
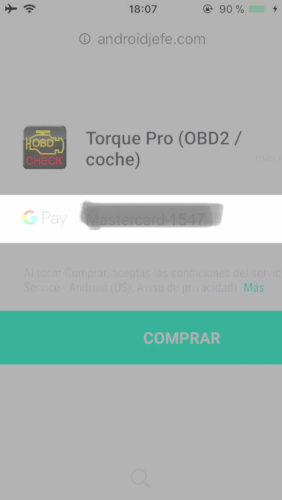
If you want to remove the painted parts of a screenshot to uncover the hidden data behind, use any photo editor on your cell phone or PC and play with the editing tools. Mainly brightness and exposure.
I don’t guarantee it will work, but it is possible. The reason is that some people use the wrong tools to edit their screenshots. For example, they take several passes with the “highlighter” to cover or cross off what they want to censor. But with a little editing work, like turning the brightness to maximum, the information is exposed.
The iPhone photo editor on iOS 11 may have contributed to that error. The highlighter is the first handy tool that people use to cover up what they don’t want to show. What they should use is the “fill box” to “paint” or cross out personal data.
3. Edit the screenshot
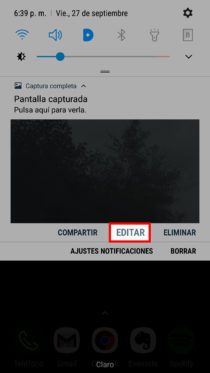
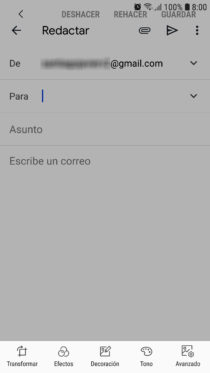
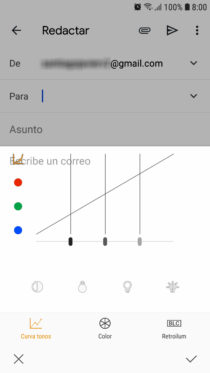
In my Samsung Galaxy I have found at least “three different editors” to retouch the captures. The most basic is accessed from the shortcut that appears after making the screenshot. If I open the photo from the Gallery I find another. Finally, if I expand the screenshot notification and tap on “Edit” I find the most advanced editor.
In addition to the simple tools in the first two basic editors, such as drawing, cropping and deleting (capture shortcut), stickers, text and filters (Gallery editor), in the editor from the expanded notification I get a tone curve to alter the RGB, hue, saturation, or lightness. There are also covers for blurring or blurring.
In a complementary way to those editors on my cell phone I use Skitch. In addition to the option to pixelate areas, there are good stickers that allow you to dimension or highlight in a very elegant way. There is a highlighter, option to add text, rectangles, lines and circles.
4. Activate DEMO mode
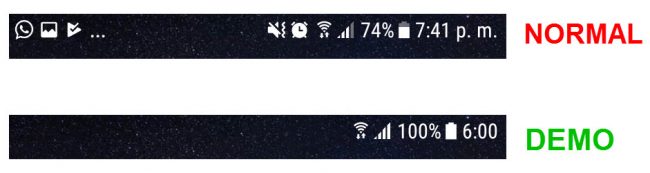
Demo mode, introduced in Android 6, hides all those icons that you can have in the status bar and maybe you don’t want to show. I say “hide” because they will come back when you disable this mode. Obviously notifications are not touched and remain there.
In addition to cleaning the status bar, in this mode the battery, cellular signal and WiFi appear completely full. The clock shows the time based on the Android version (6:00, in the case of Android 6). That is, you get clean and distraction free screenshots.
This mode is easily activated from the Android developer menu. If you don’t see it there, you may need to enter the System UI Configurator (holding down the cogwheel for about 5 seconds in the notification panel).
Turning demo mode on or off from settings can be tedious. You can add a shortcut to the Quick Settings panel with the Demo Mode Tile app. You must activate the app with a couple of commands using ADB and then add the “tile” to the quick settings panel.
5. Put a frame or art to the capture
If you want to make a screenshot prettier, the best thing you can do is put it inside a phone mold or even generate an art: if you have ever seen the image of a person using a specific application on your phone, you will get the idea.
Best of all, you don’t need to do this job manually with an image editor. There are online applications and tools to generate these frames, arts or mockups in a couple of steps.
For example, some basic utilities that have tried are Device Art Generator, mockuphone.com , appdemostore.com/frameapp , Screener, Device Frame Generator. Which offer more complete designs as illustrated above are: mockdrop.io , dunnnk.com , and if you want something pro, try placeit.net .
6. Capture full web page
After taking the screenshot you may see the “Scroll Capture” option at the bottom. This option allows you to continue capturing the screen downwards. It is extremely useful if you want to capture an entire web page.
If your device does not have such an option, you have online tools that will help you with it, such as web-capture.net or capturefullpage.com .
7. Others
Turn off notifications : Touch and hold on the catch notification and turn off the switch. If this option does not skip you, you will have to search for the «Capture» application in the application manager of your Android (showing the system applications) and deactivate the notifications like any other app.
Remember that disabling notifications will not give you direct access to the advanced screen editor mentioned above. Nor will you have the shortcut to share or delete the screenshot that appears in the expanded notification.
Clear Screenshots : Don’t waste time raising the screen brightness, assuming that the capture will be clearer. Android always generates the screenshot with the maximum brightness, regardless of the brightness that is currently configured on the device.
Screen filters : You can forget about the brightness level of the device, but not to disable some activated color filter. Applications like CF Lumen offer these filters that reduce harmful blue light from the screen. If you don’t want your screenshots to appear yellowish or reddish, be sure to disable these applications beforehand.
Batch Capture Editor : Screenshot Cleaner was an application that allowed you to edit multiple captures at once, cutting out the status bar and navigation bar. However, it is no longer in development. Its APK exists, but I have tested it and, at least on my Samsung Galaxy, it has not worked.
Disable screenshots on Android : Normally not possible. Maybe with root permissions. In this case you should disable the Capture system application (or a similar name). However, I do not recommend it because it is a factory app and doing so can cause errors in other applications.
How to search by IMAGE, photo or person
How to view and remove EXIF data from photos on Android
Draw on the Android screen, Paint style, with Floating Draw
Receive updates: SUBSCRIBE by email and join 10,000+ readers. Follow this blog on Facebook and Twitter.