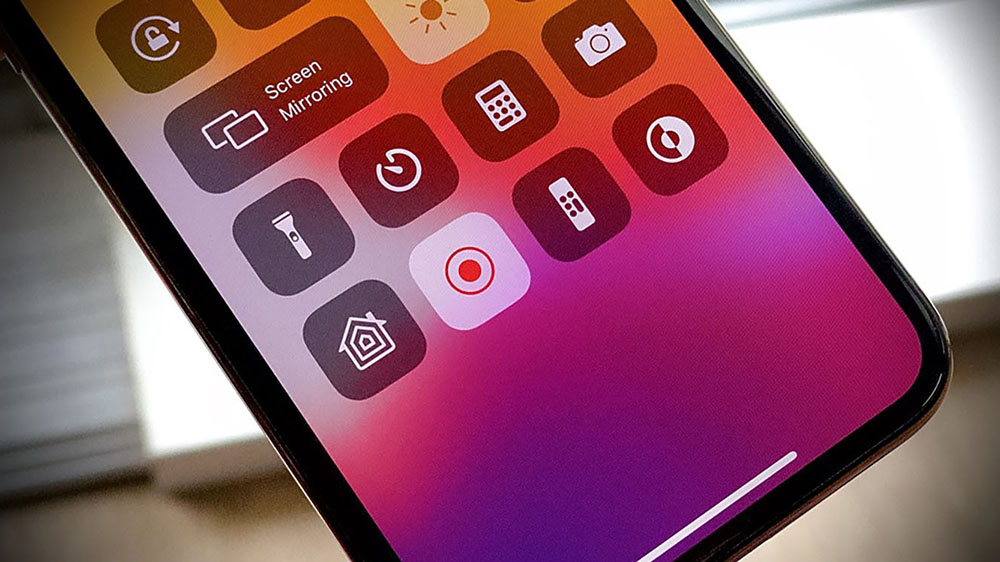
The iPhone and iPad have a very useful screen recording feature that can come in handy in many situations. However, sometimes it just gets in the way. In particular, if the user does not use this tool, he simply occupies the screen in the Control Center.
Separately, it is worth noting the potential danger in terms of privacy and security of user data. The screen recording option is also not very convenient when transferring the gadget to third parties. So more and more people are wondering how you can disable the feature.
Removing a feature from the Control Center
The Screen Recording function or screen recording is not always used by the owner of a smartphone or tablet. This leads to the fact that it simply takes up space in the Control Center and makes it difficult to work with other applications.
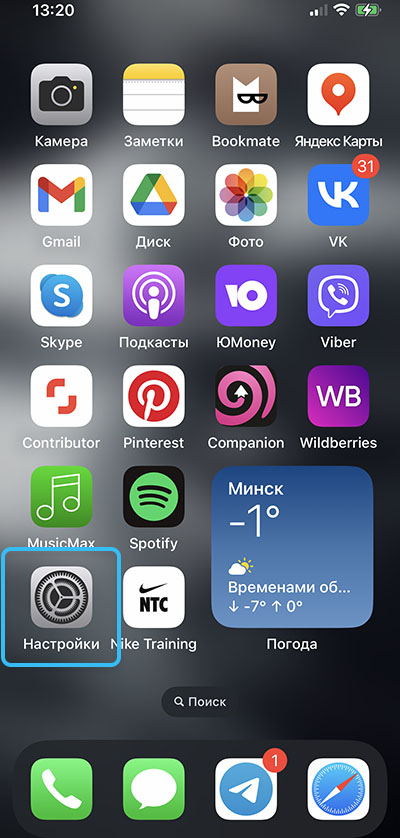
Fortunately, if an element interferes with the normal use of the gadget, it can be hidden. To do this, do the following:
- Open the Settings app.
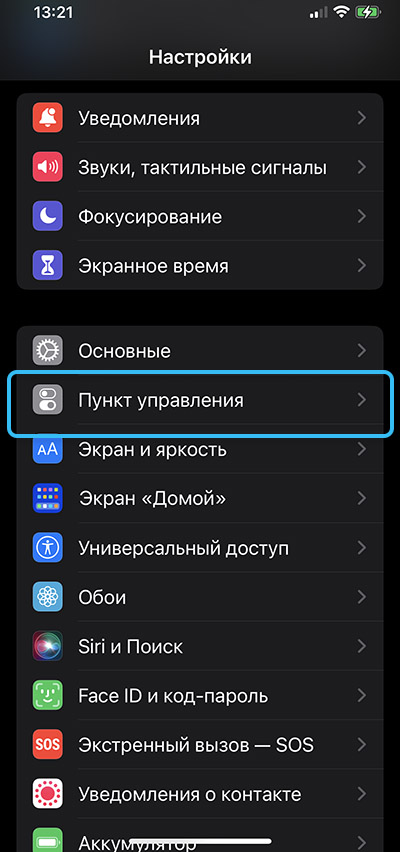
- Go to the section called “Control Center”.
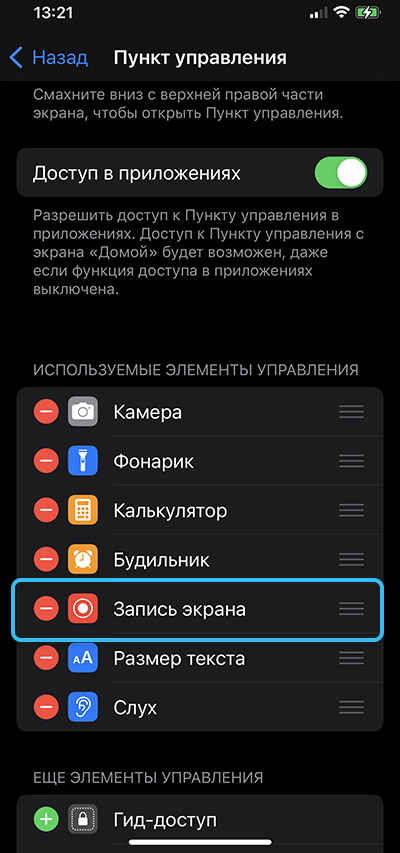
- Click on the item “Settings of controls”.
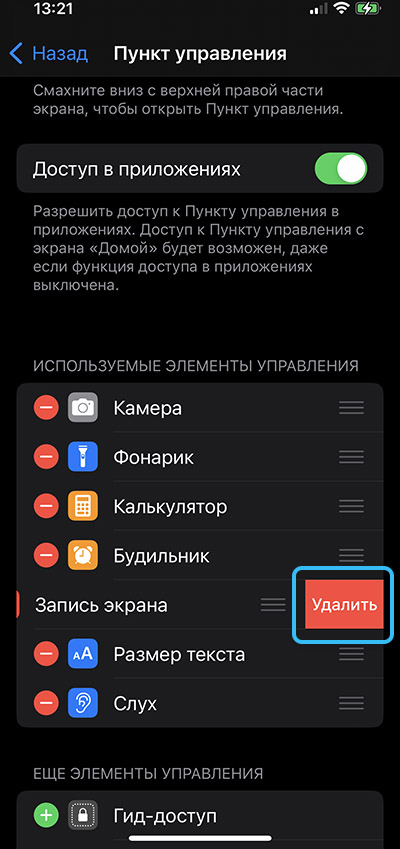
- Go to the INCLUDE section and click on the red icon next to the screen recording symbol.
- Click on the “Delete” button to confirm the actions and disable the function.
If everything is done correctly, the button to turn on screen recording will not appear in the Control Center of your phone or tablet. If in the future you need to return the icon to its place, you need to go to the “Control Center Settings” in the same way through the settings, and then click on the green plus icon in the “More control” section. Thus, you can remove or add a button to the screen at any time.
Screen recording limitation
In the process of interacting with other people, you often have to transfer your gadgets to third parties, which creates certain risks for the confidentiality of personal data. And the screen recording function in this case can cause a lot of inconvenience.
The option can be easily disabled using the method described above, but it will not be possible to prevent another person from enabling it. And here the special Screen Time iOS feature comes to the rescue, helping to impose some restrictions on the use of screen recording.
It is worth noting that Screen Time iOS is available to owners of gadgets running iOS 12 or higher. In earlier versions of the OS, the necessary function for access restrictions is located in the settings (General > Restrictions).
Setting limits includes the following steps:
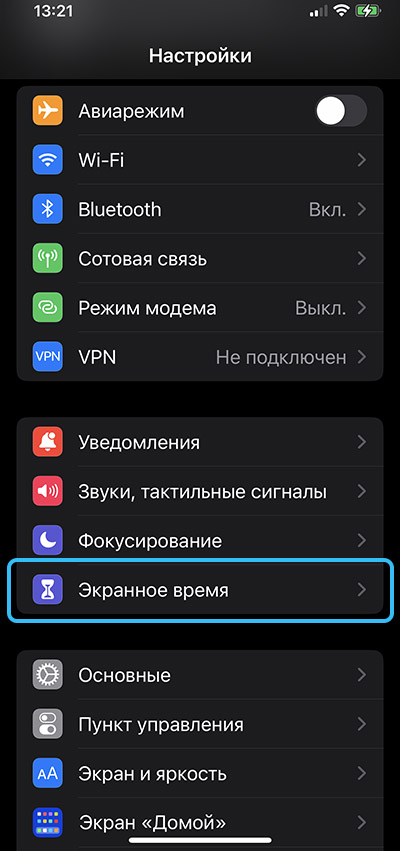
- Open the Settings app and then go to the Screen Time section.
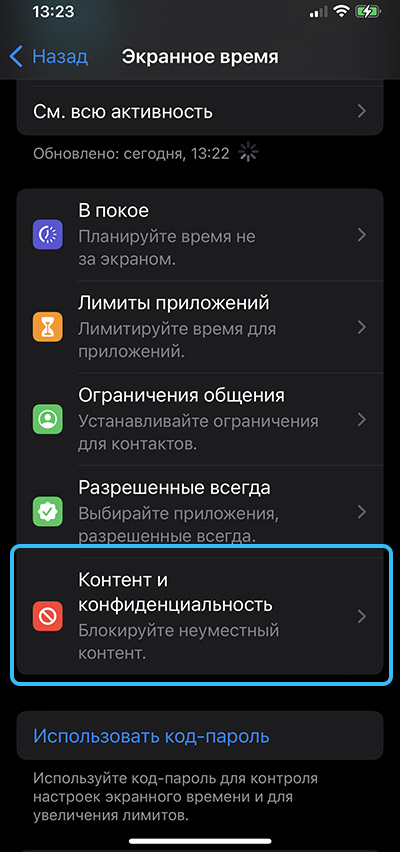
- On the panel that appears, click on the “Content and Privacy Settings” item.
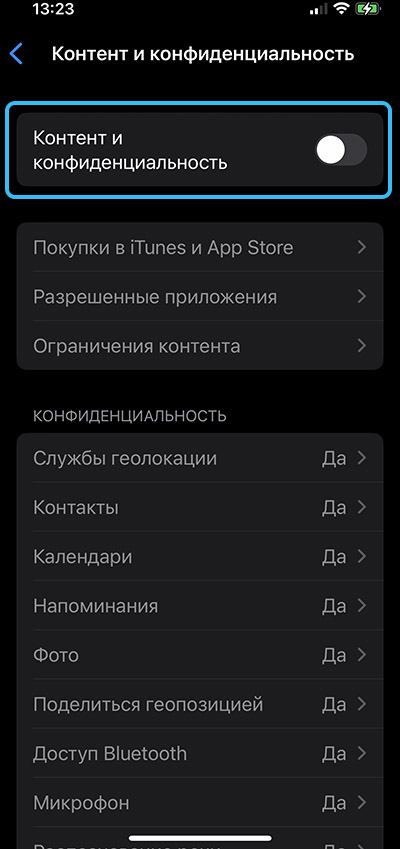
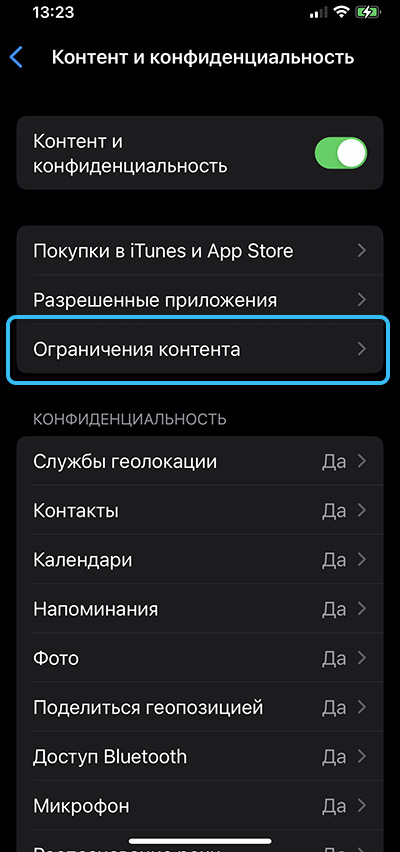
- Click the “Content Restrictions” button. In some cases, this button is not displayed. To make it appear, you need to turn on the corresponding slider next to the “Content and Privacy Restrictions” item.
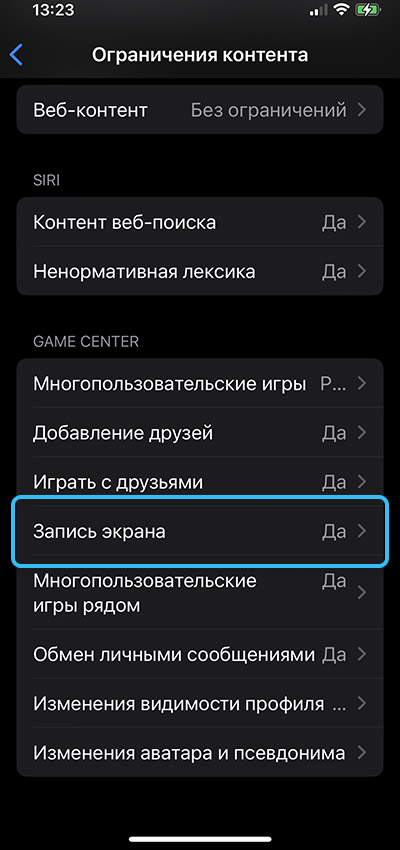
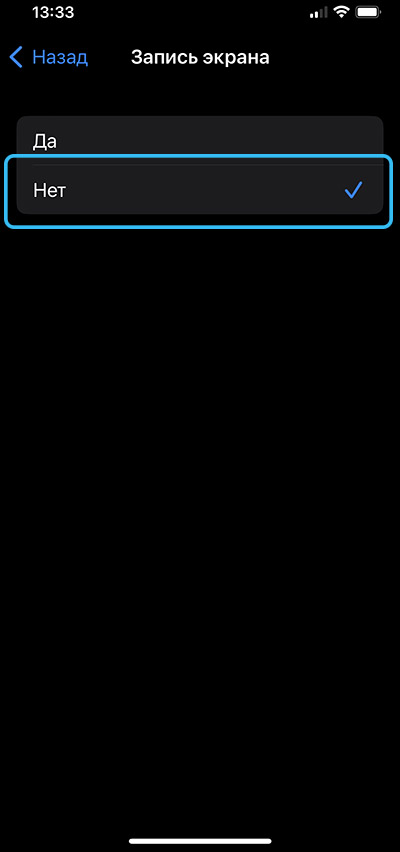
- Open GAME CENTER and click Screen Recording.
- Click on the “Do not allow” button and close the “Settings”.
In some cases, it additionally makes sense to set a password for Screen Time so that third parties do not have the right to change the restrictions settings without the knowledge of the owner of the gadget.
If all settings are set properly, the screen recording feature should not work even if it is enabled in the Control Center.
Disabling screen recording is very useful for all users who do not need this feature. After making changes to the system settings, it will be possible to minimize the likelihood of leakage of important confidential data.
If the article was useful to you, share it on social networks. Also keep the article bookmarked so as not to miss new articles on our site. Share in the comments if you managed to turn off screen recording.
