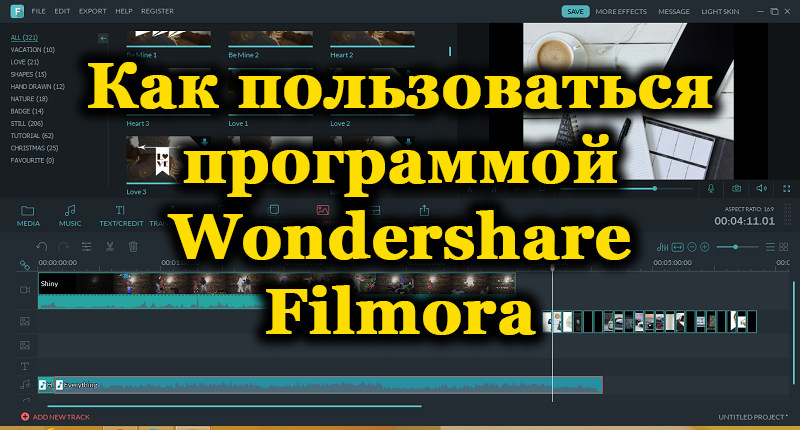
Wondershare Filmora is one of the best video editing utilities designed for beginners and casual users alike. It has everything you need to create high quality videos.
Advantages:
- The program is easy for anyone to master, even if they have never edited a video before.
Disadvantages:
- Doesn’t support editing storyboard.
Contents
Beginning of work
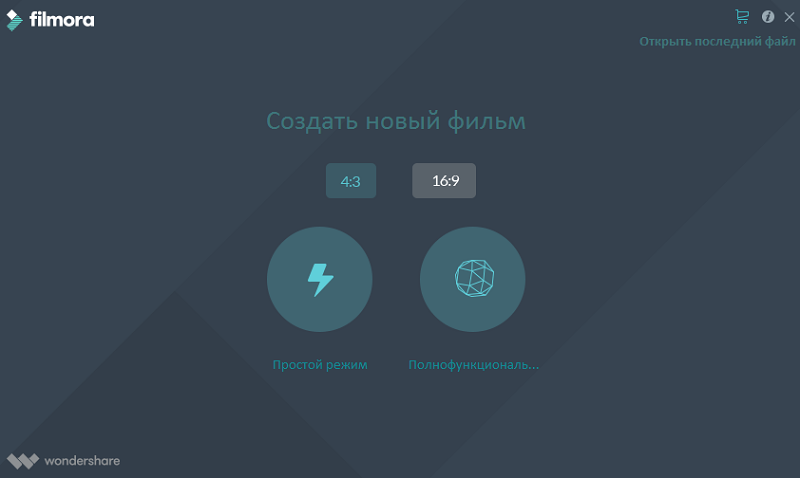
Double click the software icon to launch Filmora. This will open the Getting Started window, which has 3 options: Project Library, New Project, and Open Project. Project Library – This contains the most recent projects, sorted by their last modified date. Double-click the project to open it. You can also delete projects by clicking the trash can icons on the right side of the window. Entering the project name in the search bar is another way to find a specific project. Click “Open Project” to select one of the projects (.wfp files) saved on your computer. Left-click on “New Project” to enter the editing interface and start a completely new project.
Editing interface
Regardless of which options you choose in Getting Started, the program will open the editing interface:
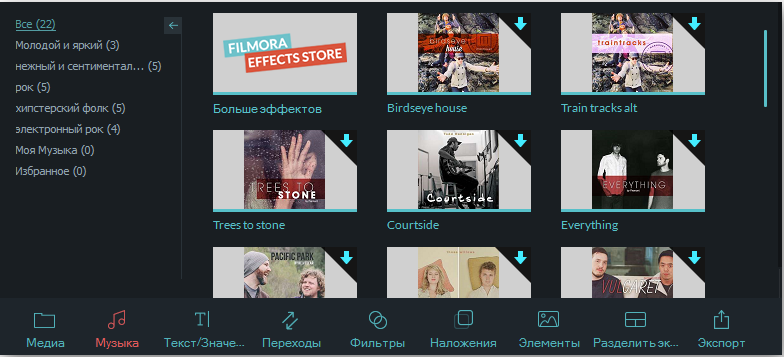
- Media Library – This is where you find all your media, including videos, photos and music. It also contains transitions, effects, and many other resources that you can use in your projects.
- Preview Window – Shows the video in a timeline. The position of the playhead is shown in the timecode in the lower right corner. You can enter a new time code to jump to a specific point in the video. There is also a snapshot button here that can save a still image at full resolution and automatically add it to your media library as an image.
- Toolbar – The toolbar provides easy access to many editing commands. You can zoom in and out on the timeline and access various tools such as cut and speed.
- The timeline is where the media and effects for your project are stored.
Basic editing
After your media files (videos, images, etc.) are imported, you can start using Wondershare Filmora directly.
Selecting clips in the media library:
- To select one media file, click on its thumbnail.
- To select a sequence of media files, click the first (first) thumbnail, press and hold Shift, and then click the last thumbnail.
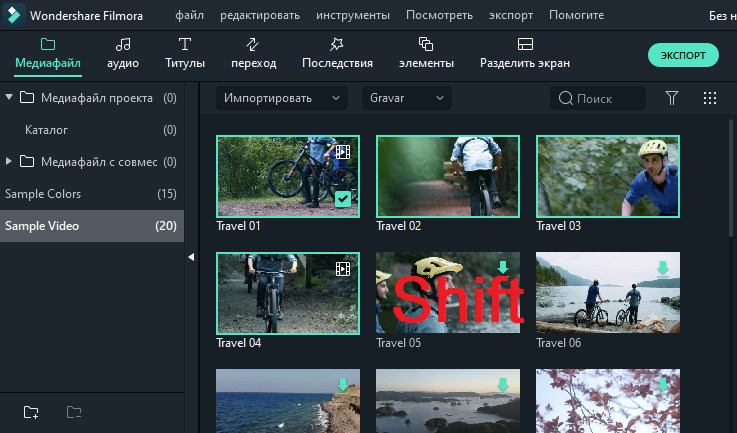
Certain media files can be found using the search bar.
Removing media from media library:
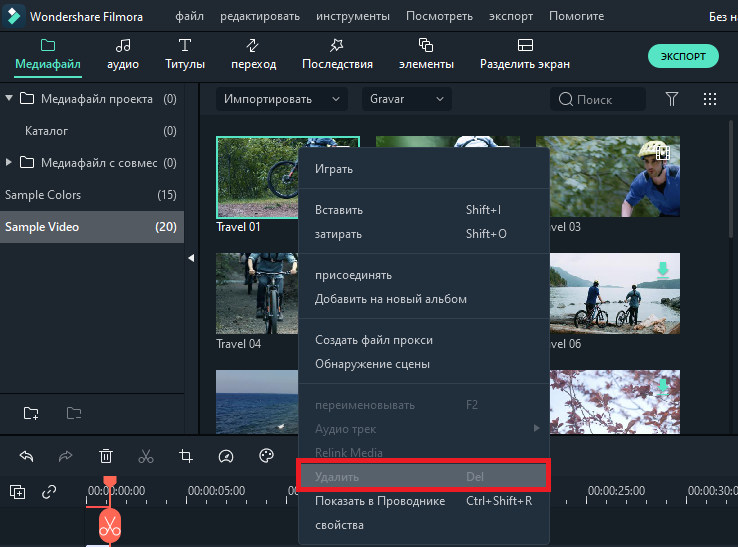
- In the library, right-click the clip you want to delete and select “Delete.”
When you delete a video clip or other piece of media from your library, you only delete it from Filmora, not delete it from your PC.
Add videos and other media to the timeline:
- Method 1 – Click on the project thumbnail, then drag it onto your timeline.
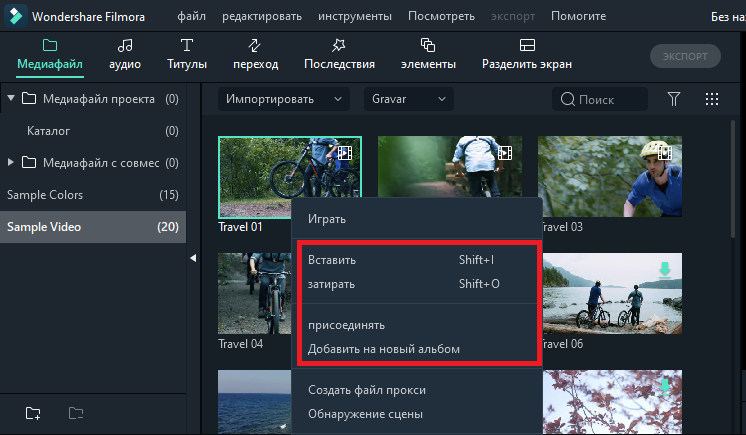
- Method 2 – Right-click on the desired media thumbnail and select one of the following options:
- Insert – Add media to the selected track in the play field. Any media that is already in the track to the right of the inserted media will move to the right by the length of the inserted clip.
- Overwrite – add your media files to the selected track in the playback area and replace any effects present here.
- Add (add to end) – add media as the last snippet in the selected track.
- Add to New Track – Add media to a newly created track that has no other media.
You cannot add media to tracks with lock enabled. Video clips are trimmed in the same way.
Joining a video
The merge function is intended for cases when you have several video clips and want to merge them into one. To combine videos, place them on the timeline in the desired order, and export them as one video. Video Clips Enhancement – Enhance your projects by adjusting white balance, tone, color, light, HSL and adding vignettes:
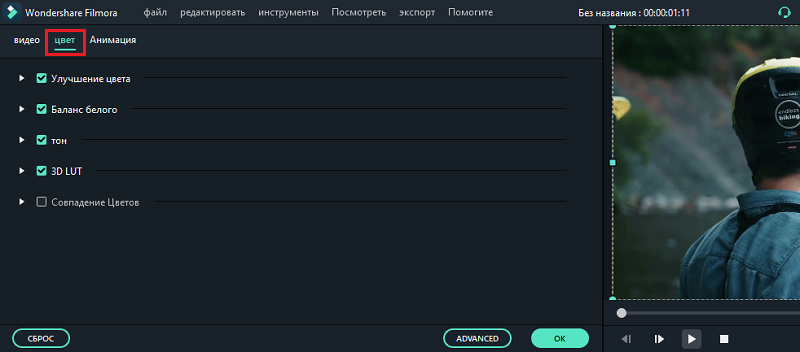
- Double-click the desired clip in the Timeline to go to the Edit panel and choose the Color menu.
- Drag the sliders to adjust color temperature, hue, contrast, saturation, and brightness. You can also enter a numerical value if you know the exact setting. 3D LUT effects are also available if you want to change the entire look of your video at once. Check out the preview window to see how the new settings affect the look of your video.
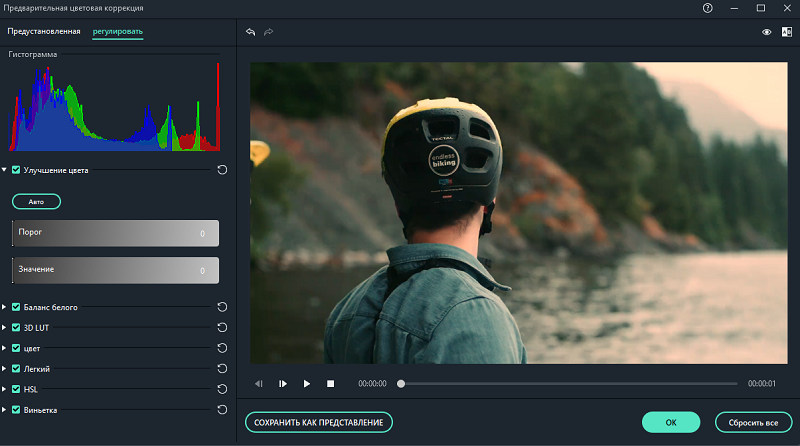
- Click Advanced to go to the Advanced Color Control panel, where you will find presets as well as options for adjusting colors, lighting, hue, saturation, brightness, vignettes, and more.
- You can also enter Advanced Setup by right-clicking the clip and choosing Color Correction or Color from the toolbar.
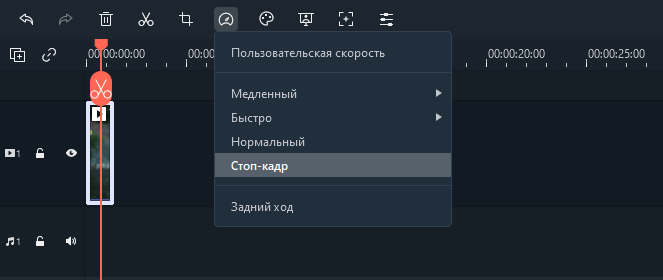
A still frame is a still image that represents one frame of your video clip. Usually freeze frames are used to give the impression that time has stopped at a certain point in your video. Here’s how to create a freeze frame in Filmora:
- On the timeline, move the playhead to the frame you want to freeze.
- Click the speedometer icon in the toolbar and select Freeze Frame.
- Set the freeze frame duration by dragging its edge. You can also change the default freeze frame duration by going to File / Preferences / Edit.
Resize video clips:
- If you need to resize the video clip, drag it to the timeline.
- You can also change the resolution, frame rate and bit rate in the export window to reduce the file size.
- If you need to resize the video display, use the Scale slider.
Applying Effects
With filters and overlays, your creative possibilities are endless. You can drastically change the look of your video in just a couple of clicks. Wondershare Filmora9 lets you add as many effects and overlays as you want. There are three ways to do this:
- In the media library, click Effects, and then select the filters or overlays that you want to add to your project.
- Hover over the thumbnail of the effect you want to use. When you see the plus sign in the middle, click on it – the effect will be added to the timeline.
- Drag the filter / overlay and drop it directly onto the video clip in the timeline. The effects will be applied to the entire video clip.
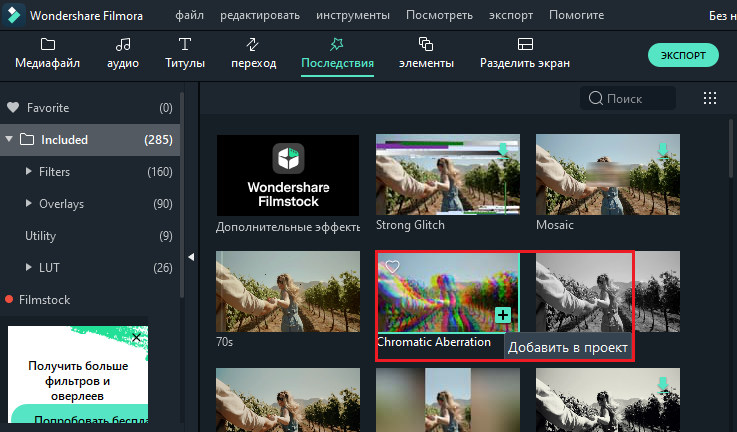
If you are editing a “portrait” (9:16) clip in a 16: 9 video, you can add background blur filters to replace the black bars.
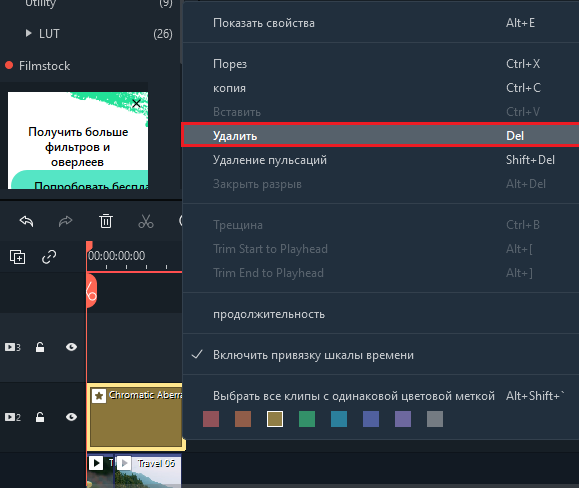
To remove filters / overlays, use one of two methods:
- Select a filter / overlay on the timeline and press “Del” on your keyboard.
- Right-click a filter / overlay in the timeline and choose Delete from the menu.
Setting up filters
All filters and overlays are sorted by thematic categories (like Faux Film or Bokeh Blurs) so they can be easily found. Go to the Effects menu and look at the left side of the screen to see the categories and start browsing. Wondershare Filmora allows you to change the duration or opacity of filter effects:
- The default length is five seconds, but you can drag the edge of the effect in the timeline to change its duration.
- Alpha opacity (transparency) can be set to 0-100. A lower value makes the filter more transparent. Double-click a filter in the timeline to adjust its transparency.
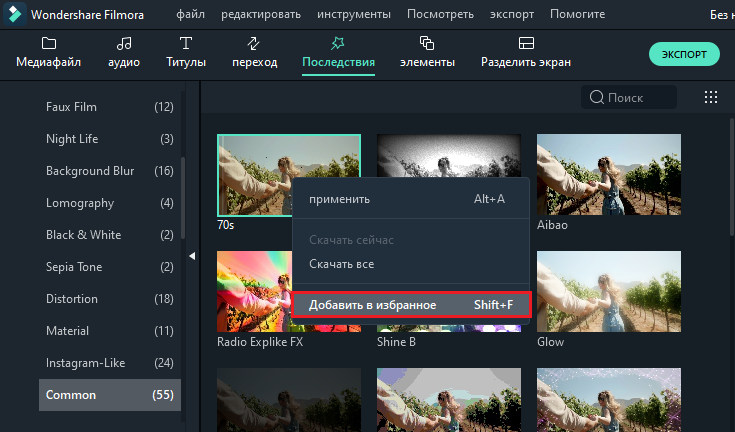
Favorite filters / overlays:
- Right-click an effect / filter in the Effects menu and choose Add to Favorites. Then go to the Favorites category to quickly find the effect again.
The elements
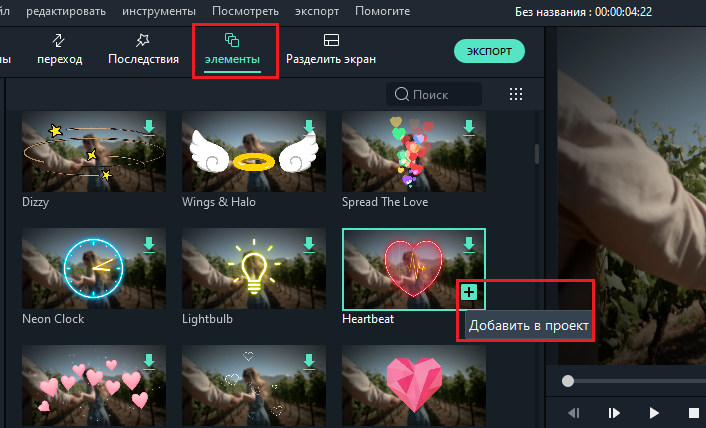
Elements are moving graphics that you can use to decorate your video. They can be added between your video clips to improve the video stream or improve its quality. Filmora includes over 20 free sounds.
To add an item to your project:
- Go to Elements and select the element you want to add to your project.
- Drag it to the timeline.
To remove items:
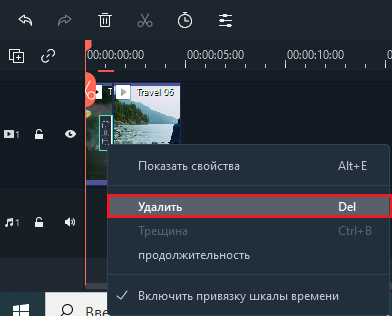
- Select the one you want to delete and press “Del” on your keyboard.
or
- Right-click an item in the timeline and choose Delete from the menu.
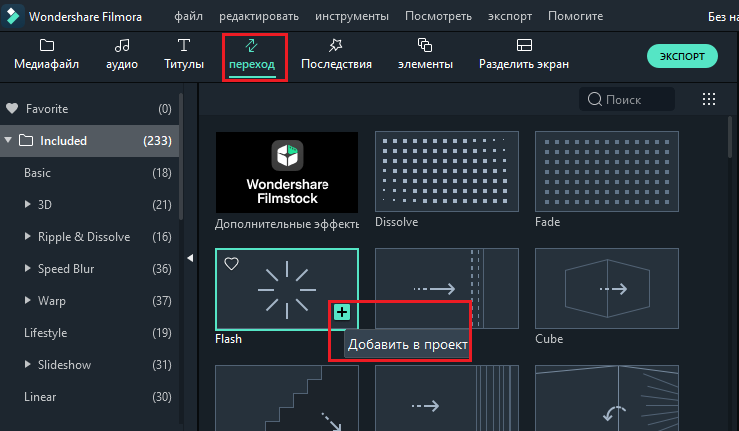
To save an item, right-click it in the Items menu and choose Add to Favorites. To add a transition between videos or images in your project:
- Go to the “Transitions” section, find the transition you like and drag it to the timeline between the two clips.
To apply a transition to an individual video or image:
- Drag a video clip or image to the timeline.
- Open the Transitions menu.
- Select a transition and drag it to the beginning or end of a video clip or image in the timeline.
To change the duration of a transition, double-click it in the timeline and then enter a new duration. You can also click and drag the start or end point of the transition forward or backward within a video clip or image. The default duration is 2 seconds.
Advanced editing
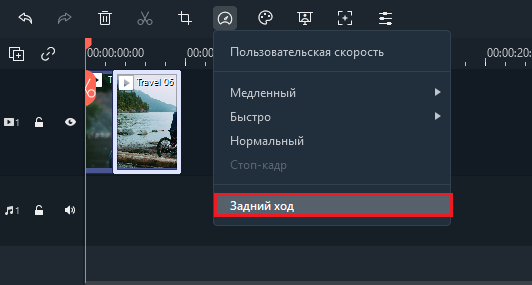
To play the video in reverse order, follow these steps:
- Run the program and select “Create a new project”.
- Click the Import button or drag and drop the video manually.
- In the Custom Speed panel, select the Play video clip in reverse order check box.
- You can also directly click the Speed icon in the toolbar and click Reverse.
To stabilize the video:
- Run the program and select “Create a new project”.
- Click Import or drag and drop the video manually.
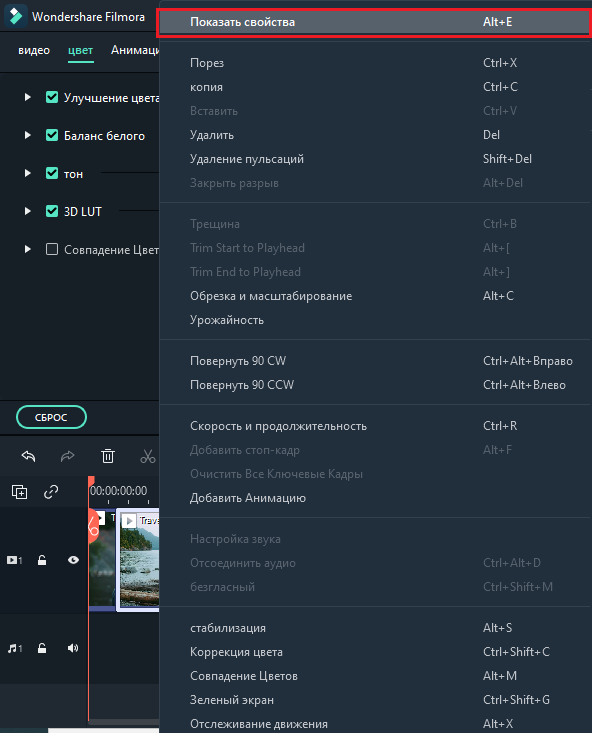
- Double-click a video clip in the timeline or right-click to select Show Properties (Edit). Then you will see stabilization in the media library.
- Once you get the desired result, click OK.
To record your PC screen:
- Run the program and select “Create a new project”.
- Select PC Screen Recording under Recording.
Panorama and zoom
The Pan and Zoom effect, also known as the Ken Burns effect, lets you slowly zoom in on your main subjects and pan them from one to the next:
- Drag the video onto the track (first line of the timeline).
- Select the video, right-click and check Crop & Enlarge.
- Select “Panorama” and “Zoom” and you will see two frames marked “Start” and “End” above the video clip in the viewer.
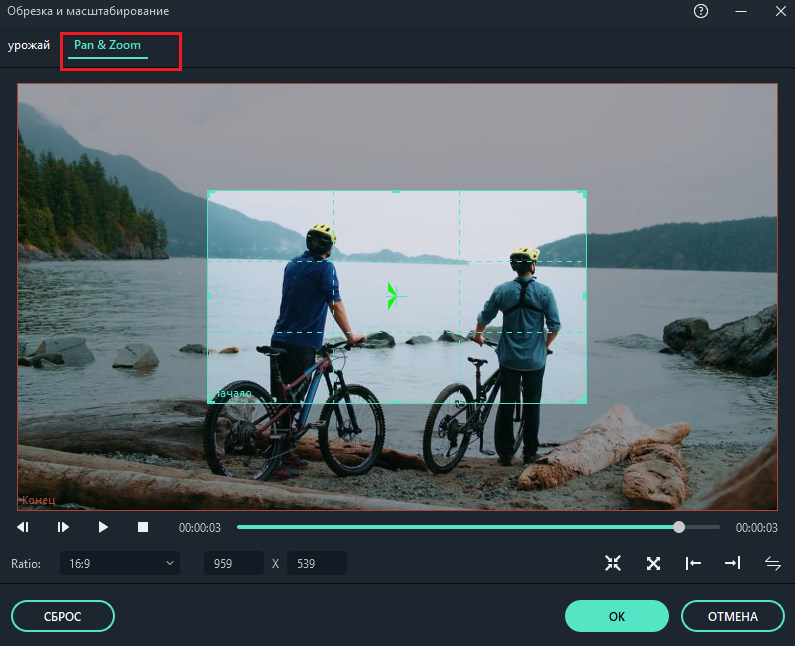
- Select the start frame, drag it and resize it until the beginning of the clip is framed the way you want.
- Select the end of the frame by repeating step 3. You can press the play button to view the instant result. If it doesn’t meet your expectations, click Reset to retry the operation.
- Click OK to save the settings.
Export video
Here’s how to save, export, and share your finished videos:
- Export video to PC.
To export the video to your computer, click the export button and select the Local tab. Then select the format for export. Filmora currently supports the following formats: WMV, MP4, AVI, MOV, F4V, MKV, TS, 3GP, MPEG-2, WEBM, GIF and MP3.
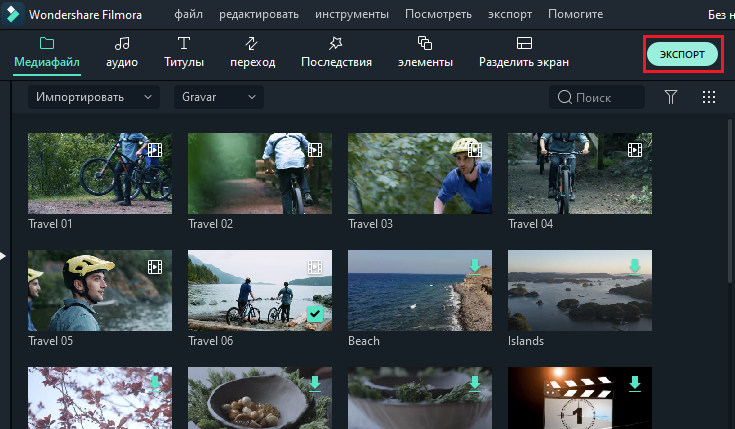
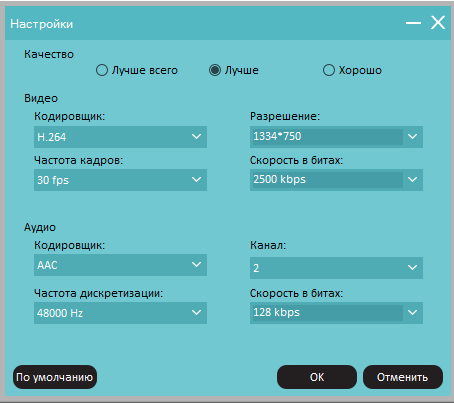
After choosing the output format, you can rename the video and change its location on the PC. You can also check the output resolution, frame rate, size and duration right in the program. To change export settings (such as resolution, bit rate, and frame rate), click the Settings button. It is best to export the video with the same settings as the original.
When you’re done customizing the export options, click OK to save them. Then, after you close the Preferences window, click the Export button in the Export window.
- Export to device for playback.
In the “Device” tab under “Format”, you can choose the video output according to the ideal settings for different types of devices, such as: iPhone, iPad, Apple TV, Samsung Galaxy phones, PlayStation 4s and others. You can also make manual changes to the settings by clicking the Settings button. Click export when you’re done.
- Direct video upload to social networks.
You can upload your videos, even in 4k, directly to YouTube or Vimeo. You will need to enter your account details for the site you want to upload the project to.
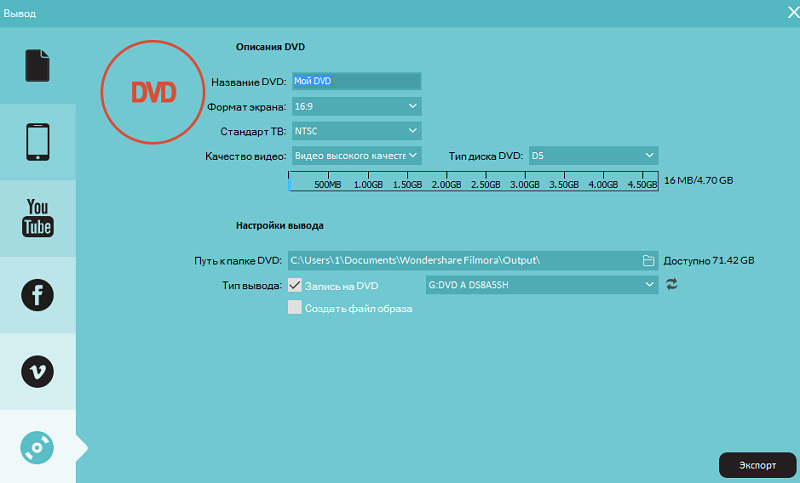
- DVD burning.
You can burn videos to DVD. Select the DVD tab and check the required options such as aspect ratio and disc type.
Watermark
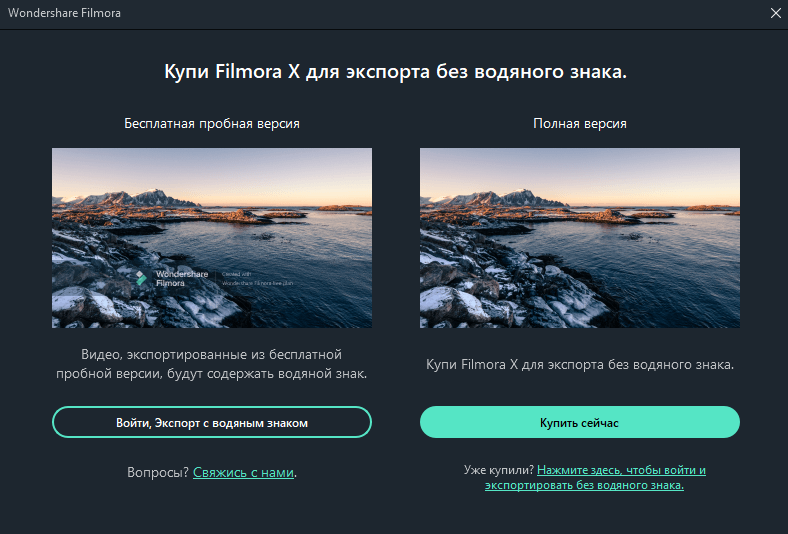
There is only one difference between the free trial version of Filmora9 and the paid license: videos exported from the free version will have a Filmora watermark. If you’ve used the free version and now want to export your video without a watermark, here’s what to do:
- Save the project. Be sure to save the project file and all original documents as they are (i.e., do not delete the video clip from the PC).
- Upgrade to the paid version of Filmora. There are two separate paid plans to choose from: a lifetime plan and an annual subscription.
- Open the project and register. Open your project again and click on the account icon in the upper right corner to enter your Wondershare ID. A pop-up window will show you that you have been successfully registered. Click OK to close the window.
- Export without watermark. Click “Export” and choose a format for the output file. After exporting, open the video and you will see that there is no watermark.
Wondershare Filmora is a good choice for casual and novice users, but for more control over your projects, look at other more advanced editors.