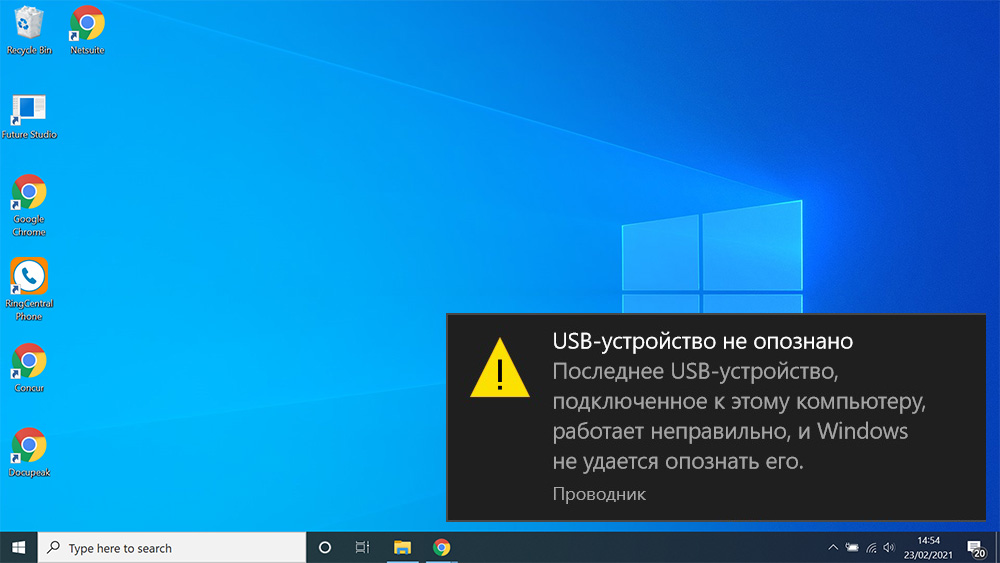
Sometimes when connecting a flash drive or other device to a computer, the user encounters a message stating that “USB device is not recognized.” At the same time, you cannot use plug-in gadgets, since the operating system simply does not install drivers for them. A similar error can occur with almost any version of the OS, regardless of the type of port (USB 3.0 or USB 2.0).

Contents
Causes of problems
The reasons why Windows does not recognize USB devices can be very different. Depending on them, it is worth choosing a method for solving the problem. However, the user is not always able to clearly identify why external devices are not connected. In this case, the most effective approach involves the consistent use of all methods.
Most often, the problem with an unidentified device is due to the following reasons:
- Incorrect operation of a specific USB driver due to overload, damage, or the complete lack of an up-to-date version.
- Lack of the latest updates in the operating system. Microsoft regularly releases updates and fixes to avoid various kinds of driver conflicts.
- The computer does not have the software and hardware updates necessary for the correct operation of external devices.
- Physical damage to the USB controllers themselves.
- The external device or drive enters selective suspend mode.
- The latest driver updates for the motherboard are required.
Problem Solving Methods
If the user encounters problems with USB devices and the inability to use them on the computer, he needs to perform a series of operations to identify the causes of the error and correct it. Consider the most popular approaches.
Disconnecting the computer from the network
The most banal way to repair many computer problems. Sometimes just turning the system off and on is enough for it to update the hardware configuration and reset all errors. However, sometimes a reboot is not enough, so you have to resort to a complete blackout of the PC.
When unplugged, power will not be supplied to all elements of the motherboard, including USB ports. Thus, it will be possible to reset their configuration for sure. The next time you turn on the system, it will load all the necessary drivers and, quite possibly, will begin to work in the usual mode.

After disconnecting the computer from the outlet, it is worth leaving it in this form for a few minutes so that all the capacitors on the motherboard are discharged. After that, you can reconnect the cable to the outlet.
If the error was caused by an accidental software or hardware failure, the problem will go away. If this does not happen, it is worth using other methods.
Driver update
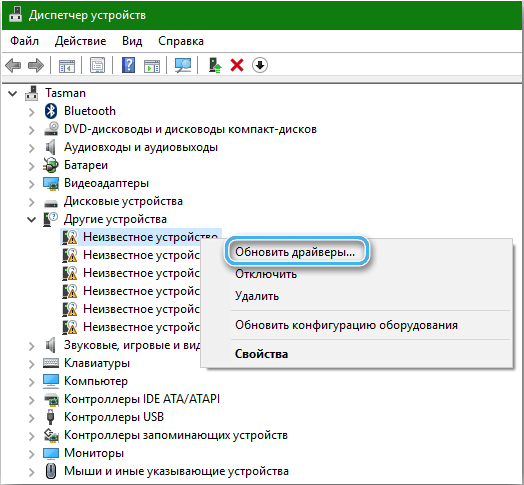
Often, the problem with identifying various kinds of external devices is due to the lack of necessary drivers. The same applies to the lack of timely updates. To install the required software, you must go to the Device Manager. The easiest way to do this is with the devmgmt.msc command, which is entered into the Run window after pressing the Win + R buttons.

In the Device Manager, you need to check all connected elements for the presence of drivers. An exclamation mark next to an item indicates that the software is missing. You need to right-click on this device and select “Update Driver”.

An update window should open, which will offer to find the necessary drivers automatically on the company’s servers or manually on the computer. The first option is often enough, since Microsoft tries to always have the most complete software base for all popular devices.


It is worth noting that automatic driver search is possible only if the computer has a stable network connection. The operating system will load the current versions and install them without user intervention.

In some cases, the opposite situation is observed, when an updated driver interferes with the operation of external devices and ports. Typically, the problem manifests itself after a software or operating system batch update. The solution is to downgrade the driver to an earlier version using built-in tools. You just need to open the Device Manager, select the desired hardware and right-click on the right-click menu item “Roll back driver”. Next, it is recommended to click on the “Update hardware configuration” button and check if the device appears in the list.

Removing an external drive or device and then connecting
This method will be useful if the driver installed on a particular device is damaged or is unstable.

Sequencing:
- Click on the “Start” button and enter the phrase “Device Manager” in the search field.
- Open the application and examine the list of installed equipment.
- In the list, find the category “Disk devices” or a specific USB port.
- Right-click on the selected hardware and select Uninstall.
- Remove the device from the computer port and wait about a minute.
- Re-install the equipment in the slot, and then wait for the automatic installation of the necessary drivers.
- Check if the device is working properly.

In some cases, the connected equipment requires additional power (some hard drives), without which it will not be able to function normally. If the described method did not help, it is worth moving on to other methods.
Changing USB disable options
Sometimes the incorrect operation of the connected device is due to the fact that the hub driver automatically suspends the USB. A fairly effective solution to this problem would be to change the parameter for temporarily disabling the function.
Algorithm:
- Right-click on the Windows icon and select “Power Options” from the list provided.
- Go to the “Select or configure a power plan” window.
- Click on the item called “Setting the power plan.”
- In the “Change scheme settings” window, find the item “Change advanced power settings” and click on it with the left mouse button.
- Open “Power Options” and find “USB Settings”.
- Find the “Pause USB Port Option”, and then disable the function while on battery or mains power.
- Apply settings and close the window.
Now it remains just to check the operation of the connected equipment. In some cases, a reboot may be required for all changes to take effect.
Disable fast startup
There is a possibility that USB devices may not be recognized by the operating system due to the USB fast startup feature enabled. This becomes an extremely annoying problem, especially if the user regularly uses external drives for data storage.
To disable fast startup on Windows 10, you need to do the following:
- Right-click on the Start button and select Power Options.
- Open the “Power and sleep” section, then go to “Advanced power settings”.
- Find the “What the power buttons do” link at the top of the window.
- Go to System Preferences and select Change settings that are currently unavailable.
- Open the subsection “Shutdown settings” and uncheck the box next to the item “Enable fast startup (recommended)”.
- Save changes and close the window.
You will need to restart your computer for the changes to take effect. In this case, turning on after editing can be quite slow, but USB devices will always be recognized.
Installing the latest operating system updates
Computer hardware and external gadgets are constantly improving. However, they require special software that is added to the operating system only as part of updates. For this reason, it is very important to ensure that all necessary updates are installed on the computer.
Update installation order:
- Click the start button and type “Windows Update” into the search bar.
- Open the found service.
- Select the item “Check for updates” and wait until the system completes the scan.
- Click on the “View Optional Updates” button.
- Explore the available updates and check the boxes next to the programs you need.
- Click the “Install Updates” button.
- Follow the suggested instructions and install the software on your computer.
In some cases, a system restart is required for the new utilities to work properly.
If none of the suggested methods gave the desired results, there may well be problems with a specific external USB equipment. You need to check its performance on another computer and, if necessary, contact the wizard.


