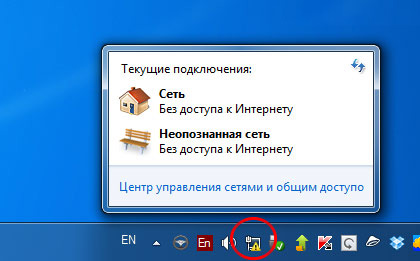
Computers have firmly entered our lives, and access to the Internet today is already an urgent need for many. Modern hardware and operating systems are becoming more and more intelligent, and the user is less likely to need to do anything to configure. However, occasionally such a need arises. Today we will tell you how to solve the problem if the computer reports that you are connected to a network without access to the Internet, and you see a yellow triangle with an exclamation mark next to the connection icon.

Contents
Why does the error occur
Microsoft operating systems, starting with Windows 7, constantly monitor network connections, and as soon as the global network is unavailable, they immediately report it. There are many reasons why a computer may not be connected to the Internet. These may be problems with the provider, incorrect configuration of the equipment by the user, or failures in the operation of network protocols. Today, the new IPv6 protocol is becoming more widespread, but its percentage is still quite small, especially in home networks, so the focus will be on the old version – IPv4.
Connecting through a router via a network cable without access to the Internet
Provider problems
Yesterday everything worked, and today this warning appeared. If this happened to you for no apparent reason, then in most cases the problem is with the provider. Therefore, before doing anything yourself, call technical support. Most often, data transmission lines are damaged, some technical work is being carried out, or you simply forgot to replenish your account on time.
You may hear in response that everything is working well for the provider, then you need to check your network and, if necessary, configure it. The support service will most likely offer the services of its own master, but, firstly, its services are not free, and secondly, while the master gets to you, you can manage to solve the problem yourself.
Physical connection problem
It is not so rare that the cause is a partially broken network cable or a loose connection in the connector. And if you have pets or children, then the likelihood of this development increases. Even Wi-Fi users should not forget that a cable is also stretched to the wireless router. Check the integrity of all wiring – if there are any strong kinks anywhere, if all the plugs are firmly inserted into the sockets and if they are inserted where they really need to be. Provided that the problem is not found here, we proceed to the next step.

Windows 7 LAN connection without internet access
If using a router
Hardware reboot
It happens that the installed router hangs corny. In this case, restarting it helps. To do this, just turn off the power to it and reconnect it after a few seconds. It does not hurt to restart the computer at the same time. If it happens that these router freezes occur with annoying regularity, consider buying a new device. It is also necessary to try to connect the Internet cable directly to the PC or laptop. If there is no result, first we will deal with the computer.
Checking computer settings
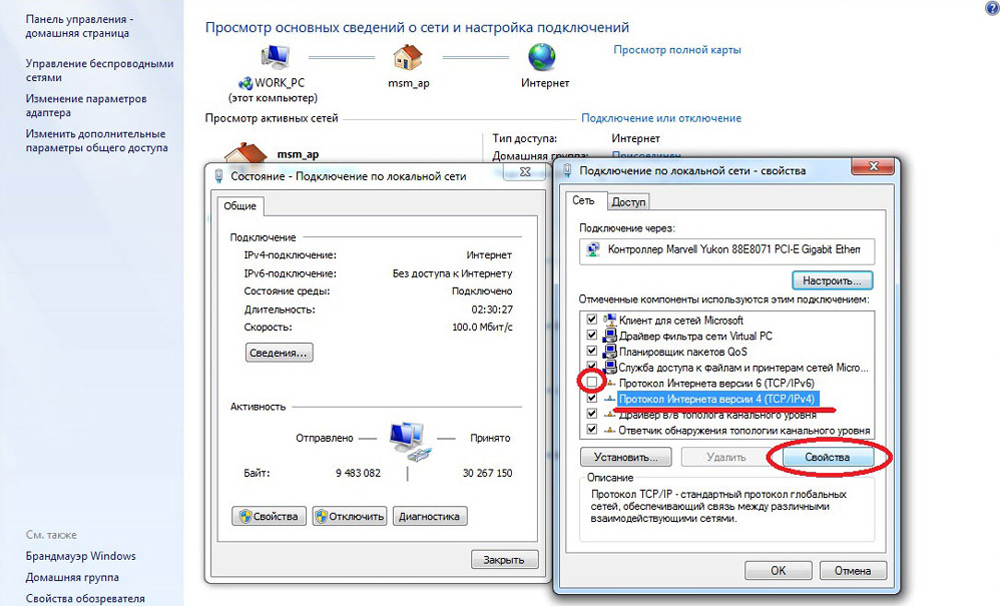
It is possible that the problem arose “out of the blue”, then there should not be any questions with the settings on the computer, much more often the problem occurs during the initial configuration or making any changes to an already working network. First of all, you need to check the correctness of the IP address of the computer, for which press Win + R on the keyboard at the same time. The Run window will open. In its line, enter ncpa.cpl and click OK. The network connections window will appear. It may happen that there are several of them, but the necessary one will not be crossed out with a red cross and its name is similar to “Local Area Connection” or “Wireless Connection” (in the case of using Wi-Fi). Right-click on the desired connection and go to properties, where the list will contain lines with IPv4 and IPv6 entries. Check the box next to IPv6, and on IPv4, double-click. Check the boxes for automatically getting settings and save the changes. If access to the Internet does not appear, go ahead.
Setting up a LAN connection in Windows 7
Finding out the address of the router
Perhaps, nothing had to be done in the previous window, the settings for obtaining IPv4 and IPv6 protocol addresses are automatic and everything was initially as it should be. Then you only need to configure the router, for which you need to know its address. Right click on the connection again and select “Status” and then click “Details”. There will be several lines in the window that appears, we are interested in “IPv4 Address”. If you see an entry like 192.168.x.x, remember or write down what is indicated opposite “IPv4 DHCP server” – this will be its address. It may be that the computer is not able to receive the settings automatically, then the entry will look like 169.254.x.x. You can find out the IP of the router from the documentation for it, or it is indicated on the device case, and most often it is 192.168.0.1 or 192.168.1.1. Open your browser and enter the set IP in the address bar, and,
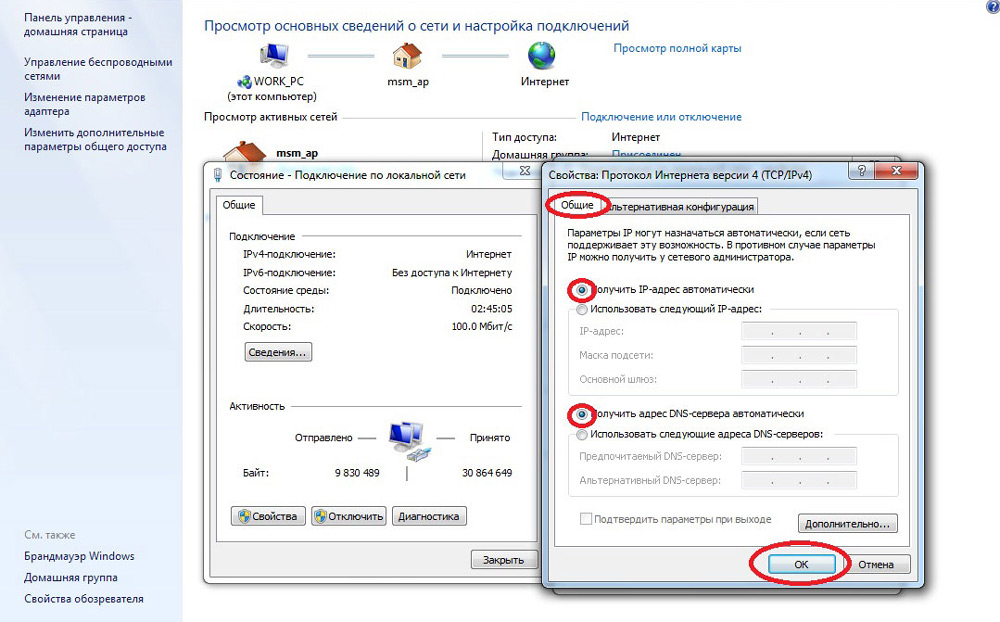
“Internet Protocol Version 4 (TCP/IPv4)” Properties
Setting up an internal network on the router
After entering the credentials correctly, you will be taken to the router control panel, and further actions depend on the device model and its firmware. You need to find a DHCP server management that is responsible for automatically obtaining IP addresses and other parameters necessary for the network to function properly for devices. Look for blocks whose names say DHCP settings, DHCP server, or the like. The block will contain a radio button with values Enable or Disable. Most often, these settings are located in the LAN (Network) section. Enable the DHCP server, save the changes and reboot the router. After this, the computer will be connected to the Internet.
Check your ISP connection settings
Do not jump to conclusions if the previous steps did not help you set up the connection. Since the network is still not working properly, we check the connection with the provider, for which go to the appropriate section in the router control panel. Almost all manufacturers call these options WAN or Internet. There are quite a few options in this section. Which are intended for you, you can find out from the contract or in the technical support of your service provider.
Reinstalling network card drivers and checking firewall
It makes sense to do this when you are sure that all the previous settings are correct, the connection with the provider is established, but the network cannot be configured normally. The best option would be to download the most recent driver from the manufacturer’s website, for which it looks like you have to go to a friend or neighbor. In the absence of such an opportunity, the driver that is included on the installation disk is quite suitable. Be sure to restart your computer after reinstallation. It should also be noted here driver failures that occur due to installed software that changes the operation of network protocols on a computer. The most common representatives are antiviruses and firewalls. Make sure that such programs are not installed, and if they are, then disable or remove them for the duration of the check,
Replacing the MAC address of a network card
Problems with MAC addresses sometimes arise in cases where the network is very large, but it is still worth excluding it. On your computer, go to Device Manager by pressing the Win+R keys, typing devmgmt.msc and clicking OK. The device manager will start, where you need to find the “Network adapters” section, expand it and select the network card with which the PC is connected. After double-clicking on it, in a new window, on the Advanced tab, select the Network address parameter and enter any twelve digits in the empty field on the right. After that, we reboot and look at the result.
Clear DNS cache and reset TCP/IP settings
The following steps will reset all network settings for IPv6 and v4, so you must follow them. If you are ready for this, and you have information about all the settings (written somewhere, for example), find the command line in the Start menu and run it with administrator rights. Enter the following commands in the window that appears, confirming the entry by pressing Enter. After working out each command, restart the computer and check the result.
- ipconfig /flushdns
- netsh winsock reset
- netsh int ip reset c:resetlog.txt – this command will completely reset all connections and they will have to be configured again!
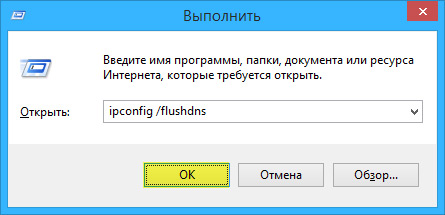
Flushing the DNS Cache Using the Command Line
You have a direct connection to an ISP
The option when your computer is connected directly to the provider, bypassing the router, is now becoming less common, as the number of network devices is steadily growing. But what if you have just such a connection? Eliminate possible problems with the drivers as indicated above, and check that the connection settings are correct. Regarding the settings, the best option would be to contact technical support, since there are a lot of variations.
Nothing helped at all.
Maybe you are lucky and your ISP provides access using the new IPv6 protocol, the configuration of which requires knowledge of some subtleties. It should be noted that the expansion of the use of IPv6 is inevitable, since the address space of the previous version of the protocol, IPv4, has come to an end, and the global network is growing every day. Since the efforts were spent, and your network did not work, then there is only one advice – call the wizard. It is quite possible that the problem that has arisen is non-standard or the replacement / repair of equipment is required to solve it.
There is Internet access, but the error remains
Such a situation may well be. The reasons may be different – most often when connecting through a proxy server. However, there is only one solution. Press Win + R, enter gpedit.msc – this will take you to the local group policy editor. In the menu on the left, go through the items: Local Computer Policy – Computer Configuration – Administrative Templates – System – Internet Communication Management – Internet Communication Settings. Now, on the right side of the window, find and enable “Disable active probing for network connection status indicator”. In Windows 10, this setting is called “Turn off active network connection health checks.” Take into account the fact that now even if there is really no connection, the message will not appear.
Conclusion
We thank the team of technical specialists of the Inetme.ru service for selecting Internet providers for their help in preparing the material.
This article collects the most common problems associated with the “Network without Internet access” error and suggests ways to solve it. We hope that the material was interesting for you and helped you to overcome the difficulties that have arisen on your own.