Nowadays, the presence of a video camera in a smartphone will surprise no one. As well as using quadcopters, action cameras and other video recording devices.
I want to upload the videos made on one of the popular platforms. This is mainly YouTube. But this is rarely done without preliminary processing.
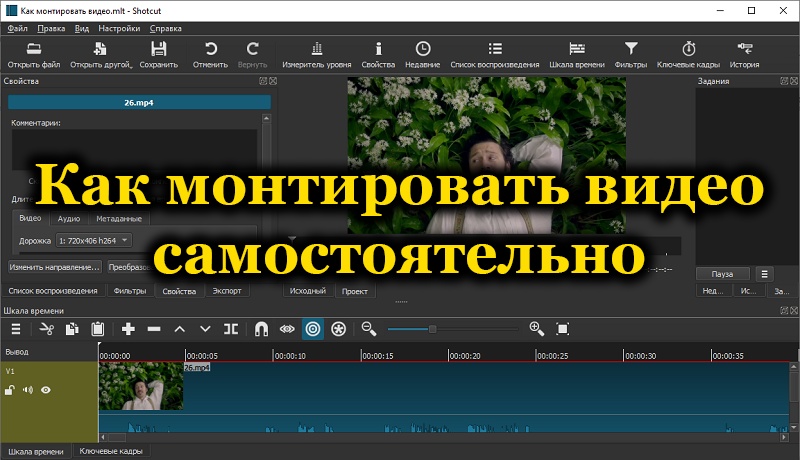
There are a lot of programs for video editing. But many of them are paid, some are very difficult to work with, and are mainly focused on specialists. At the same time, beginners also want to learn how to beautifully and efficiently process footage.
Contents
Program selection
Before you start editing this or that video clip on your computer, for beginners, the most important and first step will be to choose a suitable program.
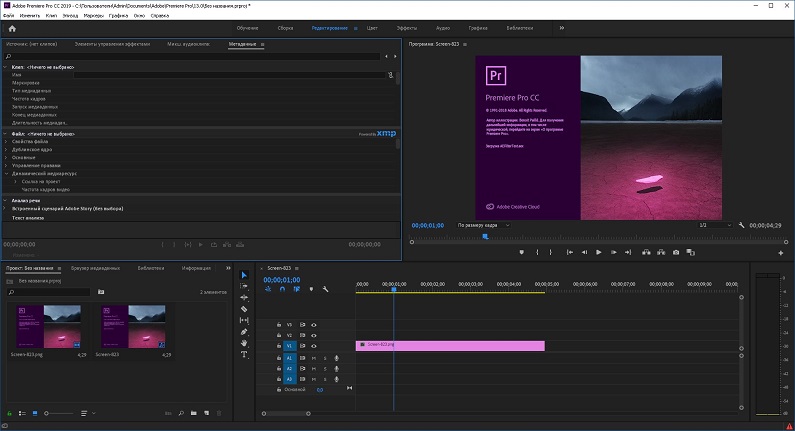
There is a huge amount of software focused on video creation. But among all this variety, you need to stop the choice on one thing. The segment leaders can be considered such programs as Adobe Premiere and Sony Vegas. But at the same time, they are paid, focused more on professionals than beginner editors. There is also Movavi, but the need to pay for this fairly easy-to-use program turns off most users.
If the task is to learn how to make high-quality video editing practically from scratch, that is, being an absolute beginner, then the program should be taken free and easy to understand. But at the same time with quite advanced functionality.
Here comes one visual version of the program in which it will be possible to edit video free of charge, and at the same time get vivid special effects, original transitions and much more. This app is called Shotcut.
It is cross-platform, completely free and available to everyone. Focused specifically on video editing. Open source. Among all its free competitors, it is the most versatile. It is not a primitive editor, but it is not overly complex either.
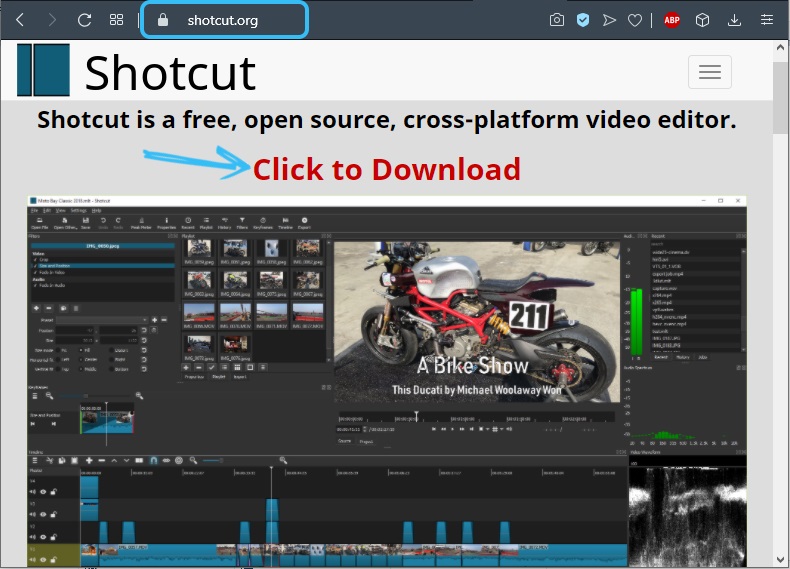
Another indisputable advantage of Shotcut is the rather loyal requirements for the power and performance of a PC or laptop. It is possible to work with video materials even on relatively weak machines.
Getting to know the interface
Since the choice fell on Shotcut, now it is worth considering in detail the question of how to properly edit video on a computer using this program.
It is important to note right away that the software is completely Russified. The interface is not overloaded with settings and options in sufficient quantity. You won’t have to figure it out for a long time. But it is still highly recommended to study the interface before getting started.
Several emphasis should be made regarding the creation of the project. So it will be easier to figure out the further design of the program:
- To begin with, a new project is created. Here its name is set, the folder for saving is assigned. Previous projects, if any, will be displayed on the right side of the window.
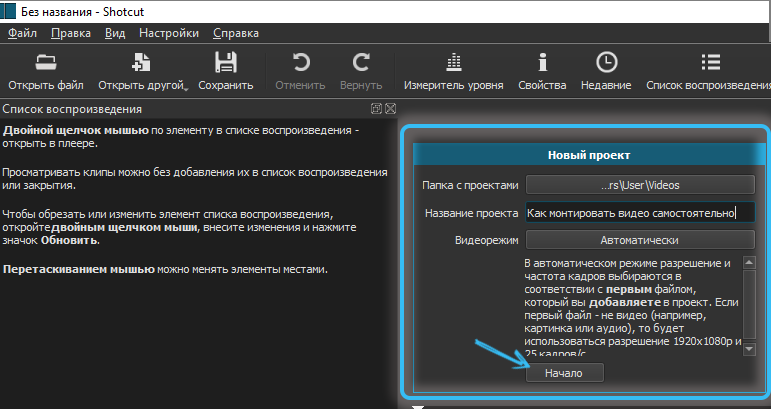
- Adding files is standard. It is enough to click on “Open file”. The program allows you to add one file, or select and add several sources at once.

- Once added, these files appear in the playlist and player.
Shotcut’s interface is a set of several panels that turn off and on as needed. At the top you can see buttons with icons. By clicking on the cross, the panel is removed. To resize the panels, drag the 5-point lines.
What is worth learning about the panels:
- The group on the right side includes “History”, “Assignments” and “Recent”. Here the History is most useful, because it allows you to go back, undo an action. The “Recents” section lists the files that you have previously opened. The Job displays the rendering of the movie.
- In the middle of the program window there is a preview window. Here the sources for the video are viewed and listened to. Here you can also see the entire project that you are currently working on, in its current form.
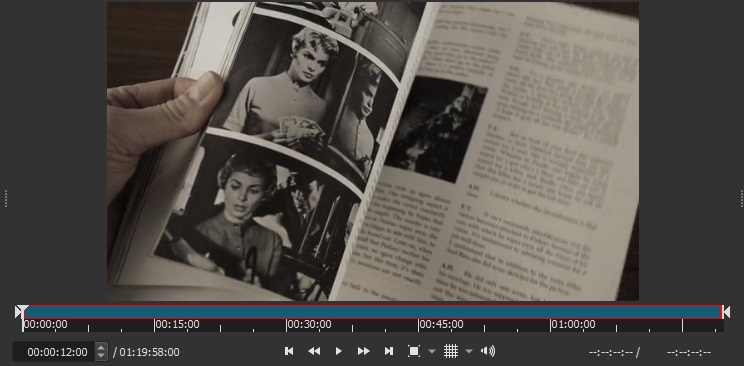
- The grid is activated directly in the video and its size is selected. This can be useful when overlaying text or other objects on the video.
- The “Export” panel is needed to select a format, parameters, as well as to save projects.
- The “Properties” displays the parameters of the file you have selected, filter, fragment, etc.
- There is also a “Playlist”. Files used during editing are uploaded there.
- Don’t forget about Filters. This is all about sound correction, animation, transitions, effects and other chips that decorate and complement the video.
But still the main panel for video editing is the “Timeline” panel. It is located at the bottom of the window.
Standard Installation Procedures
Since at the previous stage the videos were already loaded from which the video will be made, now they are directly in the playlist.
To start video editing, the files are transferred to the timeline. And for this, wait until the tracks appear on it.
Tracks are created in any number that the user needs. In this case, they are superimposed on each other, as in a graphical editor. In this case, the uppermost track closes the rest. Subtitles and text are most often added here.
For audio tracks, the principle is different. If there are several of them, then they will be played simultaneously.
If you want to combine several different videos at once into one, or trim a large video, one track is enough. For complex projects where effects, audio compositions and titles are used, one track will no longer be enough.
To add, you need to click with the mouse on an empty area of the time line, and then click on the “Add video track” button. To add audio, select the first item from the drop-down menu.
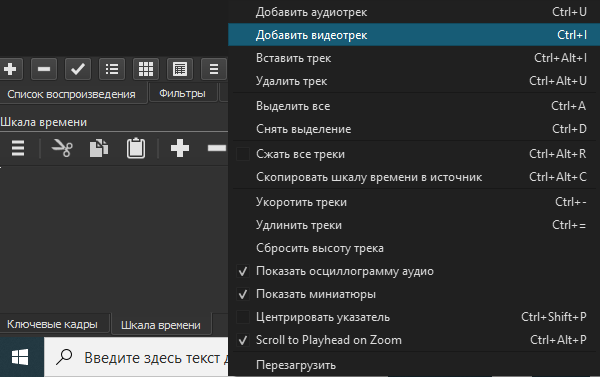
In this case, creating a track, if we are talking about the first, is not necessary. It is enough to drag a file from the list onto the line, and then the creation will happen automatically.
When files fall on tracks, they are displaced from the left edge. As a result, a void may form in the beginning. If you do not remove it, the beginning of the video will be accompanied by just a black screen. To remove these voids at the beginning or between the tracks themselves, just right-click on them and select the “Delete” option from the context menu.
There is a slider at the top of the panel that allows you to approach the desired sections of the track. The scale changes at the discretion of the user.
Files and their individual fragments can be mixed in the left and right sides, deleted, trimmed, between places, glued.
- To trim, drag the cursor to the desired point, and at the top of the panel press the “Split by points” button.
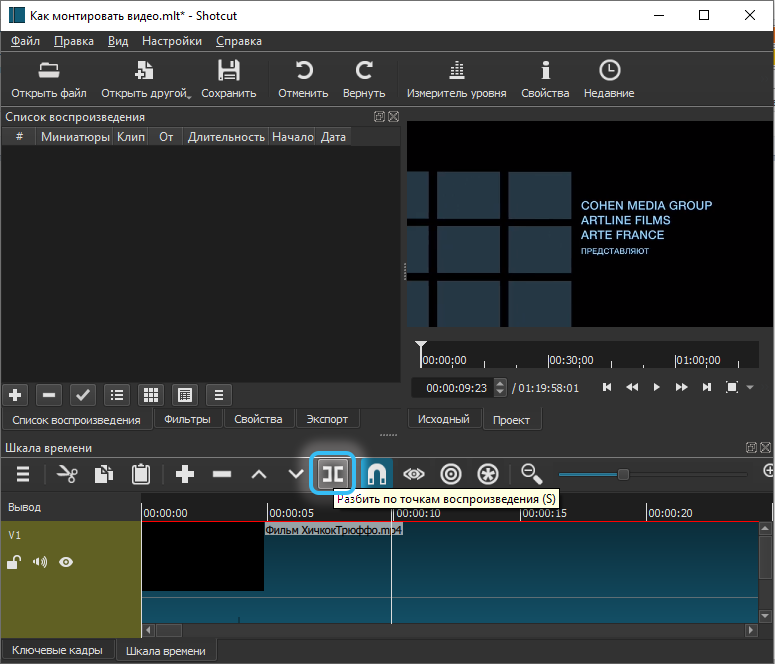
- Removing a fragment is even easier. It is highlighted with the mouse, and then the Delete button is pressed. Plus, deletion works through the context menu.
- The gluing is done as follows. The end of one clip is attached to the other. It is important that there is no void between them. If the fragments are superimposed on each other, then an auto transition will appear. And smooth.

By pulling the transition over the edge, its duration increases and decreases. The duration of the transition affects the softness of the scene transition in the video. The basic program is dissolving as an effect for an unusual transition. By selecting it and clicking on “Properties”, you can change the type of effect, set its individual parameters.
Tracks can be hidden, locked, and muted. The corresponding 3 buttons are on the left side.

Now for more details on how to edit a video yourself using Shotcut.
Replacing the sound in a video
Starting the editing of a particular video, many users are interested in how to make a different sound. The original audio track does not fit. Instead of the same voices, you need to add music or other sound.
To replace the sound, the original audio track must be deleted.
The peculiarity of Shotcut is that when you drag a file into the editing area, it is not split separately into video and audio tracks. Because of this, you will have to delete it manually.
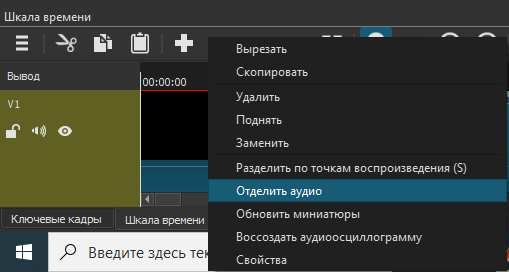
But this is done literally in a few seconds. The fragment from which you want to remove the sound is highlighted, and the “Separate audio” item is selected from the context menu.
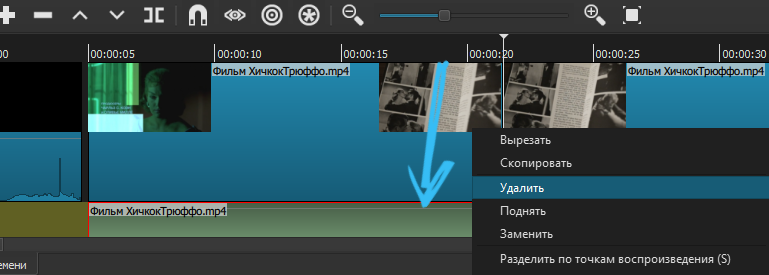
By doing this, the sound will appear on a separate track. You just need to delete it and load new audio by moving it to the same track. Plus don’t forget to adjust the duration.
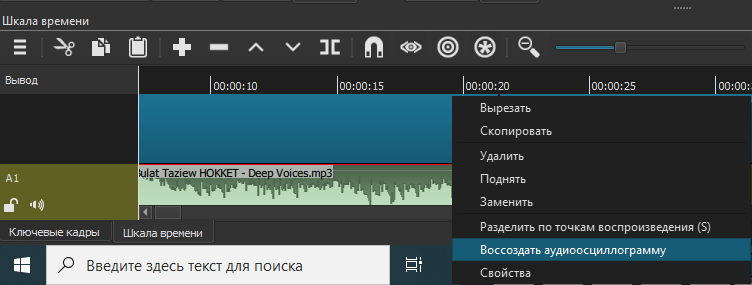
If the video is without sound, you just need to add an audio track and then drag and drop the appropriate audio file onto it.
Subtitles and captions
One of the popular questions about how to properly edit video clips on a PC is the ability to add captions and subtitles.
Shotcut has 2 ways to add text. The first is to use a filter for a separate fragment of the edited video. And the second provides for the use of a new object.
If we talk about the first method, then it is not particularly suitable for creating subtitles. If you need to make a simple signature when it will be shown throughout the entire video or a separate fragment, then you should use the first method.
Filters in Shotcut are easy to work with:
- first highlight the video on your own;
- if the video is cut into parts, then the text will be displayed only on one of them;
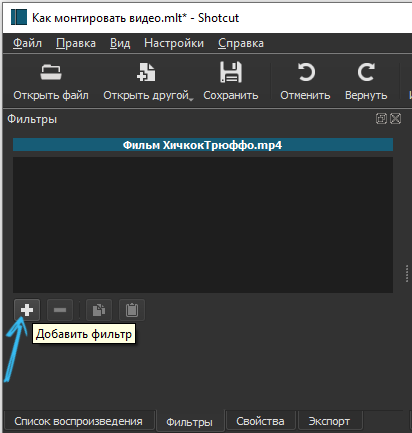
- open the “Filters” tab and click on the plus;
- there are 3 categories (audio, video and favorites);
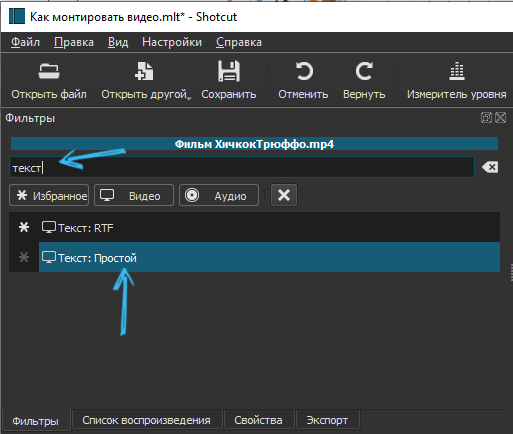
- use search, or choose from the list;
- in the search, type in the word “text”;
- add the appropriate filter;
- when you add it to the preview, the time code will be automatically displayed;
- to remove it, write your text;
- under the input field, set the desired duration of displaying text on the video.
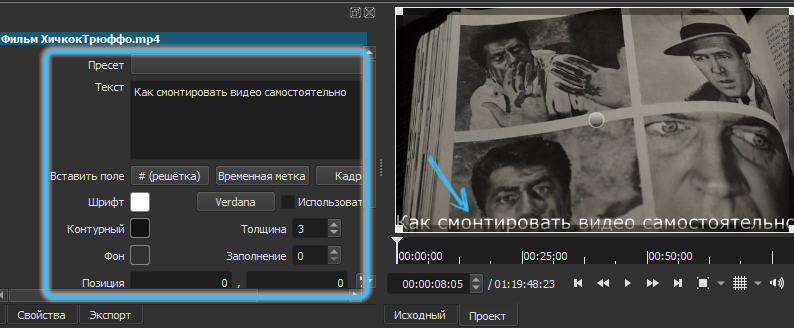
Keep an eye on the preview window in parallel, as all changes are displayed here.
There is also a second way. Here the text is already added as a separate object. This allows any text to be placed on separate tracks on top of the others. And then it will be fully displayed always, and not only when playing a separate fragment. The duration of its display is adjustable, which gives freedom for creativity. A good way to make frequently needed subtitles.
You can split a track into several parts by pressing the S button, and add the corresponding required text to each of them.
Logo laying on
Many still want to learn how to edit different videos, and at the same time leave their own copyright mark. It can be a company logo, some kind of emoticon, a picture, etc.

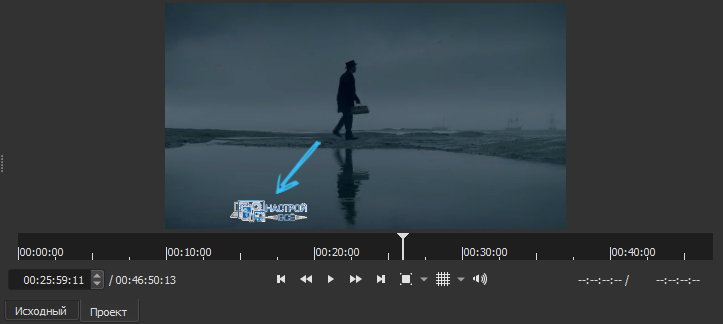
The file is moved to the top new track. Here you can change the size and position of the image relative to the video.
If the logo must necessarily appear during the entire video, then its duration is selected based on the duration of the video. They must match each other.
Change the background
Everyone can learn how to edit video correctly and in an original way. It all depends on the goal and objectives.
One of Shotcut’s features is background replacement for videos. This is especially easy to do when the video is filmed against a solid background. Even better on green.
The sequence of actions will be as follows:
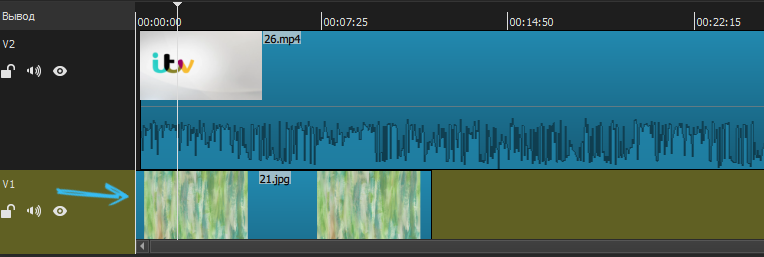
- place the original video on the top track;
- under it, place the background that you want to apply;
- open the tab with effects;
- find the Chromakey Advanced option;
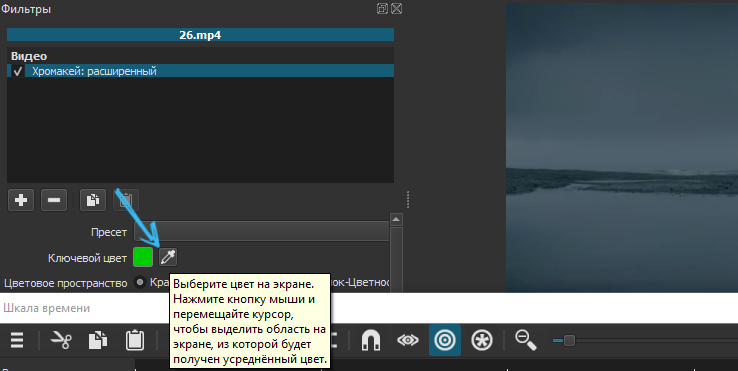
- in the key color section of the menu, click on the eyedropper;
- select the color you want to change on the screen.
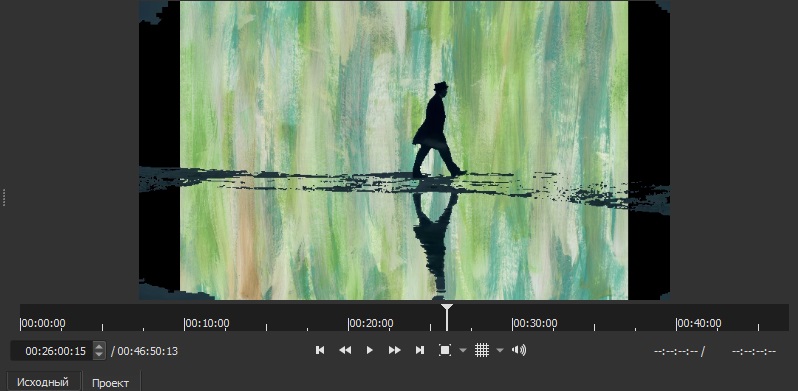
Ready. Now the background has changed.
But still Shotcut is a program for beginners. Therefore, it is hardly worth counting on the fact that you can very nicely and neatly crop the background. To achieve the effect of complete realism will not work. But for amateur videos, that’s enough.
Aspect ratio
It is also very important for a beginner to learn how to correctly edit your videos by changing the aspect ratio in the video.
Many have come across the fact that after the completion of editing, black stripes appear on the edges of the finished file. This is a problem with incorrect aspect ratio when saving.
Alternatively, a 4: 3 file is opened and saved after processing as 16: 9. Since there is a difference in size, there will be black stripes along the edges.
It is important to remember that by default the program player has the most common 16: 9 format. Therefore, the finished processed video will have such a ratio. If you set other values in the export settings, it will not change anything. There will be black stripes.
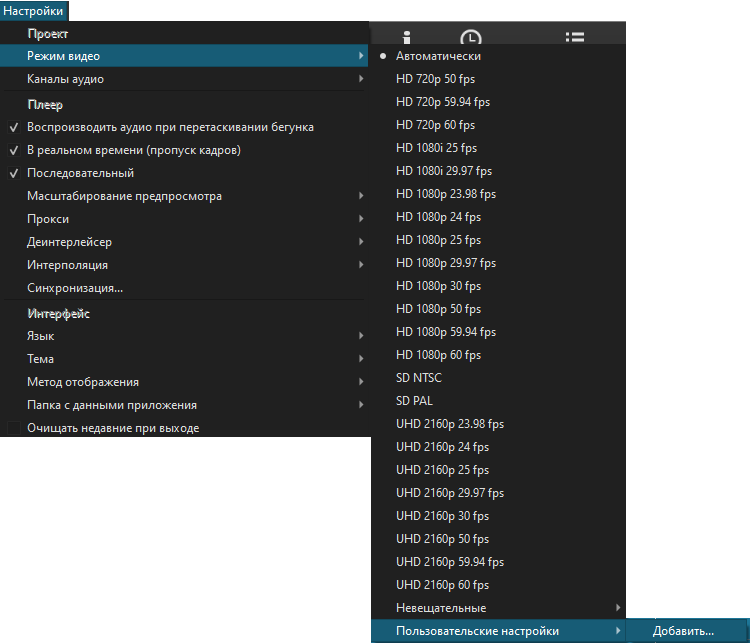
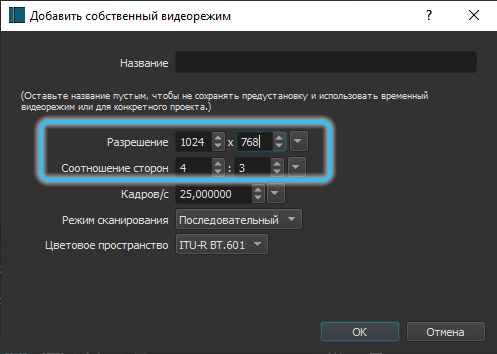
For editing video with a 4: 3 ratio, for example, you need to set your own parameters. Here you should open the settings menu, go to video mode, and then to user settings. Here click on “Add”, where and specify the desired values. To return to the standard save method, simply change the user settings to automatic.
If it comes out rectangular, and the video should turn out to be square, then when you change the mode, black horizontal stripes will automatically appear. They are removed using the Crop tool. The left and right crop filter slider is responsible for making the clip narrower or wider than the original. Drag until the stripes disappear from the preview.
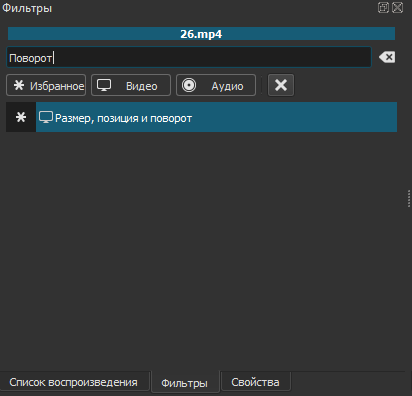
As a last resort, the “Rotation and Scale” filter is used. It changes the format automatically, but the video loses quality.
Increasing and decreasing sound
If you have decided to learn how to edit video clips yourself from scratch, then Shotcut is a great choice for a beginner.
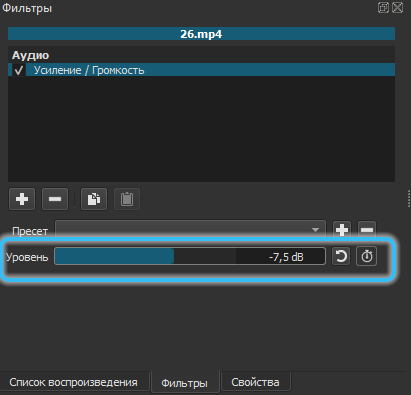
Sometimes the video is edited, where the sound is very weak. I want to increase it. The corresponding Gain / Loudness filter helps in this. It is in the Audio Filters group.
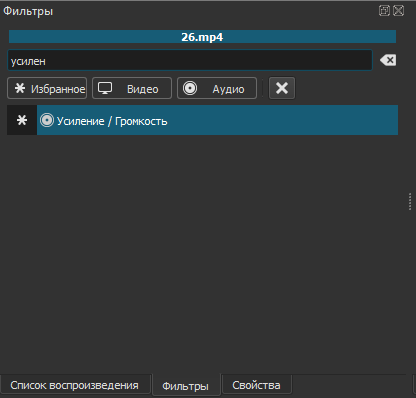
Move the level slider to the right to get the desired result. The sound can be increased and decreased. It depends on where you pull the filter slider.
Consider this. Audio amplification is not always beneficial to the finished edited video.
Key frames
The program also has a button called Keyframes. This tab appears below the timeline.
If the user wants to learn how to edit video beautifully and in an original way, over time this function is worth mastering. After all, it is aimed at more experienced and experienced video editing specialists. With its help, you can coolly complement the video edited on a laptop.
This button is needed in order to apply existing filters and create new effects and animation based on them. Keyframes are activated precisely in the process of working with different filters.

It will be fair to say that to create author’s transitions and animations, it is better to switch to more professional video programs. Shotcut is still suitable for beginners and all those who are taking their first steps in video editing.
Saving finished videos
If you managed to edit and process the video, now you need to save it. As with many other video editors, the save button is used here to save the project, not the video.
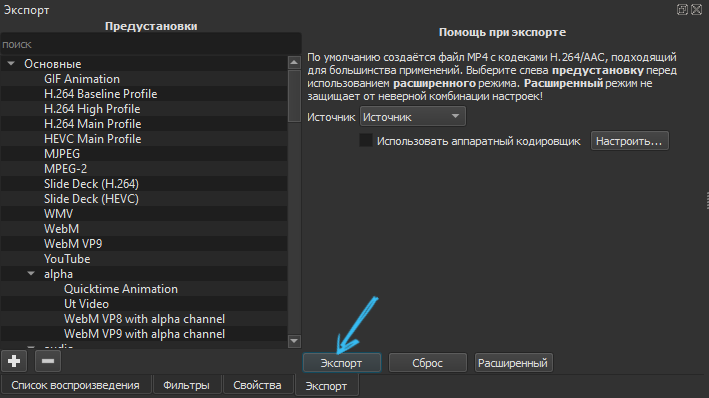
This file remembers everything that you used and added to the pasteboard.
If you need to save the video, then the capabilities of the “Export” tab are already used. The easiest way is to select the same YouTube here, and export directly to the video hosting. This option is universal, since it saves the video in MP4 format.
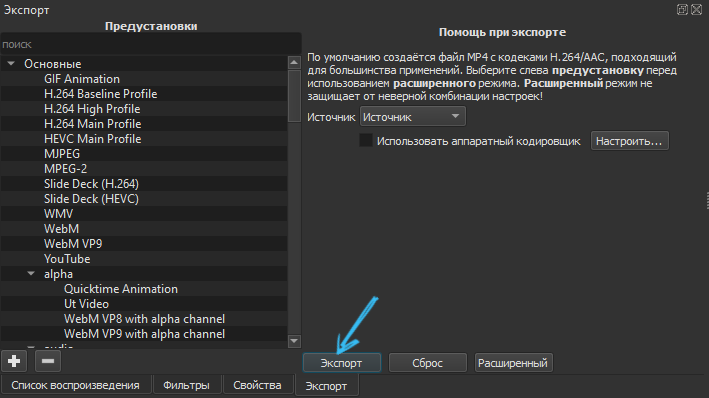
By clicking on the “Advanced” tab, you can set the necessary custom parameters of the saved video. But for beginners it is better not to get in here. It is better to choose an option from the list and use it to save the video.
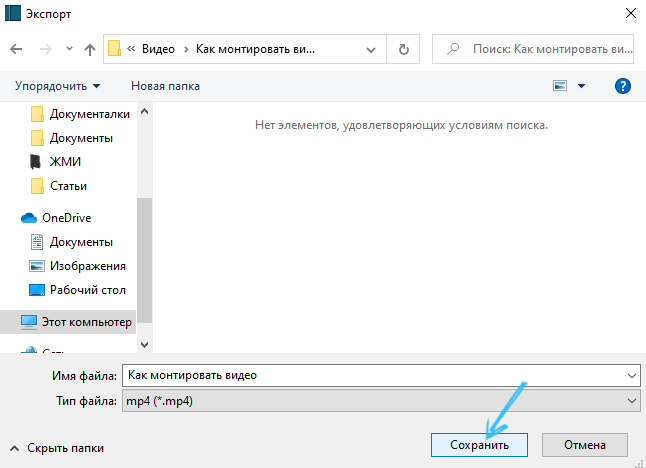
Clicking on the “Export” button starts rendering the video. Depending on the complexity of the project, this can take literally a few seconds or several hours. Computers spend a lot of resources on rendering, so weak machines will start to make noise and slow down.
In parallel, the percentage of already processed and saved video will be displayed in the “Tasks” tab. It is on the right side.
The good thing about Shotcut is that you can:
- convert videos to different formats;
- create gifs;
- extract sound from video;
- save audio from a video in MP3 format, etc.
Again, everything is done through the export menu.
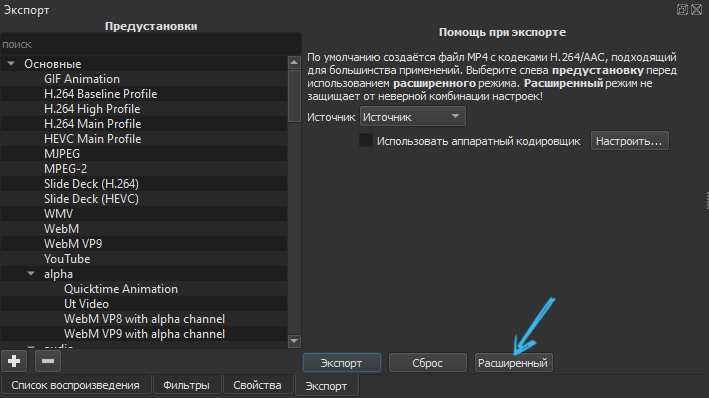
These are just the basics of what one of the best video editing software for newbies provides. But you need to start your journey from scratch.
Practice, exploring new opportunities, switching to more complex programs will ultimately allow you to make serious progress, learn how to create incredible videos and add your own special effects and transitions.
On major YouTube channels, a huge share of success depends on how competent the video blogger or his team is in video editing skills. It’s not enough just to shoot the material. It still needs to be connected, glued, cut out unnecessary, add voice acting, overlay video tracks, and so on.
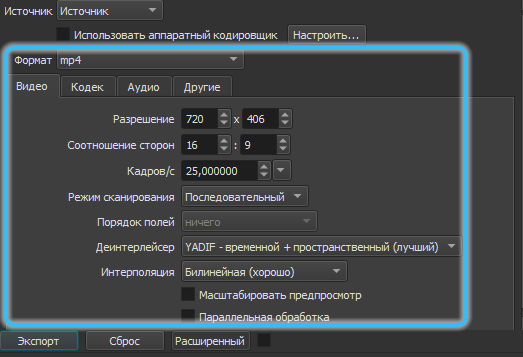
Which video editor do you prefer to use? Why did you choose this particular program? How long did you study and what did you manage to learn?
Share your experience, give practical advice to beginners, tell interesting life stories related to video editing.
Subscribe, comment and ask topical questions!