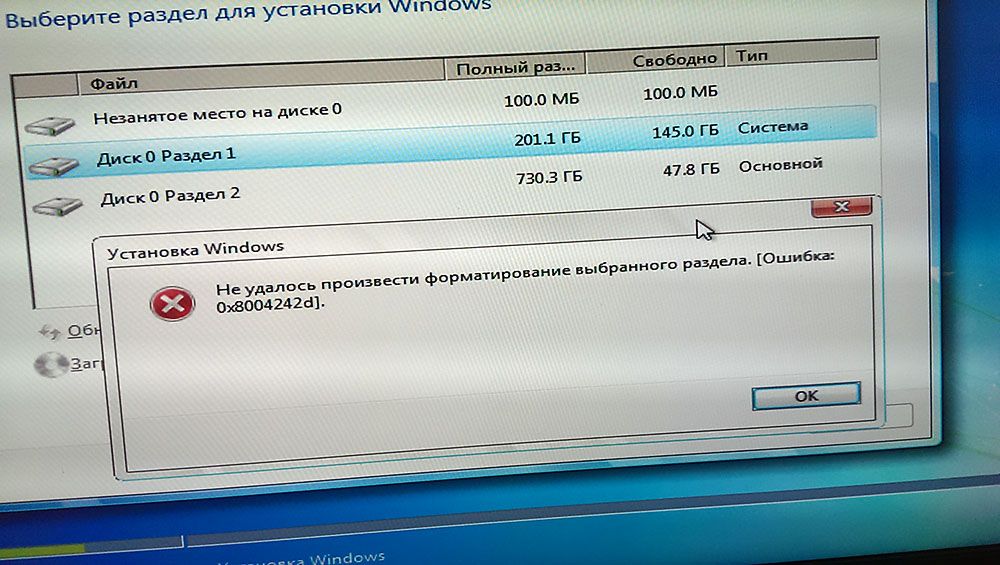
When performing a clean install of Windows, formatting a hard drive, or merging partitions, users may encounter various types of errors at different stages of the procedure. One of these failures is accompanied by the message “Could not format the selected partition” with the code 0x8004242d. The error does not allow you to perform an action, preventing further installation of the system. Let’s look at how you can fix the problem, depending on the source of the problem.
Contents
Possible reasons
Usually, error 0x8004242d with the text “Could not format the selected partition” appears to the user when installing systems on an HDD with the MBR (Mater Boot Record) format, which is already obsolete. The task to look for logical partitions in this scenario is performed by the BIOS, after which control will pass to the bootloader.
Modern PCs and laptops use the GPT (GUID Partition Table) tabular disk partition format, which was created to replace the MBR and is part of the UEFI system. To install a 64-bit version of the OS, you need to use the new standard, 32-bit Windows 8 can also work with this structure, while earlier versions need an MBR.
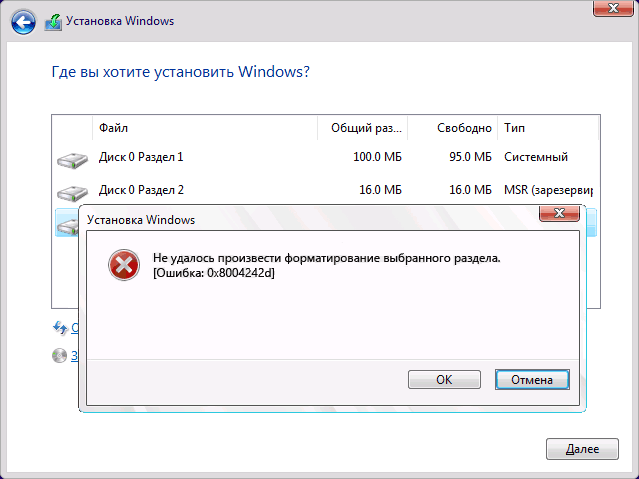
As a result of a mismatch with the boot record, an error occurs. This can happen in the following cases:
- an operating system that does not support this standard is being installed on an MBR disk;
- you need to install on a disk of more than 2 TB – such voluminous partitions imply the use of a GPT table;
- The motherboard supports UEFI. Moreover, when UEFI is absent, MBR should be used.
Less often, a malfunction can be triggered by a conflict between BIOS and UEFI settings. In this case, the fix is to disable USB boot support during the installation process.
How to Fix Error 0x8004242d in Windows 10
The failure occurs when installing Windows 7 or later during the format step, and regardless of the reason for its occurrence, instead of trying to format the disk, you can fix the problem by deleting partitions. If you cannot remove partitions, the DiskPart utility will help you with the task.
Sometimes the problem is exacerbated by the lack of access to the graphical interface of the system. If you get a 0x8004242d error while installing Windows 10 or 11, accompanied by the message “We were unable to format the selected partition” (or similar), try to use the fixes one by one.
Cleaning a disk before formatting
First of all, let’s consider troubleshooting the error, taking into account the scenario when access to the desktop fails. The method is suitable when a failure occurs due to incompatibility or damage to the drive controller or device driver. The steps are based on the availability of a compatible installation media. You need to take the following steps:
- we boot the computer from a compatible installation drive – a disk or a USB flash drive (insert the media into the connector and reboot the device);
- confirm the action, agreeing to boot from the installation drive;
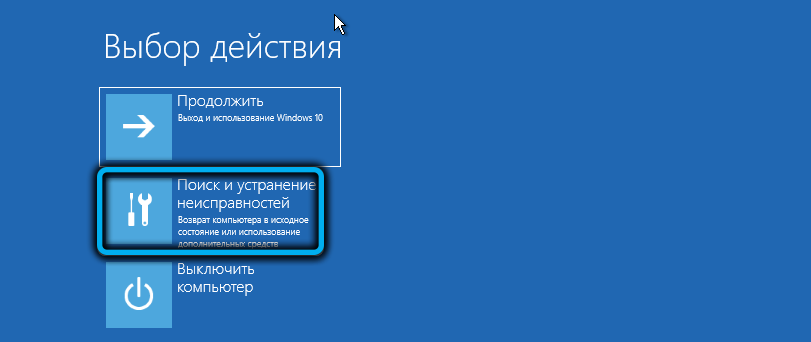
- go to system restore and go to the “Troubleshooting” tab;
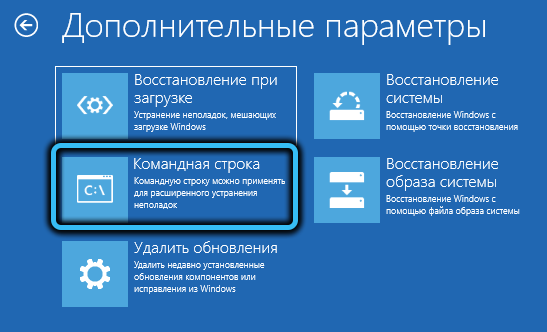
- in the advanced options section, select the “Command line” item;
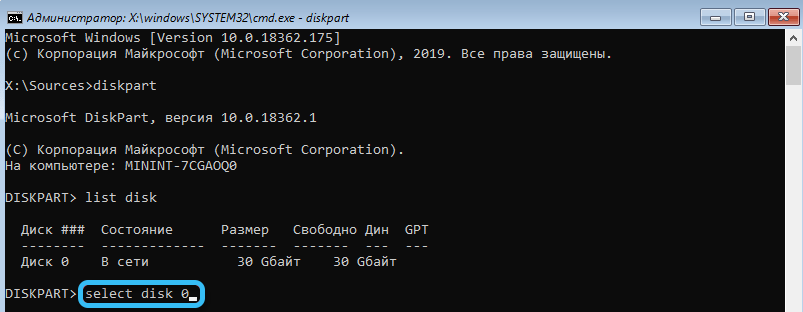
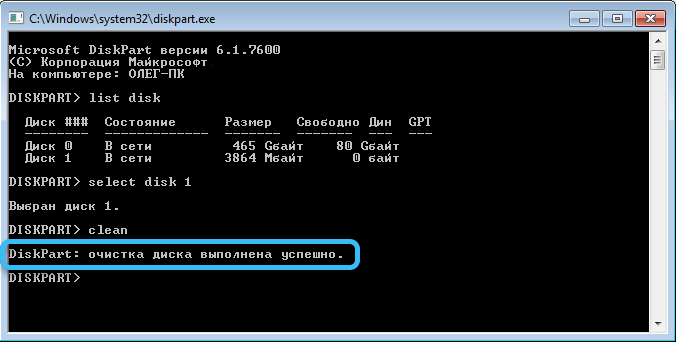
- in the terminal that opens, enter the diskpart query and press the enter key on the keyboard to use the tool;
- set the list disk command (press Enter after entering the commands), which allows you to view a list of available partitions and hard drives. The utility also displays the size of each of them, this information can be used to identify the problematic drive;
- having determined the required disk, use the select disk 0 command, where 0 is the partition number (we enter a numerical value corresponding to the problem disk);
- enter the det disk command, confirming the action;
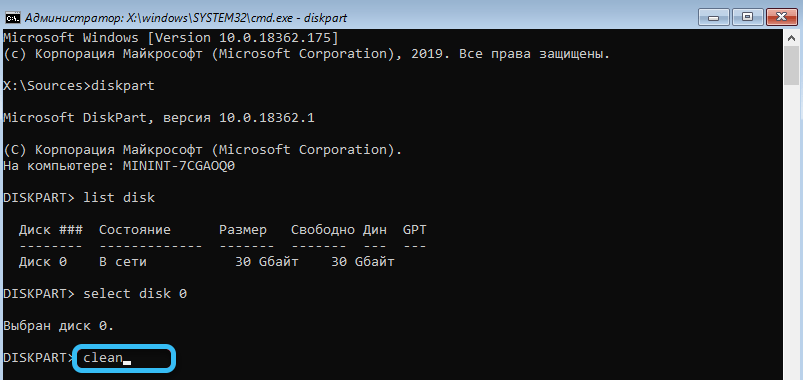
- after making sure that the partition number was selected correctly, we start cleaning the selected disk with the clean command, as a result of which all data will be deleted from the drive without the possibility of recovery;
- upon completion of the procedure, we finish working with the tool by applying the exit request, close the terminal and restart the computer.
After the above manipulations, we again try to perform the task of a clean installation or merging partitions. If the method did not help, go to the next option to fix the error.
Scan your hard drive for errors and bad sectors
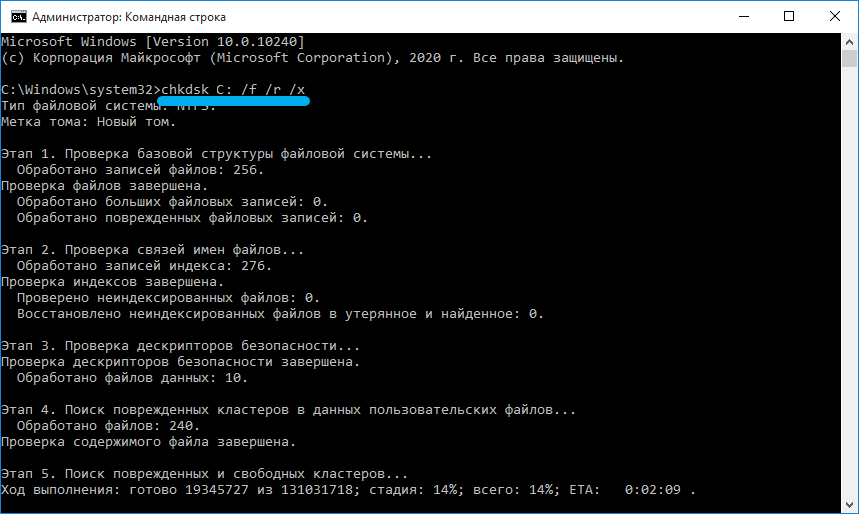
Since the failure to format the hard disk can be caused by some drive malfunctions, it is worth performing an HDD check. For this purpose, we use the built-in system tool that allows you to identify errors and bad sectors of the disk. We start the scan as follows:
- go to the command line (see the previous fix method);
- use the chkdsk c: /r request to start scanning with the utility and confirm the action by pressing Y on the keyboard;
- waiting for the end of the scan. If there are minor malfunctions, the utility will fix them on its own, but additional manipulations to fix problems may be required.
Removing all hard disk partitions
Often the problem can be caused by a damaged boot record, so the best solution to fix error code 0x8004242d is to delete all HDD partitions. You can create them again during the Windows installation process, but if you have the necessary information on the drive, it is better to create a backup copy first, which will prevent data loss.
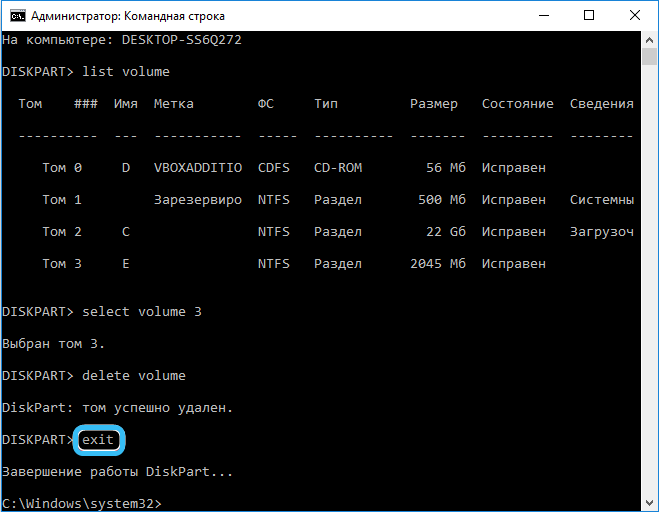
Partitions can be deleted using the command line:
- booting from the installation media, launch the terminal (the steps are described in detail in the first method);
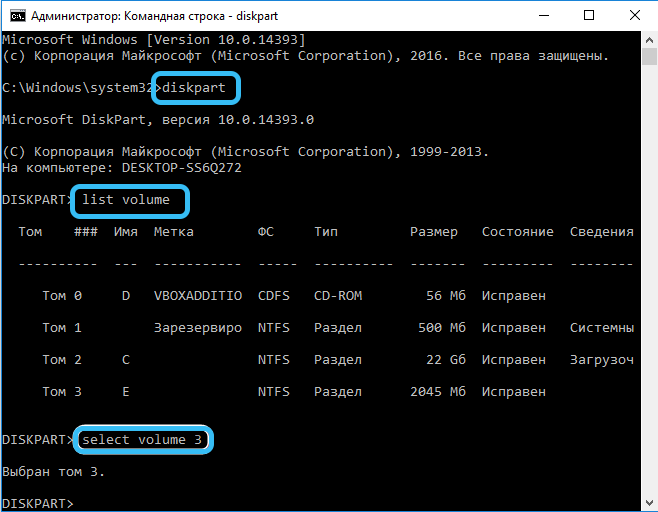
- we enter the diskpart and list volume commands in turn, pressing the enter key after each, as a result of which the tool will start and you will see a list of available partitions;
- use the select volume 0 query, where instead of 0 we put the appropriate value corresponding to the section;
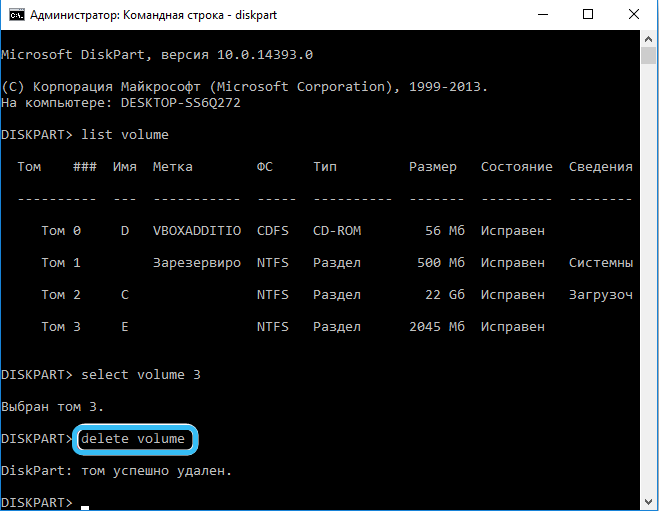
- the delete volume command deletes the partition;
- repeat the manipulations for each partition, choosing the desired number and deleting all disk partitions in turn.
Turn off UEFI support
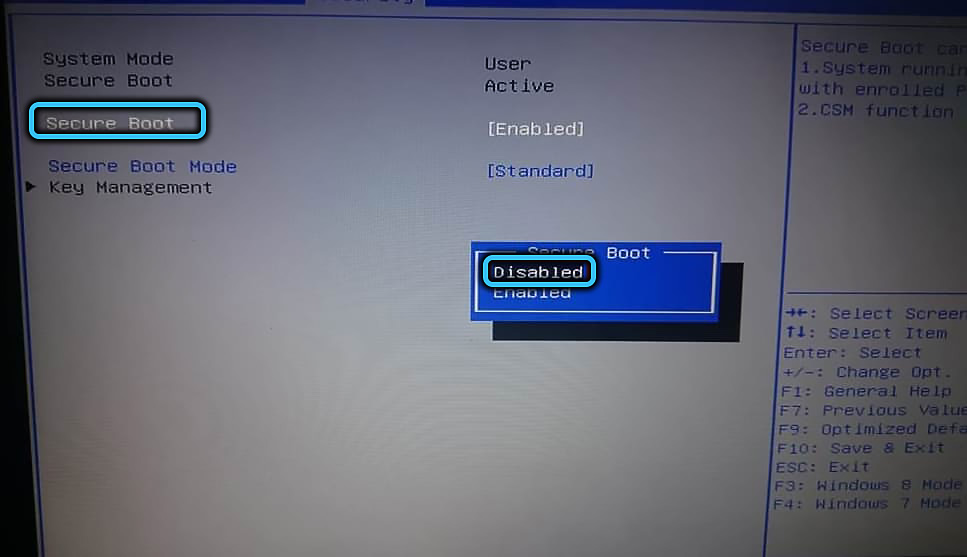
In some cases, the problem can be caused by a conflict of settings in the BIOS, and in this scenario, it is solved by disabling UEFI in the configuration settings menu. Depending on the version, the names of sections and items may differ slightly, but the principle of action remains the same, and the task is to deactivate the desired option. Turn off UEFI support:
- go to the BIOS (we press the corresponding button when the computer boots, you can see a hint on the initial screen – it can be Del, F2, Fn + F2 or other keys, including their combinations);
- go to the Boot tab (depending on the interface, it may be called differently, for example, Boot Menu, Boot Option, it is also possible to locate it in one of the main menu sections, such as System Configuration);
- we find the Secure Boot option and deactivate it by selecting the Disabled value. Save the settings and exit (press F10).
Usually one of the methods discussed above works, eliminating the error 0x8004242d, regardless of the cause and moment of its occurrence.
