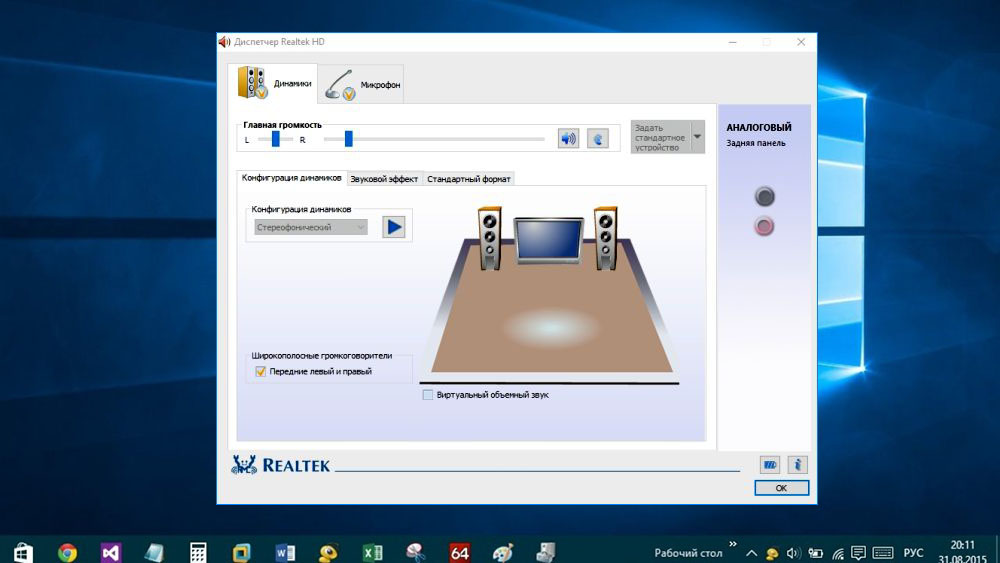
On most computers with a built-in sound card, the audio chip manufacturer is Realtek. It also produces proprietary software for sound management, which is not included in the Windows distribution. Many users, especially music lovers, prefer to use this particular utility with a full-fledged graphical interface, because it provides the possibility of advanced sound settings. But in some cases, Realtek HD Manager does not start when the OS boots. In this article, we will explain the reasons and how to troubleshoot these problems.
Contents
How to open Realtek HD Manager
This software becomes available only after installing the “native” drivers, which can be downloaded either from the official website of the Motherboard manufacturer, or directly from the Realtek portal.
We will not describe in detail how to do this – just run the installer and follow the instructions, the installation procedure is quite standard.
But after installing the drivers, you still need to be able to launch the Realtek HD Manager to fine-tune the sound. This can be done in several ways.
Through the taskbar
The easiest way, which is known to everyone who has ever run the utility for managing the parameters of a video card. In the lower right part of Windows is the Taskbar, which displays the icons of many applications loaded at system startup. Some of them are displayed on the outer panel and are visible immediately, while most of them can be seen by clicking on the arrow icon pointing up.
![]()
We are interested in the loudspeaker icon, as in this picture:
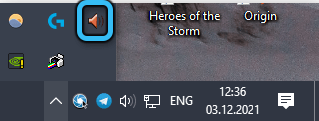
We click on it with the mouse, as a result of which the Sound Manager will start.
But it is possible that the icon of interest to us in the Taskbar is missing – this sometimes happens, and for various reasons. The situation can be corrected as follows:
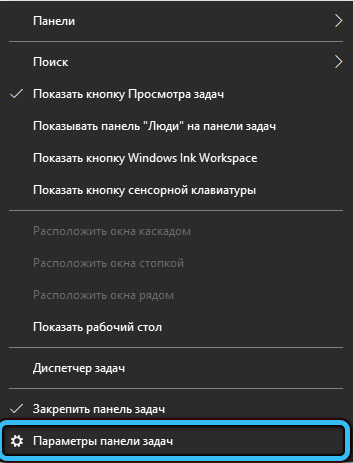
- Right-click on an empty space on the Taskbar and in the context menu that opens, select the “Taskbar Options” item, and then the “Select the icons displayed …” button. Depending on the version of Windows, instead of the “Taskbar settings” item, you will need to select “Customize notification icons”;
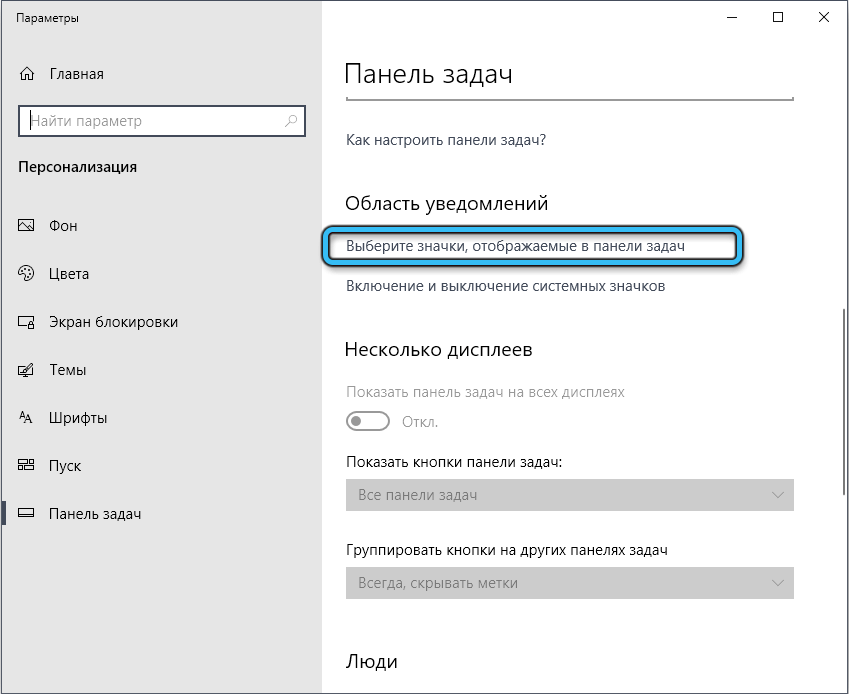
- a window will open with a list of resident utilities, look for Realtek HD Manager among them and activate it by setting the switch to the “On” position or selecting the “Show icon and notifications” option;
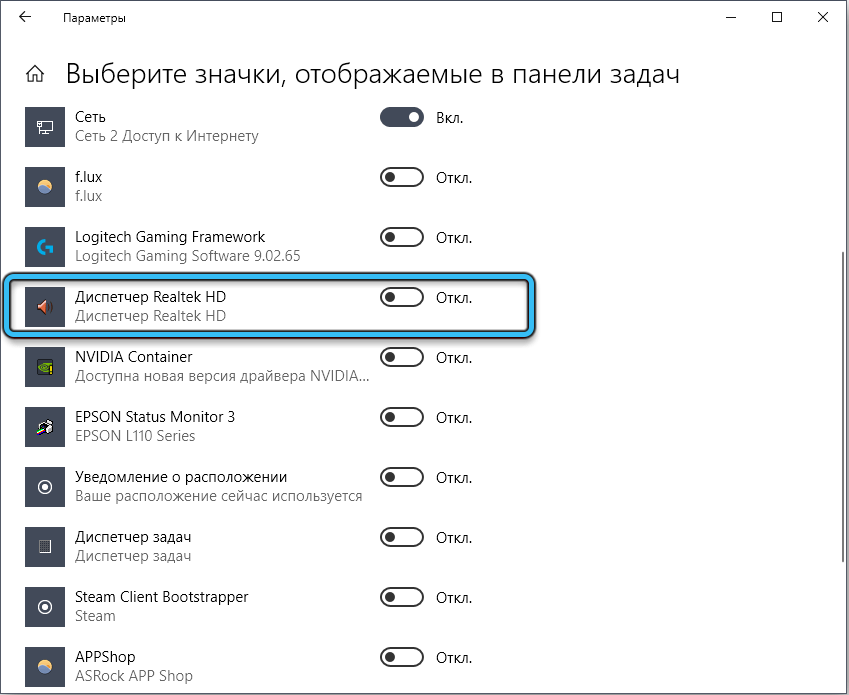
- check the result in the Taskbar. Perhaps the desired icon will appear only after restarting the computer.
If the desired icon is not in the list, this may indicate that the utility for some reason stops working after the OS starts, and then, for obvious reasons, it will not be present in the list of background applications. The problem can be solved:
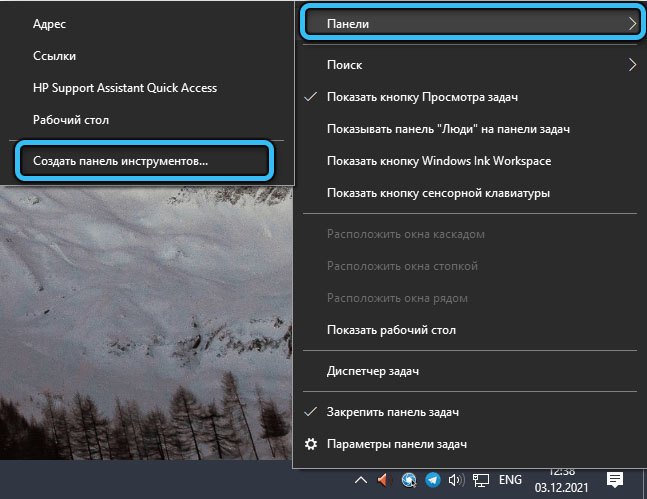
- again right-click on the empty area of the Toolbar, but now select the item “Create toolbar”;
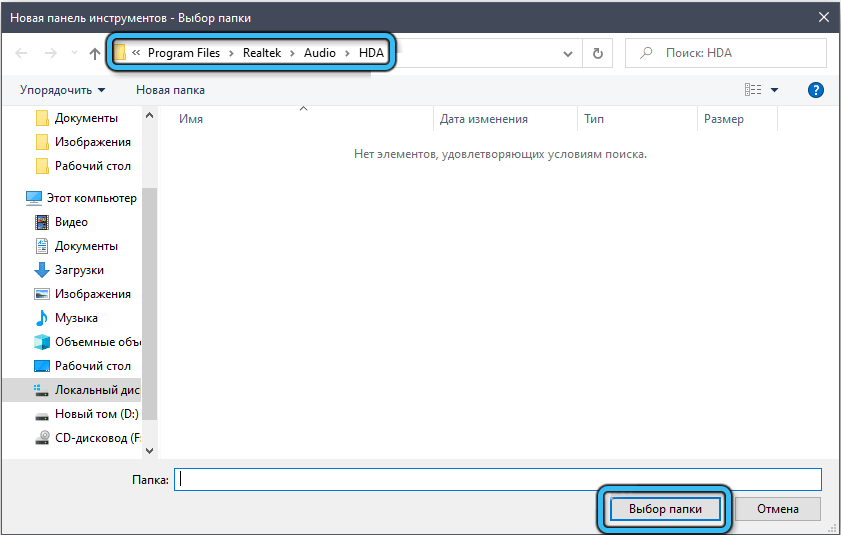
- a browser window will open, in which you need to specify the correct path to the exe-file. If you did not change it during installation, the driver and utility are located in the ProgramFiles Realtek directory of the system drive, in the Audio HDA subdirectory. Go there and click on the “Select folder” button;
- an icon labeled “HDA” will appear. Click on the arrow to the right and select the executable file itself;
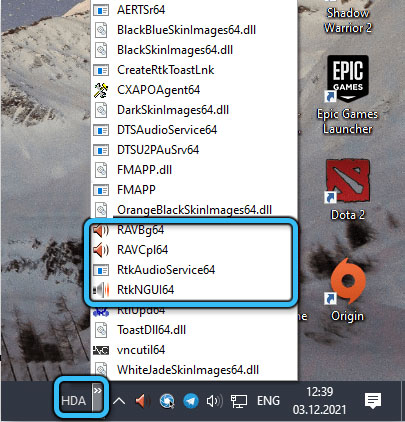
- we confirm the creation of a new panel.
The Manager icon should now appear, and launching it shouldn’t be a problem.
Through the Control Panel
An alternative way to start Realtek HD Manager in Windows to customize the sound on your computer is to use the Control Panel.
After installing the “native” drivers, the corresponding section will be added to the Panel; it is searched for in two steps:
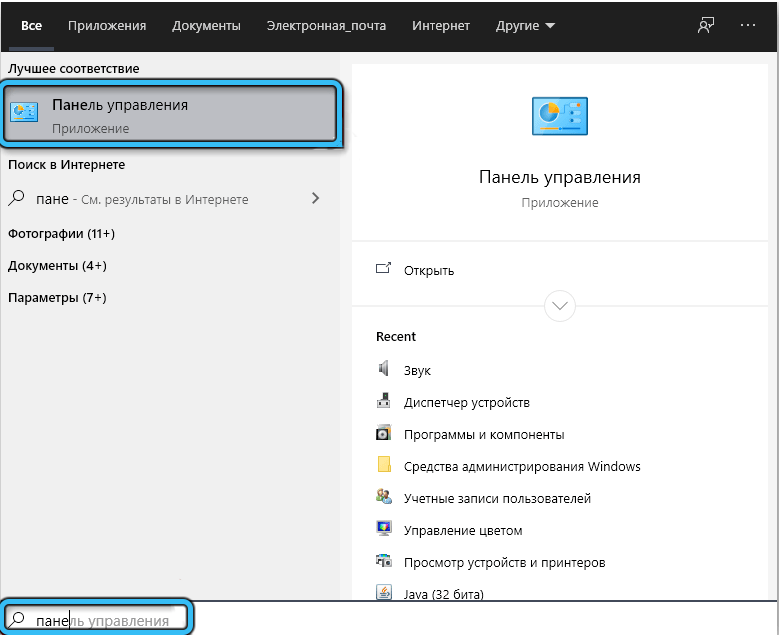
- through the “Start” panel, launch the “Control Panel”;
- look for the Realtek HD Manager tab and click on it (once or twice, depending on the Windows version) to launch the utility.
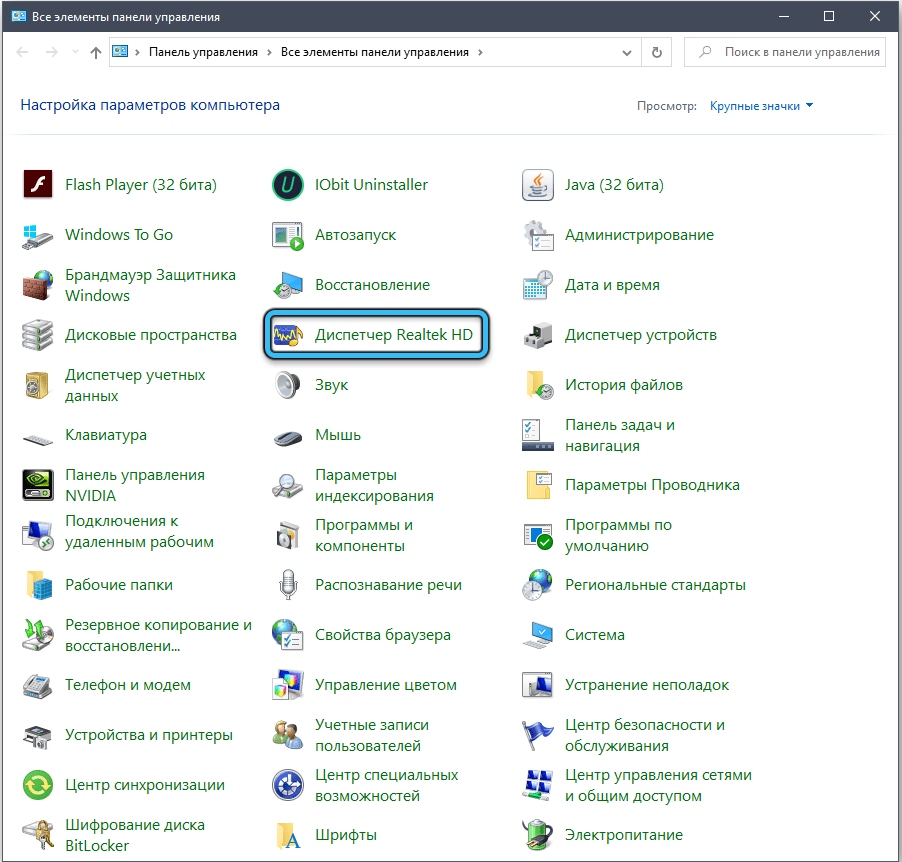
A little longer, but always works, unlike the first method.
Opening the Realtek HD Manager executable file
There is a category of users who prefer to use Explorer or alternative file managers such as Total Commander to run the necessary executable files. We recommend that you try this method as well. It’s a little more complicated, but you might find it useful in the future.
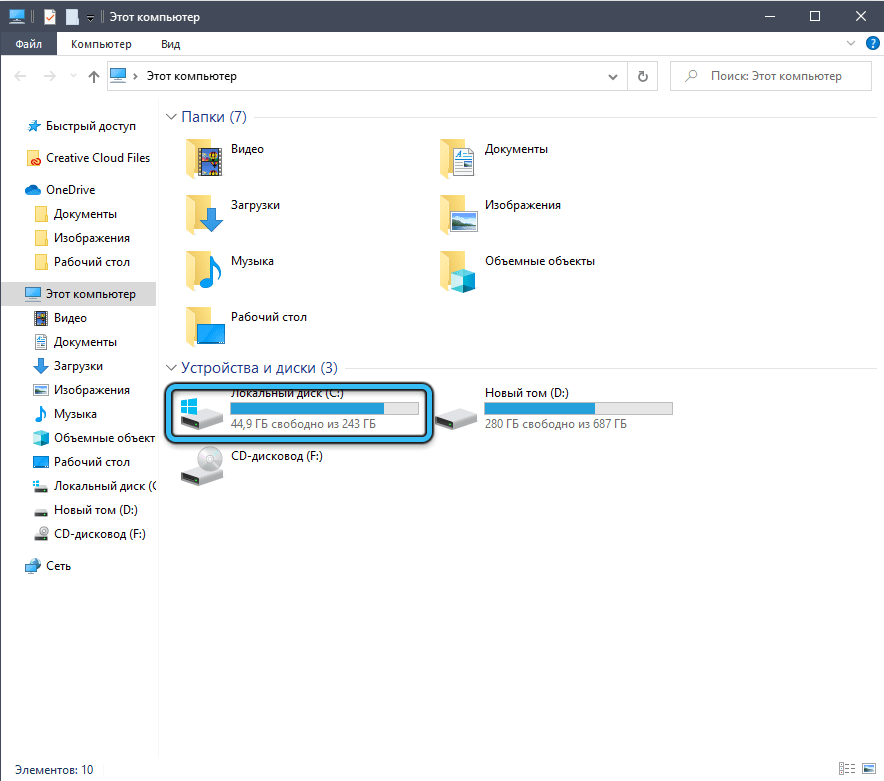
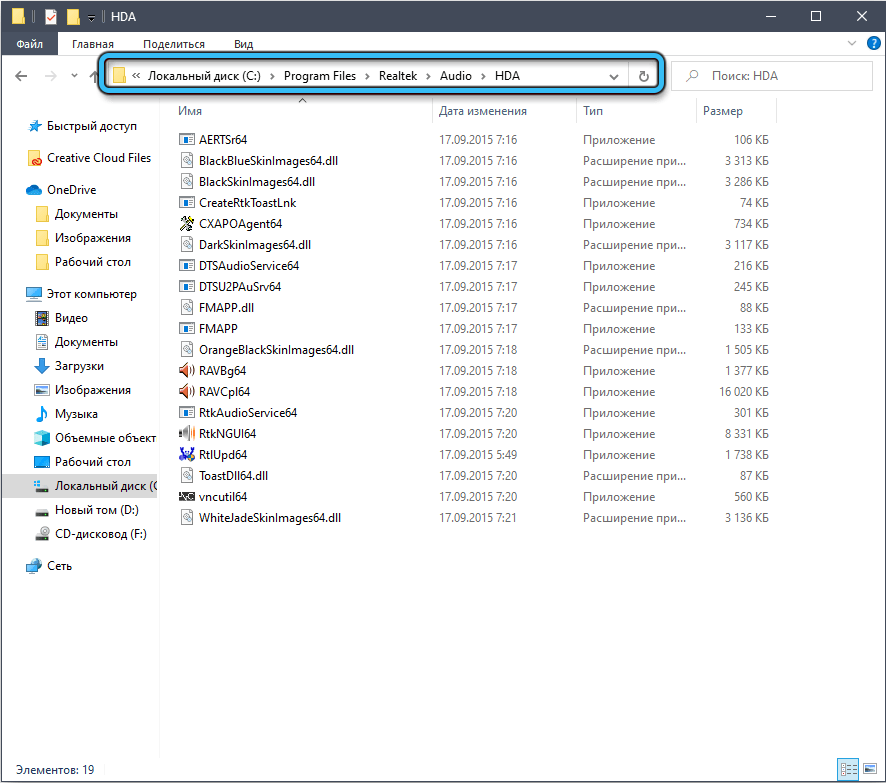
You already know which folder the Audio Manager executable file is in. So go to it, there are several executable files. We launch RAVCpl64.exe, and if the utility does not load, we repeat the launch with two other files, RAVBq64.exe or RtkNGUI64.exe.
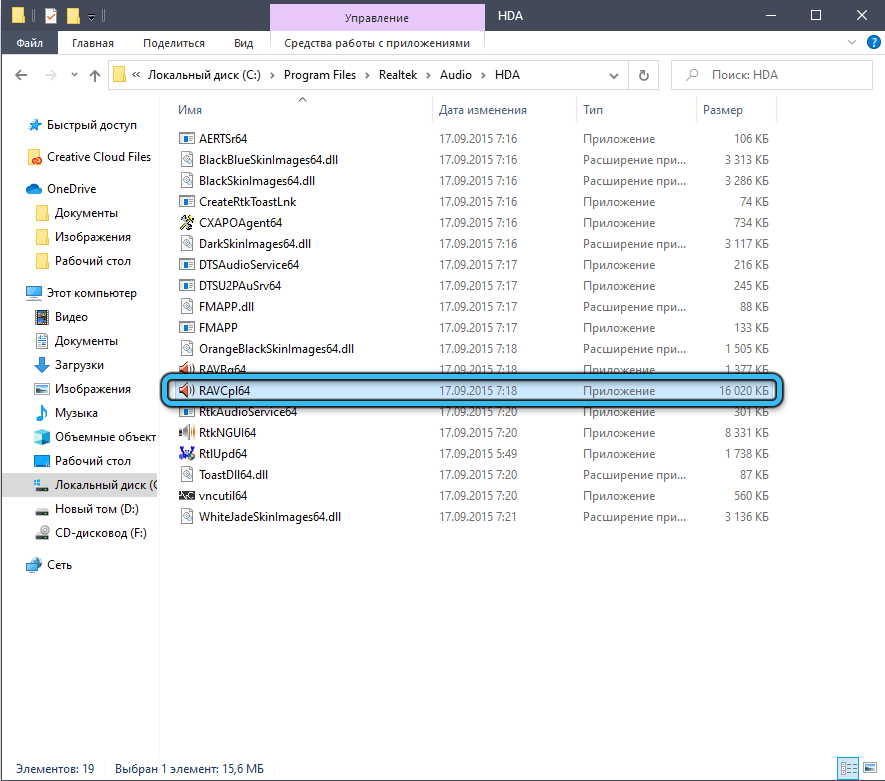
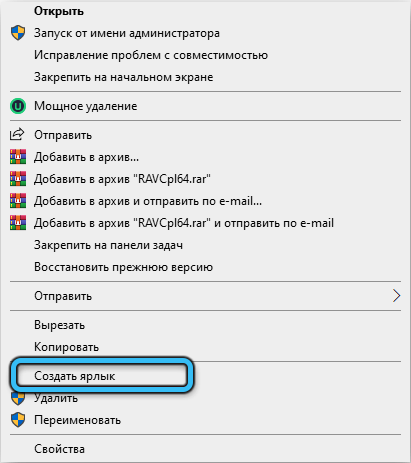
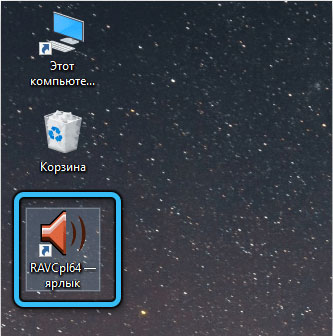
Here you can also make it possible to more quickly open the Realtek HD Manager in order to configure it. To do this, click on the name of the working executable file RMB and select the “Create shortcut” option, and then drag the created shortcut wherever you like, to the desktop or directly to the Launchpad. Now access to the utility will be much easier.
What to do if Realtek HD Utility cannot be launched
It also happens that the launch of an executable file ends with a complete fiasco. That is, the utility itself seems to be present, but does not want to work. In most cases, the culprit is an incorrectly installed or “incorrect” driver. It can be damaged as a result of viruses or as a result of a system malfunction (hard shutdown of the PC, power failure), sometimes the driver becomes inoperable after the next Windows update.
First, make sure that you do not have any uninstalled updates, often this is enough to fix the problem.
If that doesn’t work, and Realtek HD Manager is not in Control Panel, you can try the following steps.
Reinstalling the Realtek Driver
This is the first thing to do if you can’t open Realtek’s Sound Settings Utility. Sequencing:
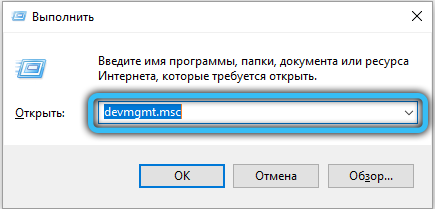
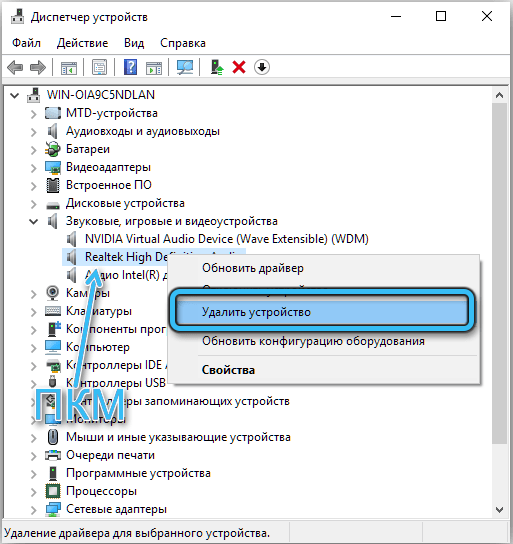
- in the “Run” console, called by the Win + R combination, write the devmgmt.msc command, confirm by pressing OK or Enter;
- open the “Sound, video and game devices” branch;
- right-click on Realtek High Definition Audio;
- in the context menu that appears, select the “Delete” item, confirm;
- click on the “Actions” button in the top menu of the “Device Manager”;
- select the sub-item “Update equipment configuration”.
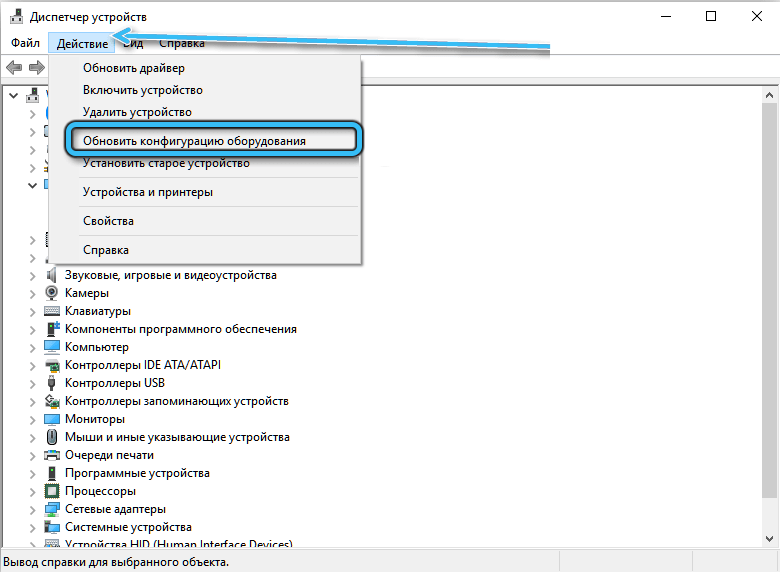
As a result, the audio card drivers will be reinstalled, which promises good prospects in terms of launching the dispatcher.
If the problem persists, repeat all the above points, except for the last one, just restart the PC. As a result, when Windows initializes, the system will detect the sound card and automatically load drivers for it.
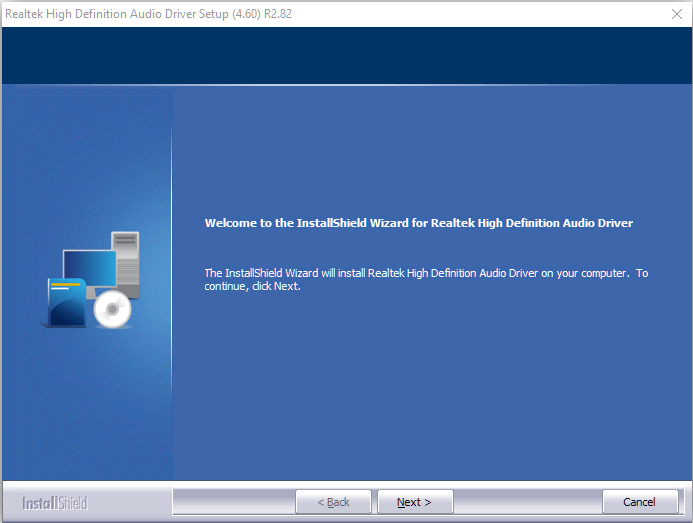
The best, but more complicated way is to manually install proprietary software from the official website. It is advisable to download the exe file for the OS of your bitness. Most likely, during the installation of the utility, the drivers will also be installed, and this will exhaust the incident related to the inability to start the Realtek HD Manager.
Adding Realtek HD Manager to Autostart
By default, when installing the driver, the utility is added to autorun, that is, it will run in the background every time Windows starts. Dispatcher activation is performed in the ways described in the first section.
The absence of this software in the startup list, which can be caused by various reasons, will lead to the fact that it will not start automatically. As a result, the corresponding icon in the Taskbar will not appear, although it will still be possible to launch the executable file.
The fix is easy:
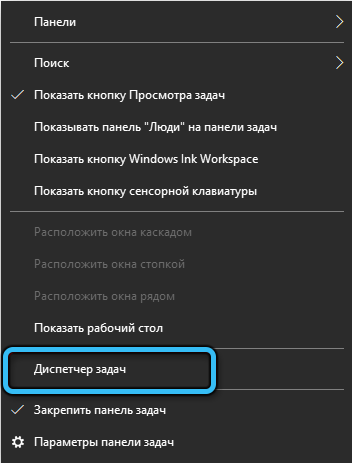
- right-click on an empty area in the taskbar;
- select the “Task Manager” option in the context menu;
- click on the “Startup” tab;
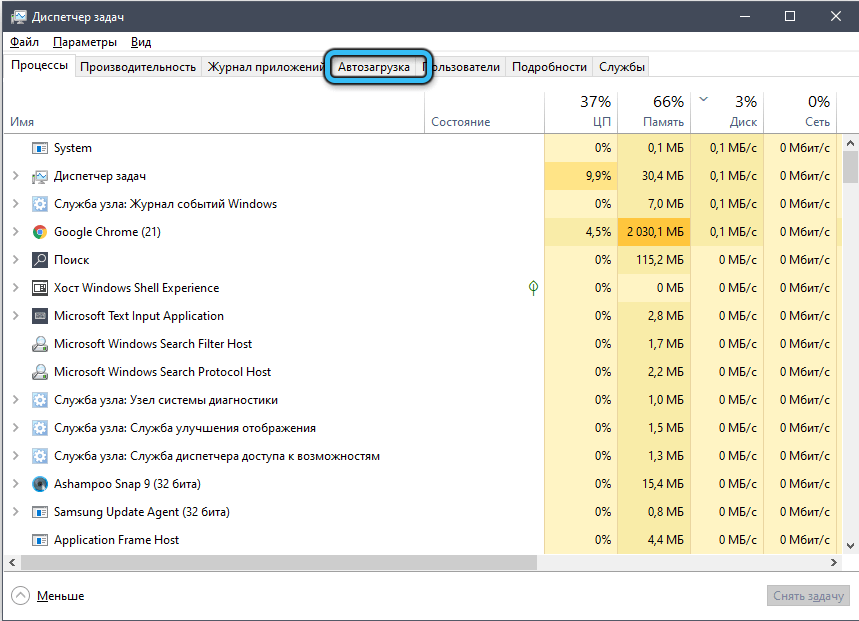
- we find in the list of applications the line “Realtek HD Manager”;
- set the switch to the “On” position.
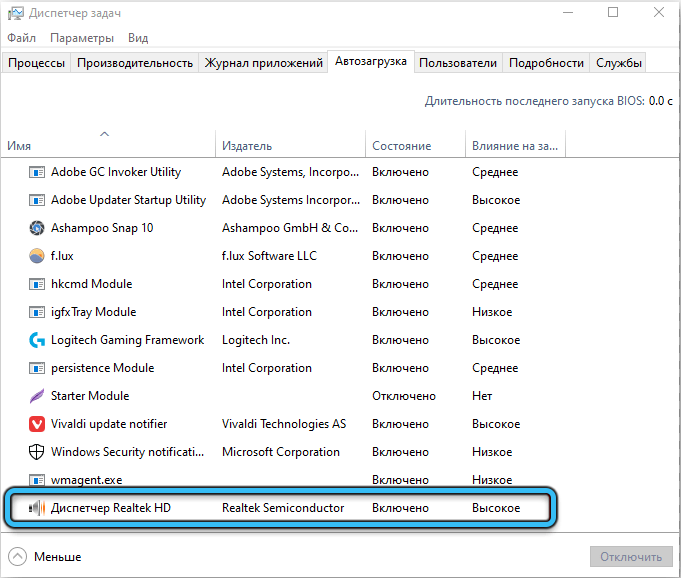
As a result, on subsequent reboots of the operating system, the sound settings management utility will be loaded automatically, with the ability to launch it through the Taskbar.
Troubleshooter
You already know that many problems in Windows can be solved with built-in troubleshooters. They do not always work, but you can try, especially since it is not difficult.
If Realtek HD Manager does not want to function in Windows 7, follow these steps:
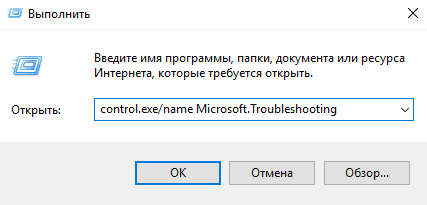
- in the “Run” console (Win + R), type the line (no errors!) control.exe / name Microsoft.Troubleshooting;
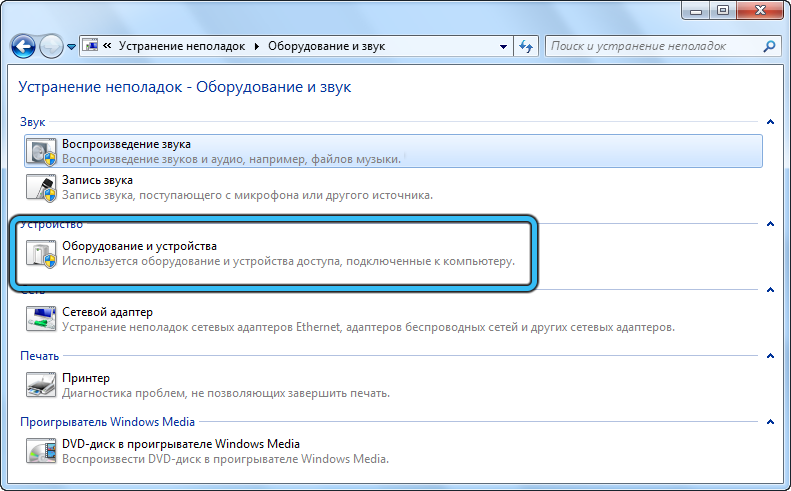
- after confirmation and a new window appears, click on the “Hardware and Sound” tab;
- select the line “Hardware and devices”;
- click on the “Advanced” button;
- in the new window, put a check mark in front of the text “Automatically apply corrections”;
- click next and follow the instructions that appear.
For Windows 10, if the Realtek HD Manager icon is inoperable or missing, the troubleshooting procedure will look different:
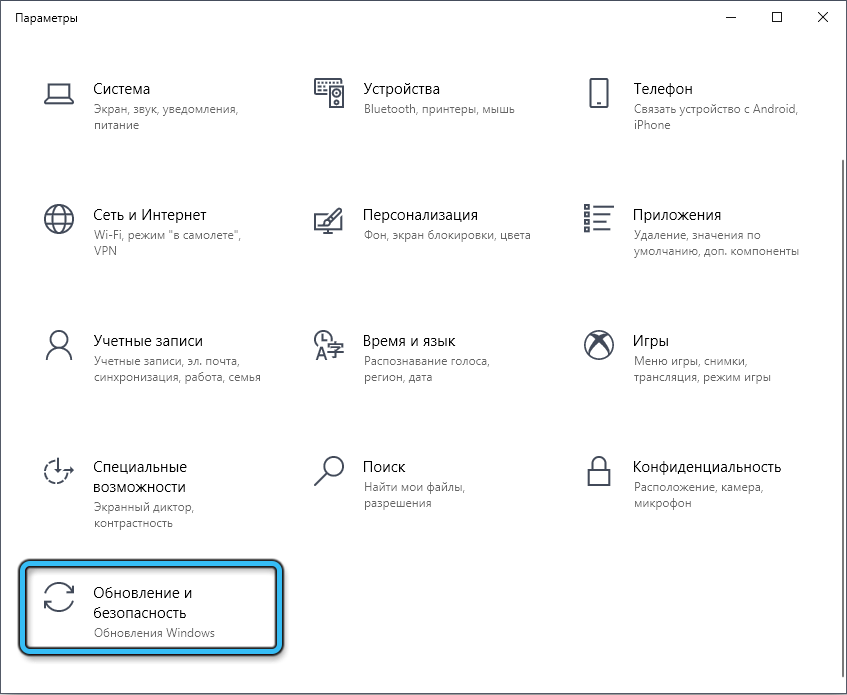
- click on the “Start” button;
- click on the gear icon;
- select the “Update and Security” tab;
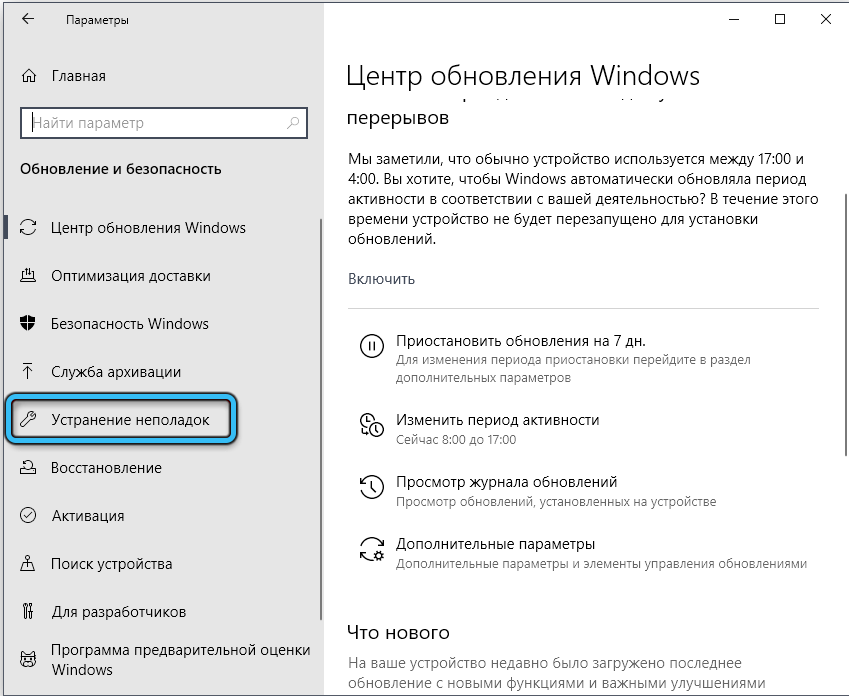
- click on the line “Troubleshooting”;
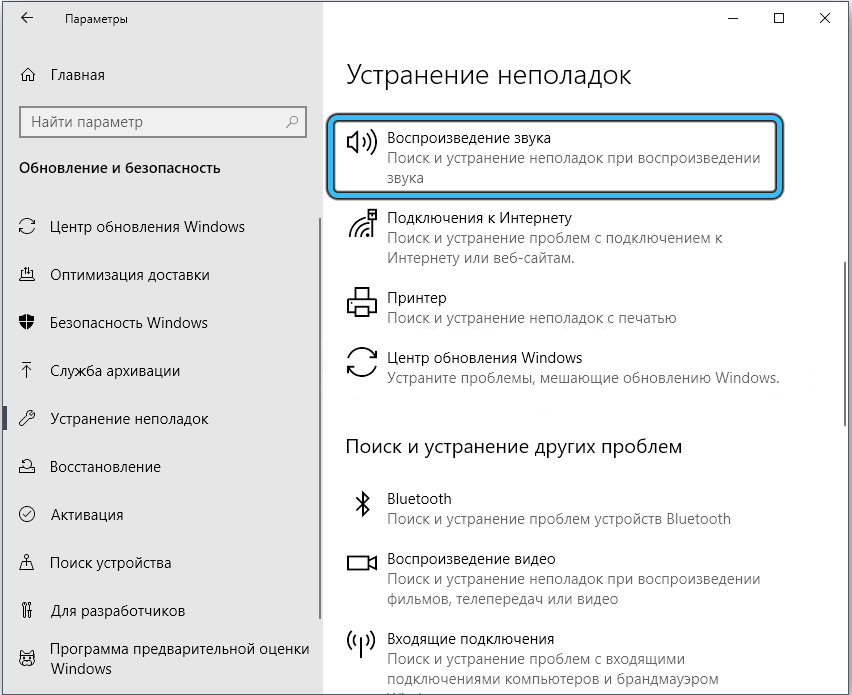
- we are interested in the item “Play sound”, by clicking on which you need to select “Run the troubleshooter”, and then use further prompts, clarifications and instructions.
After a reboot, problems starting the Sound Quality Utility may go away.
Alternative sound setting
If the built-in recovery tools did not help, as did the reinstallation of the drivers, and there is no way to download them from the official website (for example, due to the lack of the Internet or a working link), if the Realtek HD Manager utility icon disappeared and you are not able to find it, but configure I really want the best sound quality, there is an alternative solution.
You can use the built-in utility using a simple sequence of actions:
- click on the “Start” button;
- click on the gear icon;
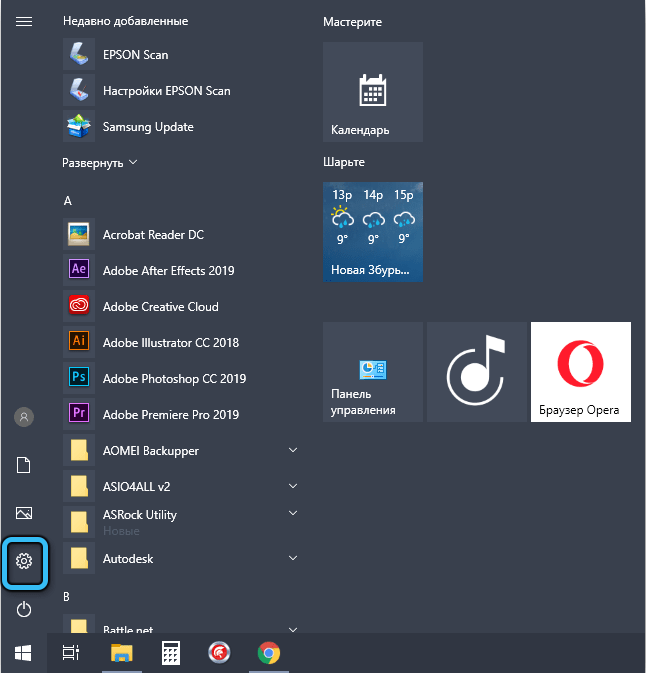
- select the “System” tab;
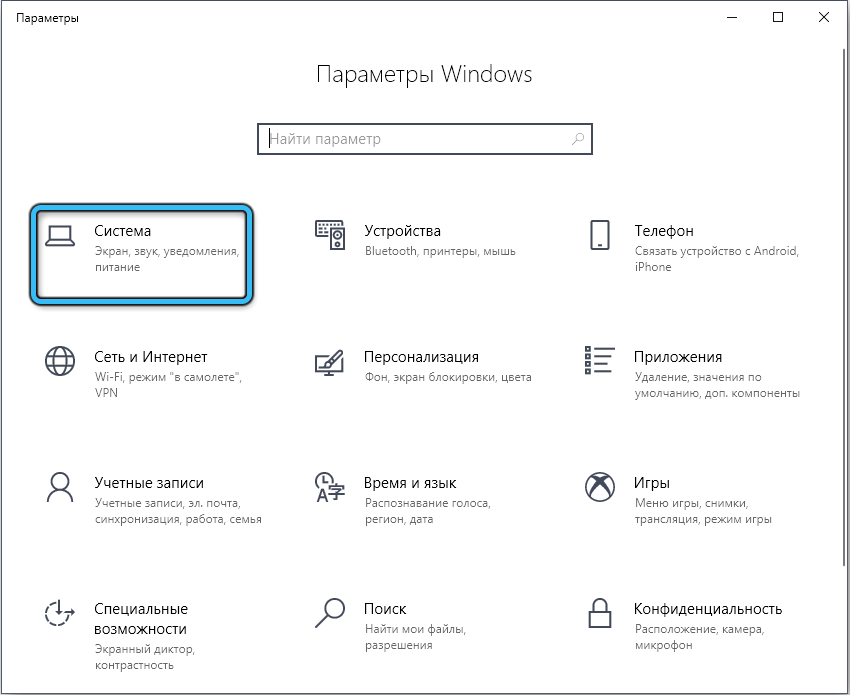
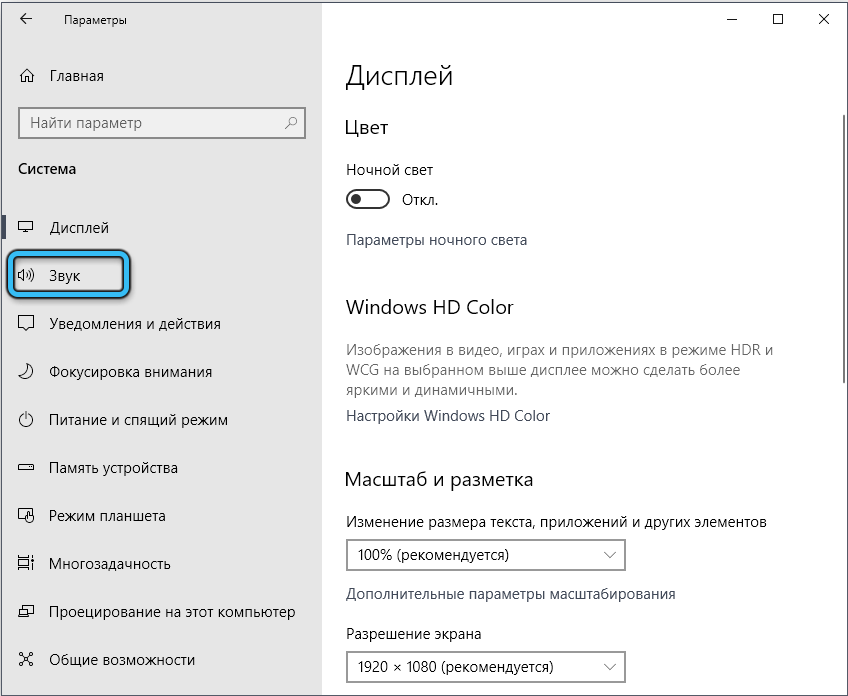
- in the left panel, click on the “Sound” line;
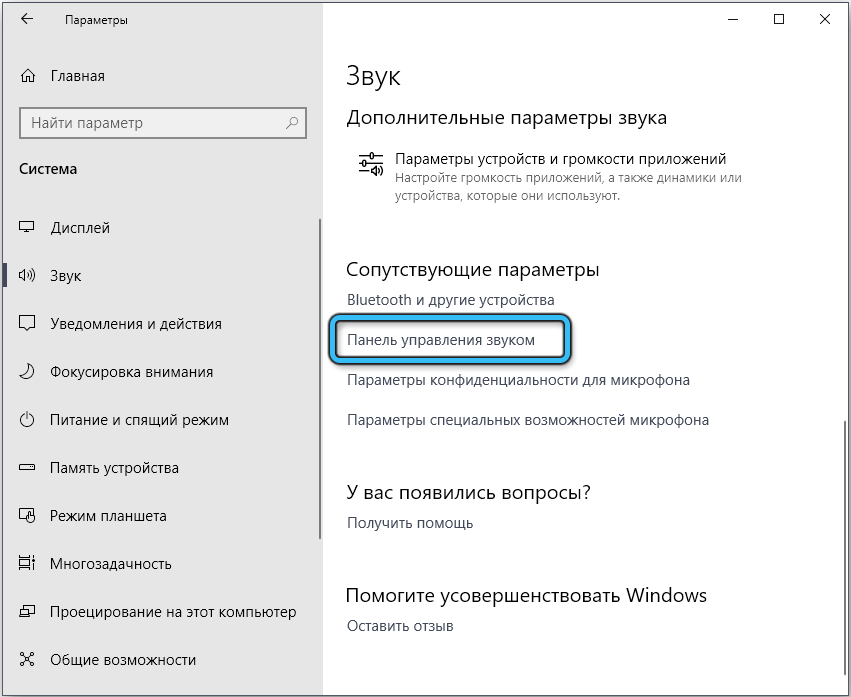
- in the block “Related parameters” select the item “Sound control panel”;
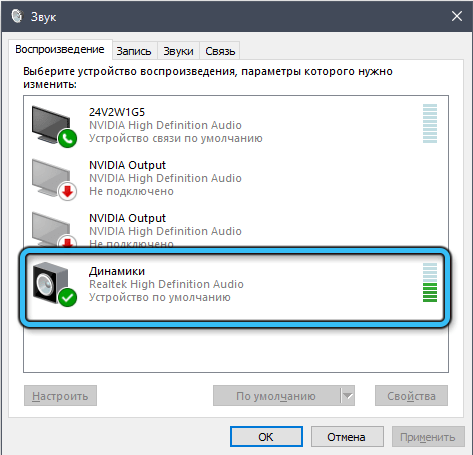
- in the next window, double-click on the item “Dynamics”;
- in the Properties window, select the “Improvements” menu item;
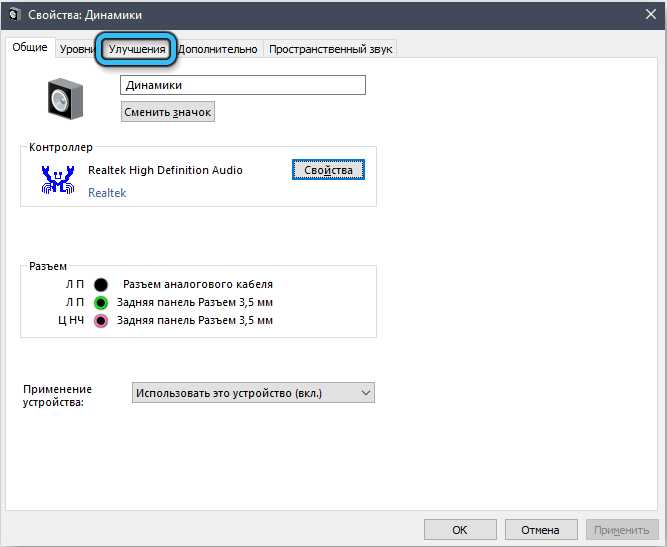
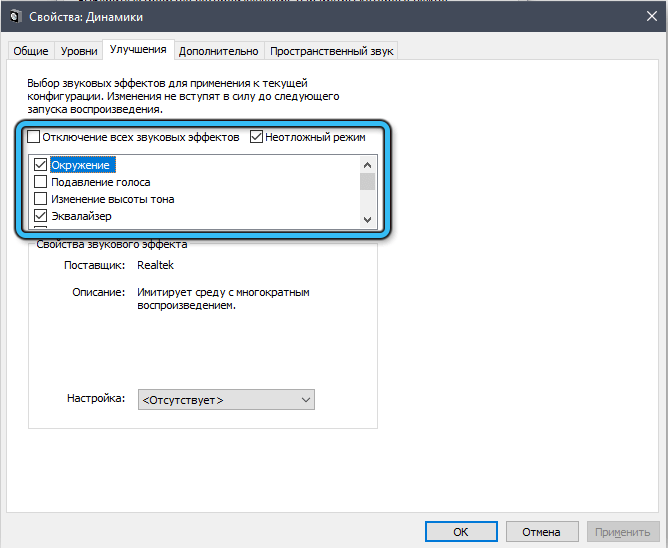
- a window will appear with a list of available sound effects and check-boxes on the right. We put down the checkboxes wherever you see fit;
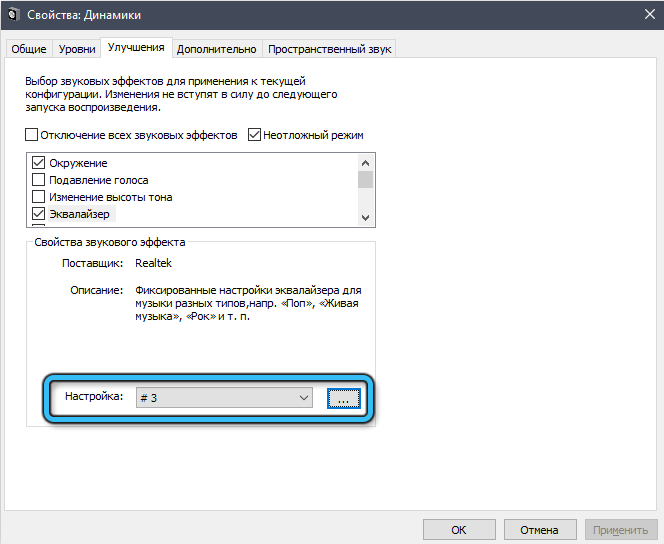
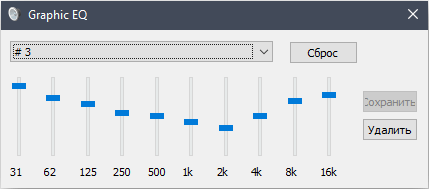
- if you activate the equalizer, an additional list of its presets will appear, although you can customize your own profile by manually changing the position of the sliders;
 HD Manager
 - save the settings (click “Apply”, OK).
Perhaps you will be satisfied with the sound quality adjusted in this way, and then you will not feel a special need to use the proprietary utility.
Nevertheless, Realtek is worth exploring its capabilities, and the above instructions will help you solve problems with its launch or operation.