It usually happens to most Android device users that when purchasing a smartphone and starting with the initial configuration of the equipment, we usually use the option for Google to automatically add all our email contacts to the phone’s contact list.
Of course, this is really useful, because from this agenda we can not only choose to call or send a text message by phone to one of our friends or family, but it also allows us to generate emails or start a video call with whoever we want, simply and quickly.

However, this automatic synchronization can cause us some problems, since as it adds all the contacts that exist in our Gmail account, surely our contact list of the Android devicelist will bulge in such a way that it is no longer convenient, since most of users usually communicate only with 10 or 20 percent of the people we have stored on the phone.
Fortunately, this is a very simple problem to solve, through the creation of a special group of people to synchronize between Android and Google Contacts, and thus in this way to have greater control over who appears in the contacts of our smartphone.
Of course, before carrying out the steps to achieve this, which we expose below, it is important to bear in mind that this method deletes many contacts when synchronizing with the phone, which can affect the autocomplete function in the application. Gmail, so maybe we’ll have to make some adjustments later to make it really suit our needs.
Steps to follow on the computer
Step 1: In principle, from our PC we enter our Gmail account, and once there we click on the “Gmail” drop-down and select the “Contacts” option .

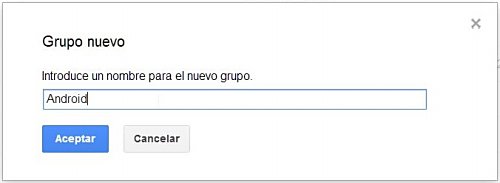
Step 2: Next, we click on the “Add group” link , which will trigger a window in which we will have to write the name we want to give to the new group of contacts. In this case, if we wish “Android”. Obviously we can also use any other term that we think is convenient to classify the contacts.
Step 3: Click on the link “My contacts”, in order to choose who will be included in the new group. We can select as many people as we want, by pressing the check box next to the person’s name. Of course, it is advisable to add the contacts in groups of 10, in order to avoid making the mistake of deleting them.

Step 4: Once the contacts are selected, we click on the “Groups” button , and select “Android” (or whatever name we have chosen) to add them to that group.
Steps to follow on the Android smartphone
Before starting, we clarify that this process may vary, depending on the customized version that the phone in question has. Basically, the steps are as follows:
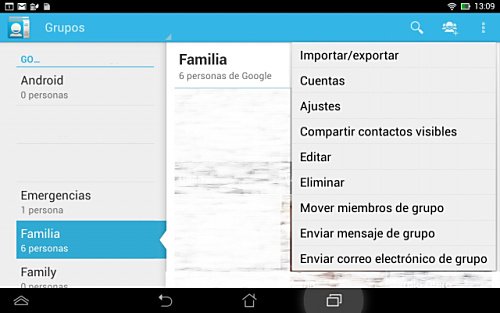
Step 1: We open the “Contacts” application on Android and once it is executed, click on the drop-down “All contacts” and then select the “Groups” option .
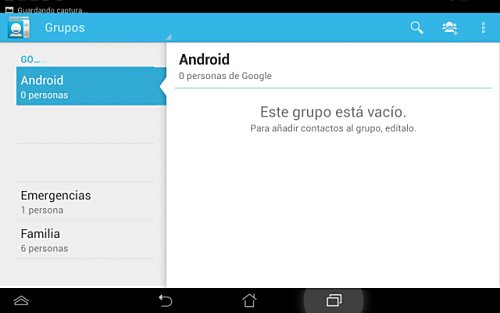
Step 2: Once there, we select the group “Android” or the name that we have chosen in the configuration made from the PC in our Gmail account.
Step 3: Click OK.
Step 4: We click on “Menu” again, then we go to “Settings”, and then on “Synchronization and data”, where we choose to synchronize the group in question, making sure that only that group is selected.
Step 5: Click OK.
In this way we have notably reduced our list of contacts in the contact list of our Android device, leaving only those we really need to have available.
Finally, it should be noted that it is important to make sure that every time an email contact is added in Gmail, that we want to have synchronized with the Android smartphone, always include it in the created group, so that it can be synchronized with the phone .