Comfort when working at a computer largely depends on how quickly the system turns on and off. Many users during operation are faced with the problem of too long shutdowns, which can cause a lot of inconvenience. However, today there are many ways to fix this problem, the choice of which depends on the initial causes of the failure.

Contents
Reasons for a long shutdown of the computer
Computers and laptops running the popular Windows 10 operating system may at some point start to shut down for a long time.
Most often, long shutdowns are associated with the following reasons:
- too many simultaneously running programs that load the processor and save an impressive amount of data in memory;
- low technical characteristics of the components and the entire computer as a whole (too old processor, lack of RAM, etc.);
- too slow or too worn out hard drive (solid state drive);
- the complete absence of a paging file in the system or a failure in its operation;
- incorrect power settings that cause an artificial slowdown of a number of processes;
- too much extra data in the registry or on the system disk (all sorts of “garbage”, old files, temporary archives);
- incorrect operation of the system drive C:, which has not been defragmented for a long time and is almost completely filled;
- an abundance of large-capacity external drives inserted into the ports (hard drives, SSDs, flash drives, as well as various kinds of card readers);
- penetration into the computer system of malicious software;
- a large number of network drives to which access is provided in one local network;
- the use of a large RAID array of hard drives or solid state drives;
- use of one system disk with a volume of several terabytes without creating partitions;
- the computer is a workstation with a network version of the operating system instead of the standard local assembly;
- PC – a connecting node for a large number of cameras, locking mechanisms and the like (most often, security systems).
A quick shutdown of a computer with a network version of the operating system or a large number of connected active devices is not possible for the reason that the machine needs to save all data very carefully and carefully in order to avoid disruption of the node.
Problem Solving Methods
Factors affecting the speed of shutting down a computer can be very different. In most cases, the problem is related to software errors, but sometimes the problem is due to improper operation of the hardware.
For each specific case, a different approach is applied to restore normal system performance. However, if it is not possible to pinpoint the exact cause, it makes sense to try each technique sequentially (provided that it does not affect performance too much).
Downloading programs
The main and most common reason for a long shutdown of the computer is the simultaneous operation of a large number of different programs. The operating system automatically closes all applications when it is turned off. And the more of them, the longer the procedure takes.
To reduce the window closing time, you can unload programs yourself:
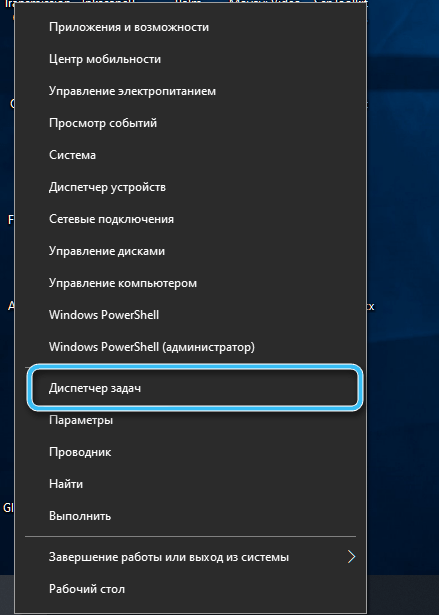
- Use the right-click context menu or the Ctrl + Shift + Esc combination to open the Task Manager.
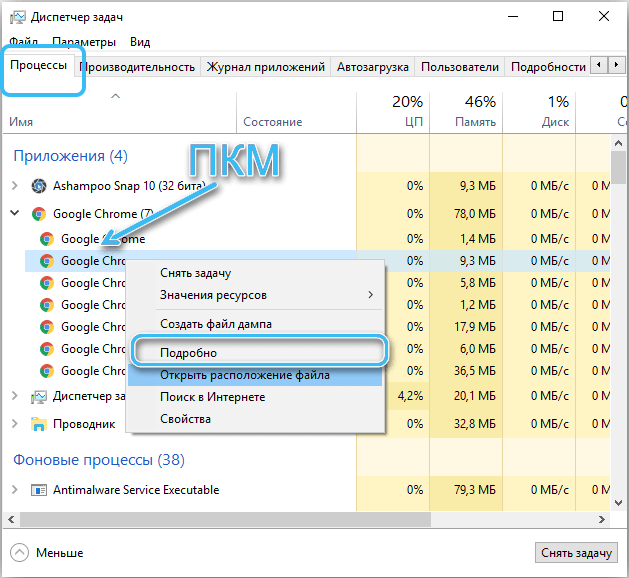
- Go to the “Processes” tab.
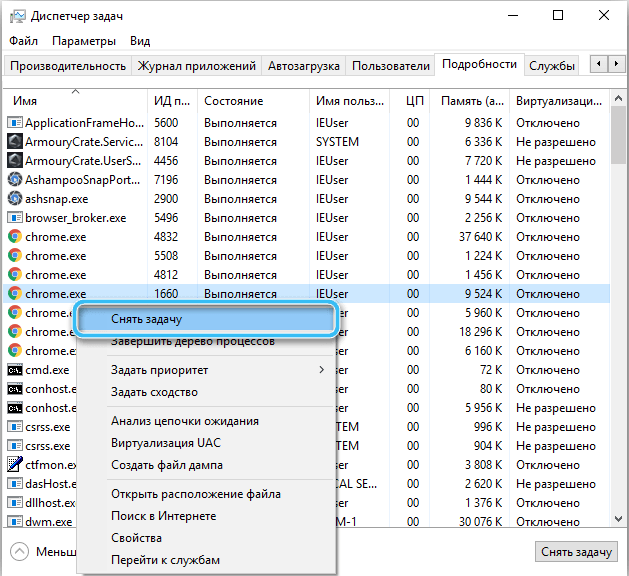
- Find the most demanding task, right-click on it and click on End Task.
- Repeat the operation for other heavy processes.
Thus, it is possible to easily complete all resource-intensive tasks in advance, automatically reducing the shutdown time.
Here it is worth considering that the load can be created not only by the user’s personal programs, but also by various malicious software. You can detect such processes using an antivirus.
Setting up the autorun system
If too many programs are configured to auto-start on the system, the user runs the risk of experiencing significant shutdown slowdowns.
To clear the autorun list, do the following:
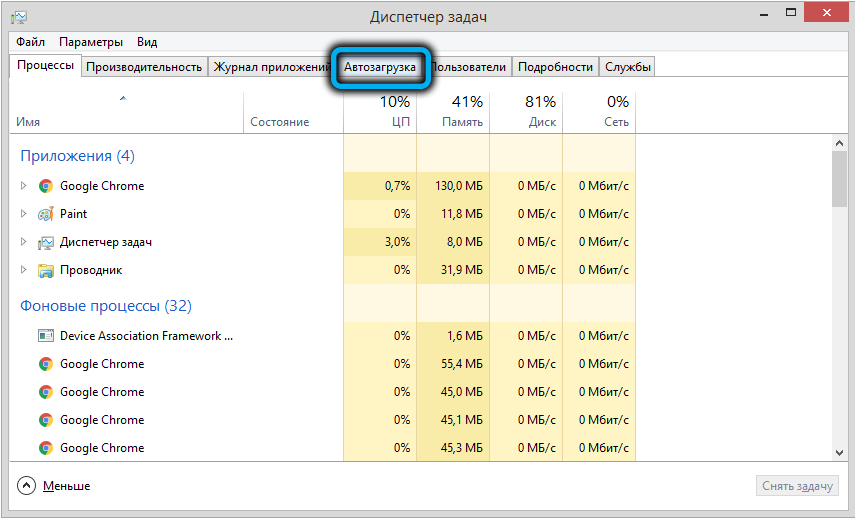
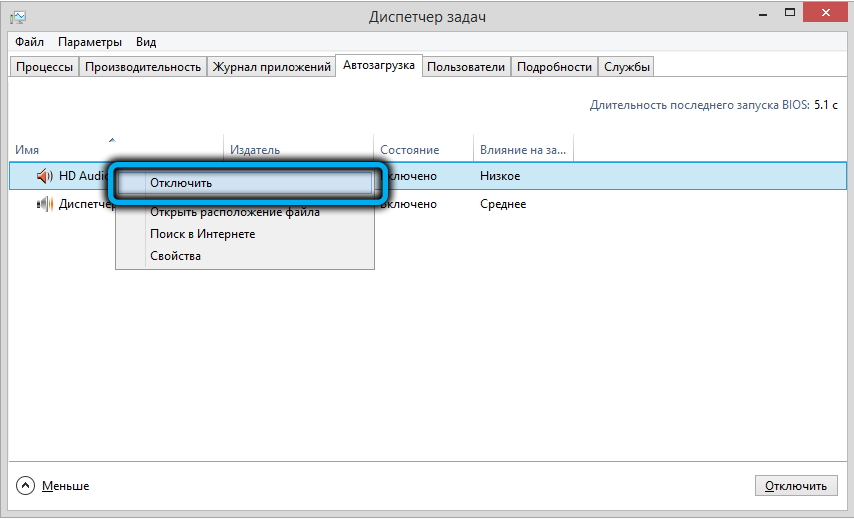
- In any convenient way, open the “Task Manager”, and then go to the “Startup” tab.
- Examine the list of automatically loaded programs and disable unnecessary items.
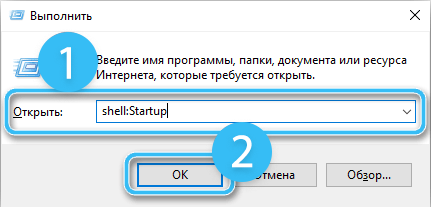
- On the keyboard, press the key combination Win + R.
- In the Run window that appears, enter the command shell: Startup and confirm the request with the OK button.
- In the folder that appears, delete unnecessary shortcuts.
- Confirm deletion of shortcuts.
Check if you managed to speed up the shutdown of the computer. If there is no result, it makes sense to move on to the next methods.
Checking System Integrity
While working on a computer, there is always a risk of damage to system files. Most often this is due to the penetration of malicious software or damage to certain sectors on the hard drive. In some cases, the user himself is to blame, who inadvertently deleted the necessary files from the system partition.
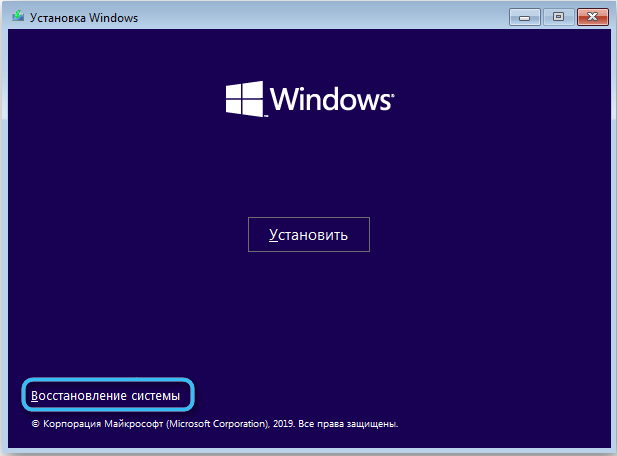
The Windows distribution media, which also provides a diagnostic tool, will help you check and restore the system. If you wish, you can completely restore or even reinstall Windows 10 in this way. However, in the latter case, you must take care in advance of saving all the necessary documents and files on external media.
The verification procedure includes several steps:
- Insert the installation media into your computer and choose the Windows 10 Media Creation Tool Remover instead of booting normally.
- Select the interface language and country, and then click on the “System Restore” button.
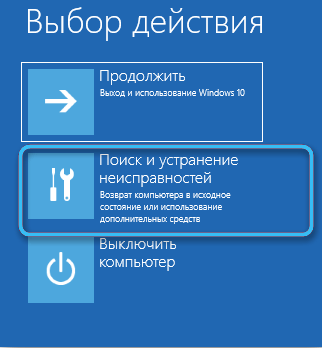
- Launch the Windows Troubleshooter tool.
- Wait for the end of the procedure.
Freeing up disk space
Many computer users do not care too much about the availability of free disk space, often filling partitions with various data almost completely. This can significantly affect the overall performance of the system, as well as lead to a long shutdown.
It is recommended to always leave about 30% of the memory free, regularly deleting unnecessary programs and cleaning with specialized software.
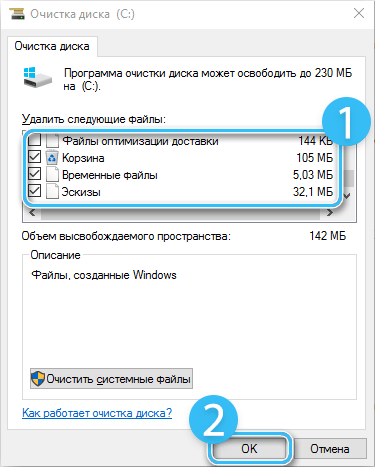
Windows 10 has a built-in Disk Cleanup tool, working with which boils down to the following algorithm:
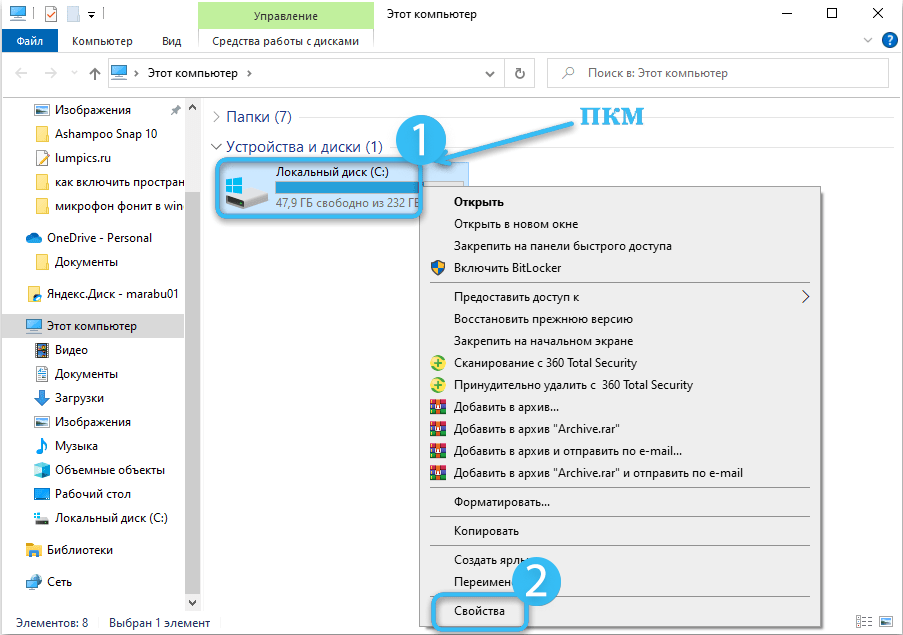
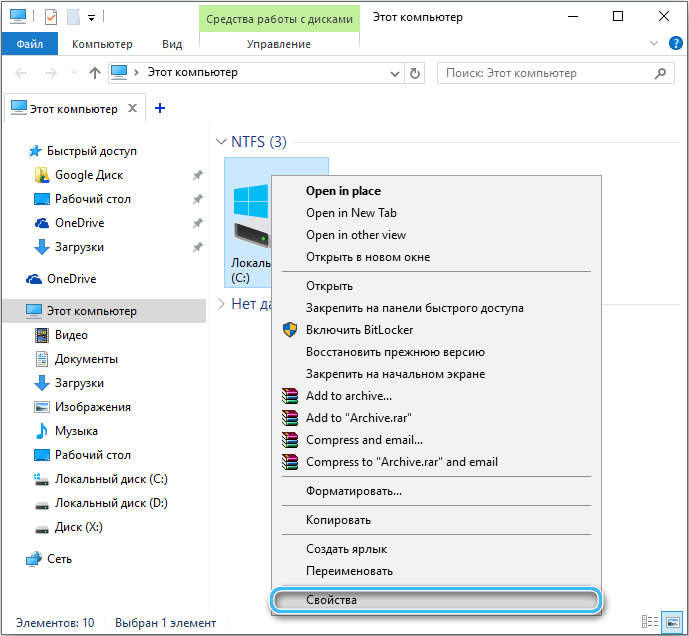
- Open “Computer”.
- Right-click on the main system drive.
- Select “Properties”.
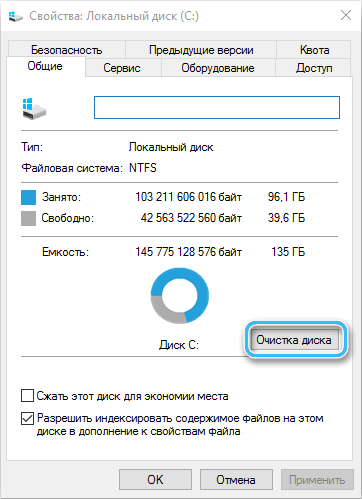
- Click on the “General” tab.
- Select the Disk Cleanup procedure.
The OS will start a full scan, the results of which will prompt the user to delete all garbage (cache, temporary files). Valuable information will not be affected, but the stability of the PC will be improved.
Identifying and Resolving Hardware Issues
In some cases, a slow PC shutdown is due to a hardware problem. In this case, you need to disconnect various peripherals from the computer (flash drives, keyboards, mice, disks, etc.), freeing up all ports if possible.
Next, you need to carefully inspect all the connectors, since various pollution or breakdowns can directly affect the correct operation of the system.
It is also worth separately testing all internal components, paying special attention to hard drives and RAM modules. If hardware problems are detected, it is necessary to replace the defective element and check the performance of the PC.
RAM optimization
The speed of any processes on a computer directly depends on the capabilities of the RAM used. And if the RAM does not provide the necessary performance, the computer may well turn off very slowly.
You can adjust the settings as follows:
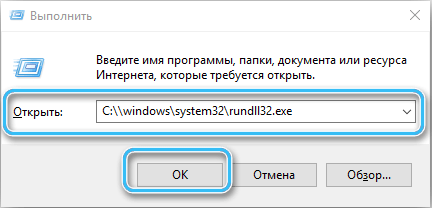
- Use the Win + R key combination to open the Run window.
- Enter the query “C:\windowssystem32rundll32.exe” in the line that appears, which will help clear the RAM cache.
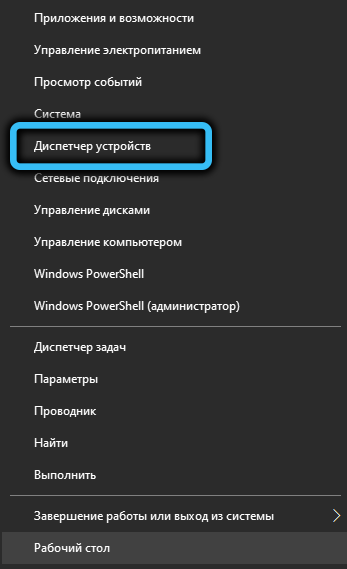
- Open Device Manager in any convenient way (via system settings, context menu, etc.).
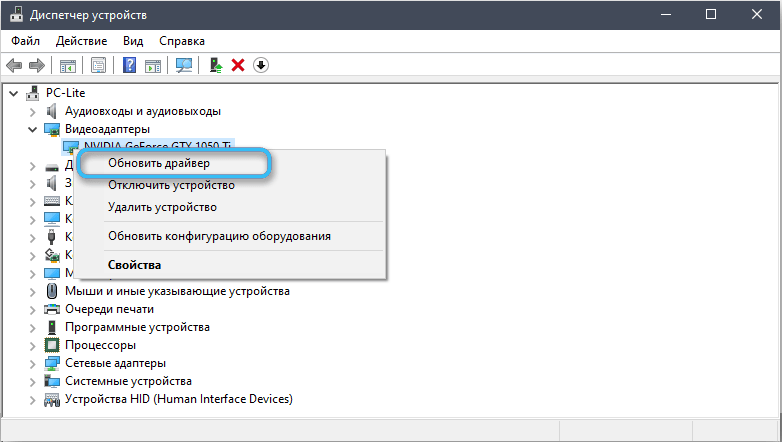
- Right-click on the RAM and select “Update Drivers”.
It also makes sense to open Windows Update and check if all updates for the operating system are installed correctly. If something is missing, you need to install it manually.
Working with virtual memory
Virtual memory is traditionally understood as a special paging file designed to store temporary files when the system interacts with RAM. This setting is especially important when there is not enough RAM on the computer.
The Windows 10 operating system is able to automatically unload data from RAM to the paging file, thereby ensuring stable work in programs.
You can optimize virtual memory as follows:
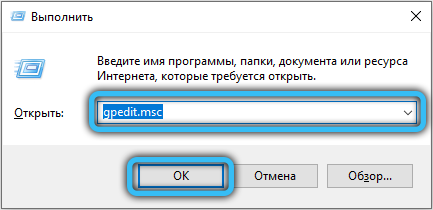
- In the search bar or the open Run window, type gpedit.msc to open the Group Policy Editor.
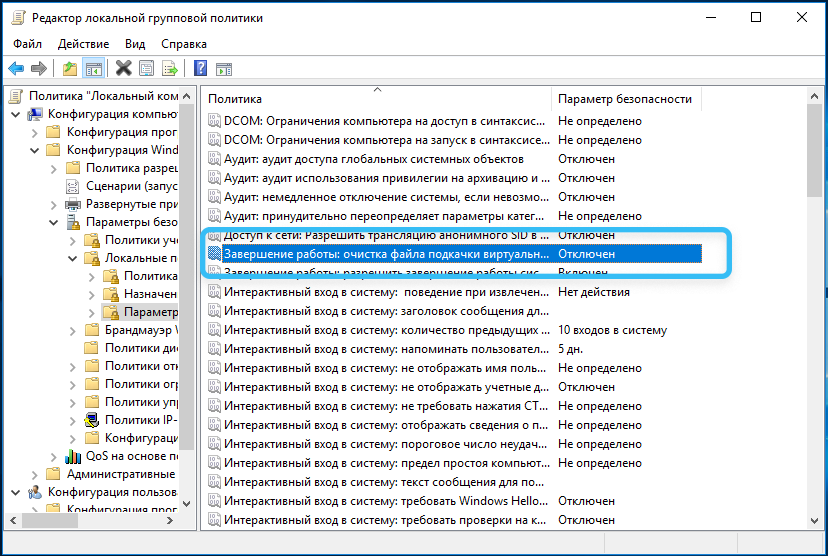
- Go along the path “Computer Configuration – Windows Configuration – Security – Local Policies”, and then enter the security settings.
- Open the “Shut down: clear the virtual memory paging file” section.
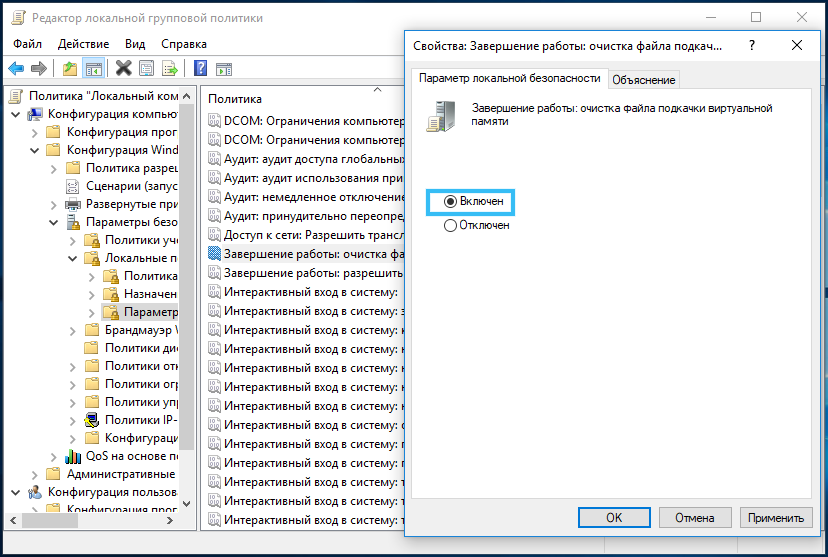
- Double-click on “Clear the paging file when the PC is turned off”. The switch that appears must be set to the “on” position.
Now virtual memory will be automatically cleared at shutdown, reducing the load on the entire system and speeding up shutdown.
Performance tuning on laptops
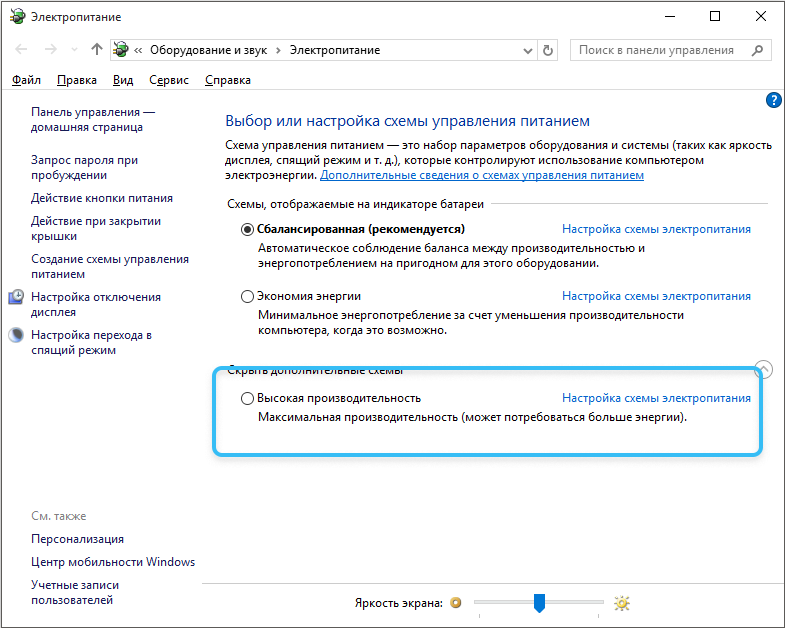
An effective method for solving the problem on laptops running on battery. In this case, you need to adjust the performance mode, taking into account what exactly you plan to use as a power source.
Sequencing:
- Move the mouse cursor over the battery charge symbol.
- Click on “Power Options”.
- Select “High performance” mode.
From this point on, the laptop will begin to use all its resources to complete the tasks. As a result, the computer shutdown will also accelerate.
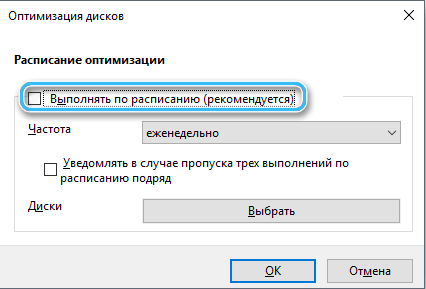
Fix disk defragmentation schedule
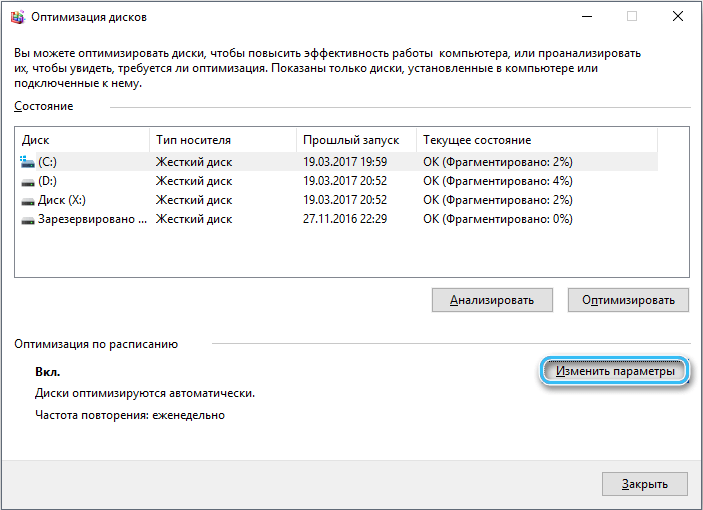
A long shutdown of the computer may be associated with the ongoing defragmentation of the system disk at a particular moment. The procedure for completing the work in this case can stretch even for several hours.
To adjust the defragmentation schedule, do the following:
- Go to “Computer” and find the desired drive.
- Right click on it and then go to Properties.
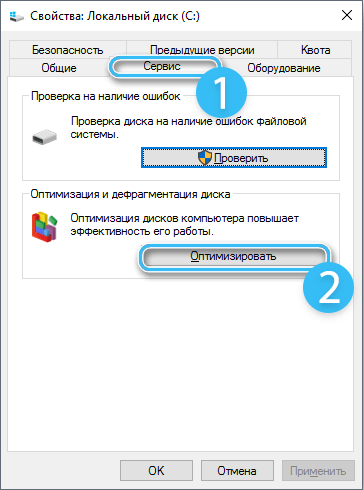
- Select the “Service” tab and click the “Optimize” button. This will open the Disk Defragmenter program.
- Click the “Change Settings” button.
- Disable scheduled disk defragmentation.
Now you need to apply all the settings and restart the system.
Registry setting
In some cases, the corresponding registry setting helps to reduce the shutdown time:
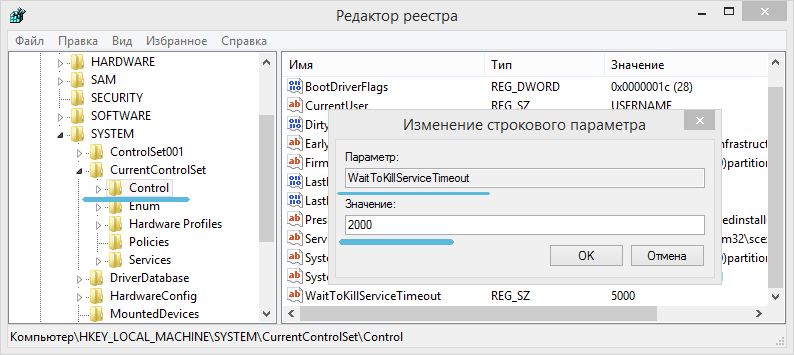
- Through the “Run” window, launch the “Registry Editor” program.
- Follow the path HKEY_LOCAL_MACHINESYSTEMCurrentControlSetControl.
- Make changes to the WaitToKillServiceTimeout key parameter and save the changes.
- Set the maximum time to close services.
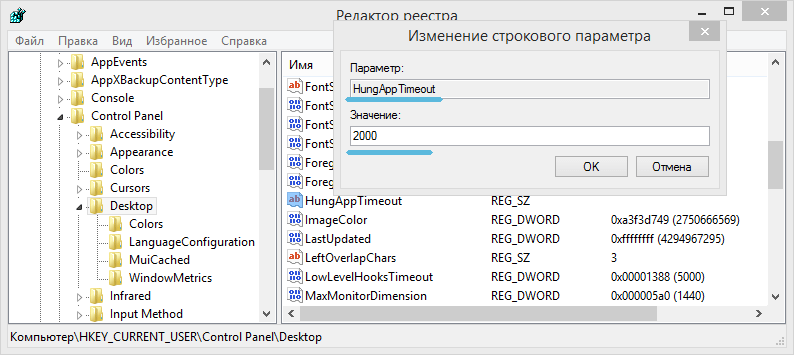
- Set the HungAppTimeout key to the same value. Sometimes you may want to create this setting.
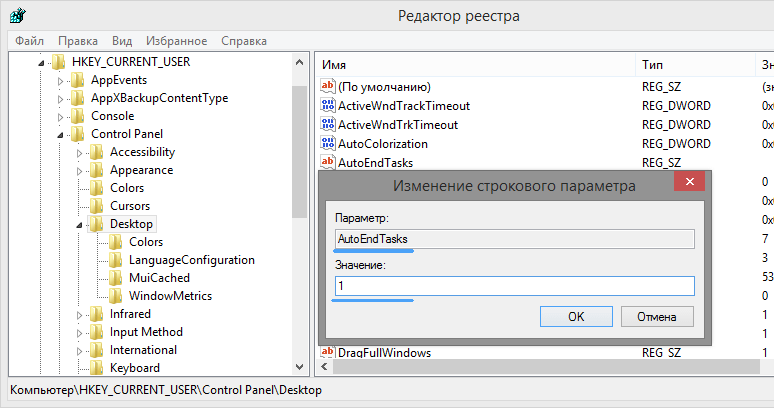
- Change the AutoEndTasks parameter to 1, thereby specifying an interval for closing programs of 1 second.
Close all windows and reboot. If everything is done correctly, the shutdown procedure will take a little less time.
As practice shows, users in most cases can cope with the problem of a long shutdown of the computer on their own. If none of the described methods helps, the problem is most likely due to a lack of power of the system components. And the solution in this case will be to upgrade the computer using more powerful components.
