Previously, operating system distributions were distributed on disks. But now the OS can be written to a USB drive. In the case of Linux Mint, installing from a flash drive is very similar to booting from a CD or DVD. Mount the image, run the installer and select the settings.
Linux Mint can be installed from a flash drive.
Contents
Image download
You can download Linux Mint from the official website of the system.
- Go to linuxmint.com.
- Download section.
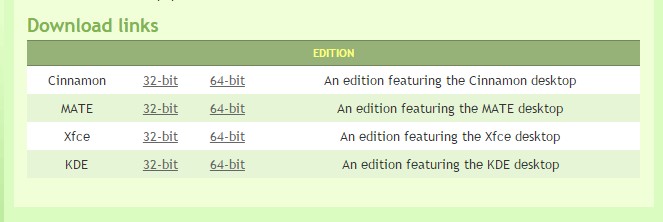
- There are several assemblies with different environments and bitness. Click on the appropriate one.
- In the next window, select the server from which you will download the image to create a bootable USB flash drive with Linux Mint. If you want a Russified version, find the Russia region. The download will start.
Image recording
To write the image to media, you need to use additional programs. If you’re on Windows, UltraISO, Rufus, or UNetbootin will do the trick. If you have Linux, use the UNetbootin application or terminal commands.
Windows
Creating a Linux Mint bootable flash drive looks like this:
- For example, take the program UltraISO. Find it online and download it.
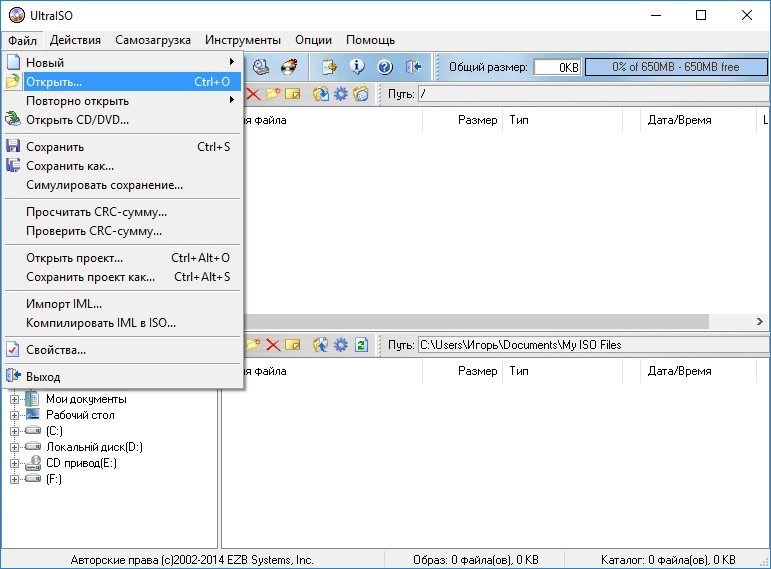
- In the utility window, click on “File” and select “Open”.
- Specify the path to the Linux ISO image.
- Insert the drive into the USB port.
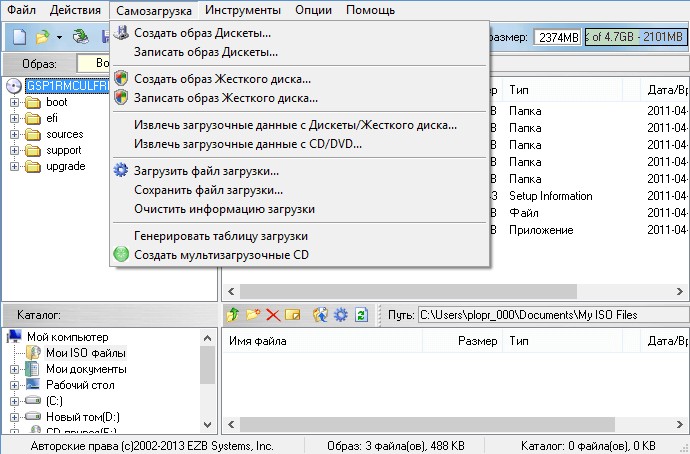
- Go to the “Boot” menu.
- Item “Burn hard disk image”.
- Select flash media.
- If it contains the files you need, copy them to another location. Before you can make a bootable Linux Mint flash drive, you need to format it. Right in UltraISO in the image recording window, click on “Format”. Select the FAT file system.
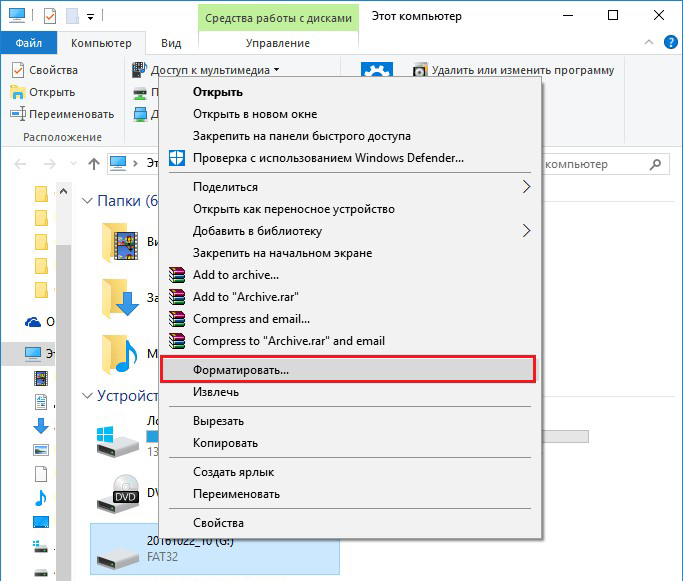
- Or use Win. Right-click on the flash drive icon in the “My Computer” folder. The right-click option will appear in the context menu.
- After formatting, you can create an installer. In UltraISO, click on Burn.
- Wait while the data is unpacked and copied.
- The bootable flash drive is ready.
In other applications, the algorithm is the same: select the ISO file, select the media, burn.
Linux terminal
You can mount the image using the Linux console commands:
- Open Terminal.
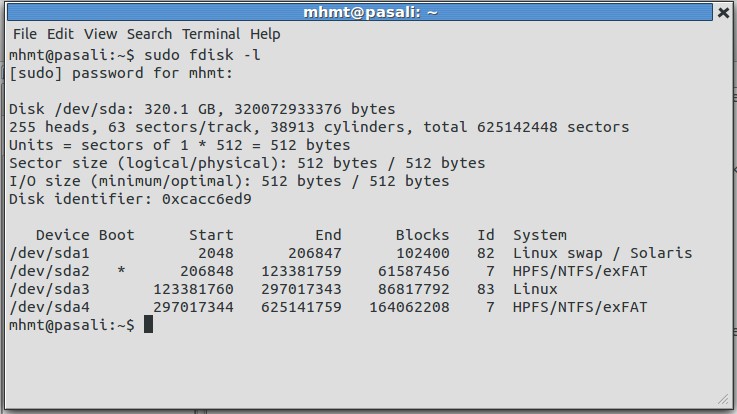
- To find out the label of the drive and the path to it, type “fdisk -l”.
- You can see the identifiers of all disks – “df”.
- Even new media needs to be formatted.
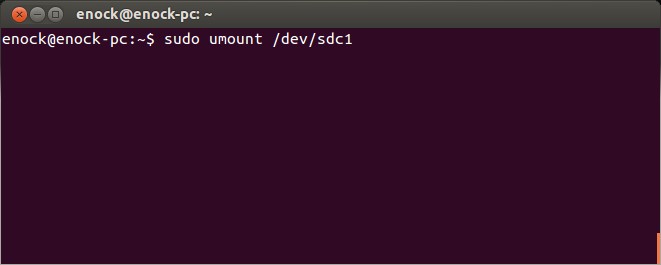
- Before making a Linux Mint bootable USB flash drive, unmount it with “sudo umount [Drive Path]”.
- Now erase all its contents “sudo mkfs.vfat -n ‘[Volume-Label]’ -I [Media-Path]”. The “vfat” option means that you have selected the FAT file system. The volume label is optional.
- Now downloading the distribution to an external device is “dd if=/[Image-path]/[File-name].iso of=[Drive-path]”. It will run in the background. To find out what percentage is written, use an additional command: open another Terminal and write “watch -n 10 killall -USR1 dd”.
Download Priority
Now about what you need to install Linux Mint. Installing another program from a flash drive is a simple task. Run the executable and select settings. But if this is not a regular utility, but an OS, you need to change the boot priority. So that the computer reads the contents of the media when it is turned on. This will take you to the installer menu, not to the operating system.
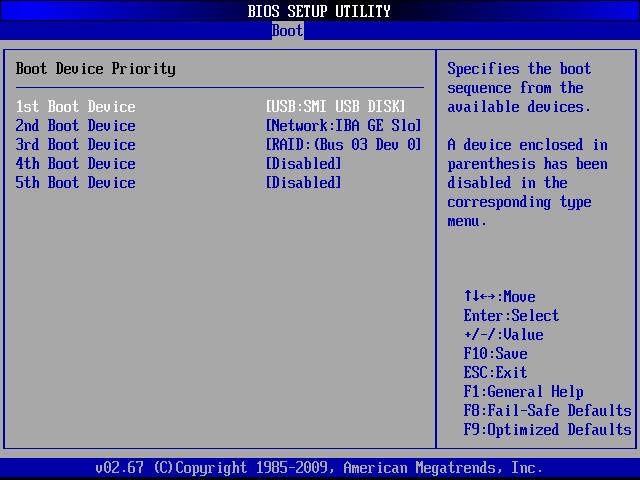
- Go to BIOS. To do this, immediately after starting the PC, press F1, F5, Esc or Del. The button is listed on the info line “Press [key] to Enter setup”.
- You need a section where you can change the startup order. In the first place should be a bootable USB flash drive Linux Mint. You can set the priority in “Boot – Device Priority”, “Boot Sequence” or “Advanced BIOS Features” – it depends on the BIOS interface. In the menu “First Boot Device”, or “1st Boot Device”, select.
- Save your changes. On the side or below there will be instructions on which keys to press for this.
- The next time you turn on your PC, the installation will start from the flash drive.
- When you’re done, go back to the BIOS and reset the HDD priority.
Installation and selection of parameters
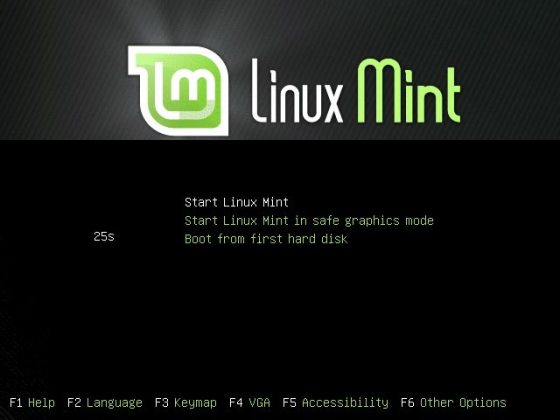
After starting, you will see a black and green Linux design and the inscription Welcome (it means “Welcome”). To use the distribution:
- In the list, navigate to the line “Start Linux Mint” and press Enter. If there is access to the network, the OS will start loading. Wait until all data is transferred. Don’t drop the connection.
- The desktop will appear. Look at the interface and some of the features before installing Linux Mint from a flash drive. On the right there will be a column describing the OS and its capabilities.
- If you do something in the “portable” version, the changes will not be saved. A full installation is required.
- Double click the Install icon.
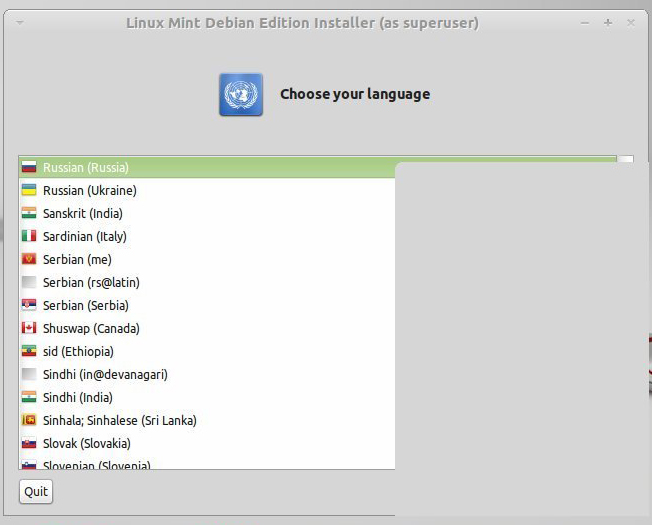
- Choose language.
- Check the “Third Party Software” option. These are various multimedia codecs, drivers. If you do not install now, then you will have to download them manually. There are no suspicious utilities or malware.
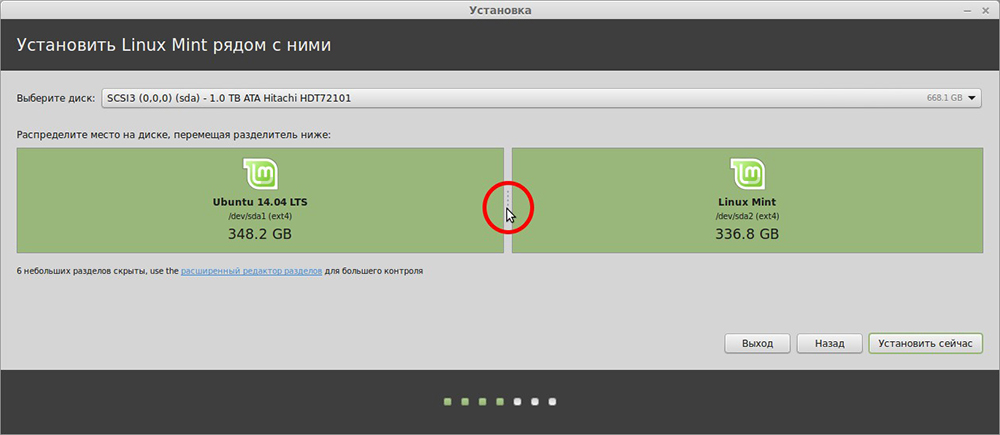
- If there is a distribution kit installed on the computer, the wizard will offer to remove it or put Linux Mint next to it. A bootable flash drive will destroy all user data (documents, music, images) if the “Erase disk” option is checked. With a parallel installation, you can choose which operating system to use. And your files will be saved.
- The item “Other option” is intended for advanced users. You can create and edit partitions. Problems can occur due to incorrect settings. If you are not familiar with this, you need a standard installation.
- In the next menu, select the logical drive where you want to boot Linux. Use the slider to redistribute disk space. Specify how much memory you “give” to the new OS. Mint himself is enough 2-4 gigabytes. But if you are going to store a lot of files and work with multimedia content, allocate more resources to the OS.
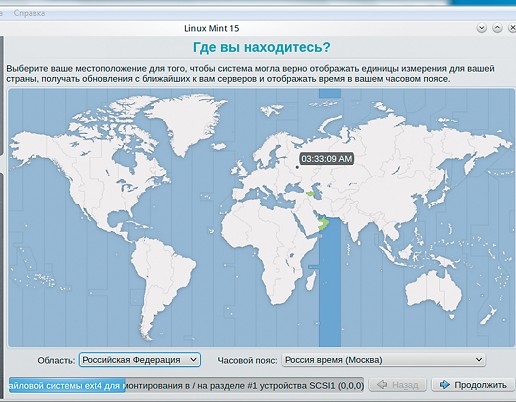
- The “Where are you?” menu appears. Click on the map or write the name of the city. The system will detect your time zone.
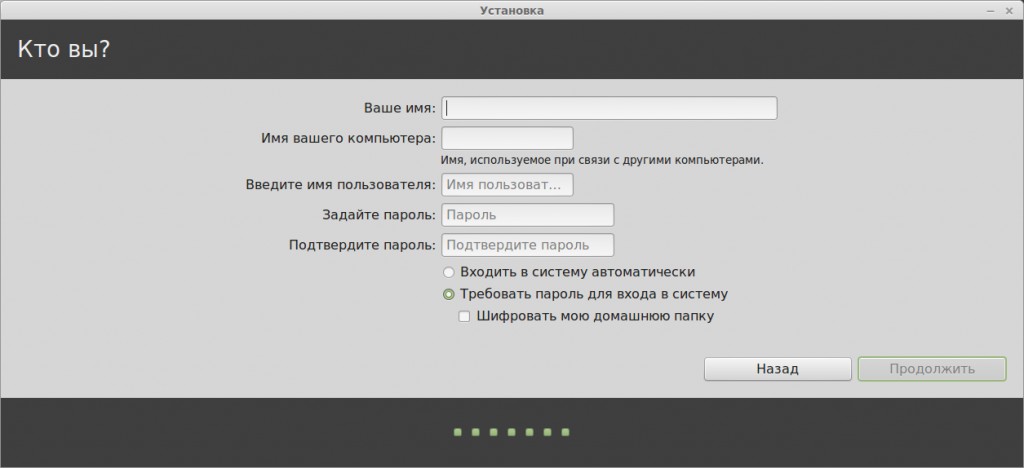
- Fill in the Username, Computer Name, and Password fields. Leaving them empty will not work, since you cannot install Linux Mint from a USB flash drive without an administrator account.
- Check one of the options: “Log in automatically” or “Require password”. If you do not want to enter the code every time you start, select the first option. But better leave protection. So only those to whom you tell the password will have administrator rights.
- The installation will begin. If there are multiple systems on the PC, a list will appear. Click on one of them to enter it after the download is complete. If you don’t select an OS, Linux Mint will open.
- Don’t forget to change the startup priority in the BIOS.
It’s very easy to figure out how to install Linux Mint from a flash drive. The installer has a clear interface. An explanation is given for each option. The main difficulties are recording the image and setting the BIOS. But they can also be dealt with.
