According to many users, the OS provided by Apple is the most stable in the world. In terms of performance and protection against viruses, it leaves both Windows and Ubuntu far behind. Statistics confirm this information, moreover, today you can update to the current version of OS X directly from the official Mac store. Nevertheless, sometimes you have to perform a “clean” installation, and for this you need to navigate the question of how to install MacOS from a bootable USB flash drive. Let’s figure this out together!
The procedure for installing an operating system from Apple for their laptops and PCs can be roughly divided into several stages. This is loading the distribution kit, preparing a flash drive, writing files to removable media, and the installation itself.
Having the right flash drive, you won’t be able to do anything without the appropriate files. Therefore, the first priority is to download the distribution.
Contents
Downloading macOS files
While many people complain that everything comes at a price when using Apple products, this is not entirely fair. Take at least the same operating system.
To get a licensed version of Windows, you need to pay money. Yes, there are pirated versions, but they are not taken into account. There are too many problems with them.
But you don’t need to buy MacOS. You can download the distribution kit of this apple operating system directly through the AppStore. And it’s completely free.
In this case, the sequence of user actions will be as follows:
- open the AppStore application through the Dock on the desktop;

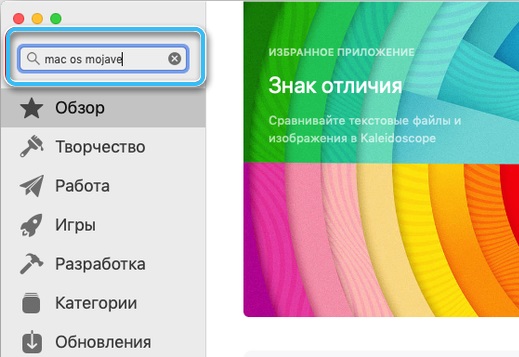
- hover over the search bar in the upper left corner;
- write the macos mojave request in this line, then press Return;
- in the search result that opens, select the option that usually comes first in the list (macOS Mojave);
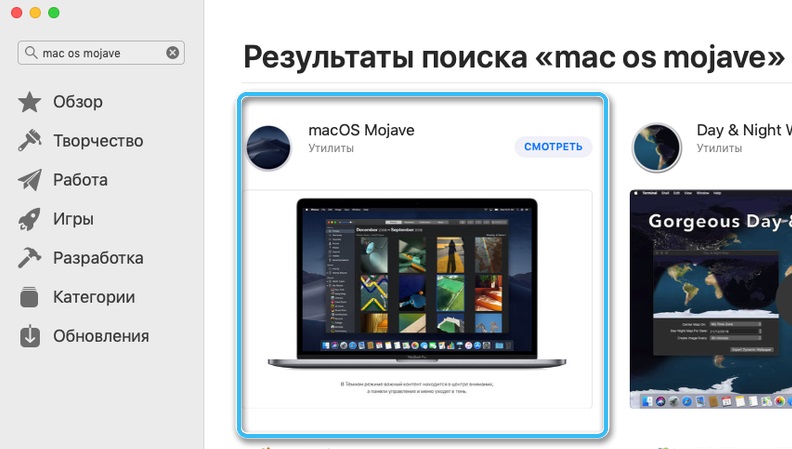
- if you need a different distribution kit, use the same instructions, just enter a different search query;
- After opening the distribution kit in the AppStore menu, click on the “Download” button in the upper right corner of the window.
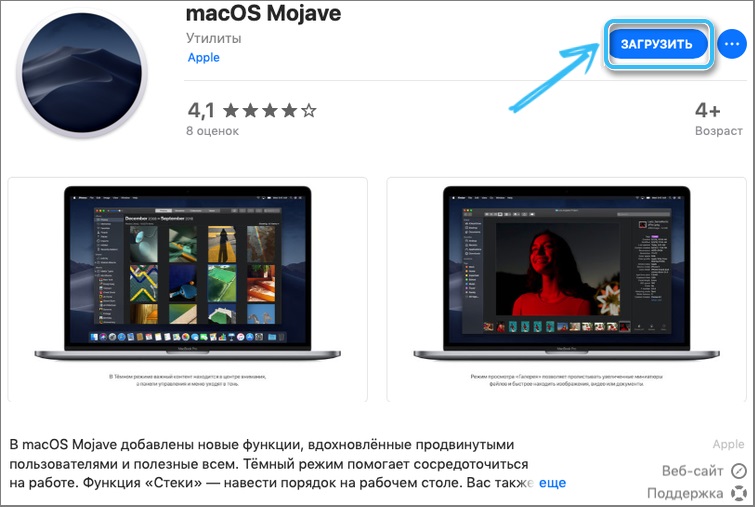
After that, the process of downloading files will begin. The distribution kit is always loaded in a special DMG format. The actual downloadable installer is one big file. Its size is about 6 gigabytes. This can take a long time to save. Also, the download speed depends on how fast the Internet is.
Be careful, because immediately after the download procedure of the distribution kit is finished, its automatic installation starts. Since this is not required in your case, close the window in time.
There are 3 ways to close the window at once:
- just press the cross-shaped key in the corner of the window;
- hold down the combination of the Command and Q buttons on the keyboard;
- open the application menu, and click on the “Complete installation” item.
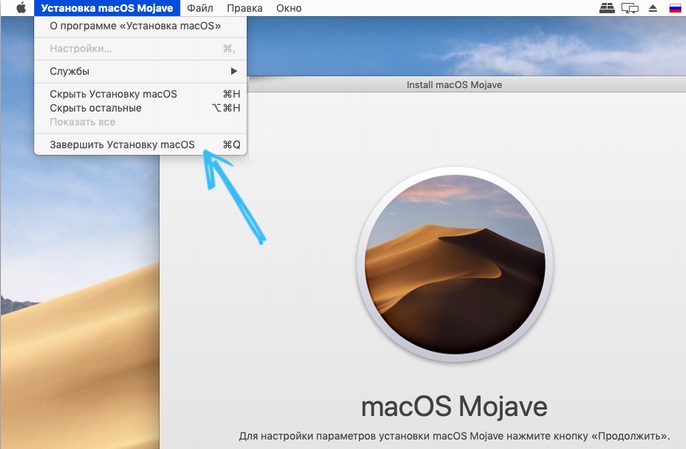
Which of these options to choose, then each user decides for himself. This does not have any fundamental significance.
Preparing a USB flash drive in Windows
The method is suitable for systems 8, 7, Vista and even XP. To perform all the manipulations correctly, you need the following elements:
- installed OS (one of the above will do);
- USB stick;
- installation image (* .DMG format);
- TransMac software (suitable for deploying systems up to 10.8.X).
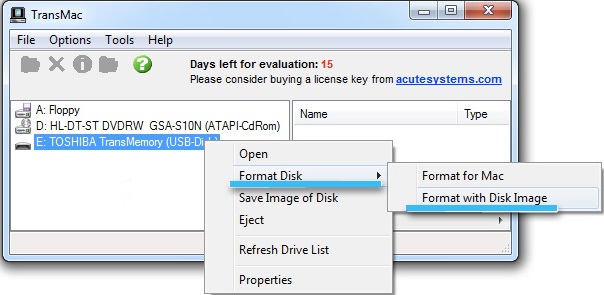
First of all, you need to install TransMac. You can use this utility for free or for a fee (the trial period is only two weeks).
After installation, run the application as admin, right-click on the flash drive that appears in the program window, and select “Format disk – Format from image”. Then you need to find the correct path to the file with the DMG extension, press the “OK” button, and wait until the system prepares a bootable USB flash drive with MacOS.
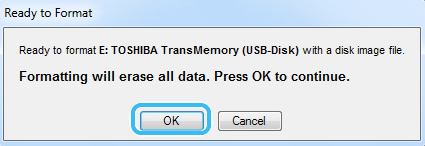
The preparation time for the drive depends on the speed of the interface of your flash drive, the size of the OS image, and the performance of the system on the PC. At the end of the process, a huge number of components will be presented on the drive, which together make up the image.
Using a flash drive
If you have a branded device from Apple, then it will be easy to boot from it. You only need to press the “Alt” (Option) button when starting the PC. The key is responsible for starting the boot manager, in which you should select the USB flash drive. If you plan to try the power of the Mac, but do not want to buy it, and want to install a fashionable system directly from under Windows, then we strongly recommend using one of the popular EFI boot loaders. Today the programs PC-EFI, Clover, Chameleon are in great demand.
Preparing a USB flash drive on a Mac
If you need to create a boot device directly from under the Mac, prepare the following elements:
- A “machine” with a pre-installed Mac;
- installer (the official assembly can be obtained from the Mac App Store, you just need to go to the “Updates” item);
- DiskMaker X application;
- a drive of 8 GB or more (a product with a USB 2.0 interface is suitable).
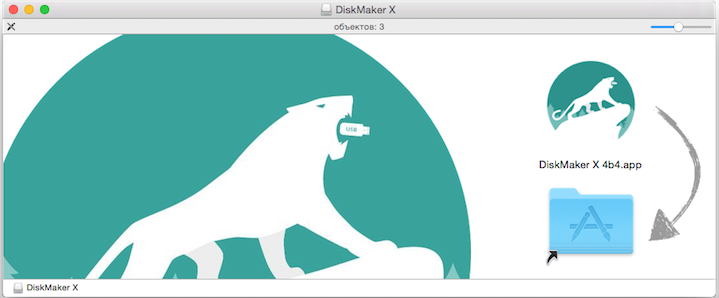
DiskMaker X was formerly called Lion DiskMaker. It can be downloaded for free from the manufacturer’s website or the App Store. The utility works perfectly with different versions of OS for Mac, has a convenient and intuitive interface, creating a drive takes just a few clicks.
Preparing the drive is very simple. First of all, connect the device to the PC and format, then run the utility to prepare the product.

In the program, you need to select the system that you want to install via USB in the future, just click on “Select an install file”. The installer is usually saved in the “Programs” folder, write down the path to it.
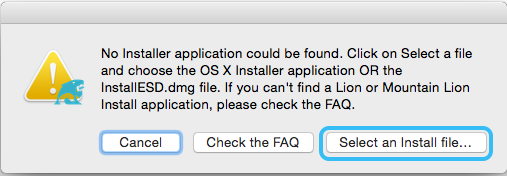
At the next stage, you need to confirm your desire to create a drive, select a USB flash drive and click on “Continue”.
The work is done, you just have to wait until the system will run the files and make the required type of device. At the end of the procedure, you will see a corresponding message.
Also, Mac users can prepare the device through the terminal. For this option, it is enough just to connect the device to the USB port, rename it to “Untitled”, and then download the installer with the system.
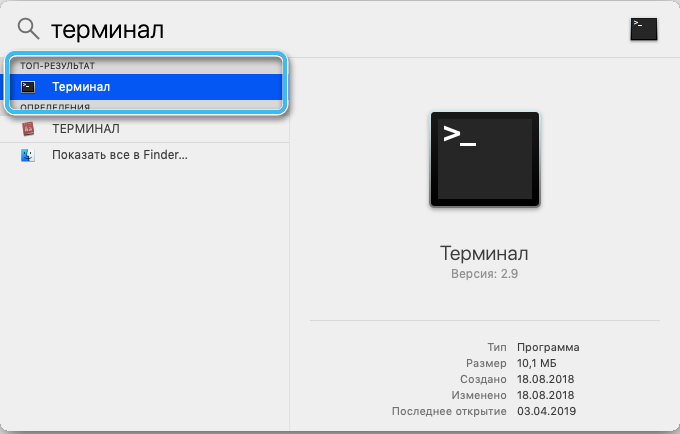
Next, open the command line (item “Utilities” in the “Programs” section) and enter the command to start the installation procedure. The process will last a few minutes, after which you will receive a ready-made solution!
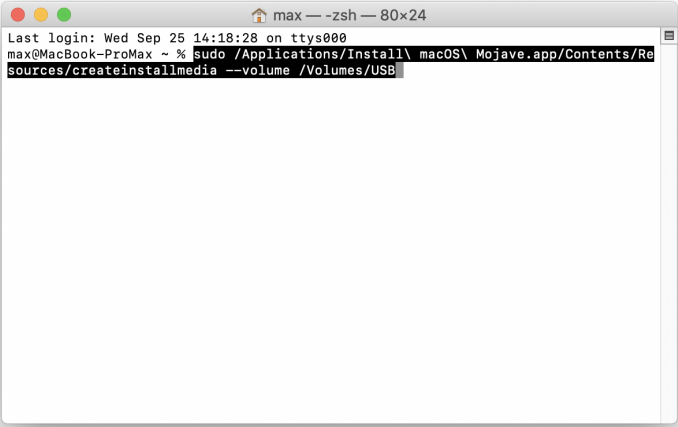
Command to create bootable media for installing macOS Mojave
Installation procedure
Now directly about how the installation of the apple operating system is performed when using a flash drive.
It is worth noting that the procedure for installing macOS using a USB flash drive is different from how you install any other operating system. This is due to the fact that in the case of Apple products, their computers do not have a BIOS system in its usual form. Therefore, additional settings and switching of the download source are not carried out here.
The process itself looks like this:
- connect the prepared bootable USB flash drive to the computer and make sure that it recognizes it, everything works stably;
- send the computer to reboot;
- while loading the operating system, hold down the Option button;
- in this case, the user must call the Bootloader menu by holding down the key;
- use the arrows on your MacBook or Apple PC keyboard to switch to the option named “Install macOS”;
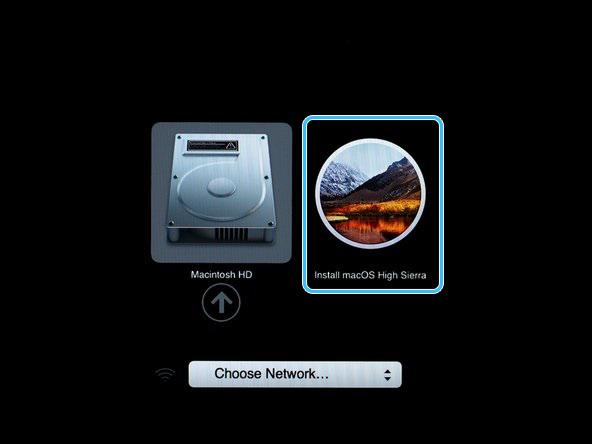
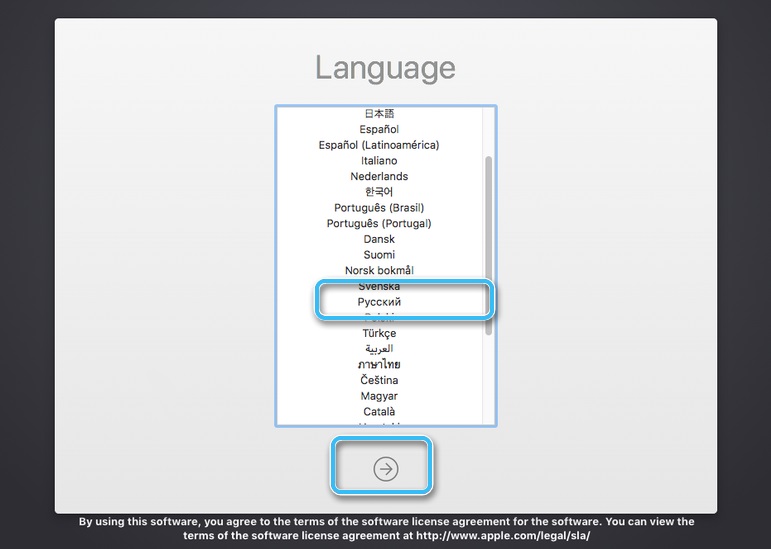
- then a menu for language selection will be displayed;
- choose the language of the operating system that suits you best;
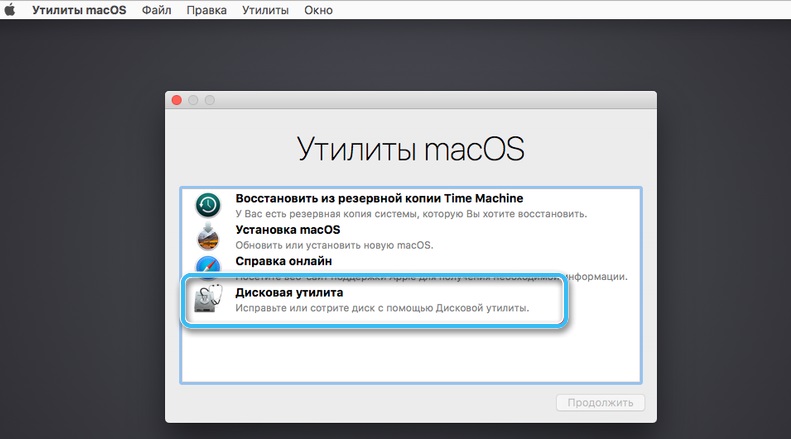
- in the next section, select “Disk Utility” from the options presented;
- now select the drive where the operating system will be installed in the future;
- follow the procedure to format the disk;
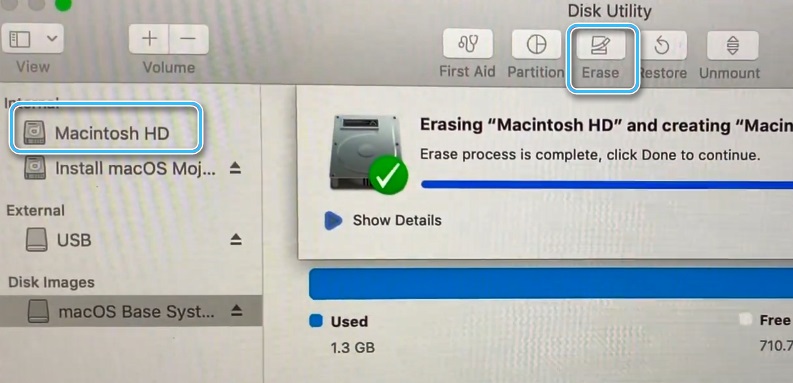
- it is not recommended to make any changes to the default settings;
- when formatting is over, you can close the disk utility;
- now click on the “Install macOS” item, that is, start the OS installation;
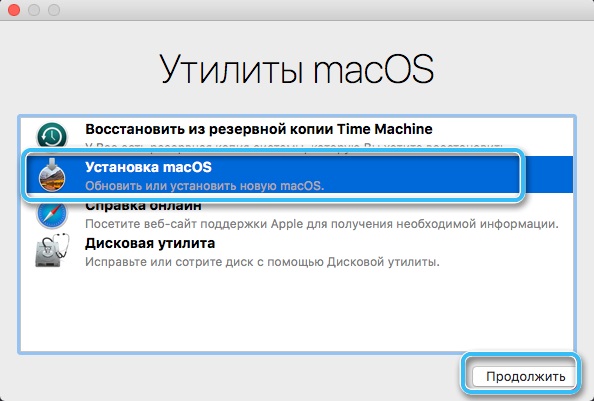
- select the disk that was formatted in the previous step and prepared for the installation of the apple operating system;
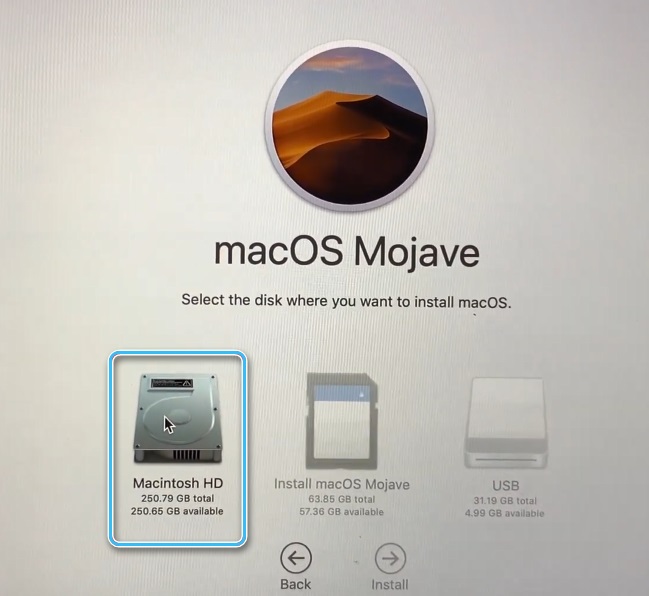
- register your data from the previously created Apple ID account (it is better to save it and write it somewhere before reinstalling the OS);
- agree to the proposed license agreement;
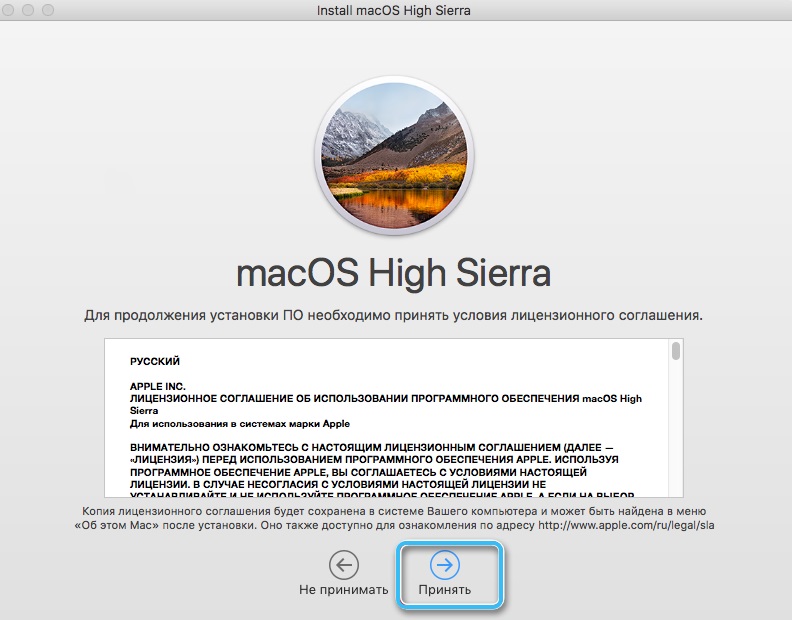
- select the language you want to use in the system again;
- depending on the version of the operating system, you may additionally need to select the time zone and keyboard layout;
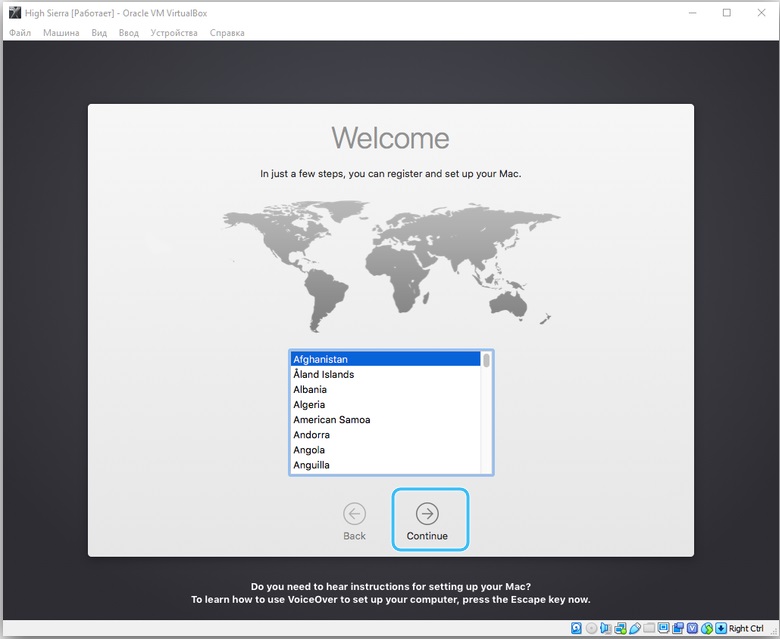
- press the button to agree with the proposed license agreement again;
- wait until the installation process is complete.
Be prepared for the fact that reinstalling the apple operating system is a rather lengthy procedure. Be patient. If you have a laptop, it must be plugged into a power outlet. Sometimes even 100% of the battery charge is not enough.
Also, do not pay attention to the fact that during the installation process the computer restarts several times.
The installation ends when the desktop appears on the screen.
Outcomes
There are many ways in which you can prepare a bootable USB flash drive with MacOS. You can solve the issue in different ways: both while in Windows and as an Apple user. The procedure is very similar, only the means that help prepare the USB flash drive differ.