Everyone has encountered a situation where important information suddenly became unavailable due to file corruption or was accidentally deleted from the device. Today, there are no problems with recovery, because special programs are ready to help the user to return lost data. You can cope with the task, even with minimal computer skills, on your own, there is no need to involve specialists, but we still need third-party software. Among the range of useful tools for recovering data from media, a small but quite effective program GetDataBack deserves special attention. With the help of software, you can restore digital information from serviceable drives, deleted by the user through negligence, viruses, as a result of formatting, reinstalling the OS,damaged due to file system failures, in the structure of partitions on a hard drive, flash drive, etc. It is not always possible to simply get a file from the basket, and if the necessary data was lost for any of the reasons, GetDataBack will help in most cases. At the same time, an important condition for the return of information is its physical safety on the drive, other files should not be written over the deleted information, so the sooner you start the recovery procedure, the higher the likelihood that it is still fixable.other files should not be overwritten over the deleted information, so the sooner you start the recovery procedure, the higher the likelihood that it is still fixable.other files should not be overwritten over the deleted information, so the sooner you start the recovery procedure, the higher the likelihood that it is still fixable.
Contents
Utility features
Among other software solutions for data recovery tasks, the GetDataBack program is distinguished by a high indicator of efficiency, a large percentage of files are recovered even after formatting the media. The software is used to return data from various devices (hard drives, SSD, USB, flash cards, virtual images, etc.) and works with Windows 7, 8, 10 (32 or 64 bit supported). There are two versions of the program, provided for equipment with different file systems: FAT and NTFS. So, the software should be used taking into account these characteristics, since there is no version that combines the ability to work with both file systems yet. In terms of working with a variety of devices, the program provides broad support, but you need to decide whether GetDataBack will be used for NTFS or FAT right away.The utility’s functionality assumes the following features:
- Recovery of lost data.
- Formatting, deleting information.
- Installing the OS.
- Correction of problems with the functioning of the file system.
- Elimination of malfunctions in the operation of the drive structure elements.
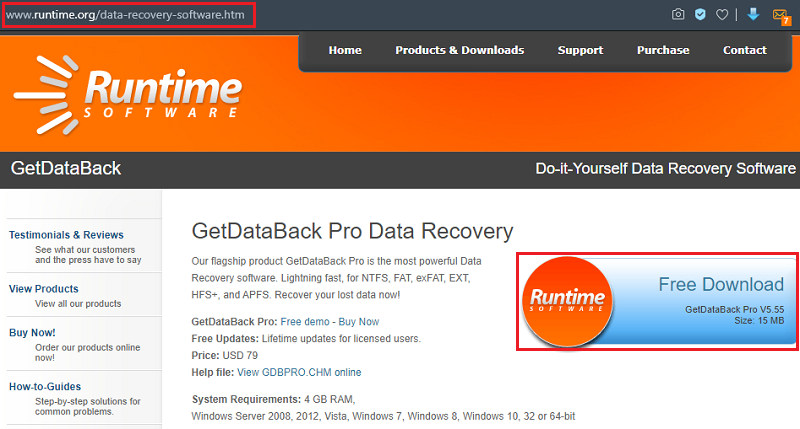
Downloading and installing the program is carried out according to the standard algorithm, the procedure is the same as in the case of other applications.
Advantages and disadvantages
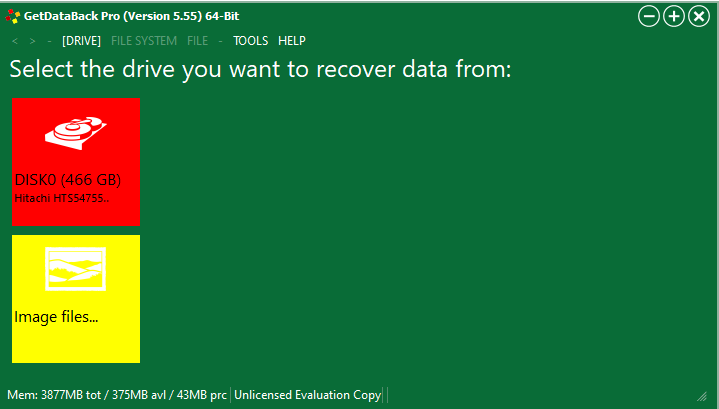
It is easy to use the program, even in the absence of the Russian language, the interface is simple and intuitive. In just a few clicks, you can recover lost data from various types of non-defective media. The GetDataBack utility can also be written to a bootable disk or USB flash drive to run from a drive.
Benefits of the GetDataBack utility:
- Efficient recovery of data, file names and directory structures.
- The ability to recover remotely.
- Simplicity of the interface and ease of use.
- High speed of work.
- Support for any drives.
- The ability to run from a bootable drive.
The disadvantages include:
- The need to purchase a license to use the full functionality (there is a trial version with reduced capabilities).
- Lack of official Russification.
- Division into versions for different file systems, which is not very convenient for fans of universal solutions.
The program really copes with the tasks and has no obvious flaws. The cost of the software is $ 79, it is supplied for two file systems at once, and all subsequent updates will be available to the user for free.
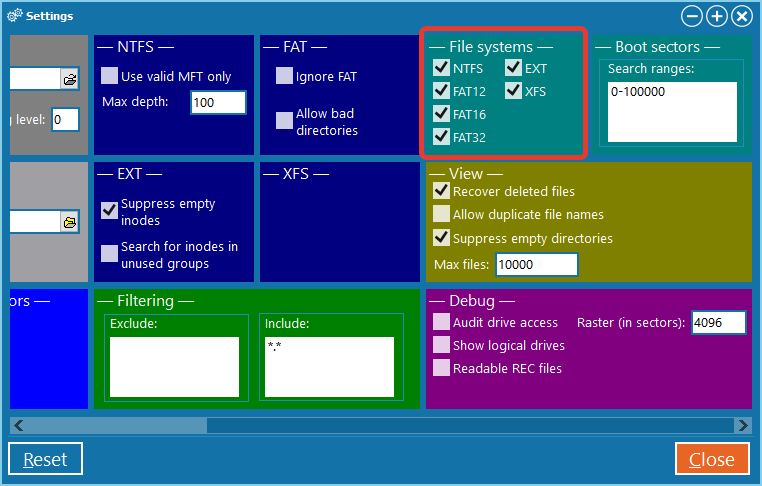
GetDataBack supports all kinds of file systems
How to work with the program
Now let’s take a look at GetDataBack as an example of how to use software to recover digital information from various sources. One important point to keep in mind here is that you cannot save data to the same media from which you are recovering it. Otherwise, reanimated files will overwrite damaged elements, which will inevitably lead to their complete loss. The instructions for working with different types of drives will help you get used to the GetDataBack program faster. When starting the software, the user is offered a choice of the scenario according to which the data was lost, and according to the information received, the utility will form the scale of device diagnostics. We mark the required scenario:
- Using the default settings (if you do not know what happened, select the first item).
- Fast scanning (in case of partition loss, unsuccessful partitioning, due to a failure).
- Loss of the file system (after formatting or marking, when nothing was written over).
- Significant loss of the file system (other information is applied to the data, for example, due to reinstallation of the OS).
- Recovering deleted files (there is no serious damage, for example, you accidentally deleted data and immediately realized).
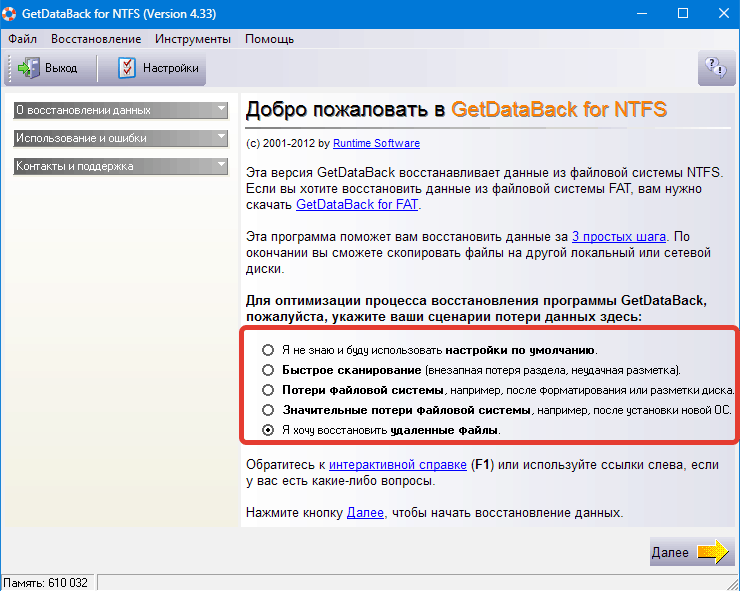
Recovering files on disks
After selecting the data loss scenario, click the “Next” button and perform the procedure in several steps:
- Select the disk (or partition) from where we will restore information.
- The first step is also available to download the scan results to continue the interrupted recovery process. Click “Next”.
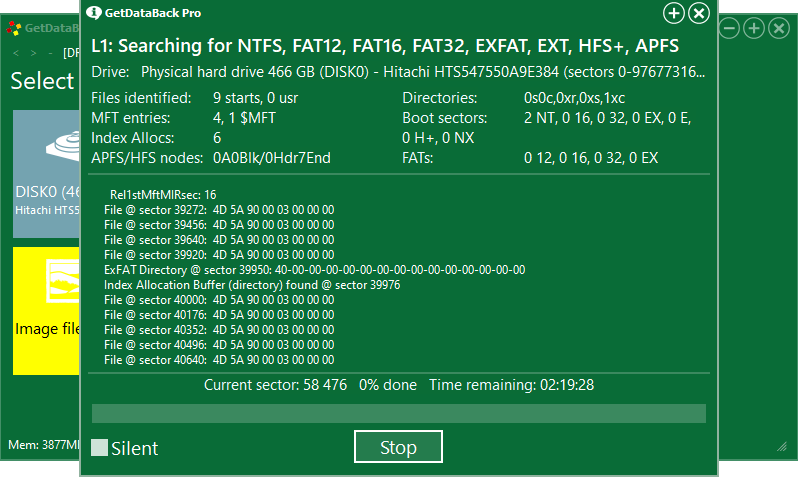
- At the second step, the program will determine the file system, click “Next”.
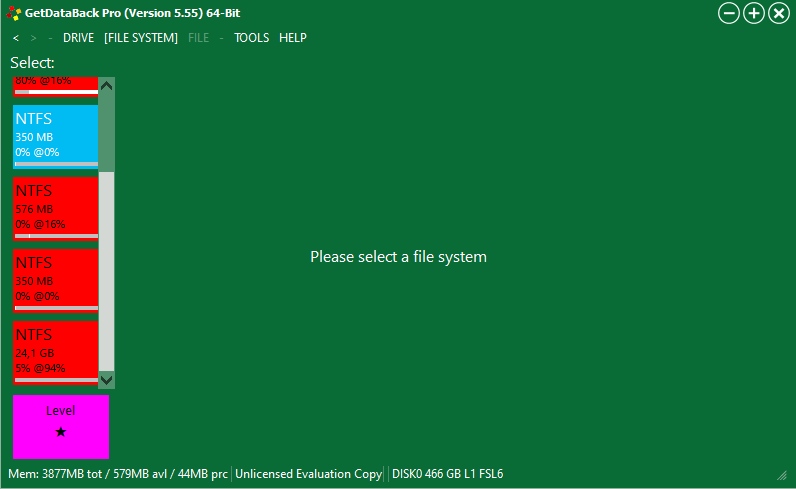
- The utility will start scanning, waiting for the end of the process (it may take quite a long time, depending on the size and number of files of the scanned disk / partition).
- After scanning, the program opens the disk structure. At the bottom of the interface there are designations, navigating through them, you can immediately see the necessary files.
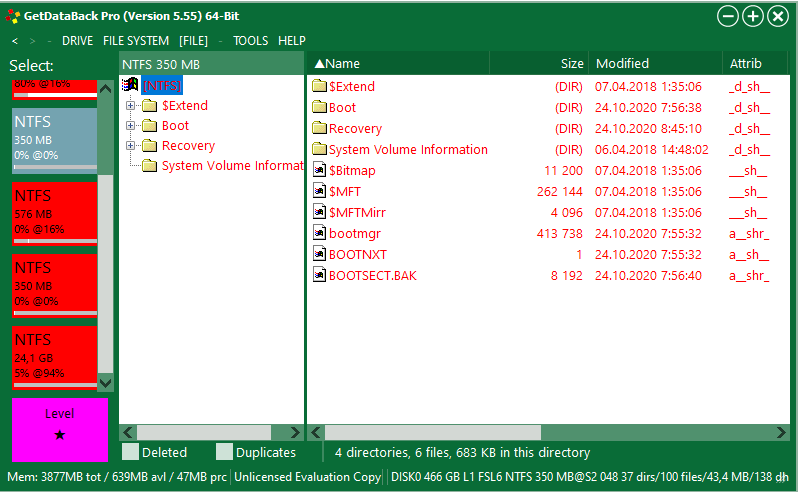
- Select the object to be restored (the “copy” option from the object’s context menu), specify the path for the restored item. Do not forget that you cannot select the disk partition from which we are recovering data as the “recipient”. We press “Ok”.
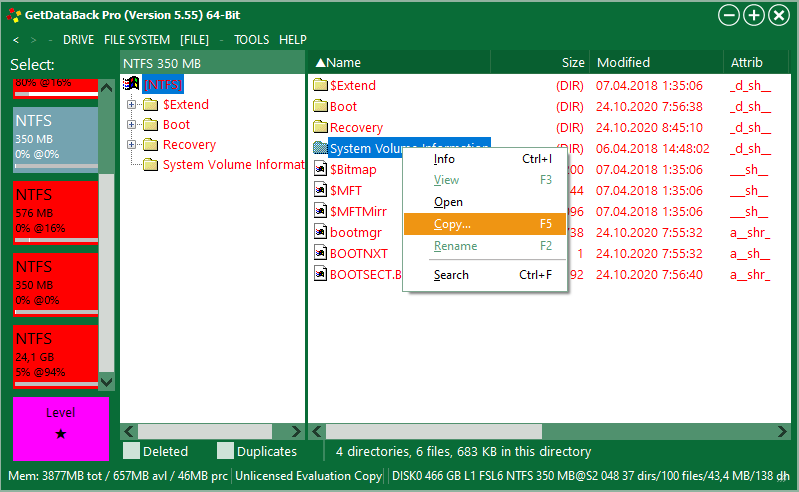
The procedure is the same for both physical and logical disks. In the second case, we select only the desired partition of the drive.
Recovering files in images
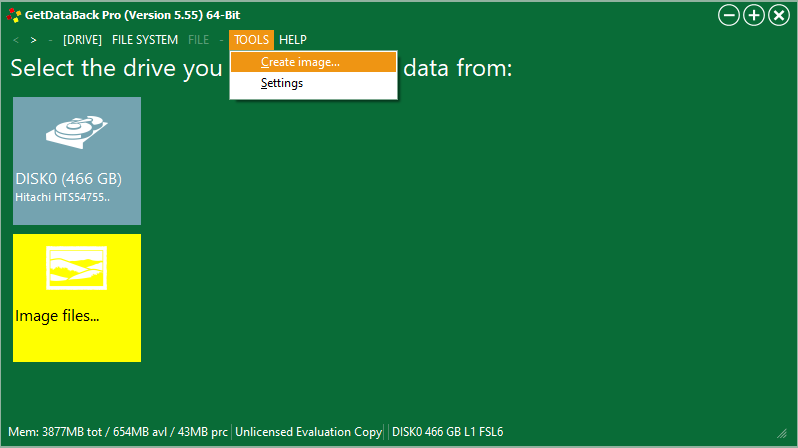
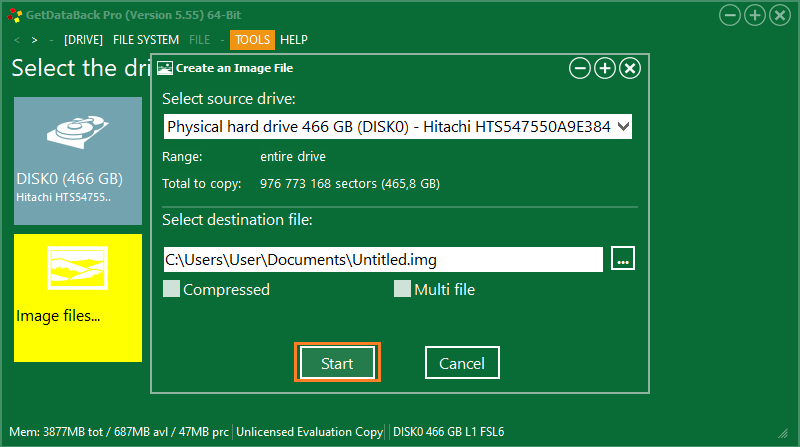
The program also offers several options for working with files in virtual images (vim, img, imc formats). You can make an image of a flash drive with inaccessible objects, format the device, restore content from the image. First you need to select a device. The functionality is available from the “Tools” tab – “Create file image”, after which you need to select the path where the image will be located. To select the required image, click “Load” next to the “Image file” item and specify its location. After these steps, the procedure is similar to that described above.
Data recovery on computers in the local network
Another interesting feature is data recovery from a remote device. To carry out the procedure, select “Load remote disk” and specify the type of connection (you can connect to the local network via a serial connection or LAN). In terms of application, the program is quite simple and, despite its decent functionality and ample opportunities, its interface does not hide from you all the options in the depths of numerous tabs and subsections, and the recovery procedure itself is performed in stages, which further simplifies the task for the user.