Changing the interface language is required infrequently, mainly when you mistakenly download a distribution kit that is not in your native language. However, you may well come across a computer with a language already installed, and it will not necessarily be Russian. In older versions of Windows, even not very experienced users know what to do in such cases. With regard to the latter, the very term “experienced user” is hardly applicable, since the system itself is very, very young.
So anyone can have problems with localization, and if you have the Home Single Language edition, then this problem will become completely insoluble. Meanwhile, the Russification of the interface in Windows 11 is not a difficult task if you know what and how to do.
How to install the Russian language in Windows 11 at the stage of choosing a language pack
Consider the case where you have a system image in English. When installing the operating system, you can Russify the interface after installing the language pack.
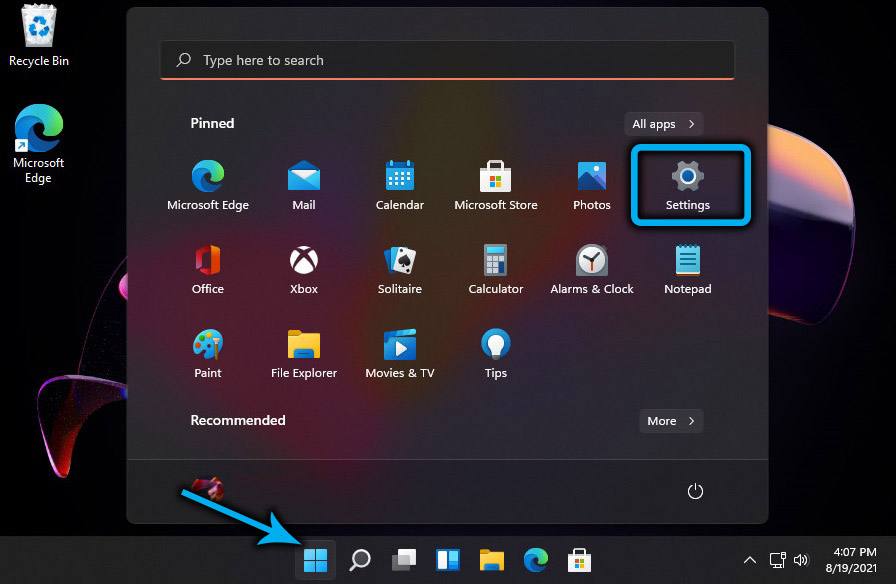
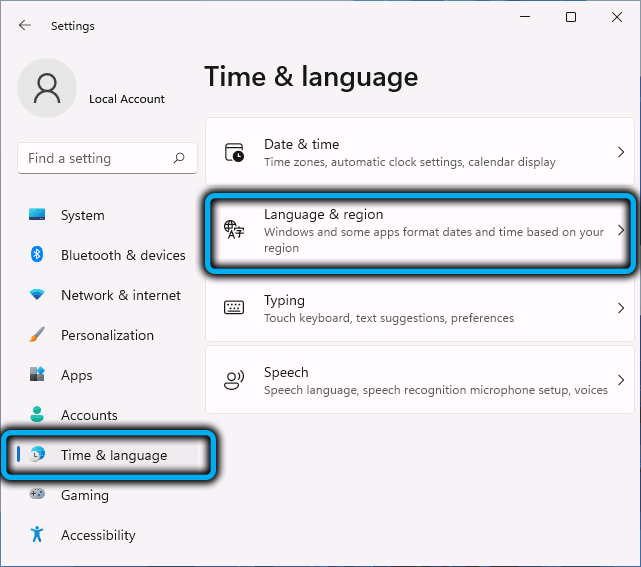
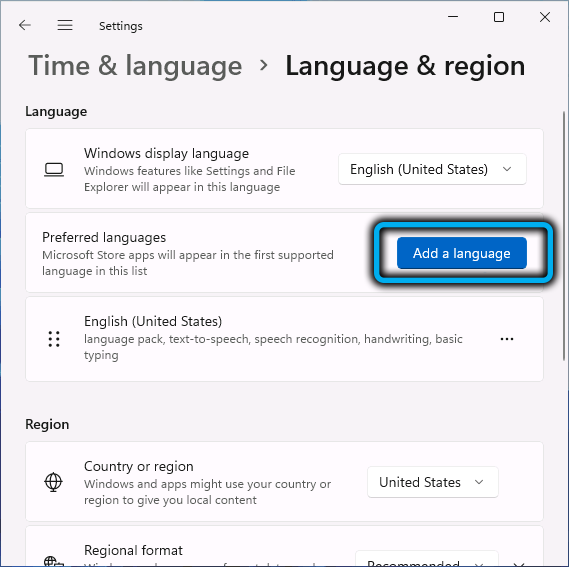
You need to open “Settings” using the Win + I combination and select the Time & language tab in the left panel (the clock icon on the background of a blue globe). In the right block, click on the item Language & region. A window will open with options for that menu item.
The Preferred languages block displays preferred languages, during the initial installation of the system this block may be empty, although the Windows display language setting will be set to English (or another). Therefore, we press the blue Add a language button.
A window will open with all the languages for which Microsoft has localized the new operating system. They are arranged in alphabetical order, their total number exceeds 200, so the list is large. If you do not want to scroll through it (and Russian in this list is located deep at the bottom), you can use the search field located at the top of the block (Tape a language name).
You may notice that on the right opposite each language there is a set of icons that characterize the composition of a particular language pack. Consider the meanings of these icons:
- the letter A indicates that it is possible to make the selected language the display language of the Windows 11 interface, that is, without this icon, it will not make sense to select the language;
- the microphone symbol indicates that speech recognition is available for this language pack;
- monitor image with pop-up text – a sign of the presence of a transcription service, that is, converting speech into text;
- Finally, the icon depicting a sheet of paper with a pencil indicates that this language has the ability to recognize handwriting.
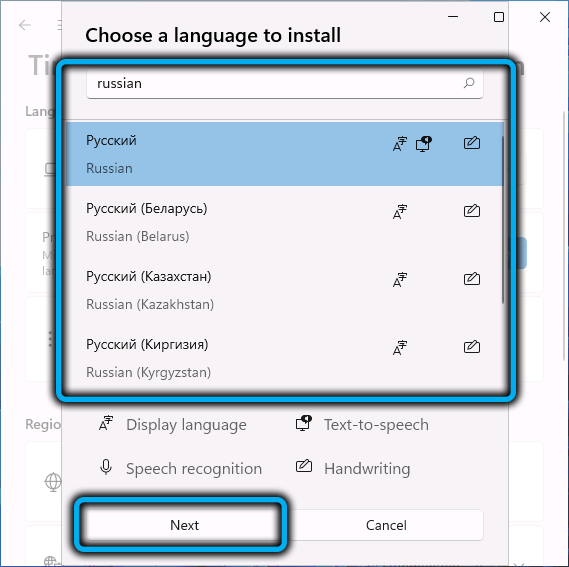
One way or another, if we need the Russian language, we select it, and then click the Next button that appears below. Go to the Install language features block – here you can set some parameters for the selected language.
In the Optional language features section, you can enable or disable any of the above features (of course, the Language pack must be activated anyway).
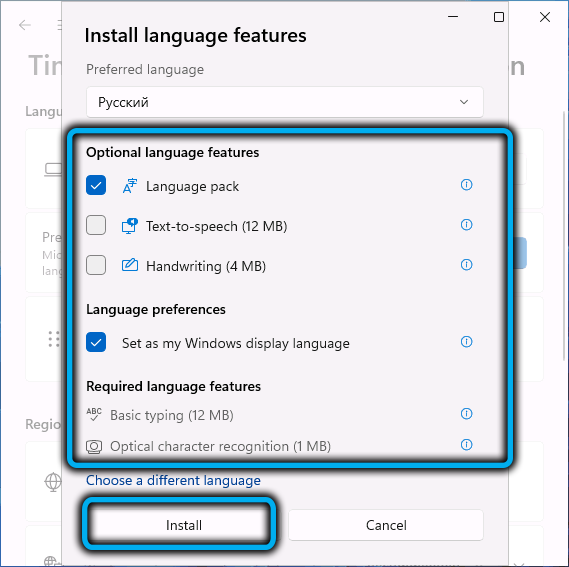
Make sure that there is a checkmark next to the Language preferences parameter – without this you will not be able to set the Russian language of the Windows 11 interface. Click the Install button, the download and installation of the selected language pack will begin.
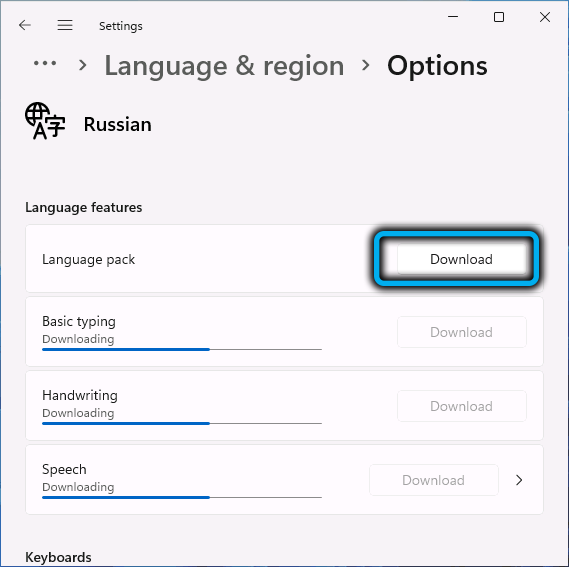
After it ends, a message will be displayed that for the changes to take effect, you must re-login to Windows. We agree by clicking on the Sign out button.
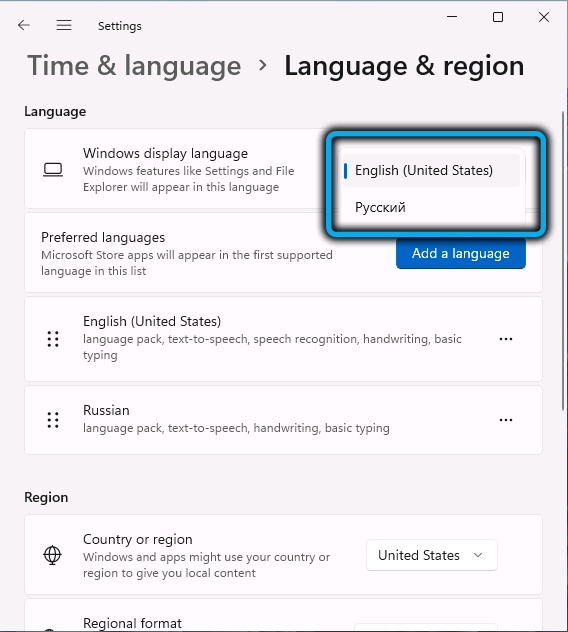
As a result, after a new login, all texts related to the operating system will be displayed in Russian.
How to change the interface language if the language pack is already installed
If you got a computer with an interface in another language, it will be somewhat easier to change it to Russian, and you can do this in the language settings. To do this, go to Windows 11 Settings, click on the Time & language tab, select the Language & region parameter, and then on the value of the Windows display language parameter. A window with installed languages will open, select the one you need, click on the Sign out button that appears for the changes to take effect. Note that this method will work only if the Russian language has been added to the system.
If it is not on the list, you can use the Microsoft Store to add a Russian-language package. To do this, perform the following steps:
- open the Microsoft Store app, enter the word “Russian” in the search bar;
- in the list of search results that opens, in the Apps section, search and click on the line “Localized interface package in Russian”;
- press the Get button;
- in the window that opens, check the boxes next to the LanguagePack and Set as my Windows display language parameters, as for the rest of the settings, here you do as you wish. The main thing is that the Russian language pack becomes the main one for the Windows 11 interface, which will be facilitated by the activation of these two main parameters;
- press the Install button and wait for the end of the language pack installation procedure, after which we press the Sign out button, as described in the previous sections.
After the reboot, it is advisable to go to “Settings” and move Russian to the first place in the list of available languages, and then change the region as well, setting its value to “Russia”.
Note that such Russification, although quite simple, is not complete. For example, the lock screen will remain in English, the same applies to applications that do not support Unicode. For such cases, you will need to perform some additional steps.
Since we have already Russified the interface, further names of services, functions, menu items will be given in Russian.
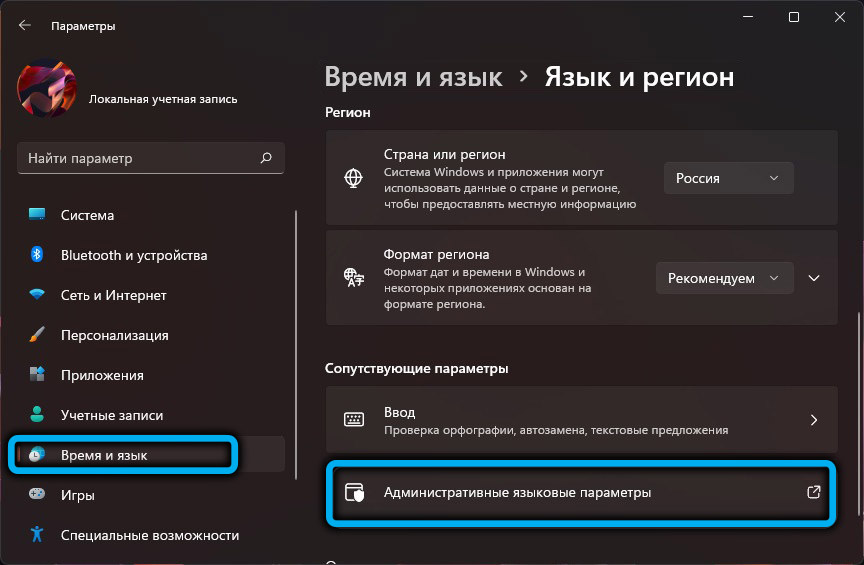
So, go to “Settings” again, select the “Time and Language” tab, in the right block – the “Language and Region” section. We are interested in the line “Administrative language settings”, click on it and in the new window click the “Copy settings …” button.

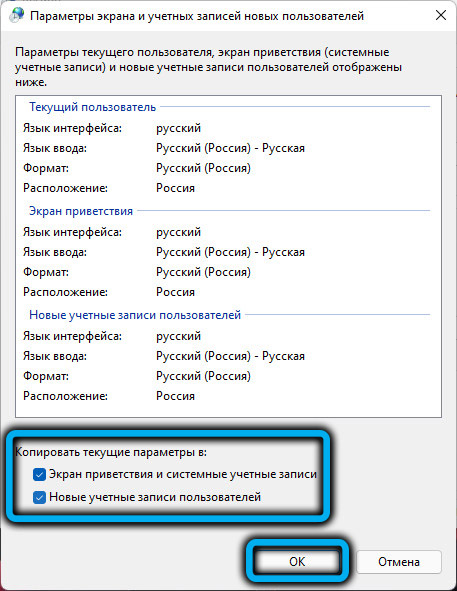
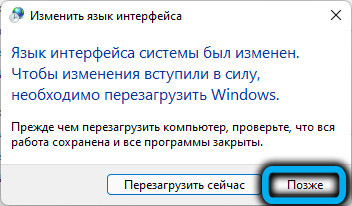
The parameters of the current user will be displayed, at the bottom of the window we put two checkmarks and click OK. We will be offered to reboot the system – we refuse, click on the “Change system language” button.
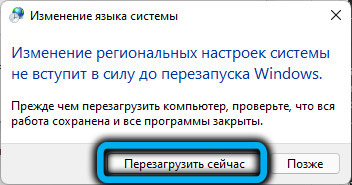
Another window will open, in which the “Current system language” field should be set to “Russian”, it is also advisable to check the box next to the lower parameter to solve the problem with Russification of some programs. You will be prompted to reboot again, this time we agree.
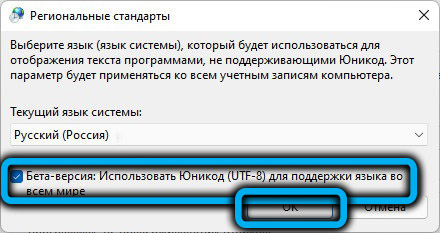
Only now we can say that we have added the Russian language and thus completely Russified Windows 11.
Change the application interface language
It is believed that if you Russified Windows 11 using any of the methods described above, then many applications installed from the Microsoft Store (Mail, Calendar, Photos) will also be Russian-language. But this cannot be said about all the programs present in this online store.
The problem, however, is partially solvable. To do this, go to “Settings”, select the “Time and Language” tab, in the right block – the “Language and Region” section. In the “Preferred languages” section, opposite the “Russian” line, click on the three dots located on the right. A menu will appear with two items, “Up” and “Down”, move the selected language to the top position in the list if there are several language packs.
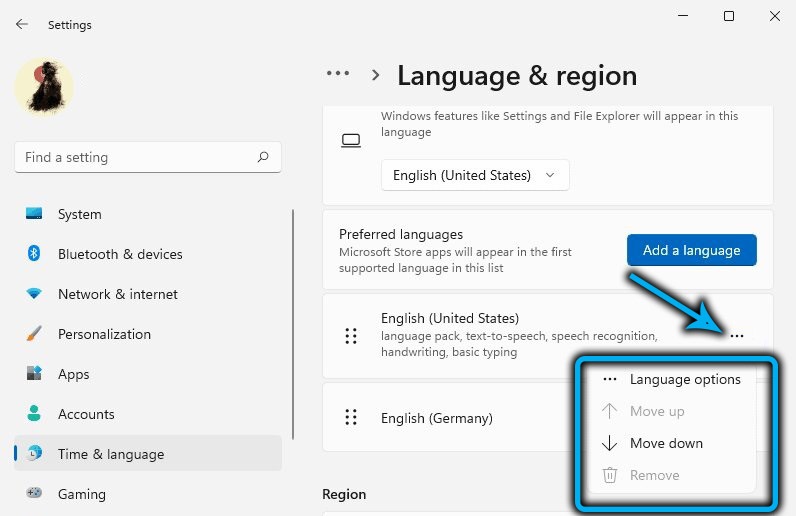
In this case, there will be no prompt to reboot the system, it is enough to exit the settings for the changes made to work.
However, apps that aren’t installed from the Microsoft Store may well ignore operating system requirements, if only because they’re not as well localized as trusted store apps. Here we are already powerless – at least until the developers of such applications bother to translate their programs into Russian.
There may also be problems with the operation of those applications that do not support special characters from the Russian language pack – for example, this applies to many media players. If such special characters are present in the names of tracks or subtitles, it will be shown instead of them incomprehensibly.
However, this situation is typical for all versions of Windows – many programs still do not work correctly with the Russian character set, but this is not a Microsoft problem.
