If you use Google applications a lot, you are probably starting to use up your storage space, so knowing how to delete Google Photos screenshots on mobile, or duplicate or blurred photos, can be very useful . And the thing is, this service is no longer 100% free: once you have exceeded 15GB of storage, you either start paying for more space, or you delete what you have saved. No more thinking that Google Photos has no limits!
HOW TO DELETE SCREENSHOTS FROM GOOGLE PHOTOS ON MOBILE
Knowing how to delete screenshots from Google Photos on the mobile can save us a lot of space, because they are images that weigh the same as the rest, but are they really useful? That screenshot so as not to forget an address, a conversation to send to a friend, or an article that we liked on the internet… Once these images have done their job, what do we want them for? Well, by deleting them, we can save a lot of space, and finding them is very simple, look:

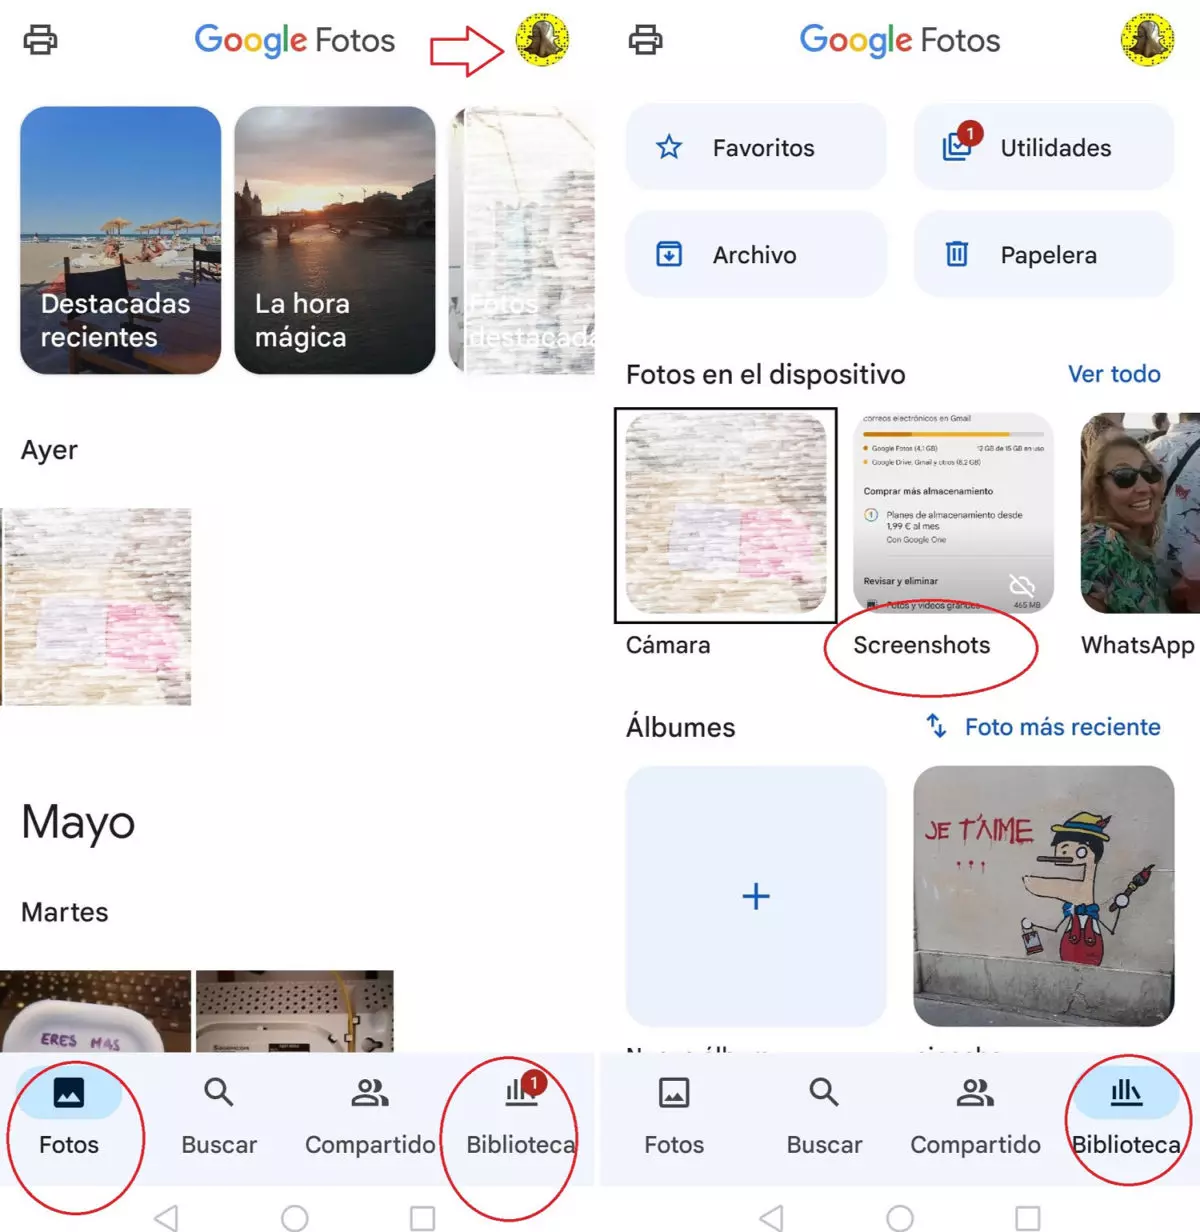
- Enter Google Photos from the mobile.
- At the bottom right, tap on “ Library ”.
- On the next screen you will see your photo albums appear, including one called “ Screemshots ”. It’s there!
- In this folder are all the screenshots and you can delete them directly there.
HOW TO DELETE DUPLICATE PHOTOS IN GOOGLE PHOTOS
Another way to save space is to know how to delete duplicate photos in Google Photos : why do we want the same photo twice? Now, with mobiles, we take many more photos than before (remember when film reels were used? Not the same…), and the memory of the phone and Google is filled with repeated images. That is why it is best to delete duplicate photos, and for this you can choose two methods, one manual and one automatic. We tell you!
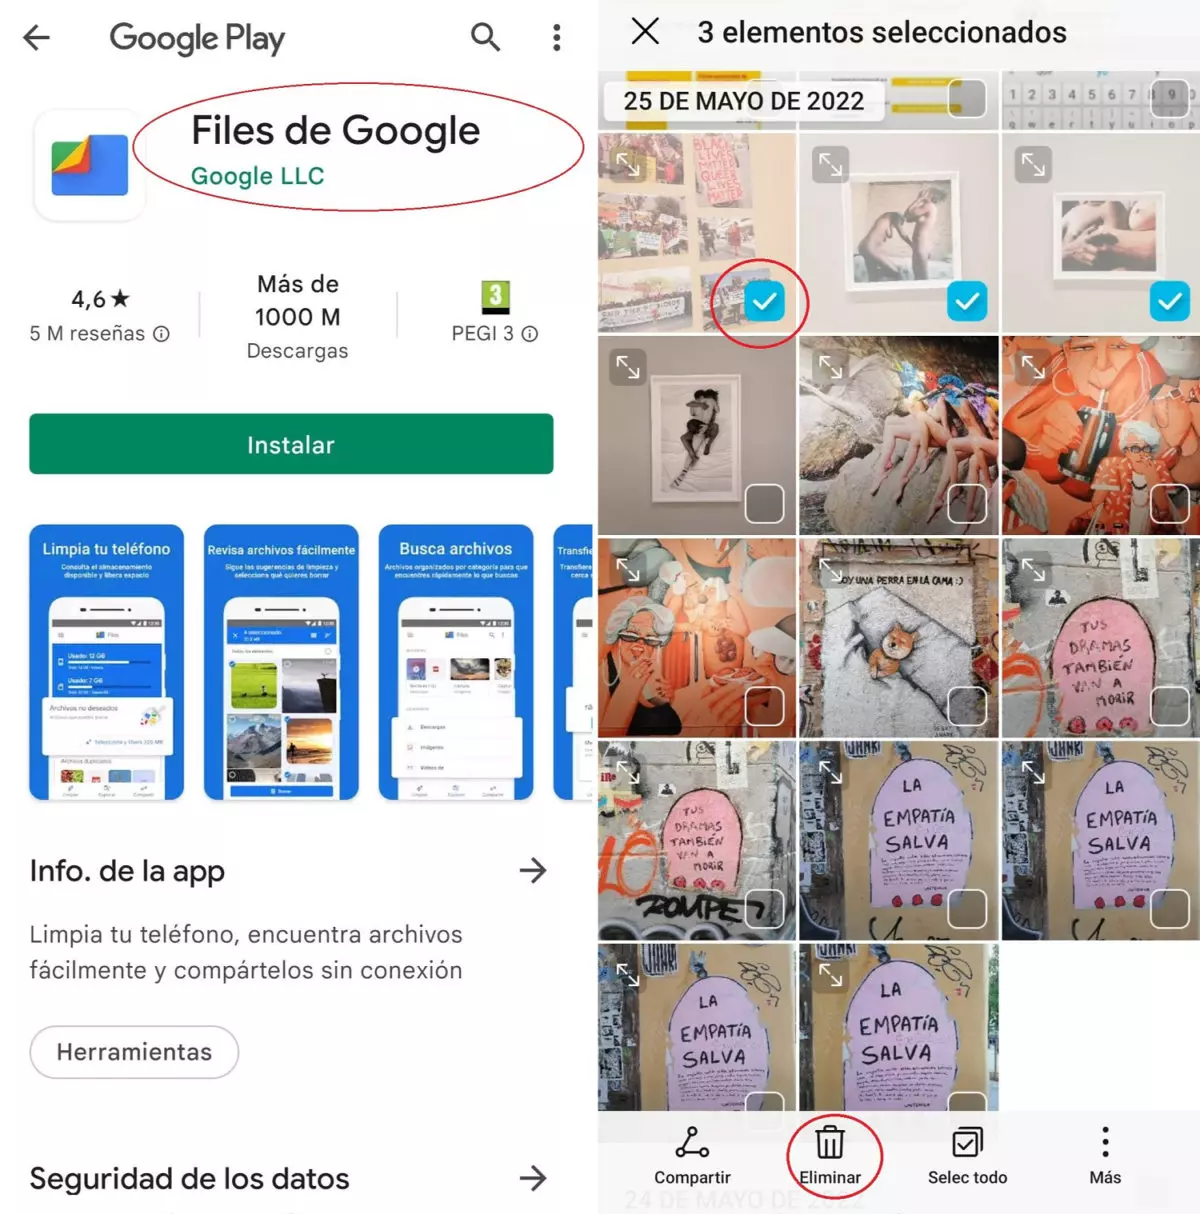
- Manually: just as we have entered the Google Photos folders before, if instead of clicking on “ Library ” we click on “ Photos ” (on the left), all the images will appear in chronological order. There you can go reviewing one by one and deleting the ones you have the same. As in the example.
- Automatically: It ‘s also possible to do this automatically, but you’ll need to download an app called Google Files . This has an option to delete duplicate files and not have to check them one by one.

HOW TO AUTOMATICALLY DELETE BLURRY PHOTOS IN GOOGLE PHOTOS
Finally, we are going to tell you how to automatically delete blurred photos in Google Photos, in this case without having to download anything, since the application itself has the option to locate them.
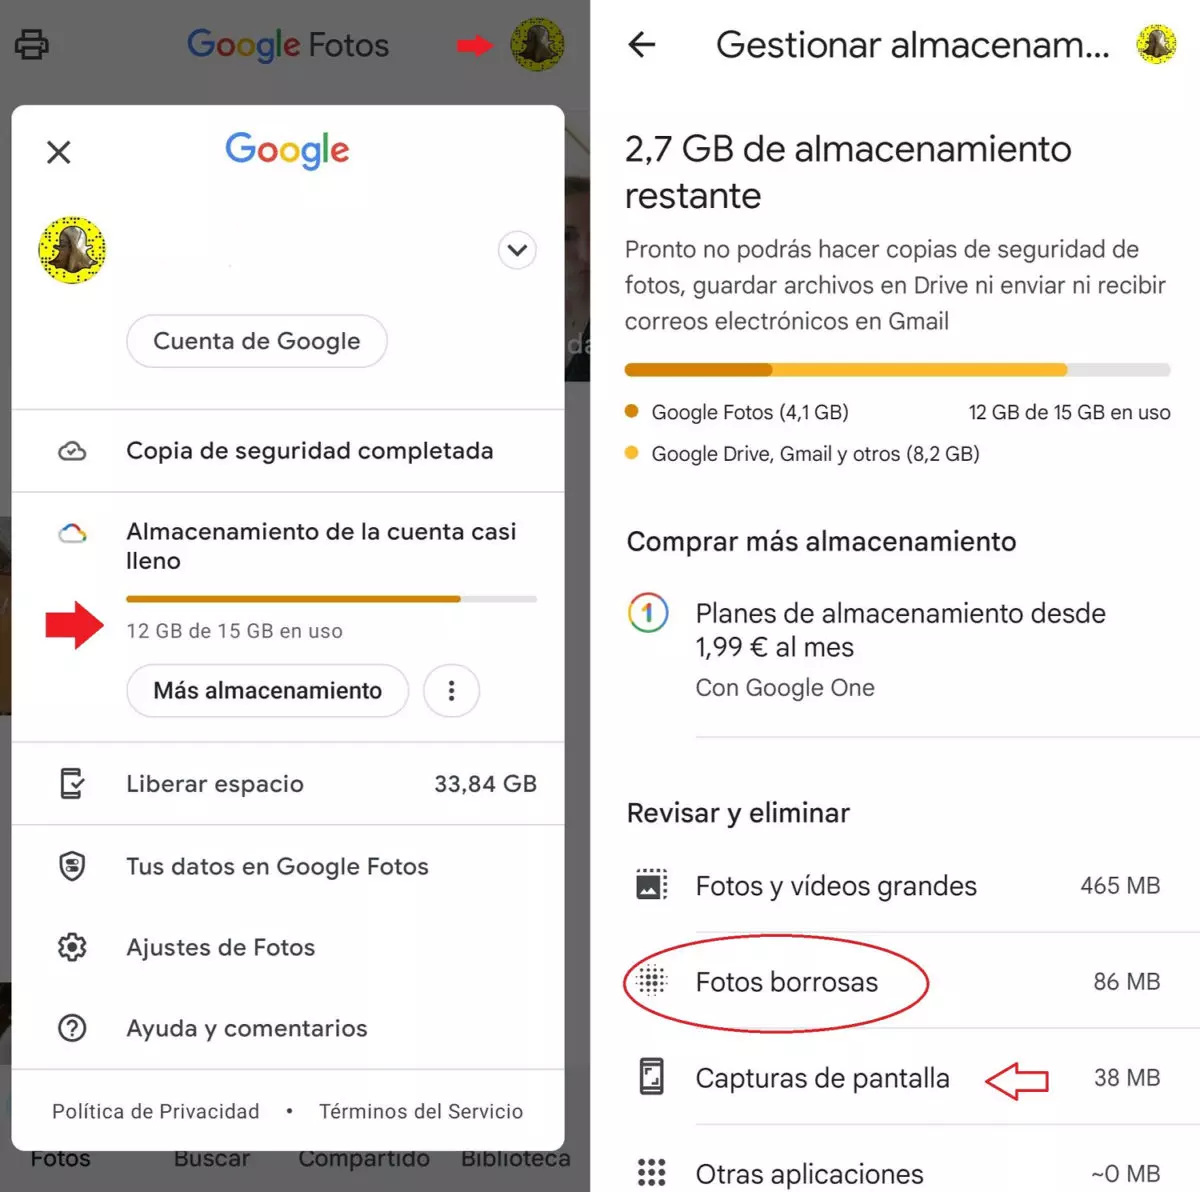
- In this case you have to go to “ Storage ”. To get there, click on the icon in the upper right, the logical thing is that it is your profile forum.
- A drop-down will open, in which you can see the storage you have left. Click there.
- In the next window, as we show you in the image, you can see the “Blurred photos” options.
- If you press, all the blurred photos you have saved will appear so you can delete the ones you want.

To take into account: as you will see, the “Screenshots” option also appears, which you can delete from there, or as we have explained a few lines above