Android 12
Contents
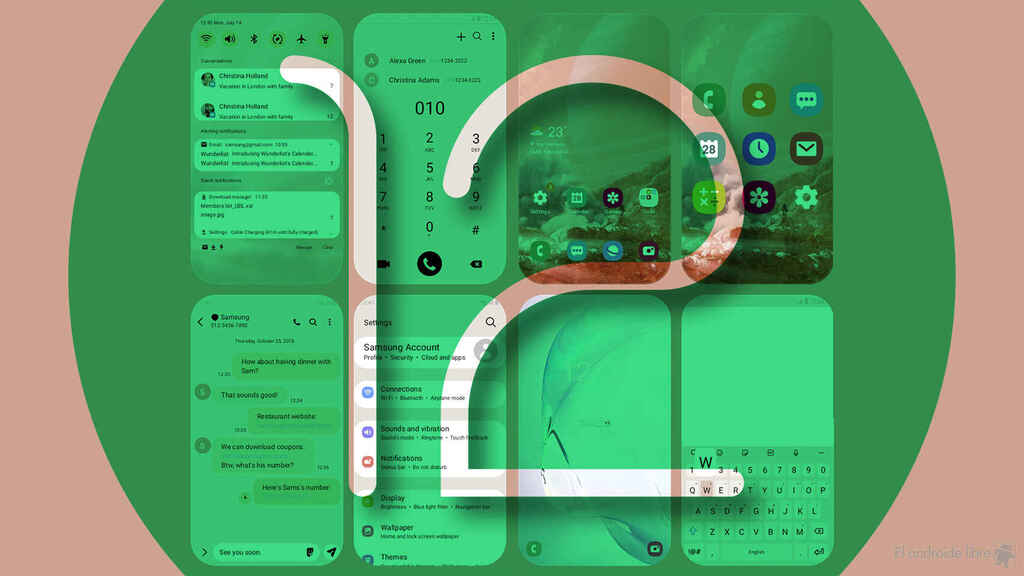
With the help of various Good Lock modules and some apps, we will be able to customize the appearance of Samsung Galaxy phones to Android 12.
Android 12 and its radical turn to design is already here, at least in the devices compatible with the beta, already for the second , and we are going to show you how to make your Samsung mobile look like Android 12 .
In fact, Samsung has already been playing with these customizations through Good Lock with its many modules . So let’s get straight to the point to even extract the colors of the Android 12 wallpaper as it was shown in Google I / O and which is already available in the second beta.
A first note
We are going to use Good Lock to personalize most of our mobile and thus leave it like Android 12 , just as we will use the widgets of a renowned developer to underpin all that theme that we will apply to our smartphone.
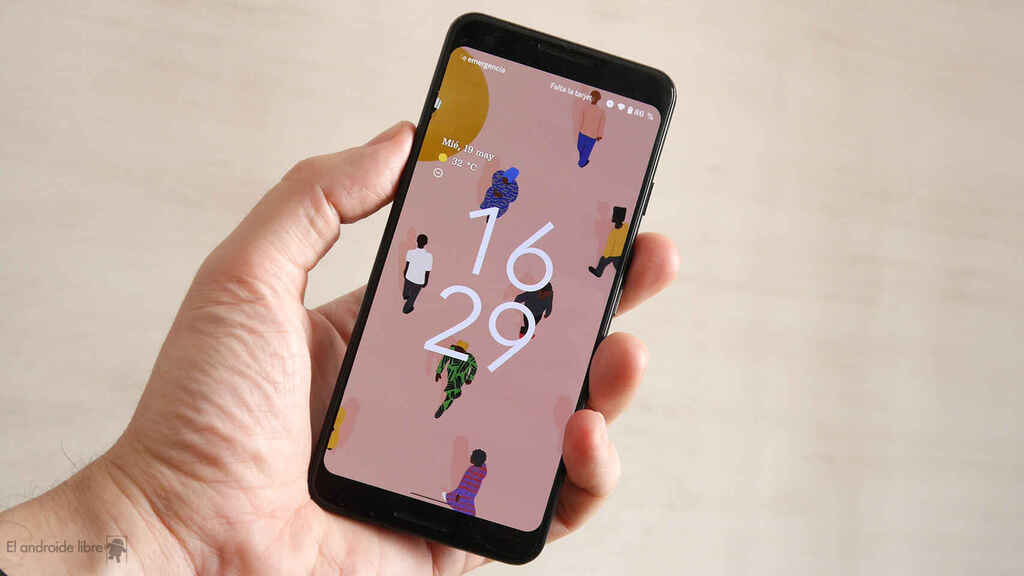
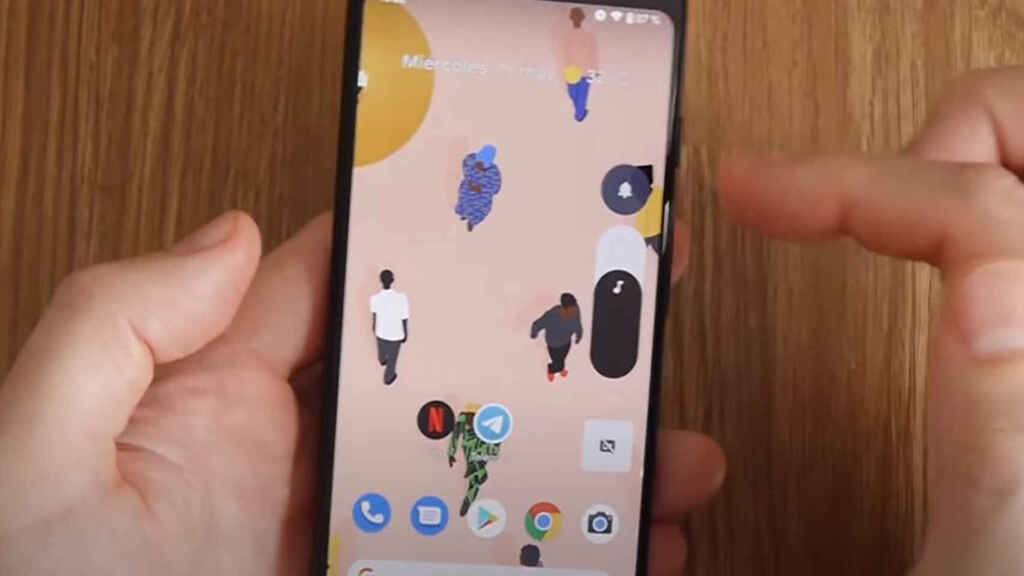
Android 12 on the Pixel 5
Not in all the elements we can completely imitate Android 12, but we will get close enough to have that particular style in the widgets , extract the color scheme from the wallpaper or in the volume bar.
How to extract the color scheme from the wallpaper
Theme Park is another of the Good Lock modules that will allow us to do this magic that Android 12 will do by default when it is launched in autumn with the new Google Pixel 6 . You can download the APK or go to the Galaxy Store like the rest of the modules.
Apart from being able to extract the combination or color palette, we can also select one, but in this case we focus on Android 12, so that wallpaper that you can see in the capture will be the one that gives us the key colors for every screen of our system, in this case a Samsung mobile.
- We started Theme Park.
- We give to create a new theme.
- Click on the “Current Wallpaper” button.
- We extend the box to take the entire wallpaper in full and place it in the center. Click on Done.
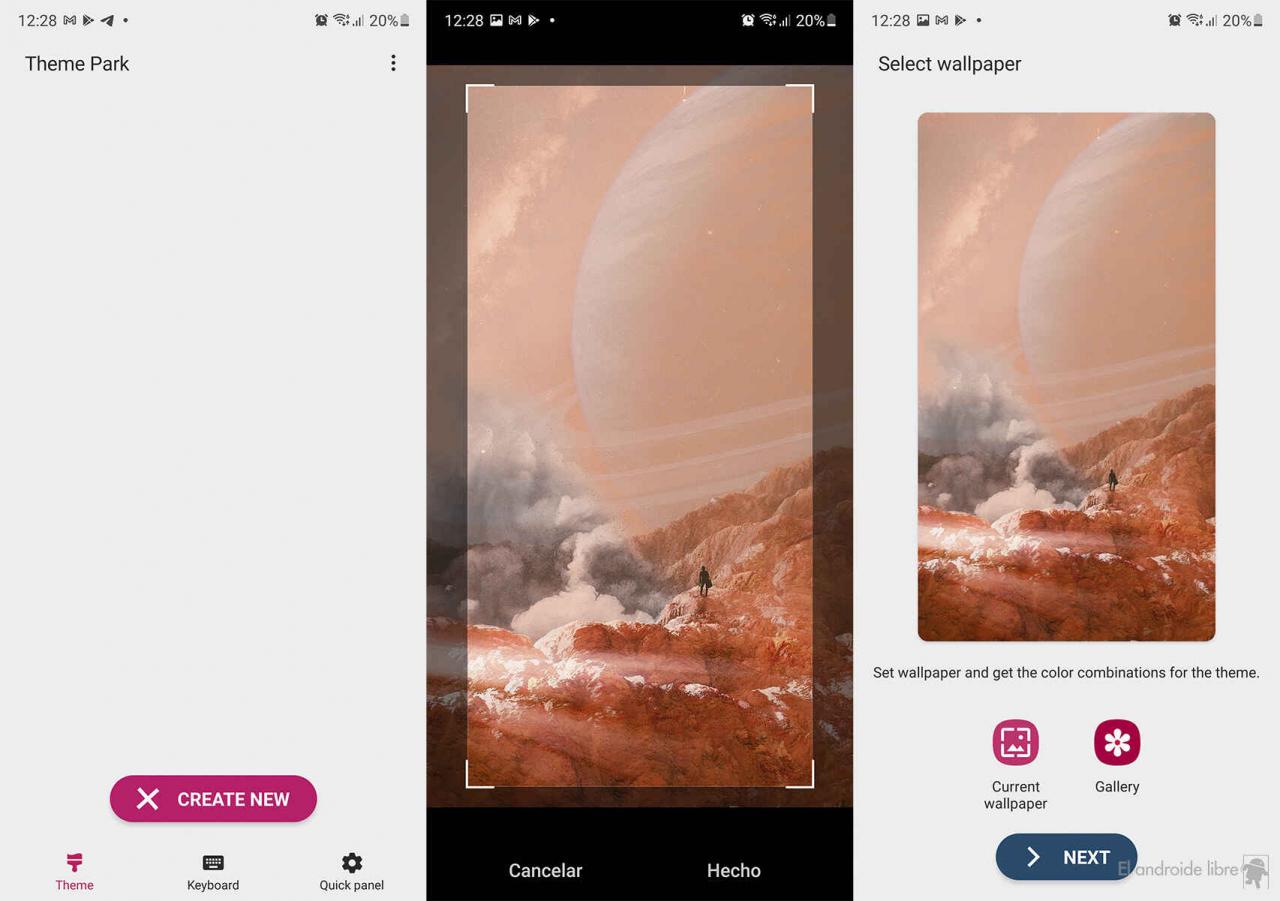
Extract colors from wallpaper
- Next, click on Next.
- We will see the miniature views of the most important parts of the system and below a series of colors extracted from the wallpaper.
- Here it is important that we bear in mind that each time we click on the key colors, we will go to a new range of colors focused on the one chosen. If we don’t like any of them, we go back by giving the key color on the left again, and thus choosing another.
- We click on one and the other to see how it looks in the miniatures until we find the one we like the most.
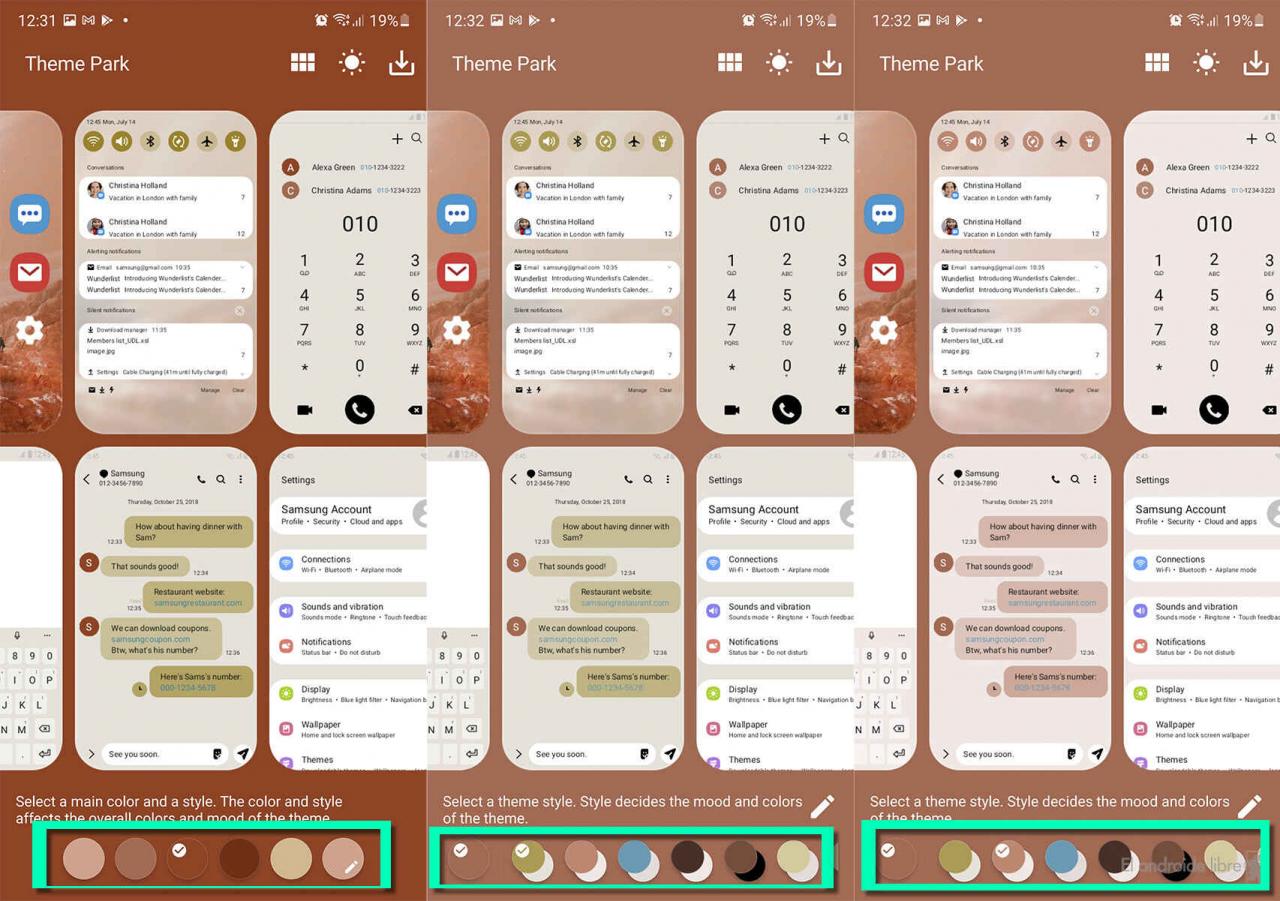
Color combination to choose from the theme extracted with Theme Park
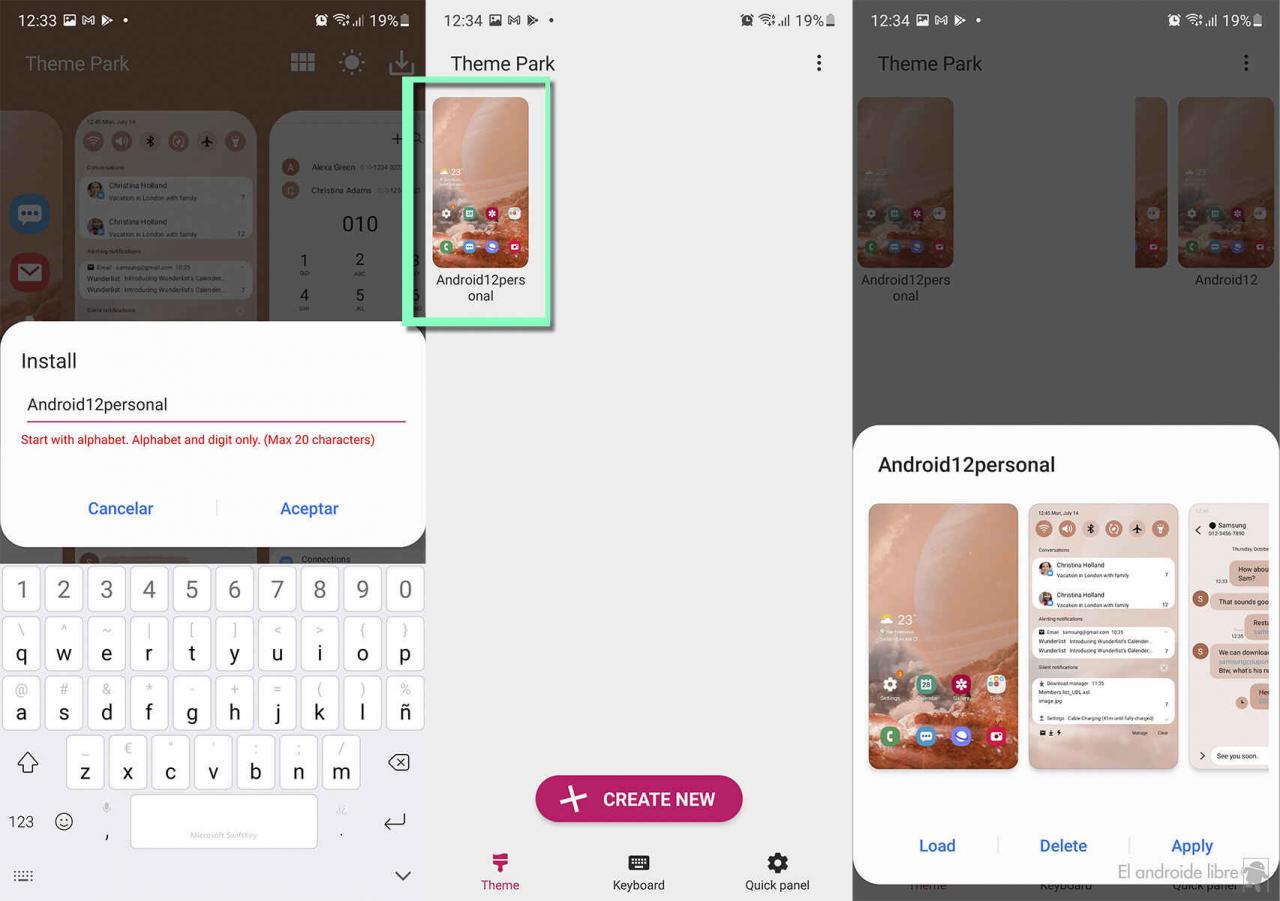
- We go to the upper right to click on the install button (the one with the arrow).
- We put a name to the created theme and click on accept. It will take a few seconds to install.
- Now from the thumbnail views that we have created, we select the latter.
- A preview is generated and we click on “Apply”.
The theme created in Theme Park is applied
Now the theme should be applied. If not, we make sure from the thumbnail view of the theme, by going to the menu at the top right in “App’s Theme setting” that all apps are activated. On this screen we can deactivate the system app that we do not want the created theme to be applied.
To color the notifications and the text color
So far we have ‘painted’ the most important system apps on the phone, but we want to go further and even color notifications and their text so that it is on par with the theme.
We will use the Good Lock Quick Star module to color them, but we have to do it a bit by hand. To do this, we are going to install Adobe Capture, an application that will extract from a screenshot the tones in hexadecimal values that we will use for the panel notifications.
In our case we are going to extract the values of a screenshot with the extended notification panel as you can see in the screenshot below. In the Galaxy we press the power + volume up at the same time to take one.
Extract hexadecimal value from color with Adobe Capture
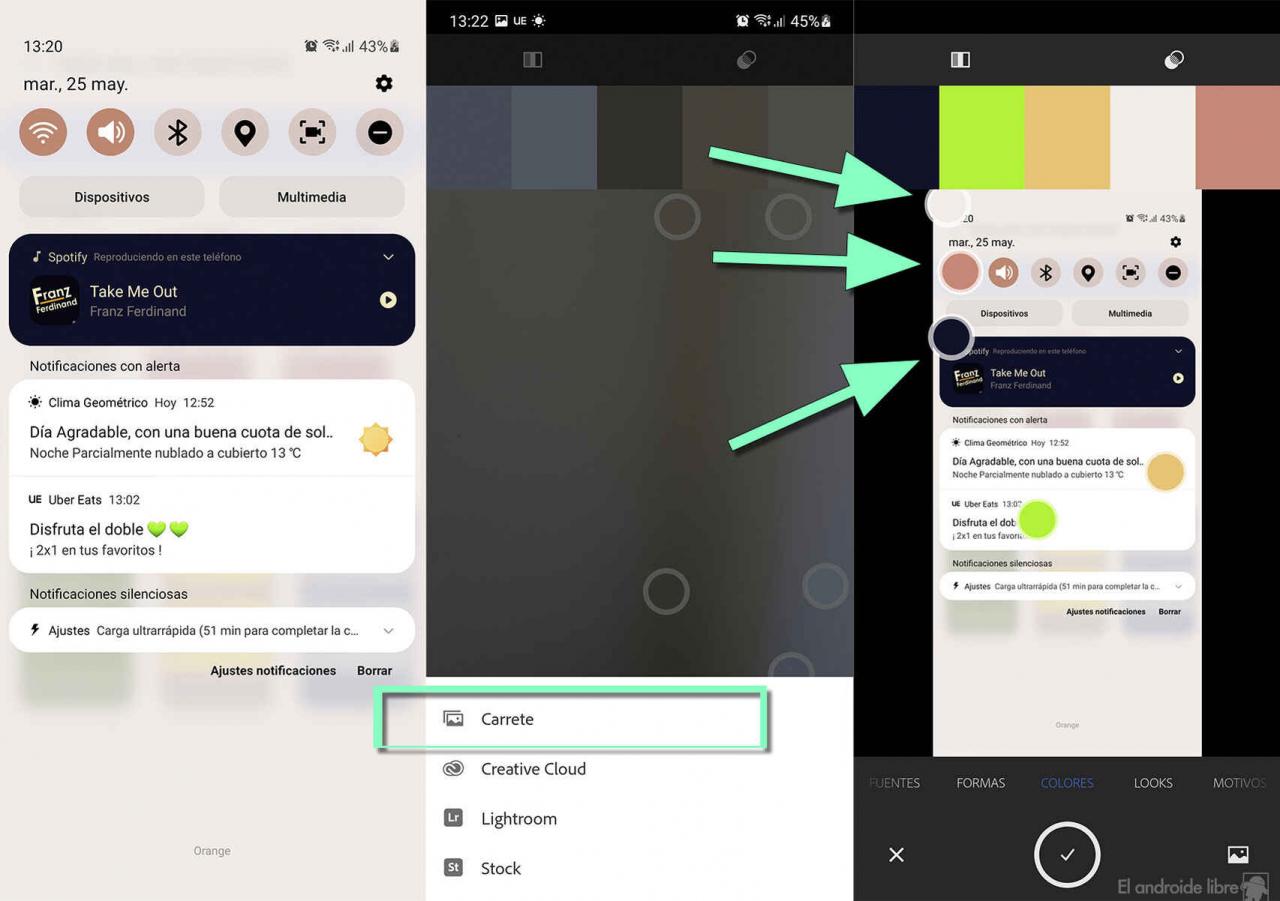
- We take the screenshot with the notification panel extended.
- We start Adobe Capture: download .
- Click on the gallery icon.
- Now in reel to select the screenshot made.
Color tones are selected to extract the hexadecimal
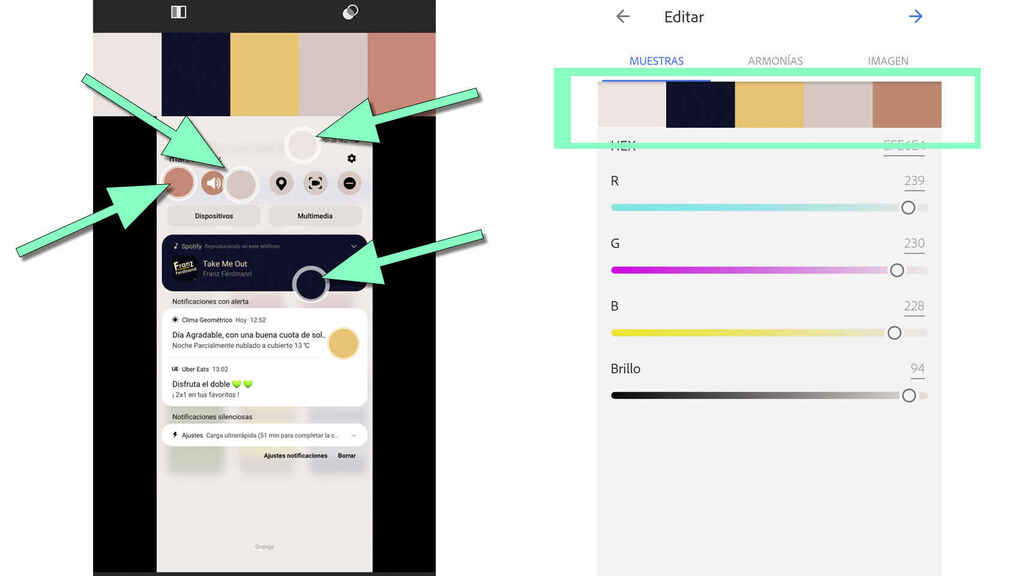
- Now we have to take each of the color selectors to place one above the active shortcut and thus take its hexadecimal value.
- We will do the same with the quick access color tone disabled, and in case the flies, we will take the background color of the upper part as well as the black color.
- We give Ok at the bottom.
- In the next screen we have the 5 samples obtained so that when we click on each one we can copy its hexadecimal value that we will use in the Good Lock Quick Star module.
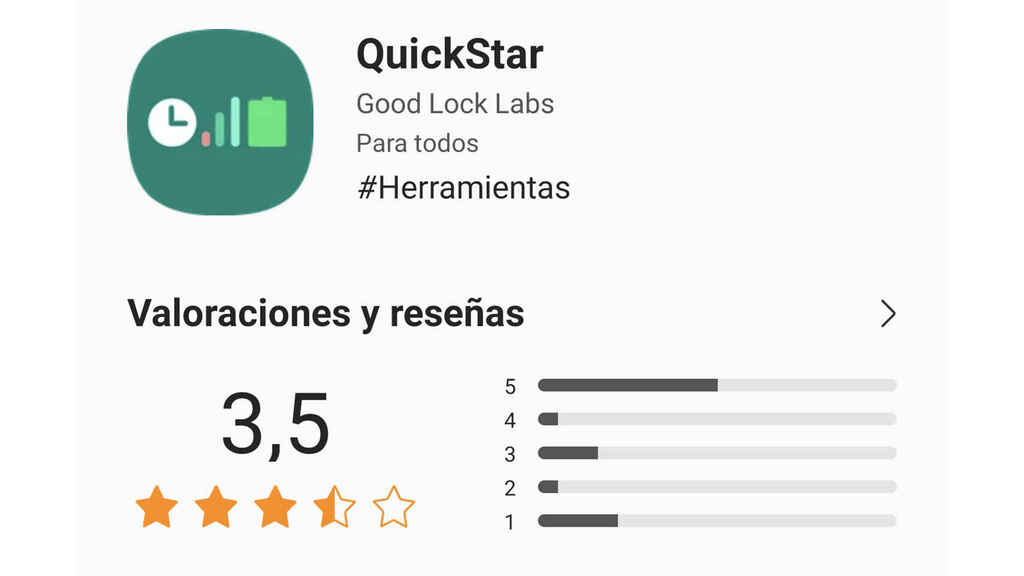
QuickStar module
- We download QuickStar from the Galaxy Store or from apkmirror .
- We go to “Style your own Quick Panel”.
- Click on + in My Themes to create our own personalized panel.
- On the next screen we have the selectors to color both the text and the empty spaces or backgrounds.
- We notice that at the top right is the sun icon that indicates that we are customizing the clear theme.
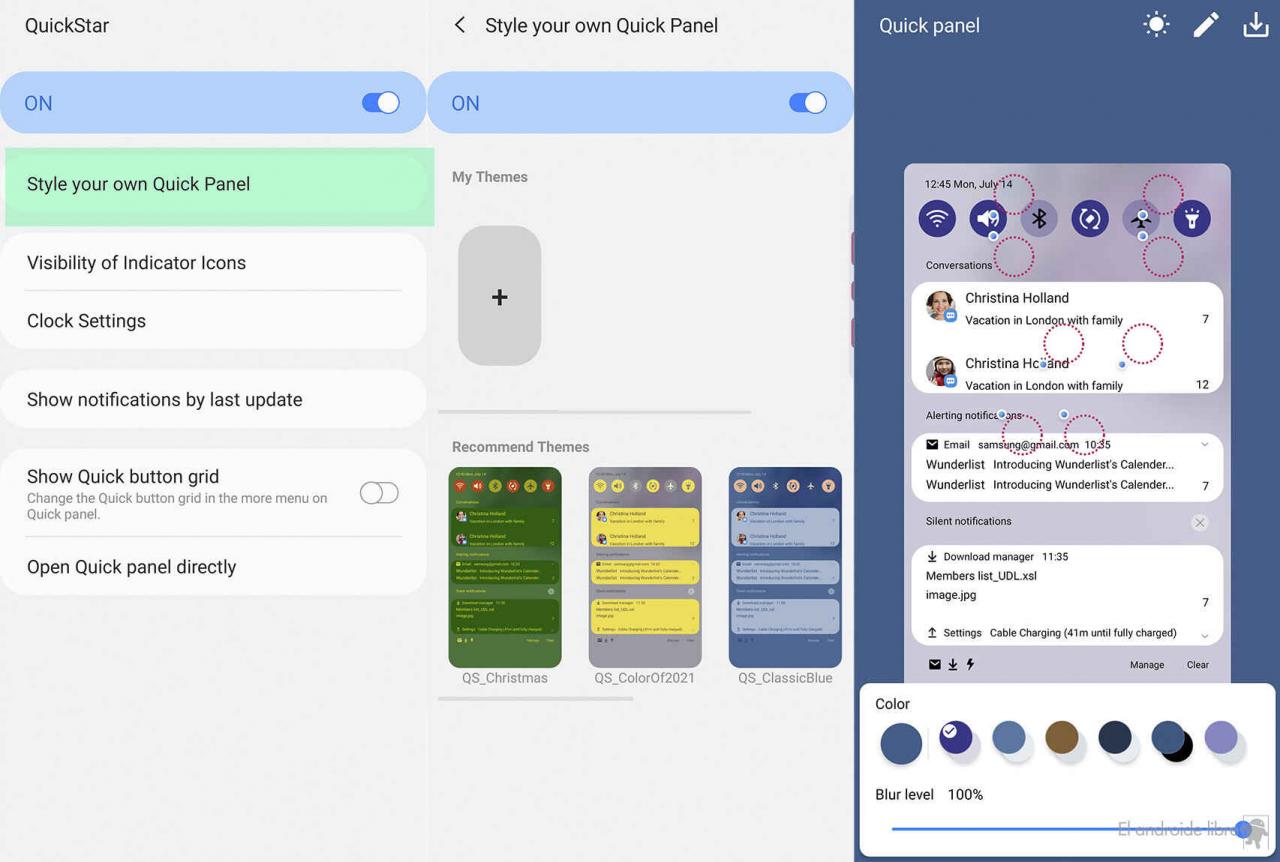
Good Lock QuickStar
- We have a number of selectors for quick settings when they are on and off.
- We select the selector of the activated setting and paste the hexadecimal value of the color obtained with Adobe Capture . In this case it is # CE8970.
- Precisely on the value that we will substitute to assign that tone in brown. We click on accept and we will see the change.
- Now we will do the same with the color of the icon and the rest of the selectors.
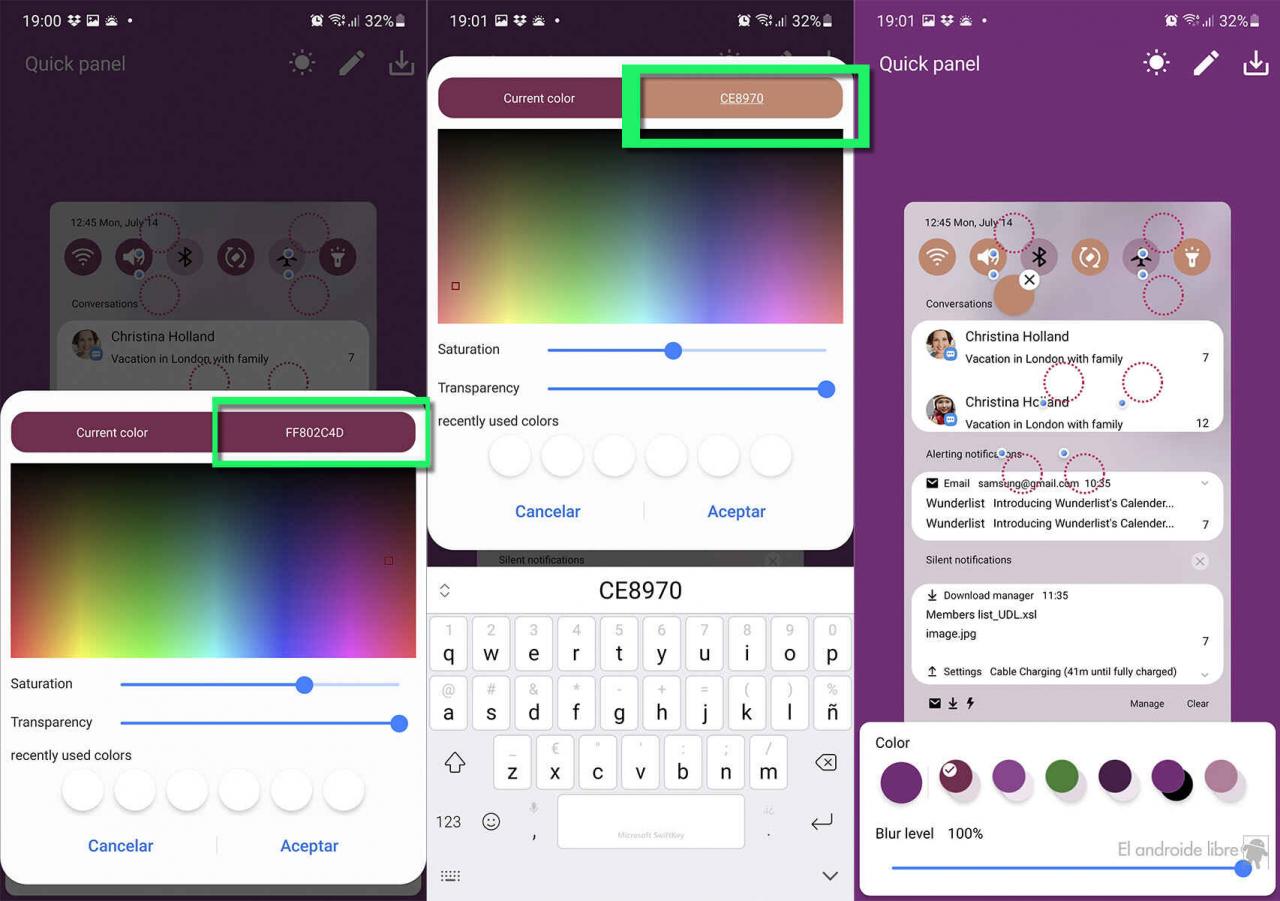
Coloring the active shortcuts in the notification panel
- The tones that we add will be saved, so to color the background of the notifications we will do it quickly.
- For the deactivated quick access we will return to Adobe Capture to take the hexadecimal value. In our case it is DCC9C4.
- For the text we have chosen white.
- We will use this same white for the background of the entire notification panel so that it goes along with the color of the text.
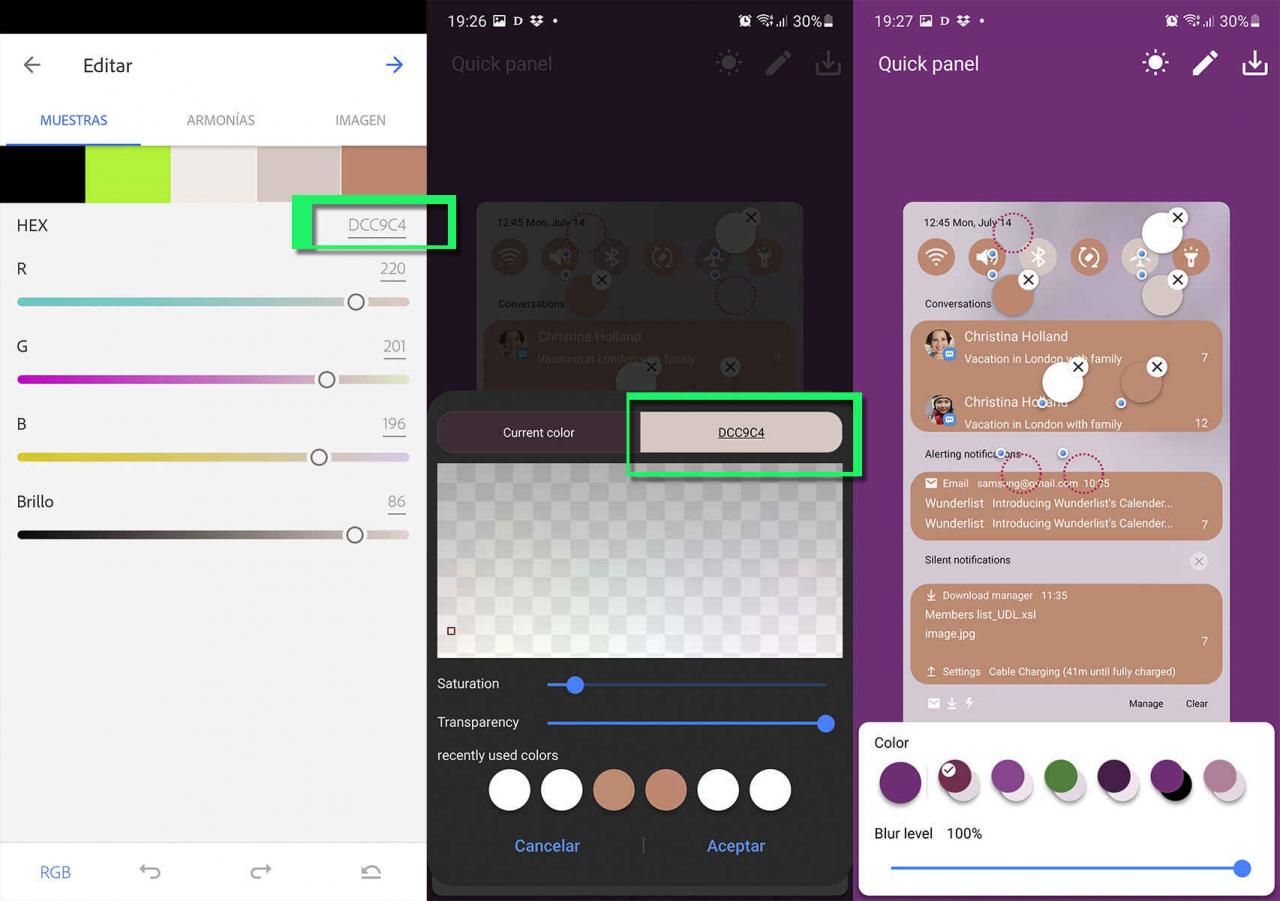
We apply hexadecimal values to the rest of the selectors
For the dark theme what we do is click on the sun icon so that the one at night is shown, and here we are going to be faster.
We take the main key color from the bottom bar, just the main selector, the first one from the left, and select the key color. In our case it is CE8970.
After selecting it, we will be left with the first color combination that is the best one with this color range. Here you will have to weigh the extracted color palette to decide to try another color combination for the dark theme.
It would look like this:
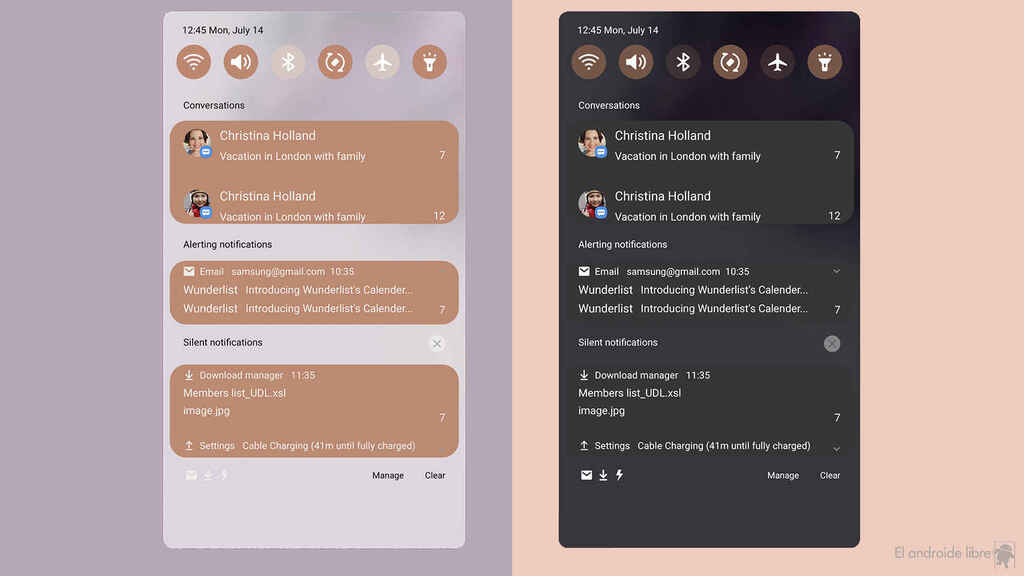
Customization in light theme and dark theme with Quick Star
You have to take into account that these tones will always depend on the wallpaper you use. In our case, the end would look like the following image:
Notification panel
Through the download of Power Shade we will be able to customize a little the quick settings to put 3 columns . That is, we will not be able to leave them in two because the app has that limit, so here we will not be able to imitate the customization of Android 12.
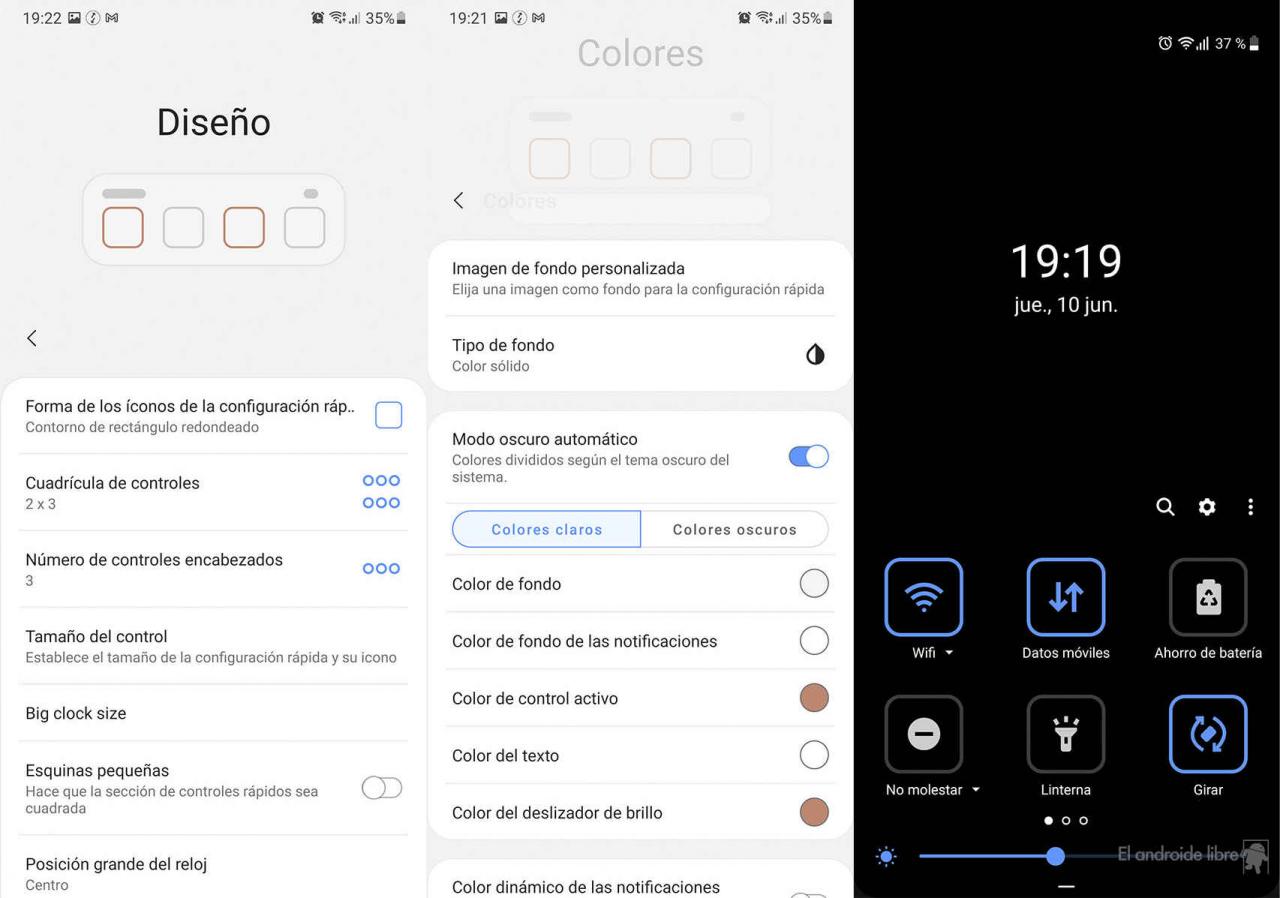
Customizing the quick settings to Android 12
Although setting the main key color, selecting 2×3 in the control grid, numbers of headed controls to 3 and raising the size of the control to the maximum (so that they appear larger), we are going to be able to get a little closer.
Perhaps we are missing something to touch up, since in the screenshots of the Google Play page of Power Shade, only two columns appear and the possibility of making the settings appear rectangular with rounded corners like Android 12.
Change volume control style to Android 12
We are going to use the free app Volumen Styles that through some advertising videos will allow us to change the key color for the volume slider.
It is important that you give accessibility access permission so that the volume style can be applied. This is the volume control in Android 12:
Volume control in Android 12
And so we will have this app called Volume Styles:
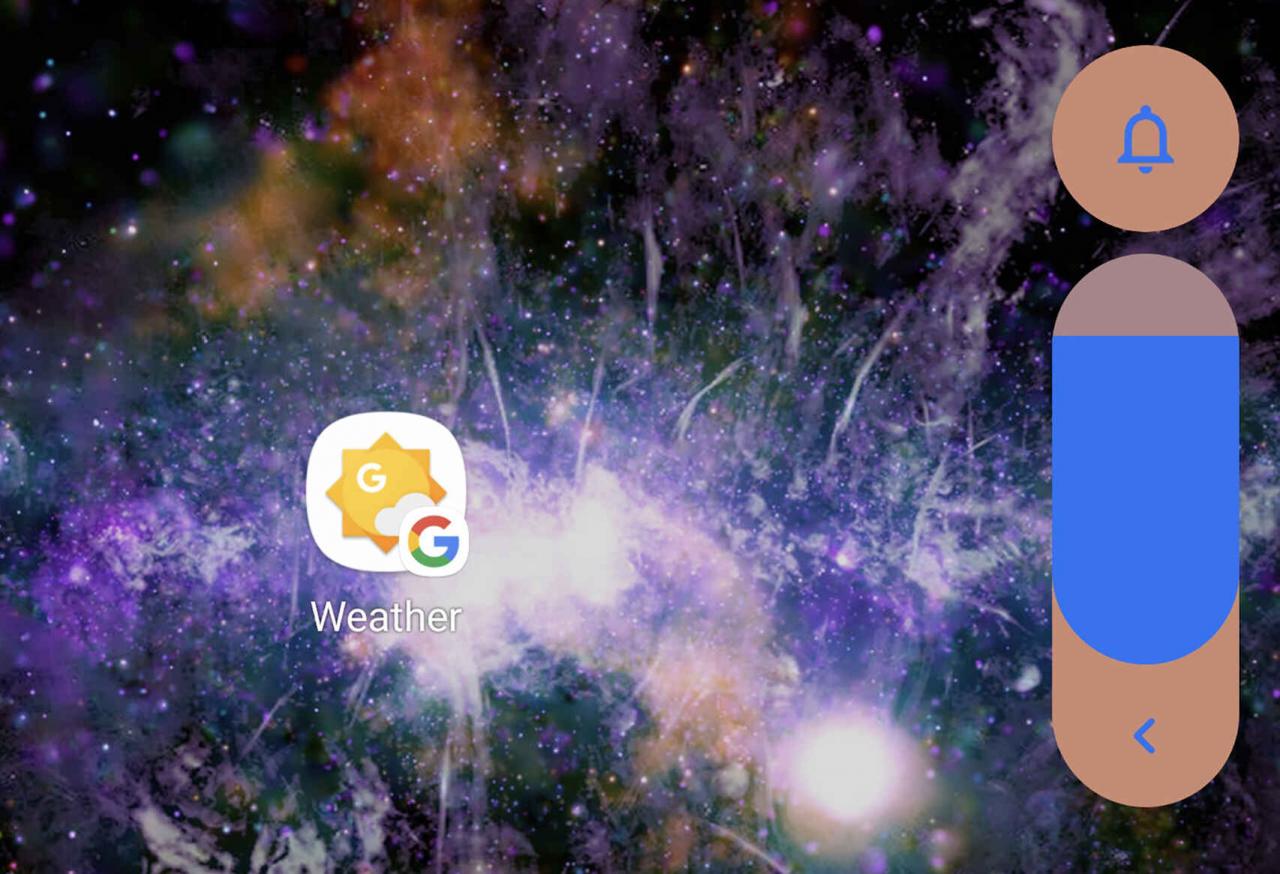
Stylized with the free Volume Styles app
It is not equal to 100%, but creating our own style with this app we are going to get a little closer. If we want it to get closer, we can pay the micropayment and we can change the blue color for a white one to make it similar to the one shown in the Android 12 screenshot.
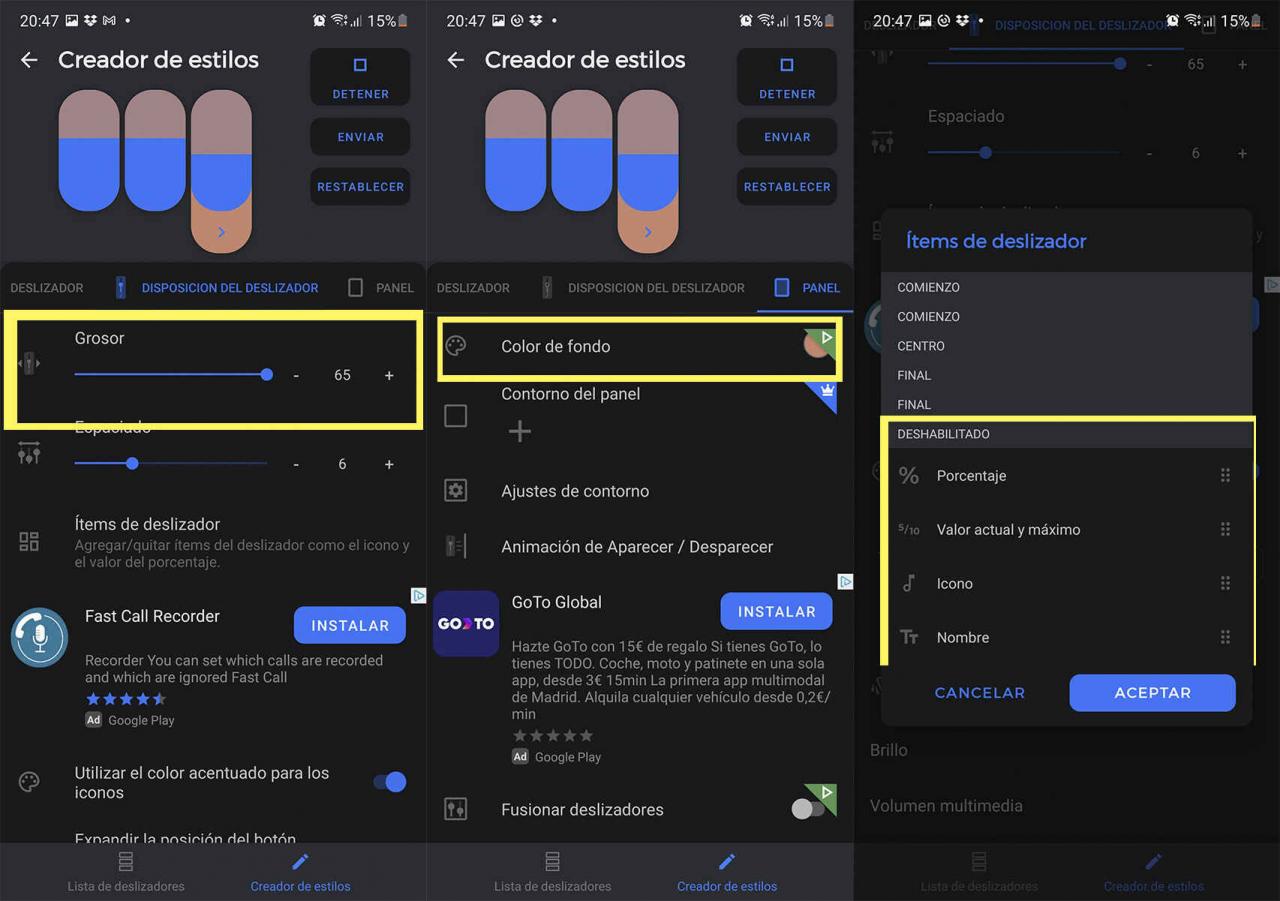
- We change the color from the panel and choose the key color used in the theme.
- We set the thickness of the selector to the maximum with 65 points from the disposition of the slider.
- From the main tab we are going to change the corner radius to 30 to make it rounded at the bottom and top.
- In the panel tab we have to configure corner radius to 30.
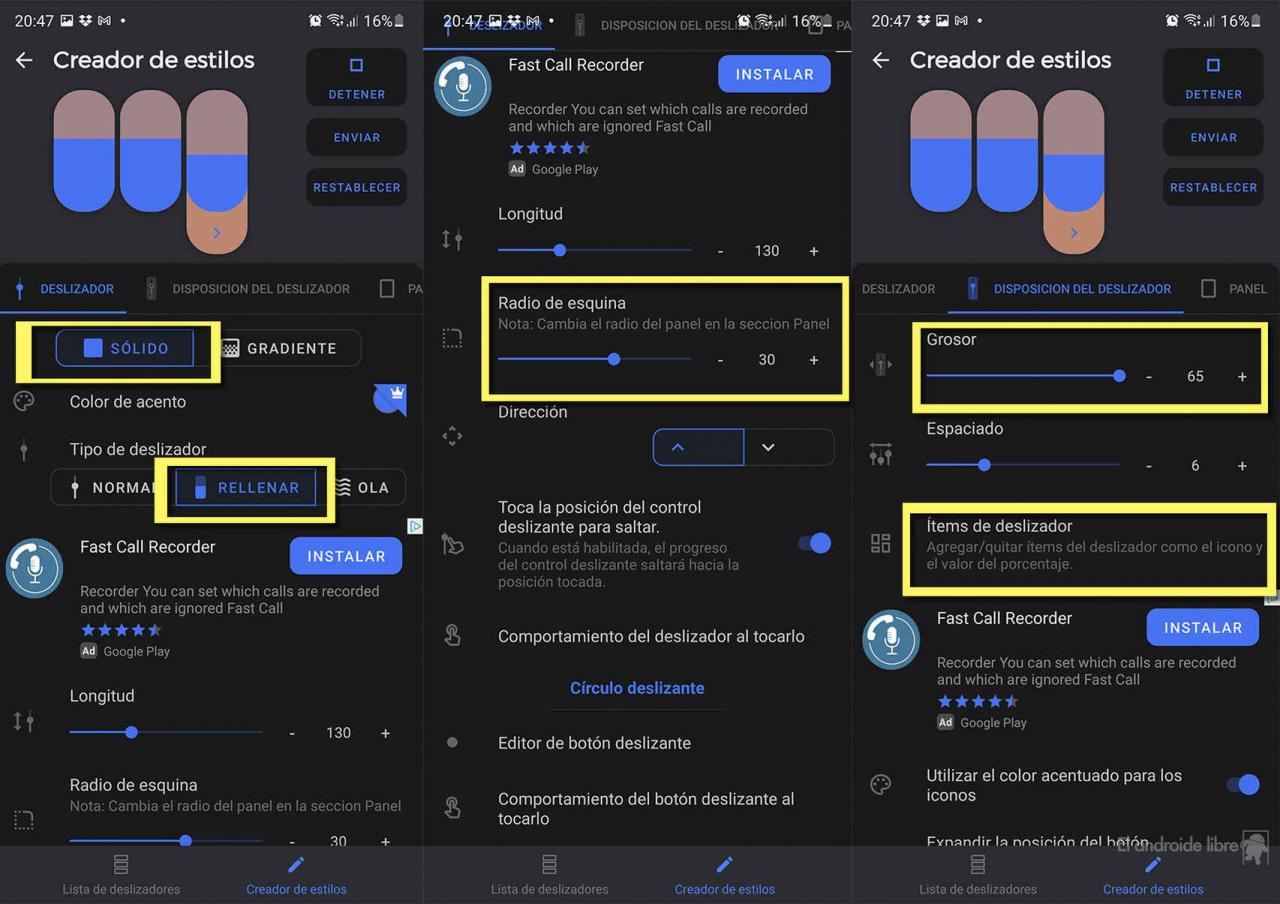
The Volume Styles app
Other configurations to take into account:
- Solid color.
- Slider type: fill.
- Length we can increase it by more than 130.
- Important: in the Disposition tab of the slider we have to disable the icon button so that the volume bar only has one.
Giving style to the volume selector like Android 12
Increase the size of the lock screen clock with Lockstar
To enlarge the clock on the lock screen we are going to install Lockstar from the Galaxy Store (it is available from Good Lock) and ClockFace from it in the Family tab.
ClockFace will allow us to create a larger clock as we want, while Lockstar will use it to position the elements of the lock screen.
Anyway, you can go to the next section to use an Android 12 type clock that includes the widget application. The only thing that is paid, for about 0.99 euros, but it allows you to save on creating your own with ClockFace .
- We go to Lockstar and activate it.
- On the first screen we move the notifications to put them on top, as well as the music playback widget.
- We place the clock a little lower than these two elements, but as it will be large, it will take up the desired space.
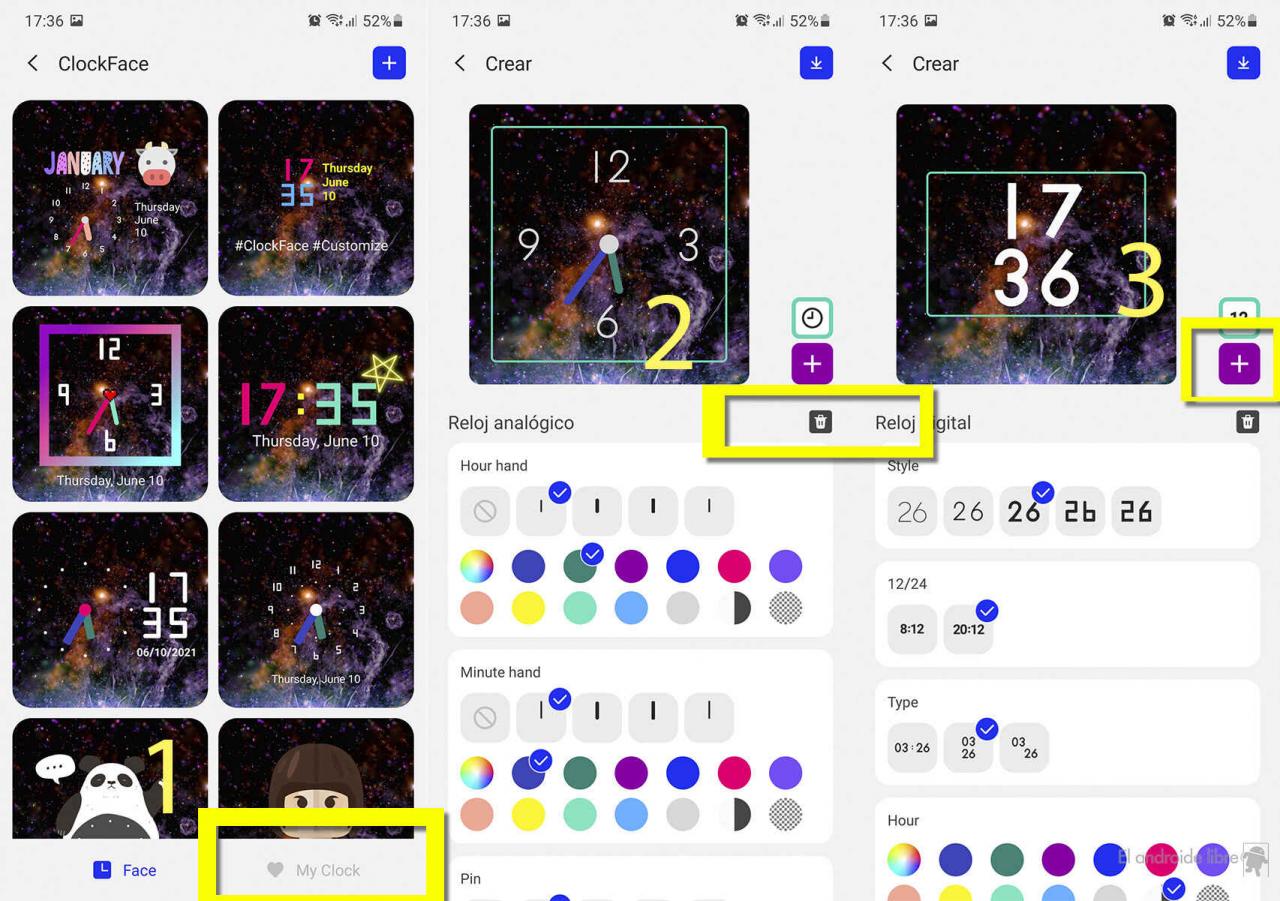
Steps to create a new watch
- We start ClockFace and choose lock screen.
- Click on “My Clock” at the bottom.
- We hit the + button.
- Now click next to “Analog clock” on the garbage button to delete it.
- We already have the canvas clean and click on +.
- We choose digital.
- And in the rest of the options you configure them as we show you in the following screenshot.

Settings to enlarge the clock
- Remember that in the preview you can use the pinch gesture to increase the size of the clock and so it looks like Android 12 in the second beta.
- Now you just have to click on the button located at the top right to save the style.
- In the styles screen, click on the one created and click the Ok button to apply it.
- We already have the watch as Android 12
How to use widgets like Android 12
Now we would have the Android 12 widgets and what we are going to achieve thanks to KWGT. The only problem is that again we are facing a paid app.
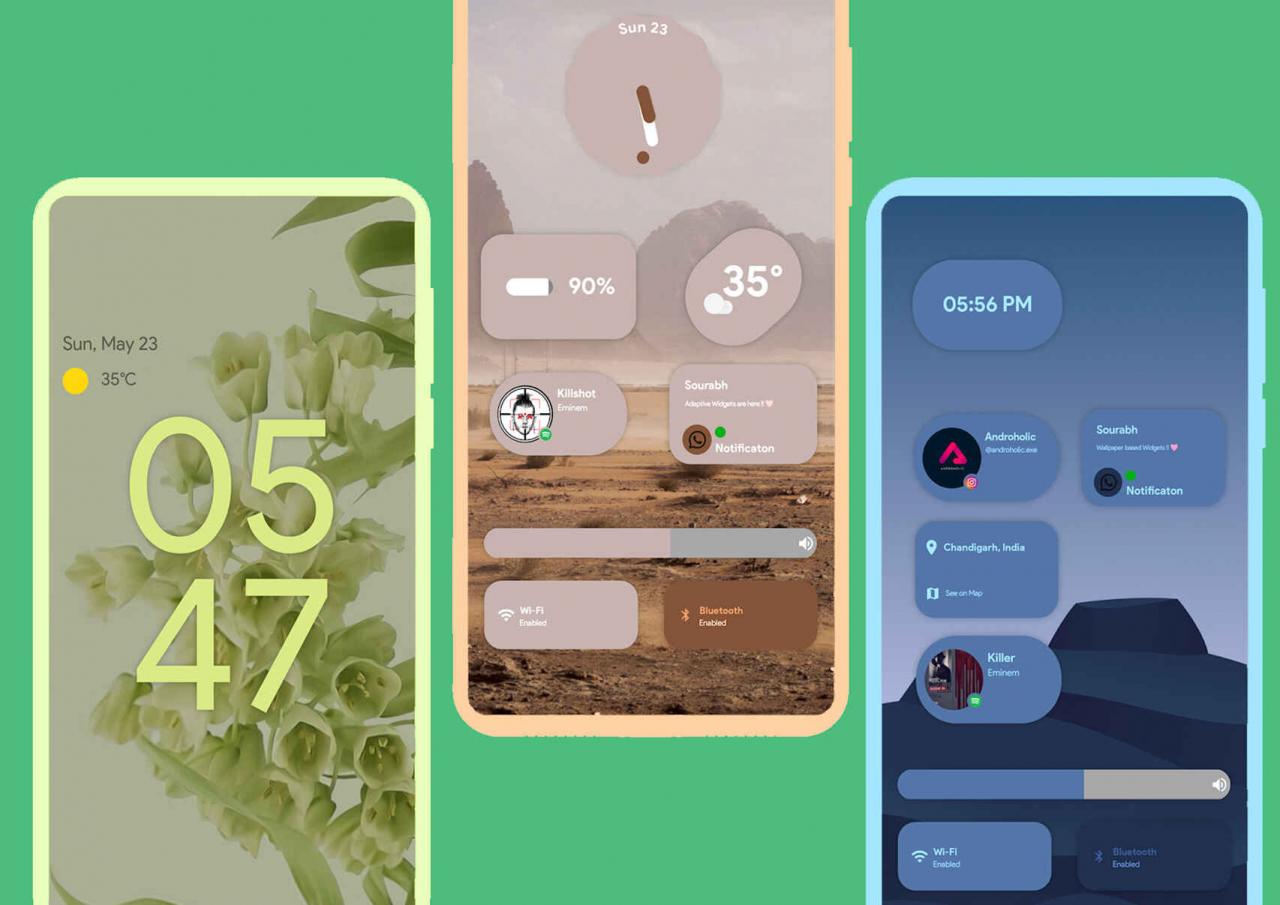
Android 12 widgets
It simulates Android 12 widgets quite well and is an app known for customizing other custom layers. You can download KWGT from the Google Play Store for 0.99 euros.
The interesting thing about this app is that it includes an Android 12 type clock, so you can save yourself the previous installation and customization with the Samsung app.
How to leave the default theme on your mobile
Now, if at the end of all the customization we do not have the way we wanted or we have simply stayed in the middle, we can leave the theme as it was.
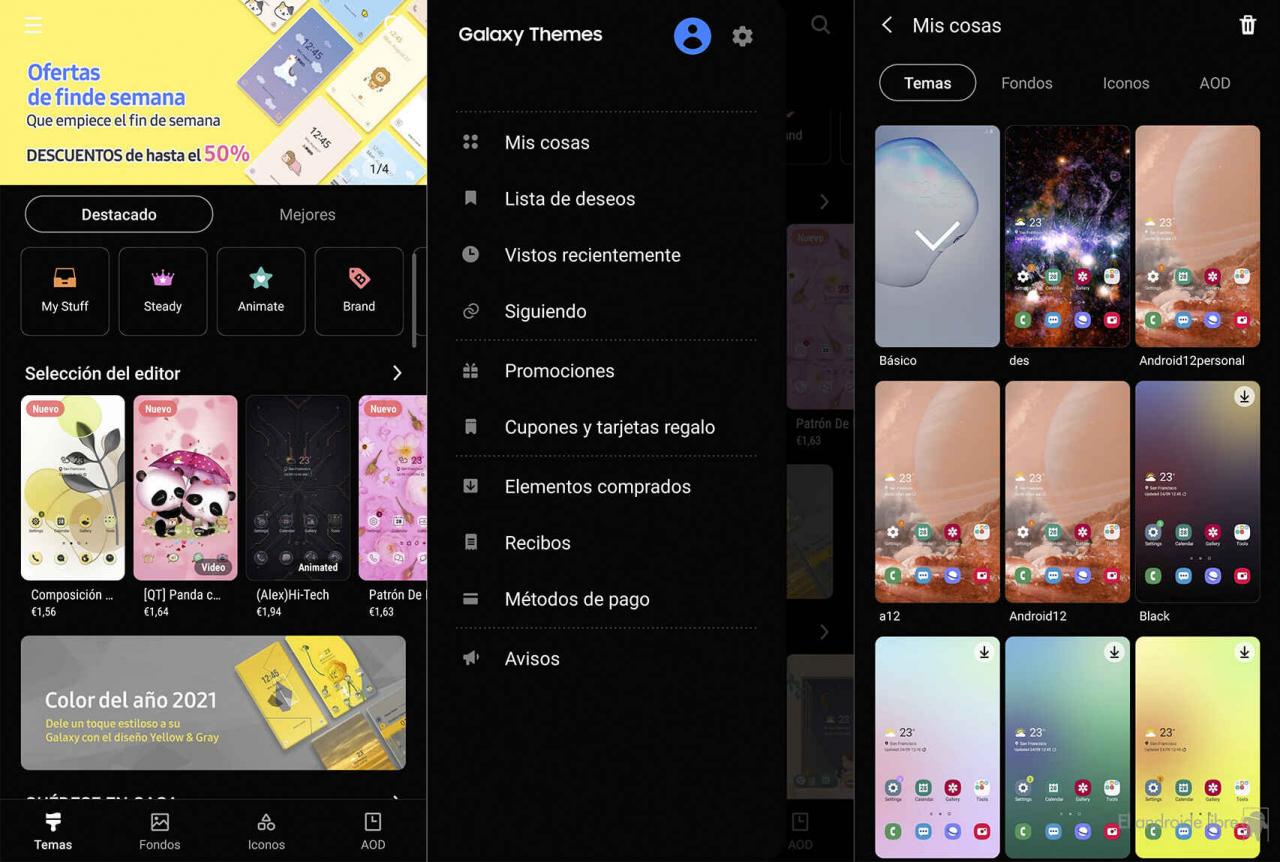
Restore the default theme
Although yes, we will have to pull the default theme, unless you have one saved to apply it. How to do it:
- We go to settings & gt; Topics.
- Click on the hamburger button located in the upper left part.
- We select My things.
- Of the themes we choose the basic one if we want to return to the Samsung by default or any other that we have saved.
- Ready.
A customization to get closer to Android 12 in the Samsung Galaxy that will be updated in this series of terminals as announced by the Korean company.