Contents
A little about Adobe Photoshop
Surely you often hear people around say: “Photoshop”, “photoshopped” and your mind has roughly outlined some idea of what kind of program is so wonderful that allows you to turn a photo into a work of art. Indeed, the Adobe Photoshop software presents its user with a huge palette of image editing tools.
At first glance, when you open a program (if it is on your computer or laptop), it may seem like you will never learn how to use it. But as they say, “never say never!” There is nothing complicated about this, you just need to follow the simplest instructions that can be found on the Internet. And so you can slowly do simple manipulations with photos and images.

How to make a frame in Photoshop?
Let’s now move on with you directly to how to make a frame in Photoshop yourself. If you do not have this program on your computer, then you should install it. After that, you can already proceed to the following actions:
- Open the photo in Adobe Photoshop that you want to put a nice frame on.
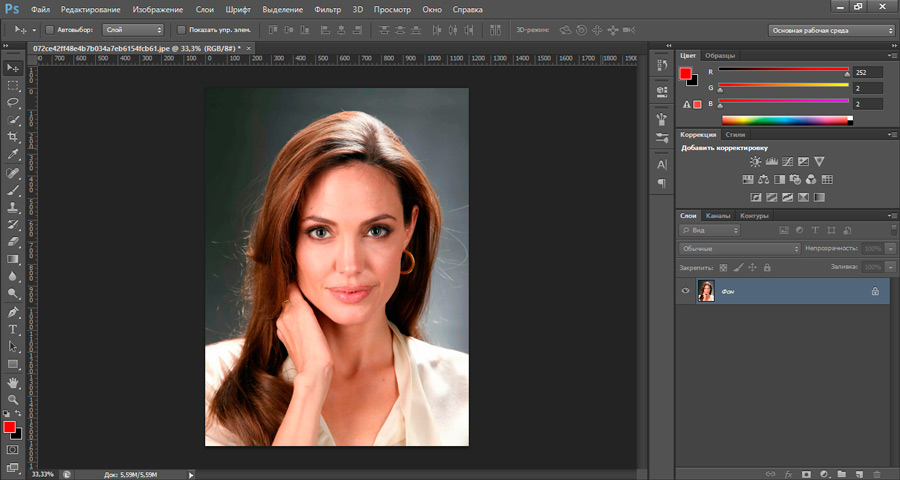
- Switch to the internet browser you are using. You will need a search engine.
- In the search box in the “Pictures” category, write “photo frame”. Among the results that appear, download the one you like. Pay attention to the fact that the format of the photo with the frame must be .png, and its background must be transparent.
- Also, you can simply write “download frames for photoshop” in the search bar. From the resources provided, you can download entire collections of frames.
- Now open the photo with a frame in a new window of Photoshop.
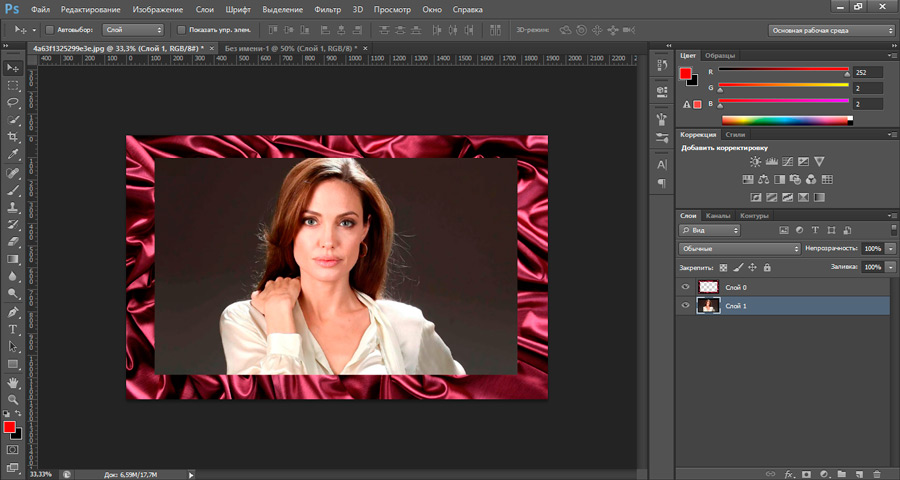
- The next step is to apply a frame to our photo from step 1. In the window with a frame, select the “Move” tool. It is located on the left toolbar at the very top (black arrow with a move icon). Or press the V key for a shortcut to the tool.
- Move the cursor over the frame and press the left mouse button. Now, without releasing the button, move the cursor over the tab with your photo. The tab is located below the main top menu. If you did everything correctly, then you will be taken to your photo from point 1. Now move the cursor to the area of the photo and release the left mouse button.
- At this point, we were able to insert a frame. But you may have noticed that the sizes of these two pictures do not match. What to do? Below the top menu, check the Show Controls box. There are now sizing buttons around the border. Use them to fit the image to the required size.
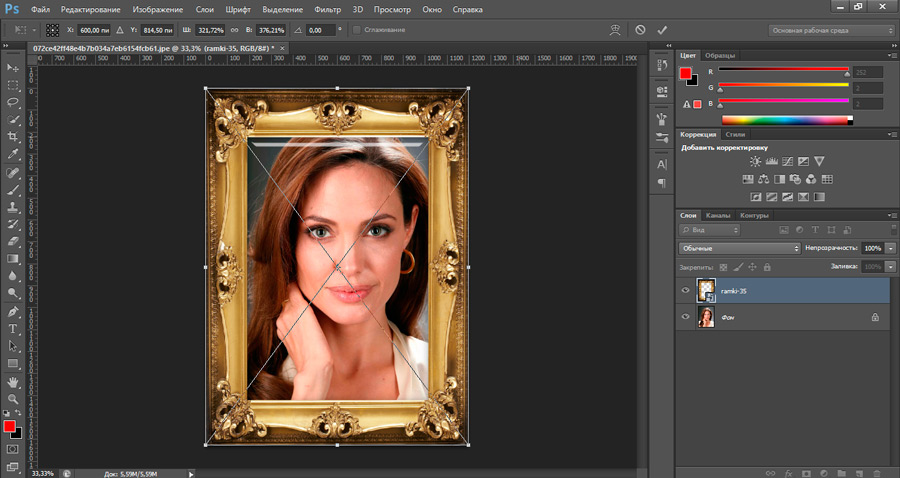
- When everything is done, you can save the result. To do this, select “File”, then click “Save As …”, and then select a folder for the file. Select .jpg in the image format field.
- Ready! You can show your creation to friends or family. Or just print the finished drawing and paste it into a photo album.
How to draw a frame yourself?
Here you will have to sweat a little. The fact is that beautiful patterned photo frames are drawn by professionals who often use a drawing tablet. And in most cases, artists do it. It is not possible for a simple user to draw a patterned frame. However, you can create a simple frame for your photo, but with your own texture and form. To do this, do the following:
- To begin with, all in the same browser, find a texture that you like and that will stylistically suit your photo.
- Then, just like in the previous instructions, add it to a new Photoshop tab.
- Now the fun begins! You can try to cut the frame yourself, or you can use the auxiliary tools. They are located on the panel on the left, below, under the black arrow. By default, a rectangle is shown there. Click on it with the right mouse button and select the shape, which will be the stencil in the future.
- Next, draw this shape by holding the left mouse button on the texture and dragging it to the other end of the picture.
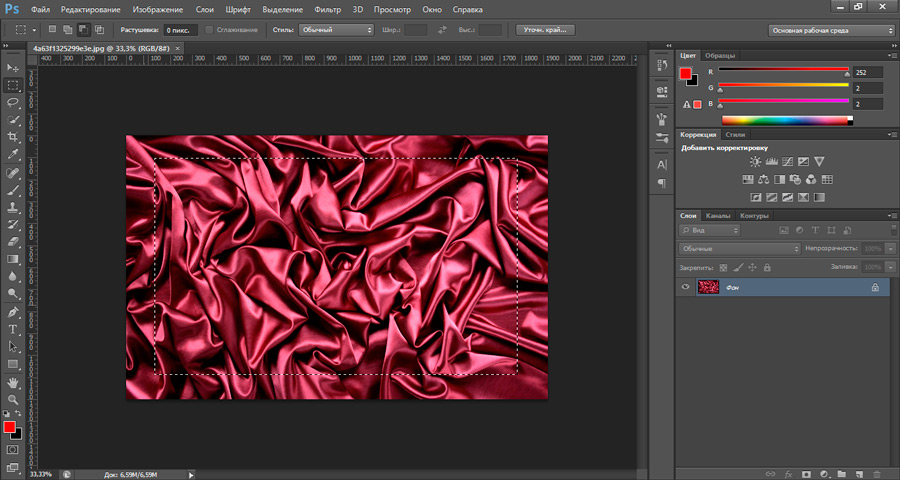
- The size of this shape can also be changed, as in the previous example (point 8).
- In order to adjust the size of the frame, you must understand that the space that the figure fills in the future is nothing more than your photograph (point 1). And what you leave from the texture around this shape is the future frame.
- After you have resized, double-click the shape quickly (as if you were opening a folder on your computer). At the bottom right under the “Layers” tab, you will see that you are currently on the shape’s layer. Right-click on this layer and select “Rasterize Layer”.
- Next, on the left panel, find the “quick selection” tool. Right-click on it and select “Magic Wand”.
- Now left-click on the shape.
- In the Layers tab, go to the texture layer (click on it with the left mouse button) and press the Delete key. In the window that appears, in the “Use” field, select the “Base color” item and click OK. Then in the same left pane find the Eraser tool and right-click on the Magic Eraser and left-click on the background of the shape.
- Now delete the shape layer. If you did everything correctly, then there will be a chess texture on the background of the figure. This means that there is a transparent background in this place.
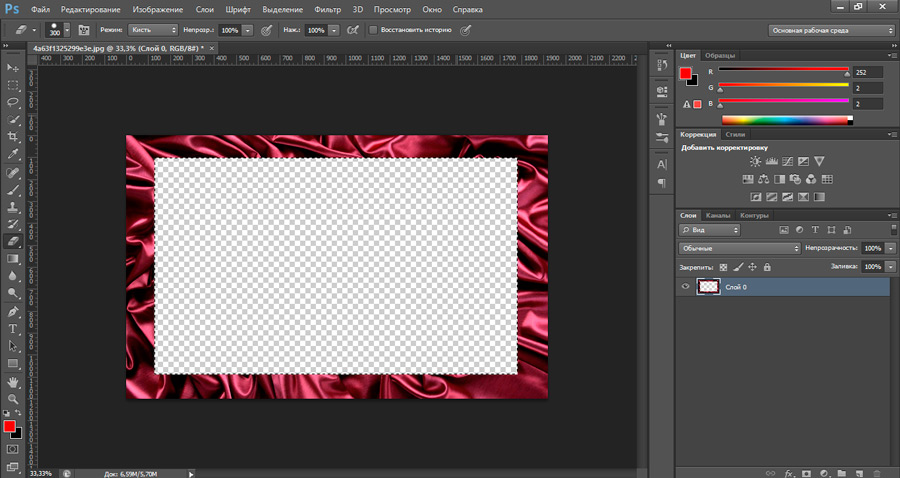
- Ready! You were able to draw your frame and now you can add it to any photo according to the principle described in the previous instruction. It remains only to preserve the fruits of your labors.
- We click “File”, then “Save as …”, after which we select the folder, and in the format field, take .png. Click OK.
Outcomes
Today we have not only learned how to insert a photo into a frame using Photoshop, but also learned how to create our own frames. Now you can add some charm to your old photos. Share examples of your work in the comments!