Microsoft Outlook is one of the most popular email programs. It has many very convenient and useful functions that can significantly simplify the process of exchanging mail messages. Many users found themselves in a situation where they could not answer someone’s letter for a long time. So that the person with whom you are in correspondence does not think that you are ignoring him, you can set up automatic sending of letters. This feature is extremely useful and useful to everyone. This article will take a closer look at how to set up auto reply in Outlook. Let’s figure it out. Go!
Contents
General setting principle
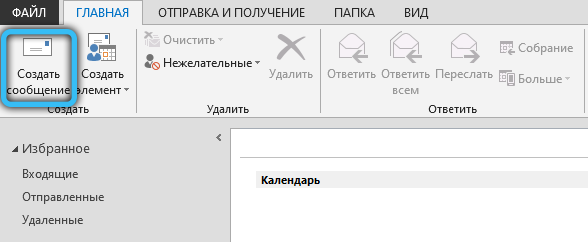
To set up automatic sending of emails in Microsoft Outlook, start the program and open the “Home” section. Next, click “New items” and in the pop-up list, hover over the item “Message in format”, and then select “Plain text”.
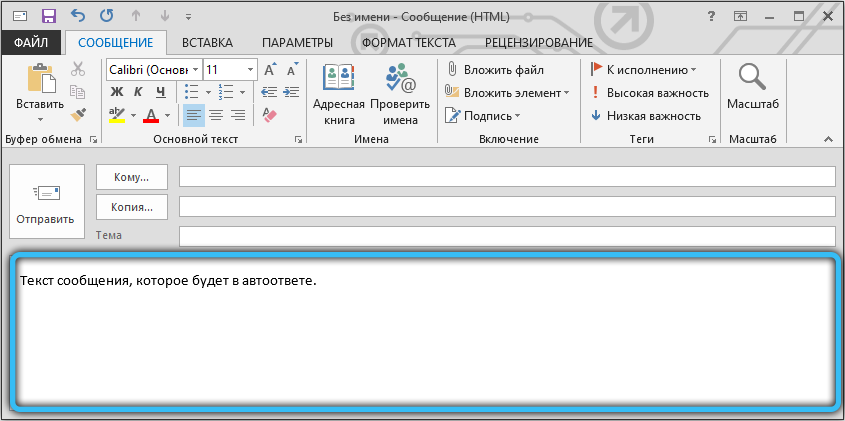
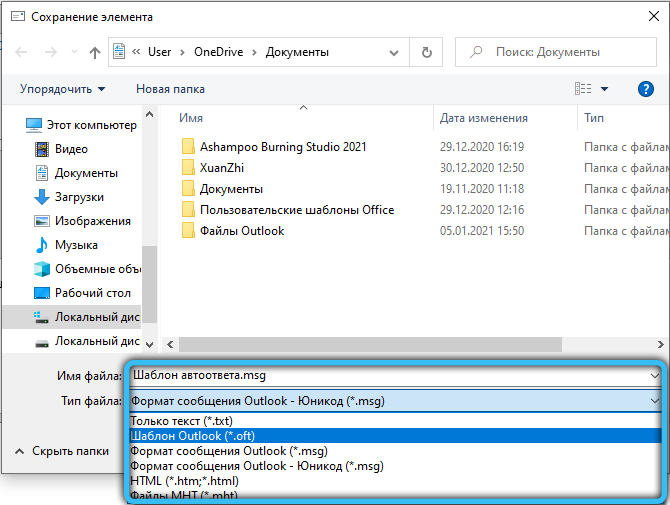
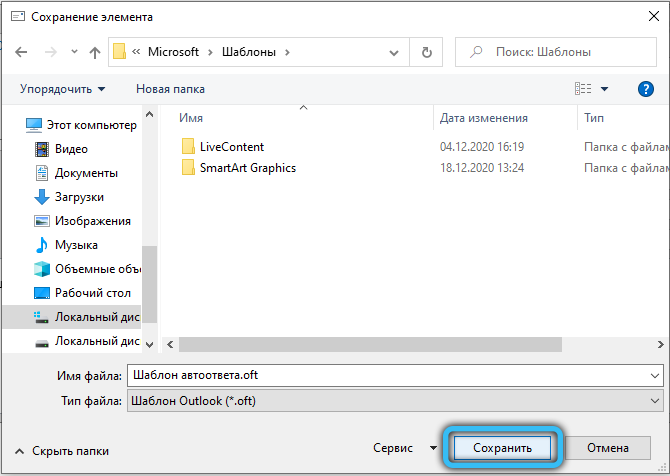
After that, you need to write the text of the letter, which will be automatically sent. Then go to the File menu and click Save As. A window will open in front of you where you need to enter the name of the saved file and its type. In the Save as type box, specify Outlook Template (* .oft). Click on the “Save” button.
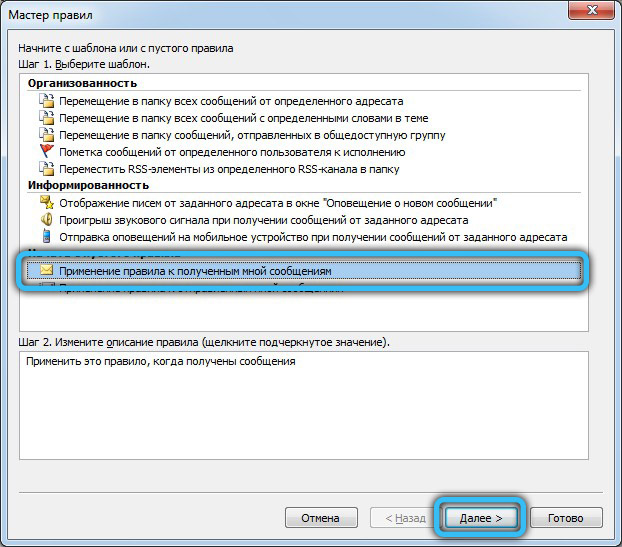
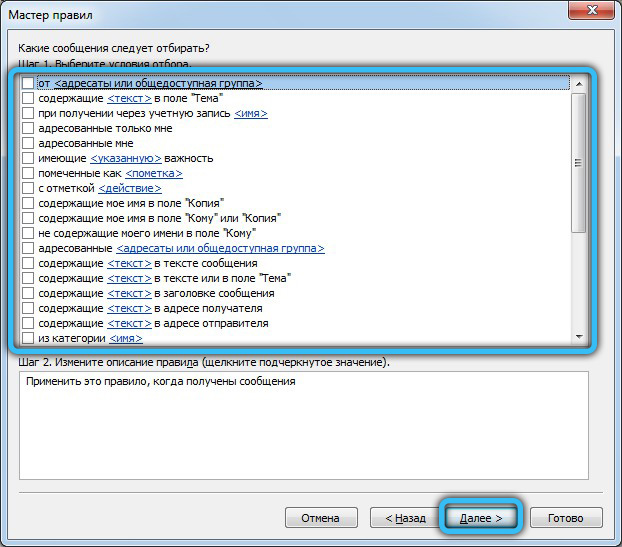
Now open the File menu again. Select the “Rules and Alerts” section. In the window that appears, click on the “New” button. You will see a list from which you need to select a template. Scroll down to the “Start with an Empty Rule” section, select the “Apply Rule to Messages I Receive” item and click the “Next” button.

At the next stage, it is necessary to mark the desired selection conditions with a bird. For example, send a response only to letters with a specific mark (address, heading) or only to e-mail with text, and so on. After checking all the necessary items, click “Next”.
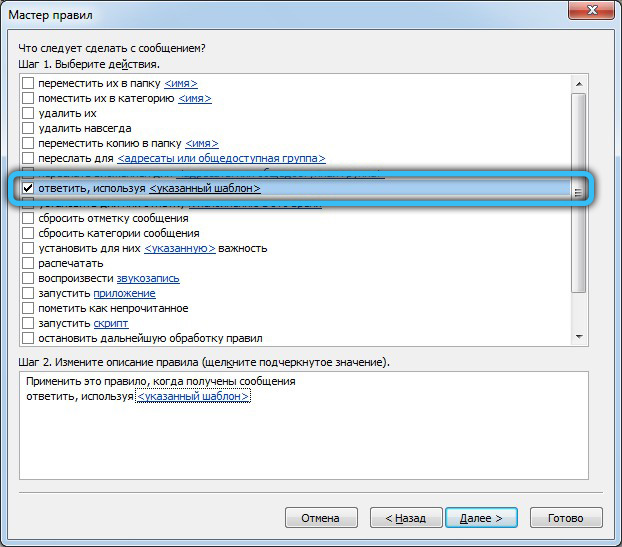
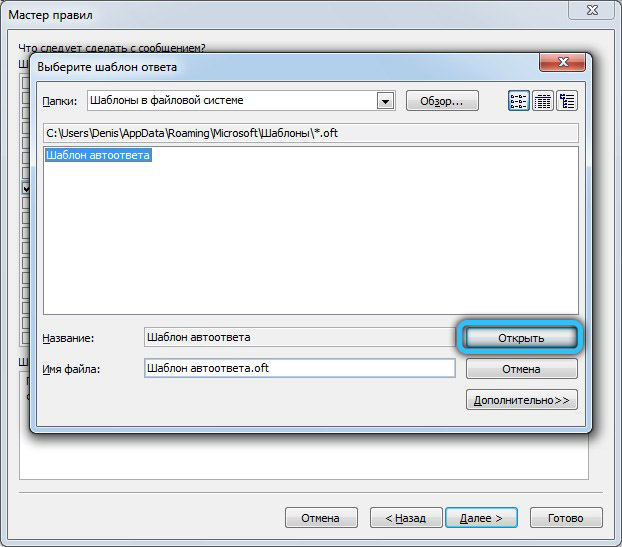
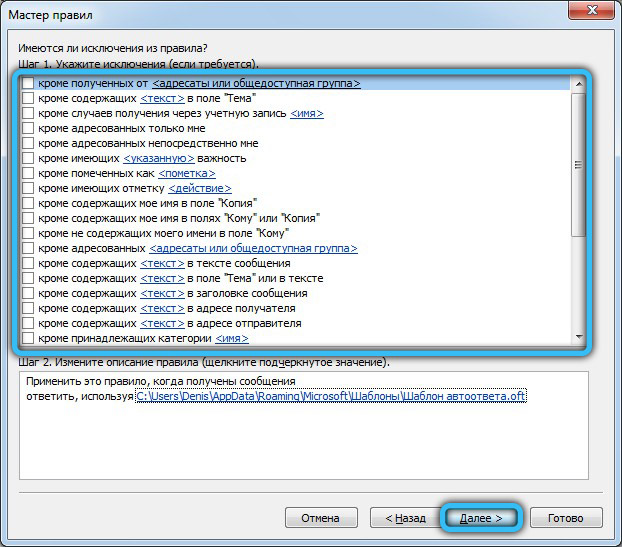
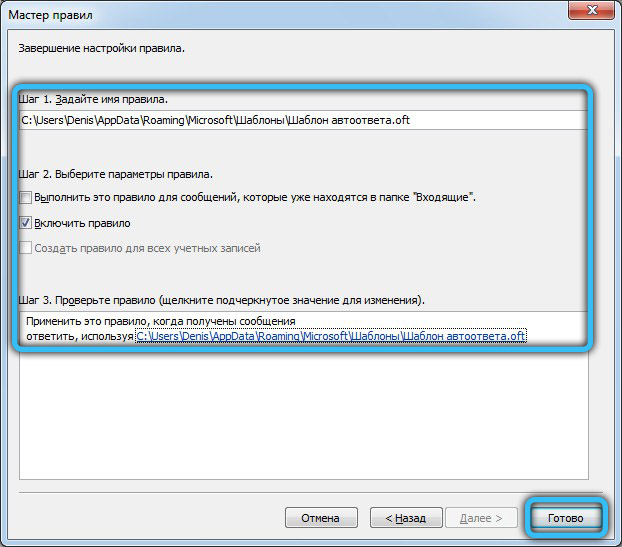
Now choose what to do with the message. For example, “Reply using <specified template>”. At the bottom of the window is the <specified template> link. Click on it and specify the path to the previously saved template file by clicking the “Open” button. Make sure the path is correct. It remains to press the buttons to confirm and complete the operation. Ready. After that, in all the cases you specified, the letter you just created will be automatically sent.
Outlook 2007
Despite the fact that the earliest version of Microsoft Outlook was released more than 10 years ago, it is still actively used by owners of weak and outdated PCs.
The Auto Reply feature in Outlook 2007 is called Proxy. To go directly to the setting, click on the “Service” tab and select “Substitute” in the drop-down list. In the next dialog box, check the box next to the line “I’m out of work” and enter the text of the message that people will receive when you are out of the workplace.
Please note that the rules for processing notifications are located in the same window under the letter input field. Upon completion of all operations, close the menu by clicking on the “OK” button.
Outlook 2010
You can configure automatic replies in Microsoft Outlook 2010 from the menu “File” → “Info” → “Auto replies”. By default, this option is disabled, so you need to activate it by clicking on the text “Send auto replies”.

In addition, users have the ability to set the time period during which this function will operate. To do this, check the box next to the “Send only within the next period” line, and then specify the exact time and date of the automatic messages. This item will be extremely useful if you have a vacation or business trip planned.
The next step is to come up with and enter the text of the letter intended for your recipients. We also recommend opening the “Outside the organization” tab, ticking the “Auto reply outside the organization” checkbox and duplicating the text in the corresponding input field. Thus, each sender will be promptly notified of your absence.

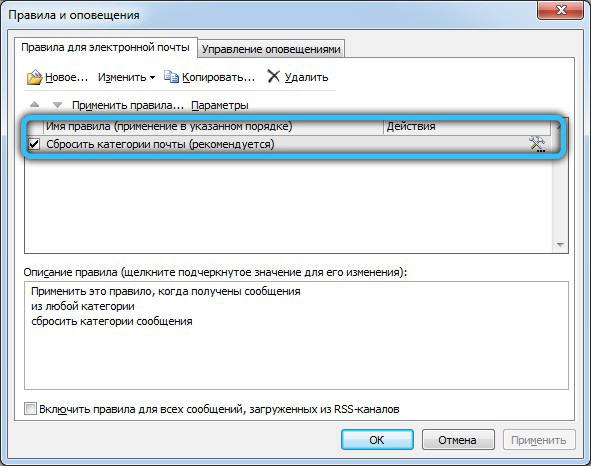
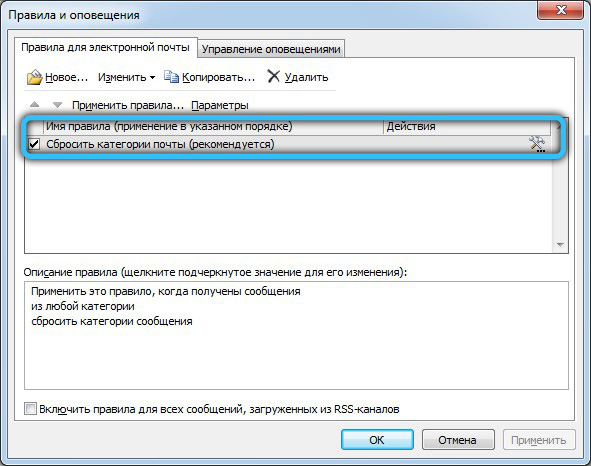
But that is not all! The functionality of the program allows you to set certain processing rules for the answering machine by clicking on the “Rules” button in the same window. Create a new rule by clicking on “Add”. This menu allows you to configure sending in such a way that emails from specific people are forwarded to someone else, for example, colleagues. Or create a filter for emails, the subject of which includes the word “invoice”, and automatically send them to the accounting department.
Complete the configuration by double clicking on the “OK” button.
Outlook 2013 and 2016
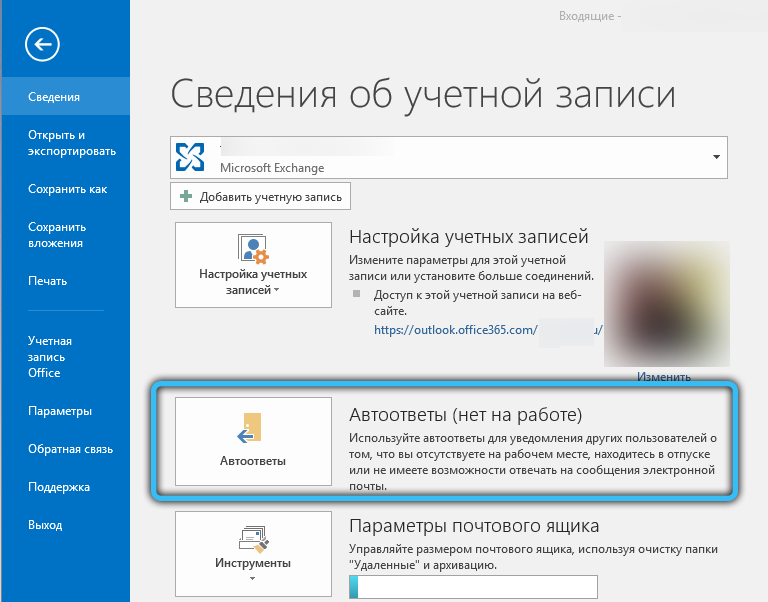
The setup in these versions is actually no different, so we decided to combine them. First, start Outlook and go to the File menu at the top left. Then click “Details” → “Auto replies”. The window that opens is visually very similar to the 2010 version. To enable the function, change the switch to the “Send auto replies” position.
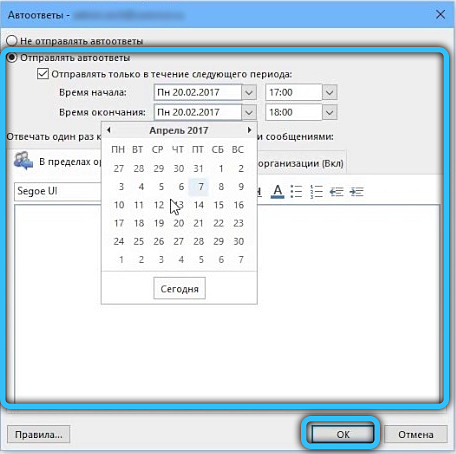
Moreover, you can set the time frame during which the status of automatic messages will be active. This is done using a checkmark opposite the corresponding item. This method is especially effective if you need to set, for example, the start date and the end date of the vacation.
After adjusting the initial parameters, fill in the field with a response message. If you want, you can use the editing tools, in particular, change the location, size and color of the font.
In the “Outside the organization” tab, we also recommend that you fill in a corresponding notification, so that as a result of your absence, everyone will be notified on time.
Another useful option “Rules”, located on the same panel. With its help, you can process incoming letters, adhering to certain conditions. This setting has many uses and corresponding parameters, so it will not be difficult to add a selection by addressees or keywords and perform any action on this basis.
After all the changes made, save the settings by double clicking on “OK”. To make any edits and make a complete shutdown, return to the “Start” → “Info” → “Auto replies”
Cloud version of Outlook
Turning on and configuring automatic replies on Outlook.com is easy. Of course, the web version has limited capabilities compared to Outlook software, however, its advantage is accessibility and ease of use.
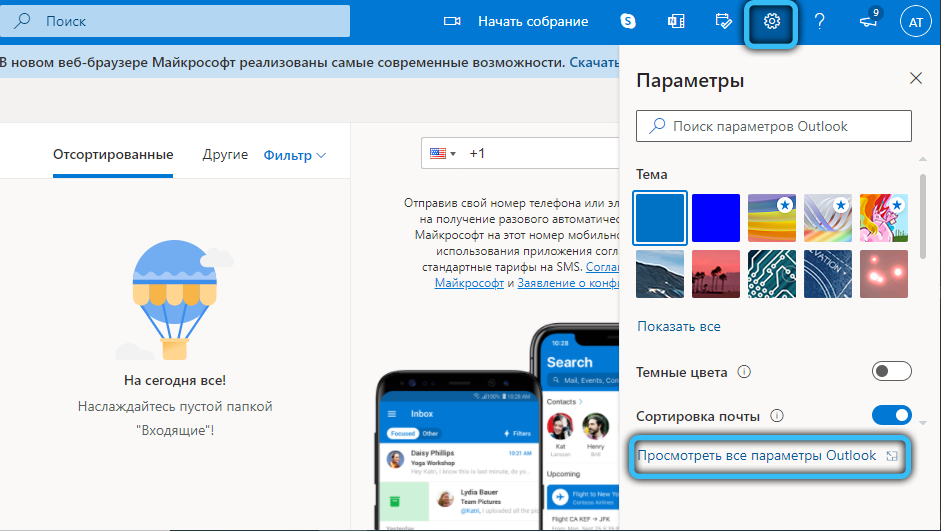
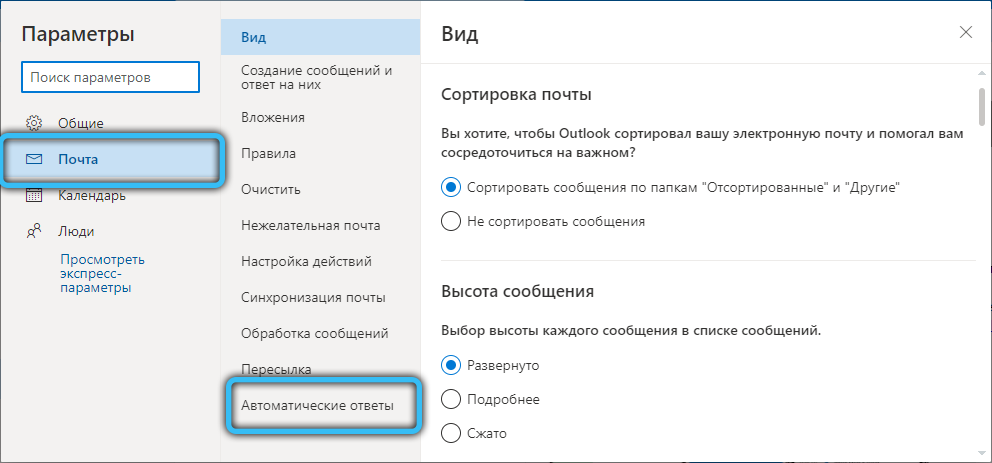
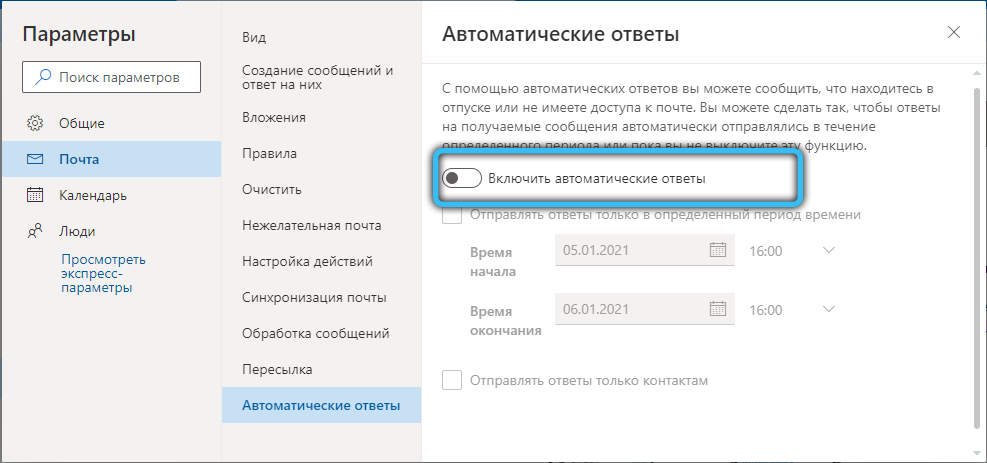
Go to the main page of the official website and select the section “Settings” → “View all Outlook settings”, and then the item “Mail” → “Automatic replies”. Move the switch “Turn on automatic auto replies”.
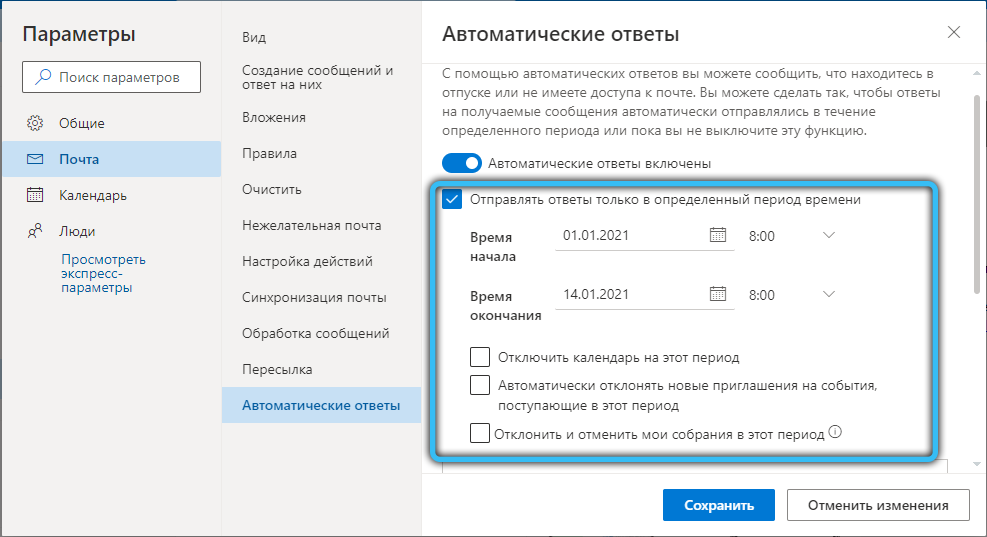
On the same page, you can set the time period when the responses will be valid by filling in the fields with the date and time. A useful condition under certain circumstances is optional. If you are interested – check the box, if not – feel free to skip.
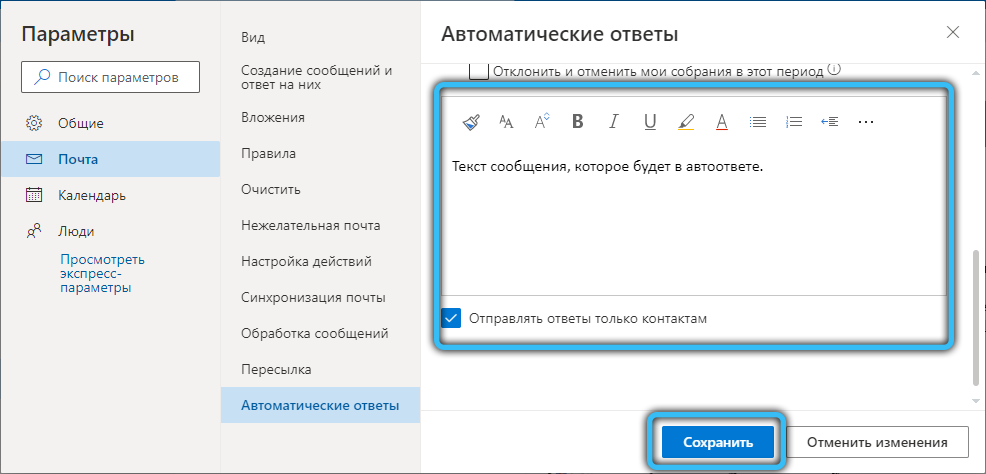
Now the most important thing is to enter the response text that will be contained in the outgoing letter.
After entering your message, we advise you to pay attention to the item “Send replies only to contacts”, which is intended to be sent only to those addressees who are in your contacts. Fix your choice with the checkbox next to this line. Finally, click “Save”.
Set up an Outlook autoresponder on your phone
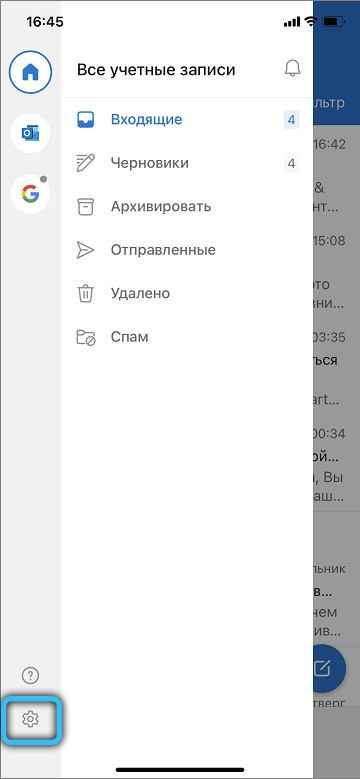
It is not always possible to use a computer or laptop to set up an autoresponder in Outlook. In such situations, this can be done using a mobile device. The general principle is just as simple and will not be difficult for most users. However, we have compiled instructions for you to surely put everything in its place.
Launch the application and then go to Menu (three vertical dots) → Settings. Next, select “Email Settings” → “Automatic Replies”. Enter the text of the notification and save it by clicking on “Ok”.
For each individual situation, you can create an appropriate auto-reply. This will help you automate the sending of email messages, save time, and stay in touch with friends, clients, or colleagues. You can also make a similar answering machine for the vacation period.
Now you know how to make auto reply in Outlook. As you can see, this is done very simply and quickly, while at the same time you greatly simplify the conduct of correspondence for yourself. Write in the comments if this article was useful for you, and ask any questions of interest on the topic considered.