ADSL modem is designed to connect to the Internet via a telephone line. It can act as a bridge or router. Many models have Wi-Fi. The device provides asynchronous data transmission. To configure it, you need information provided by the provider (DNS and IP addresses, PVC, login and password). It depends on the type of connection. All parameters must be entered manually.
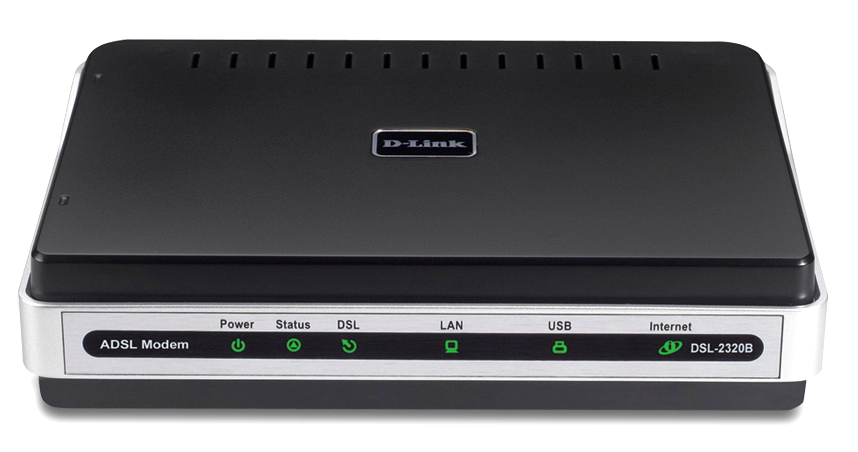
Rostelecom, for example, provides a disk complete with its modems, which sets the settings itself. With it, you can quickly connect your equipment to the network. And this does not require special knowledge or skills.
Contents
Reset
If your ADSL modem has been previously used, it is best to reset it to factory defaults. It will also be useful if you do not remember the password for the web interface. Different operators have different connection methods. When changing the provider (for example, you used Domolink, but moved to a new apartment, which is located in the coverage area of Rostelecom), it is easier to set up the device from scratch than to change individual options.
To revert the default options:
- You need to connect the ADSL modem to the electrical network.
- Find a button or hole with the inscription “Reset” on its body.
- If this is a button, hold it down for 30 seconds. The lights on the device may blink.
- If it’s a hole, insert a rod or paperclip into it. Also hold for a few seconds.
- If none of the methods worked, hold down the On / Off button and wait for the lights to flash.
After the backup, the device will reboot. You can also reset the parameters through the web interface. How to enter it is described in one of the following chapters.
PC connection
Before setting up an ADSL modem, it must be connected to your network and your computer. To do this, you will additionally need:
- Splitter. Frequency separator. It is a small box with three ports. Internet and telephony “are” in one wire. But they have different frequencies. The splitter eliminates their influence on each other.
- Ethernet cable. Needed to connect PC to ADSL device. Wi-Fi can also be used if you know the password. If you are connecting the modem via USB, you need a USB cable.
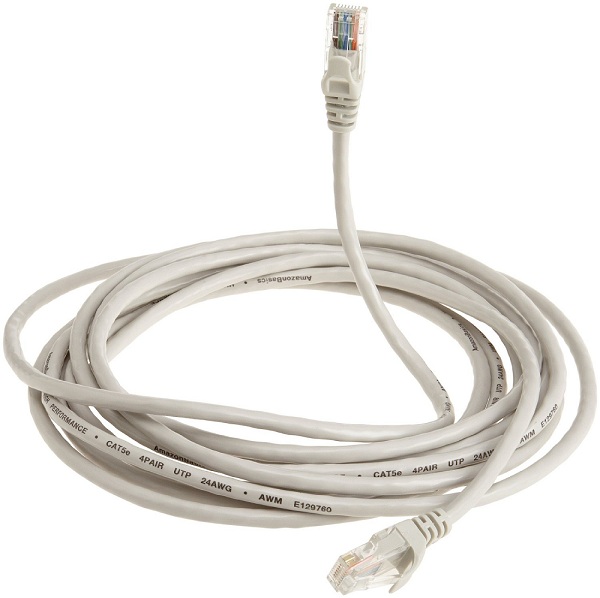
Ethernet cable
- Telephone cable with two connectors. To connect the router and splitter.
Many operators simultaneously provide Internet, telephony and television services (including Rostelecom). So all communications will work on one wire. There are other types of connections though. Nowadays, optical fiber cables are very popular – they have high bandwidth, or twisted pair of various categories. They have different sizes and connectors. Therefore, they are not suitable for ADSL.
Setting up a modem begins with connecting it to your computer and network.
- Take the splitter.
- In the slot called “Line”, insert the main telephone cable that is connected to the provider (Rostelecom, Domolink, MTS, and so on).
- The “Phone” (or “Tel”) port is for a telephone (if you have one). You can use wall outlets to connect multiple devices.
- Insert the telephone wire into the “Modem” jack, which will lead to the modem. The “ADSL” connector is intended for the Internet cable. Slots there are of different sizes – you will not mix it up.
- Connect the router itself to the PC in any way convenient for you. To work via Wi-Fi, find the required wireless network on the computer and enter the password (it should be indicated on the modem case or in the instructions). To connect using an Ethernet cable, insert one end of it into the “LAN” slot, and the other end to the port on the network card. Or use a USB wire.
- Check if the corresponding indicators on the router are lit. The “Internet” light should be off until you have established a connection.
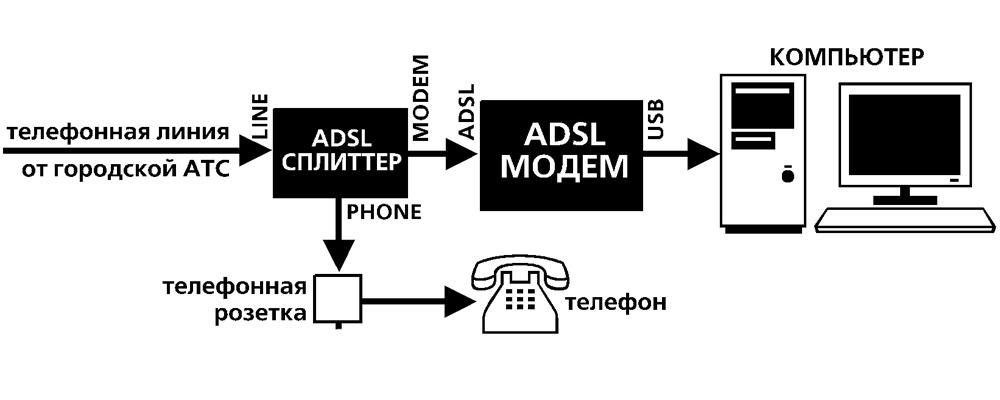
Connection diagram
Web interface. Configuring a network card
Configuring an ADSL modem is most often done through a web interface. This is a visual display of device parameters and information about it. There you can see logs, statistics, options set. To enter the interface, open any browser and enter in the address bar “192.168.1.1” or “192.168.0.1” without quotes. The address may be different – this is always indicated in the instructions.
If the page of the router does not open, it means that it is not connected correctly, or it is not connected to the network card. In the first case, check the cables, see if they are properly fixed in the sockets. If everything is in order there, you need to configure the network card.
- Click on the connection icon in the taskbar (or open the “Control Panel”)

Click on the connection icon
- Go to the Network Sharing Center.
- Click on “Change adapter settings” (or “Manage connections” if you have Windows Vista).
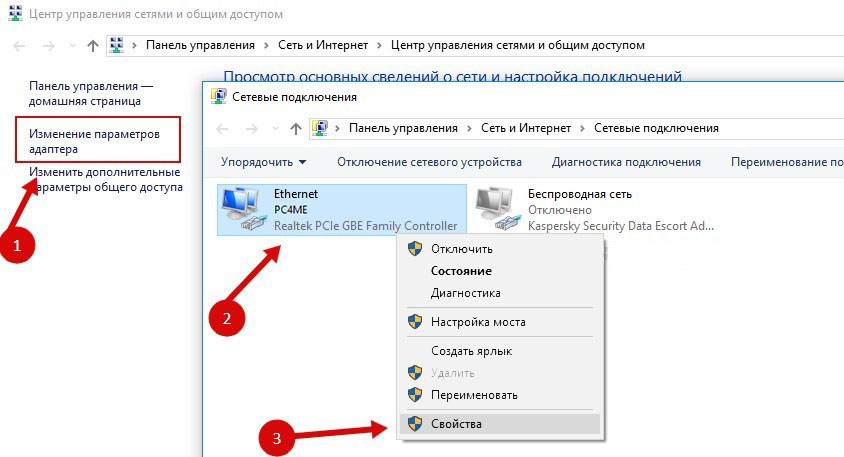
Change adapter settings
- Right-click on the desired connection.
- Select Properties.
- Find “Internet Protocol 4” in the list. Double click on it.
- A window will open in which you need to specify the IP and DNS.
There should be information that the provider will give out (in Rostelecom, for example, you need to automatically receive addresses). But for now, you need to configure the network card. To do this, set the following parameters:
- The IP address is “192.168.1.2” (remove the quotes).
- The subnet mask is “255.255.255.0”.
Save your changes and try opening the web interface again. Upon entering, he will ask for a username / password. The default is “admin / admin” or “admin / 1234”. The key is indicated in the instructions.
There you can reset the parameters.
- Go to “Mangement” (“System”).
- Setting section.
- Click the Restore Default Settings button.
Internet connection
If the parameters are not set automatically, you need to connect the device manually. The setting differs depending on the operator and router model. But the algorithm of actions is the same. For example, the situation with D-LINK DSL-2640U:
- Go to the web interface.
- Click on the “Net” or “Network” tab. On the 2500U, it is called “WAN”. In previous versions, it is located in the “Advanced Setup” section.
- Subsection “Connections”.
- Click the Add button.
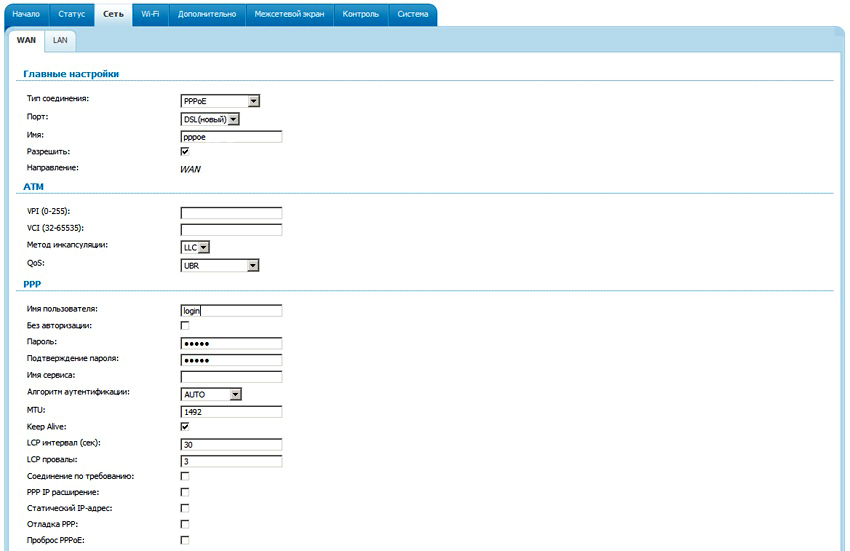
Configuring D-LINK DSL-2640U
- Select “PPPoE” from the “DSL protocol” or “Connection Type” list.
- Enter the PVC parameters in the VPI and PCI fields. They depend on the region and the provider. For example, for Rostelecom in Moscow, VPI is 0 (zero), and VCI is 35. This information can be obtained from the operator.
- In “PPP Username” write your username.
- In Password and Password confirmation, copy the password.
- Check the “Keep Alive” and “IGMP” checkboxes.
- “LPC interval” and “LPC fails” are designed to set the intensity of authorization requests. If you set the interval “20” and the failure “3”, after three unsuccessful attempts to connect the device will “wait” for 20 seconds. If the network is constantly interrupted, the interval can be reduced.
- Click the Save button at the bottom.
- Restart your ADSL modem.
Some models have so-called “Quick Settings” – “Quick Setup” or “Wizard”. Just enter the data that the operator received – the system itself will select the appropriate parameters.
Titles and sections may vary. But the principle is the same. Let’s consider the situation with a specific example. This is how Rostelecom’s ADSL modem setup looks like:
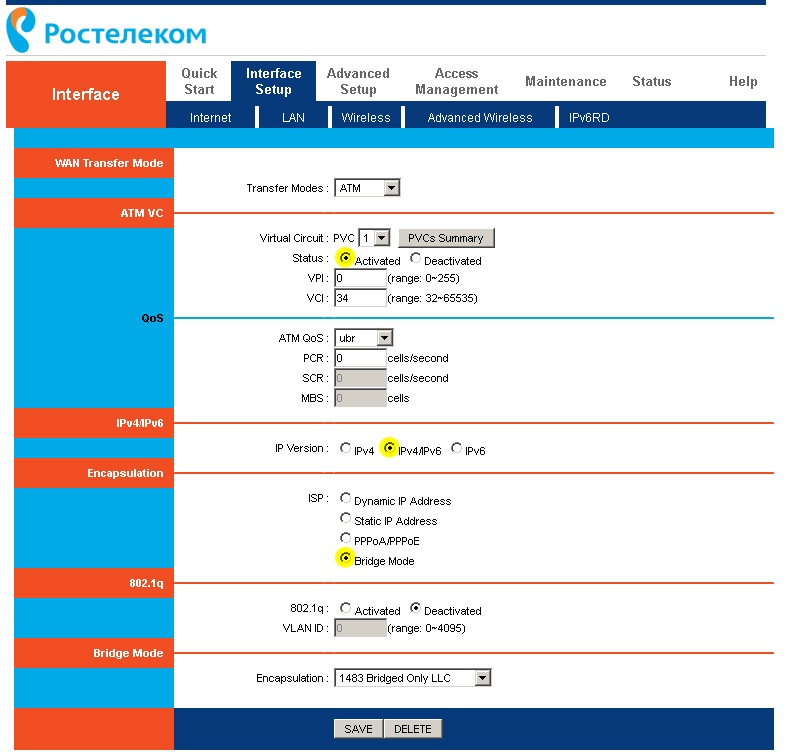
Configuring a Rostelecom modem
- Go to the web interface.
- Open Interface Setup – Internet.
- In the “Virtual Circuit” section in the “Status” item, check the “Advanced” option.
- In “IP version” select “IPv4”.
- In the ISP section, check PPPoE / PPPoA.
- In the fields for entering “Username” and “Password” write your username and password.
- In the “NAT” list, check “Enable”.
- In the “Direction” item, specify “Both”.
- Wi-Fi is configured in the “Wireless” section.
- “SSID” is the name of the network. Pre-Shared Key – password.
Rostelecom, like many other providers, provides an installation disk along with its equipment. It is easier to connect to the Internet with it. Just insert the CD into your drive and follow the instructions.
Connecting the router to an ADSL modem
You can use the modem as a link between your internet connection and your router. Then another device will “distribute” the Wi-Fi signal. To do this, it is necessary that all equipment is on the same network. This type of connection is called “Bridge Mode”. This is useful if you have multiple computers at home. After all, the router provided by the ISP may not support a wireless connection.
Here’s how to connect an ADSL modem to a Wi-Fi router:
- First, set up your DSL device separately. So that through it you can go online.
- Insert an Ethernet cable into its LAN connector.
- Reset the parameters of the router from which you want to distribute the Internet. Even if it’s new and hasn’t been used before.
- Connect the other end of the Ethernet wire to the Wi-Fi router to the WAN slot. The port may be called “Internet”. On the case, it is always highlighted in color.
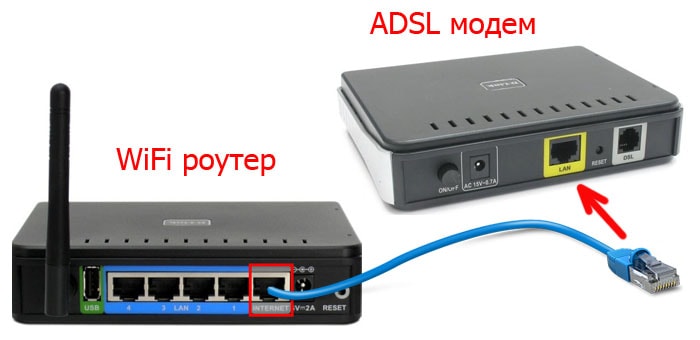
Connecting the router to a modem
- Connect it to your computer.
- Go to the web interface.
- Open the “WAN” section.
- In the “Connection Type” list, select “Dynamic IP”.
- Check the “PPPoE” option. Enter your username and password.
- Save changes and restart the device.
The network should work. If this did not happen, then it has specific parameters that need to be learned from the operator.
IPTV setup
Many providers provide Internet and television in one package (for example, all the same Rostelecom). A Wi-Fi router is best suited for working with IPTV. But you can also use a regular ADSL modem. If it has several LAN connectors. To configure it, you need to create a bridge.
- Go to the web interface.
- Open the Network – Connections section.
- Select Bridge from the Connection Type list.
- Specify VPI and VCI. If they are paired, you need two bridges.
- Click “Save”.
- Click on the “Advanced” tab.
- Subsection “Grouping of interfaces”.
- “Create group” button.
- Enter any name.
- Move the bridge and some LAN port to the right speakers. For example LAN3.
- Click “Save” and reboot your device.
After that, IPTV will work on the selected connector.
ADSL modems are ideal for use over telephone lines. But in order to install such devices, you need to understand the parameters. If your DSL does not have a wireless network, you can configure it to connect to a router.