Working with a video projector opens up wide opportunities for high-quality and efficient presentations, business meetings, seminars. Despite the seeming simplicity of connecting to a computer, this task sometimes causes serious difficulties. We will try to consider the main subtleties of high-quality settings without unnecessary waste of time and risks for a successful event.
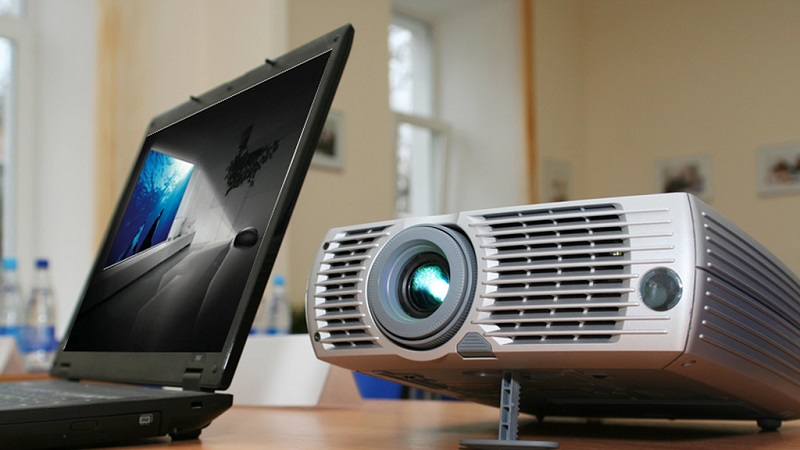
Let’s consider simple tips and principles of connection. As a rule, the connection does not imply any special difficulties – it is enough just to take into account some of the nuances, which we will talk about in more detail.
Contents
Why and how to connect a projector to a laptop
At some point, every computer or laptop owner begins to realize the rather miniature dimensions of his screen. If the standard computer also supports the ability to connect other monitors, then in the case of a laptop, such an opportunity cannot be counted on. To solve this problem, you should take care of connecting a video projector, which allows you to increase the display diagonal.
How to connect a projector to a Windows laptop
The first step is to figure out which interface for connection will be used. The most common options are:
- VGA – analog signal;
- DVI – can be both digital and analog;
- HDMI is a digital signal, audio is also transmitted through it (in VGA and DVI – only video).
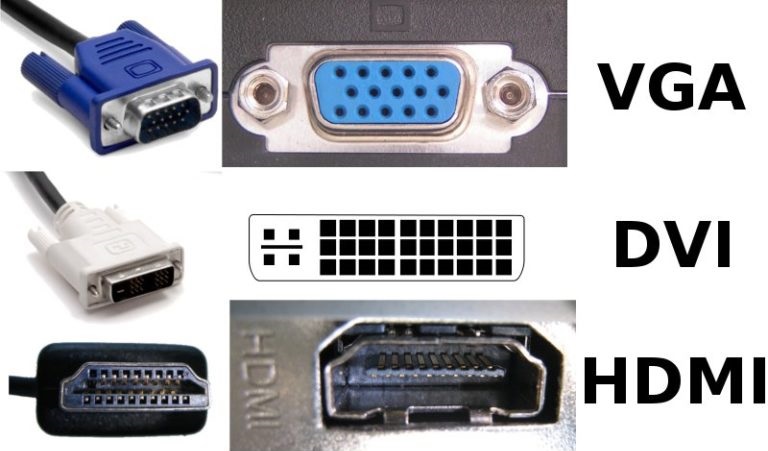
As a rule, all projectors have a bundle of either DVI and HDMI, or VGA and HDMI. In the event that the laptop has only VGA, but the projector does not have it (but there is DVI), then it will be possible to use a special adapter (without signal conversion).
The best picture quality is provided by HDMI. For DVI, it is slightly worse. And VGA is one of the most outdated interfaces. Although there is not much difference for projectors – among such devices, the resolution of the final picture rarely exceeds Full HD (1920 by 1080). And for transferring such an image at a frequency of 30 frames per second, VGA will be more than enough.
Connection process
So, having chosen the interface that will eventually be used, you should turn off both the projector and the laptop. Moreover, it is recommended to de-energize them as well. Next, the video signal cable is connected to the laptop and the projector. Then you should turn on the projector and, last of all, the laptop itself.
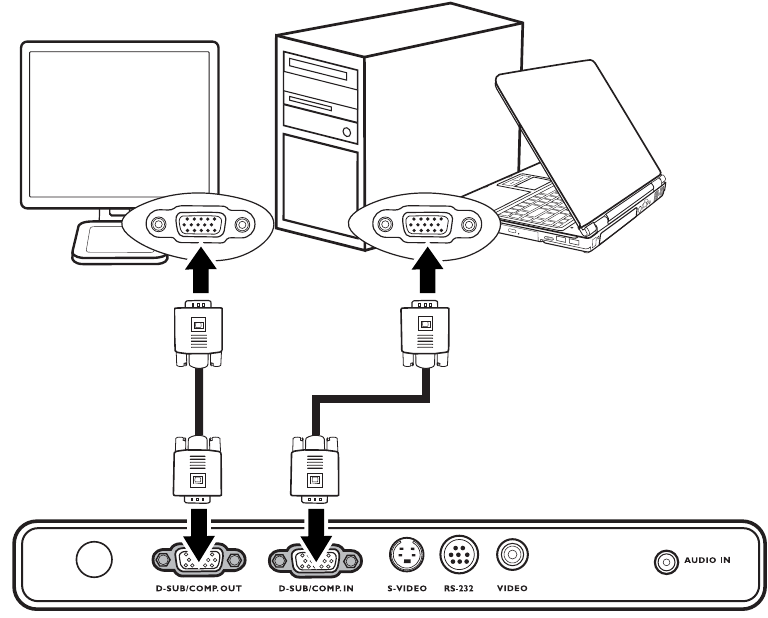
Immediately after connecting the cable and booting the system, the video signal from the laptop should already go to the projector. That is, there will be no image on the screen; instead, the Windows interface will be displayed on the projected area. This scheme works in Windows 10, 8, 7, Vista. In Windows XP, by default, the output of the image to an external monitor is not enabled.
Selecting the Image Output Source
You can select the display to which the video signal will be sent in the following ways:
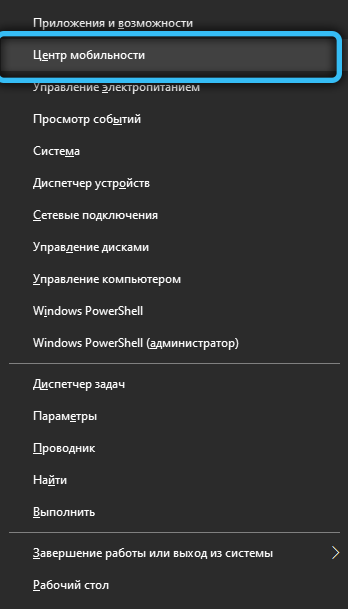
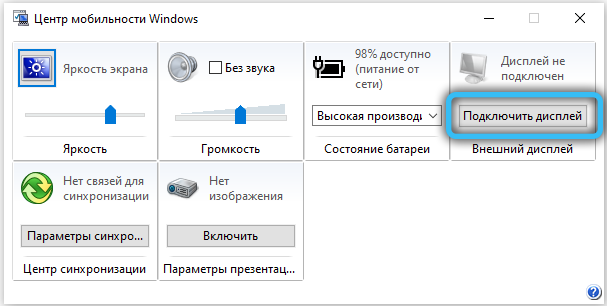
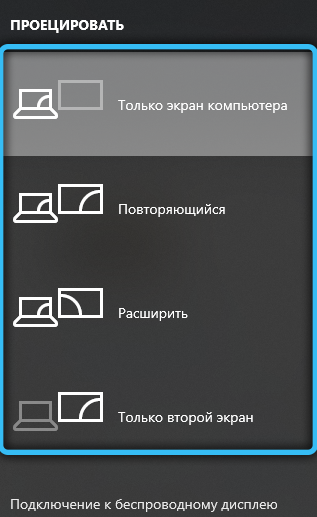
- Through the Windows Mobility Center. Launched by the Win + X key combination. In Windows 10, after clicking it, a list of system utilities opens, from which you will need to select “Mobility Center”. Then select from the dialog box “Connect display”, then specify the connection mode. You can have both the built-in display and the projector display the same image at the same time.
- Via graphics driver software. It is enough to open it through the “Control Panel” and go to the “Display” section (or “Connected Monitors” for Radeon). And there you can individually configure each connected external monitor or projector in detail, set the display mode.
In some laptop models, the image output to an external source must be enabled at the hardware level. To do this, use the key combination Fn + F8. That is, if after loading the device the image is not supplied to either the built-in display or the projector, then it is with this combination that you should start.
What to do if Windows cannot see the projector
A similar situation occurs with older projectors. The problem is the lack of support for interoperability with WDDM drivers. In 99% it is solved as follows:
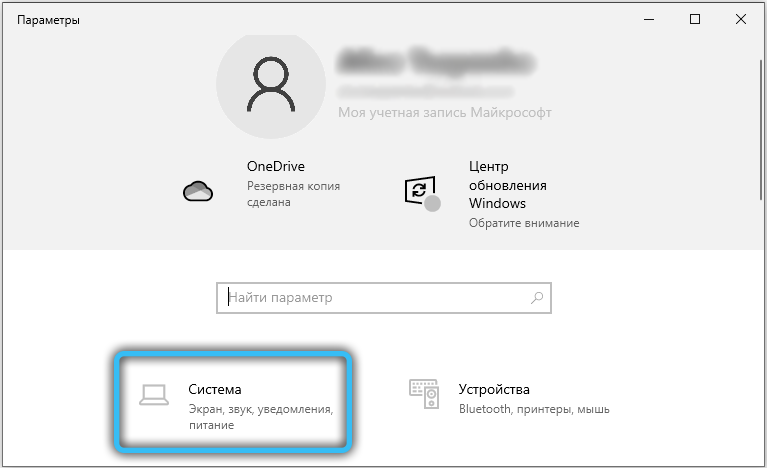
- open “Options”;

- select the “System” section;
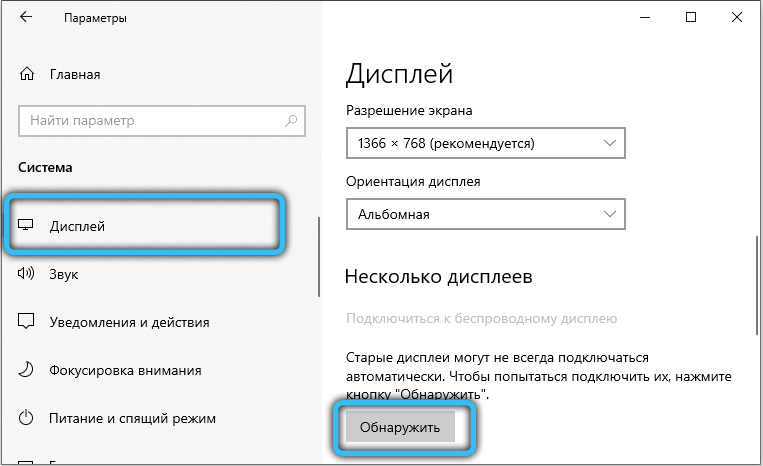
- go to the “Display” tab;
- select “Discover”.
In this case, you will also need to manually adjust the image parameters. That is, specify the resolution and scan rate. The exact specification should be checked in the technical documentation for the projector.
If the “Detect” function did not help and the projector is still not visible to the system, then with a high degree of probability the cable that connects it to the laptop is damaged. It is recommended to use a different interface or replace the wire itself.
Sound output
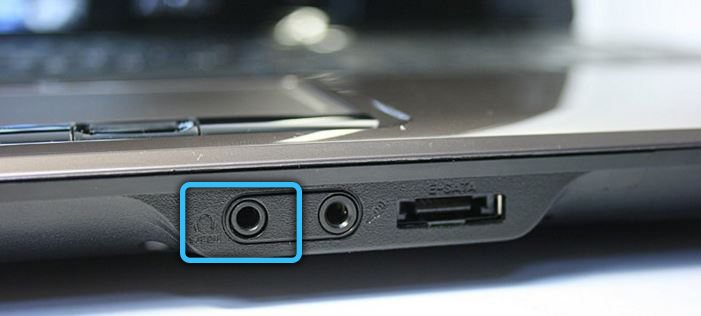
If the projector is connected via HDMI, it also outputs sound from the laptop. Accordingly, external acoustics must be connected to a 3.5 mm jack. or S / PIDF of the projector itself. If VGA or DVI is used, then external speakers should also be connected to the laptop (to the 3.5 mm jack.). In this case, the volume and equalizer are adjusted using standard Windows tools (or through the sound driver software – it depends on the model of the installed sound card).
How to connect a projector to a computer
In fact, connecting the projector to a computer is almost the same as connecting a second monitor. Although it is worth admitting – there are some differences, so the characteristic nuances should be noted.
If the functionality of a particular video projector supports the ability to process a digital signal, with the output of a high-quality image at the output, a more rational solution would be to work with a digital data transmission channel (meaning HDMI). If there are only analog ports on the projector, then a more logical option is to switch the monitor to the digital port of the video card. We carry out the appropriate actions with our monitor.
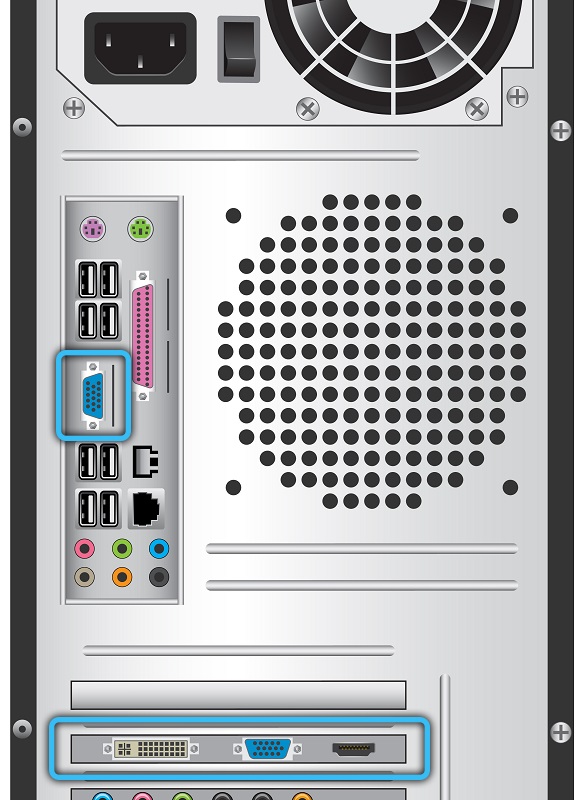
If the video card has VGA and DVI ports, and both devices have only VGA ports, you should get an additional DVI-VGA cable. Its cost is low, you can easily find it on the Internet or various digital technology stores. Of course, this option will lead to a decrease in the quality of the picture. However, it will be possible to connect both devices at the same time. Next, we connect the projector to an empty video card slot. We turn on the projector. After turning on the personal computer, we are waiting for the operating system to load.
We can only wish you successful presentations and events. And, of course, do not forget about the valuable advice – try to connect the video projector in advance so that you have enough time before the event itself, without facing difficulties and problems at the most inopportune moment.