With little experience in Photoshop, most users are not even going to stop there, continuing to improve their skills. Wanting to create a postcard or a unique holiday photo, aspiring graphic designers may face another problem, which is not understanding how to combine pictures in Photoshop.
Of course, faced with this new task, beginners may have the wrong opinion that it will be quite difficult to understand, and even more so to learn to master in practice the skill of combining photos in Photoshop. In fact, everything is not so scary – the process of combining two or more photos is not difficult. Having learned this business, later beginners will smile, remembering how much they were wrong, fearing their failures.
Contents
Easy ways to combine photos
There are several options that allow you to combine, glue, superimpose photos in a certain sequence in Adobe Photoshop. For a designer who is just starting to master the possibilities of Photoshop, it is enough to read the instructions of experienced users who know how to combine photos in Photoshop.
Connecting pictures
Combining several pictures in Photoshop can be viewed as the simplest action that does not need any special skills at all.
To get hands-on experience and be sure, open Adobe Photoshop, load an image that will act as the main background, and then open several photos to be combined.
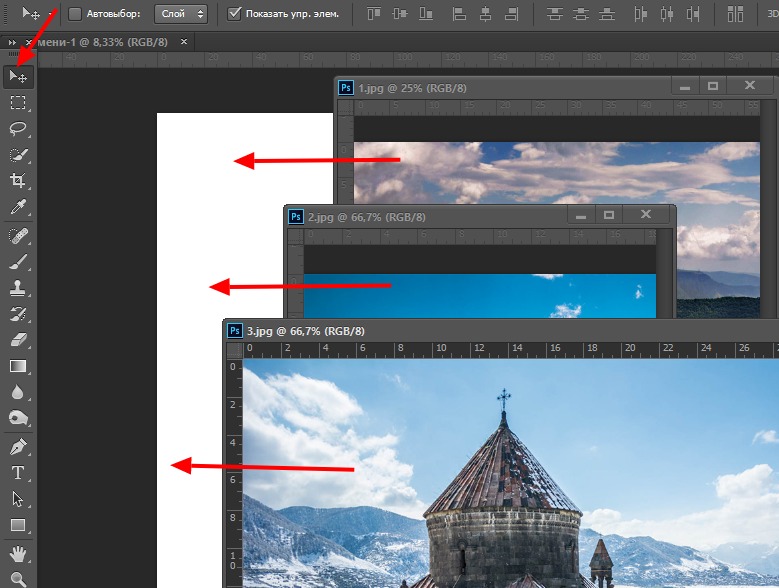
After grabbing the first photo with the mouse, it should be dragged onto the picture with the main background. If you now activate the image with the main background by clicking on it with the mouse, then on the panel where all the layers are displayed, the user will find not one, but two layers. The rest of the photos should be done in the same way, one by one, dragging them onto the main background, and then placing them in the sequence that was planned.
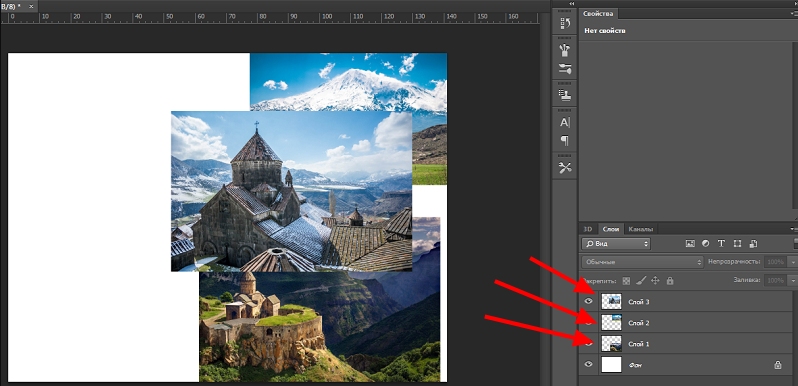
Of course, in this case, some photos will partially overlap each other. If some images are too large relative to the others, you can resize them.
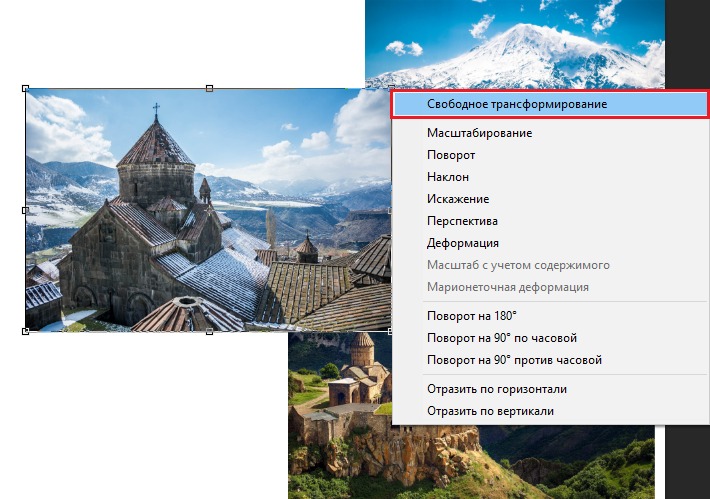
To do this, you need to select the “Free transformation” mode. After that, an active frame appears around the picture, respectively, after grabbing a marker, you can enlarge the image, reduce and unfold it, changing its angle of inclination.
Of course, this is the easiest way to combine pictures, so each of them against the general background is still perceived as a separate whole. But in reality, situations arise when it is important to know how to combine two photos in Photoshop so that they look like one whole.
Drawing up a high-quality collage
It’s a little more difficult to compose a high-quality collage, which is a composition of several photos combined in Photoshop so realistically that even the people depicted in the photo can believe in their reality. Of course, in order for this to work, you will need to master additional knowledge.
Insert a fragment of an image
Adobe Photoshop is a graphics editor that allows you to cut, modify and paste images. A beginner designer can open a photo with a favorite object or subject, and then, using the tools of Adobe Photoshop, cut it out. You can simply circle and copy it, and then, after moving to the next image, which acts as the main background, you can simply paste the copied fragment.
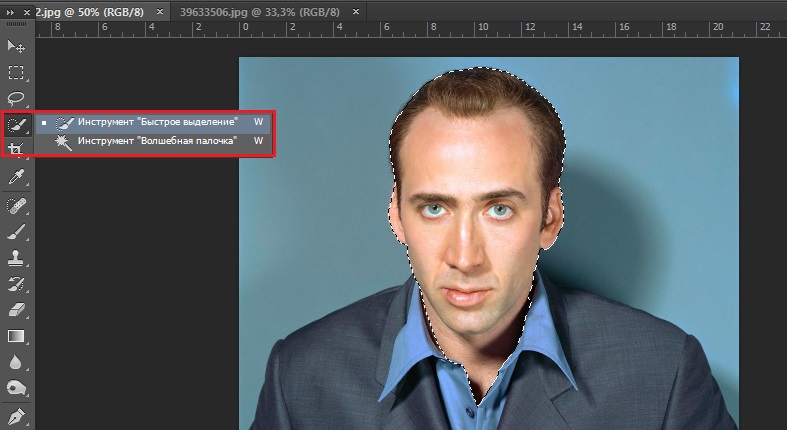
Next, you should visually assess the connection of two photos. If the dimensions of the inserted fragment are not quite suitable, they are corrected.
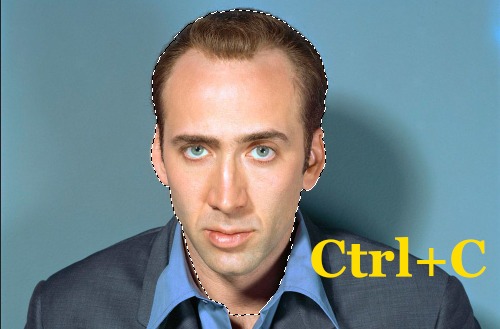
Unfortunately, the process of selecting an object that needs to be copied and then pasted is quite complex and time consuming. Therefore, many users deliberately try to get away from the problem by making it easier for themselves to complete the task in other ways.
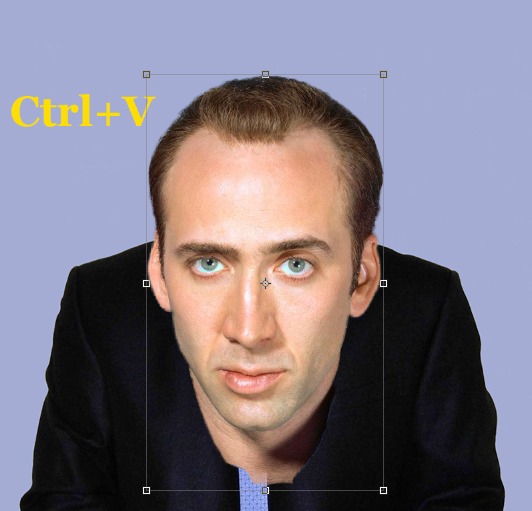
In particular, on the Internet there are many collections of cliparts, which are pictures on a transparent background. These photos are easier than shelling pears to join, as there is no need to crop them – you just need to superimpose one photo on another. 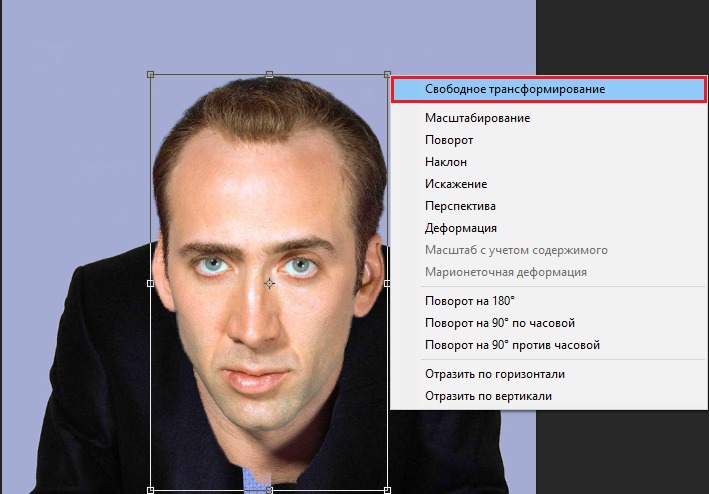
You can also easily find and download isolates on the Internet, which are pictures on a white and black background. They are also easy to superimpose on the main image. You can remove white or black backgrounds using a tool such as the Magic Wand. She is able to select a uniform background, and then easily delete it by clicking on “delete”.
Smooth gluing of two photos
If you have to glue two photos, accompanied by similar, but still different backgrounds, you should use other tips from experienced designers.
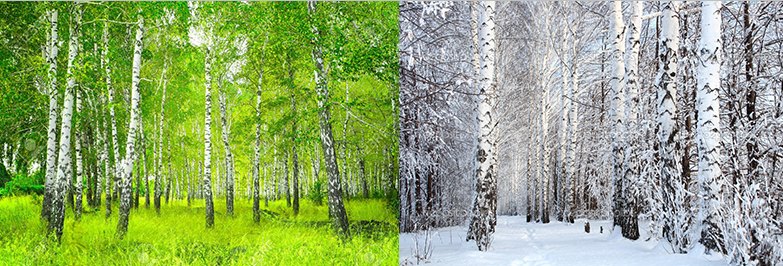
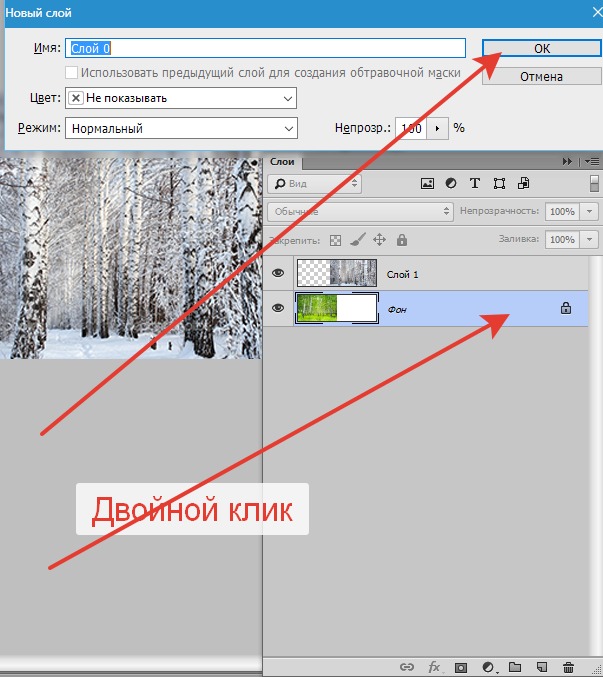
In Photoshop, two photos are opened at once. One is grabbed with the mouse and dragged into the second document, in which two backgrounds are formed at once. The top layer needs to be made half transparent. To do this, the user should find the “Opacity” parameter in the “Layers” panel, go to it and use the slider to decrease the parameter by 50-60%.
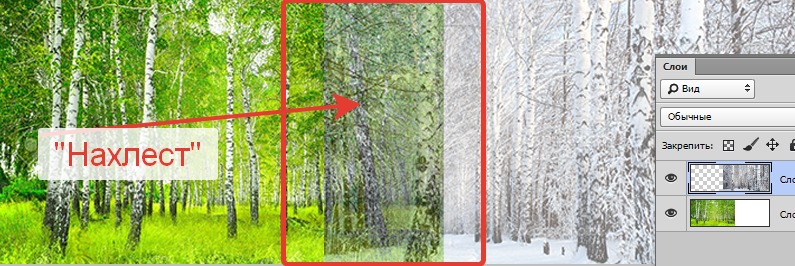
After that, the second image below the first will be easy to view. The user must move the first or second photo so that they are positioned in relation to each other as perfectly as possible.
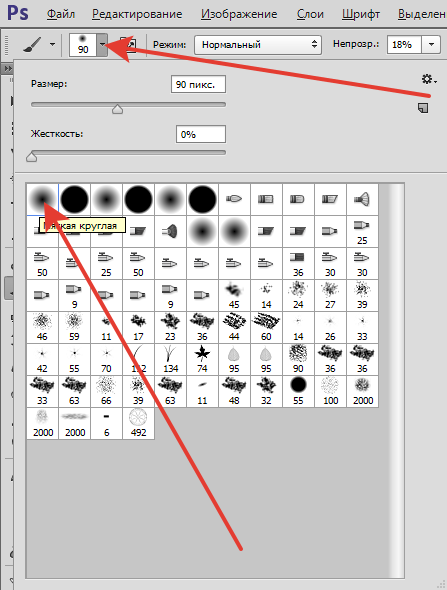
Next, you need to use some tools, including an eraser and a brush. The eraser will allow you to erase part of the top layer according to the design vision of the user himself. The brush tool lets you add the desired hardness, density, opacity, size, and shape to the eraser.
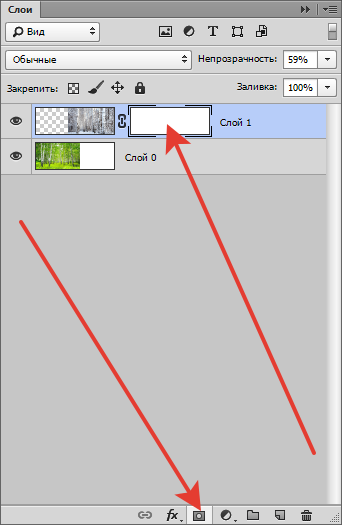
Be sure to set the hardness parameter in the brush settings to zero, and the opacity to 20-30%. After all the necessary places on the first photo are erased with the eraser, the user must return the opacity to 100% for the first layer.
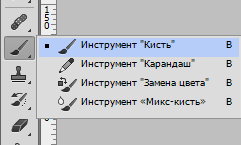

You can also apply a mask, then both photos remain intact, but part of the image of one of them will be hidden.
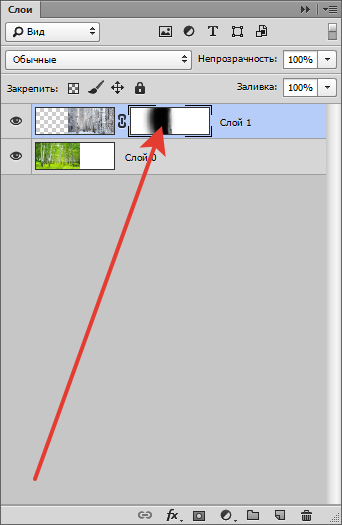
On the panel, select two primary colors (black and white), then take the “gradient” tool, in the settings of which they set the transition from black to white. Now, on the created mask using a gradient, the user creates a gradient transition at his own discretion. To increase the realism, take a soft brush and paint with it white and black areas, remembering that areas painted with black will subsequently be opaque, and with white, vice versa. All that remains is to place the picture on top of the main background, and then add a mask. Thus, it will be possible to glue two photographs as realistically as possible.

Working in Photoshop can bring moral and aesthetic pleasure. Indeed, thanks to her, you can create magical photos that will receive grateful responses from people. And completely simple skills help in this, which are easy to develop even for a beginner.