
Google Chrome does not allow by default to activate DNS encrypted DNS over HTTPS – as Firefox offers for a few weeks. But there is still a tip that we suggest you discover in this quick tutorial.
What if DNS were the Achilles heel of the security of your personal data? So that one can type an address to reach a site, rather than an IP address, Domain Name Servers or domain name servers, have appeared since the beginnings of the web. Today they form the backbone of the network, so that an incredible amount of data passes through these nodes every second. Including personal data.
Chrome: when DNS betrays your history
The problem is that your data is transmitted to these servers in plain text via port 53. And, since it is not encrypted, it becomes possible for the owner of the DNS server to see your activity – in other words the detailed history of sites you visit. Whether it is the DNS of your ISP, Google (8.8.8.8, 8.8.4.4), Cloudflare (1.1.1.1, 1.0.0.1), OpenDNS (208.67.220.220, 208.67.222.222), or even FDN (80.67.169.12, 80.67.169.40), all have clear access to this data.
There is of course a solution: DNS over HTTPS , which consists of fully encrypting the data passing through these servers. But all browsers do not yet allow their activation by default. Firefox has been offering a simplified activation for a few weeks, but Google Chrome still remains for absent subscribers – but it is this browser which is by far the most used in France and in the world. Fortunately, it is still possible to force the use of these encrypted DNS with a trick.
How to enable DNS over HTTPS in Google Chrome
For that :
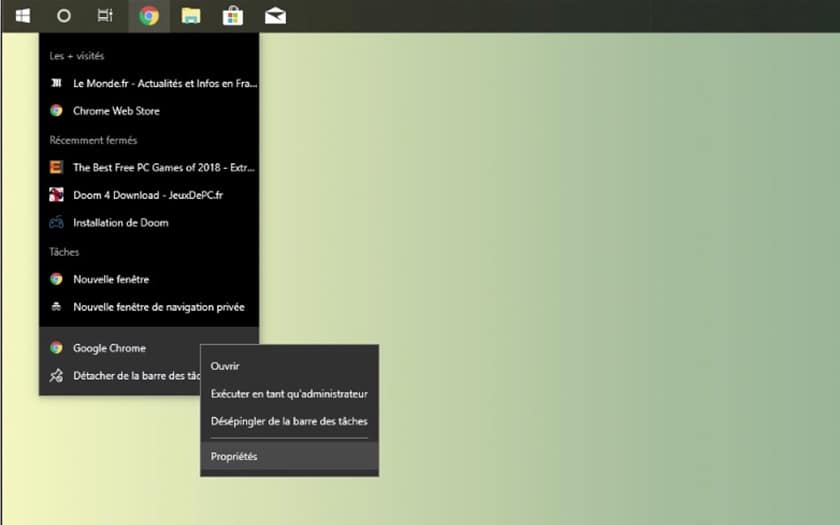
- Right-click on the shortcut to Google Chrome (for example the one on your taskbar that you often click on)
- Click on Properties
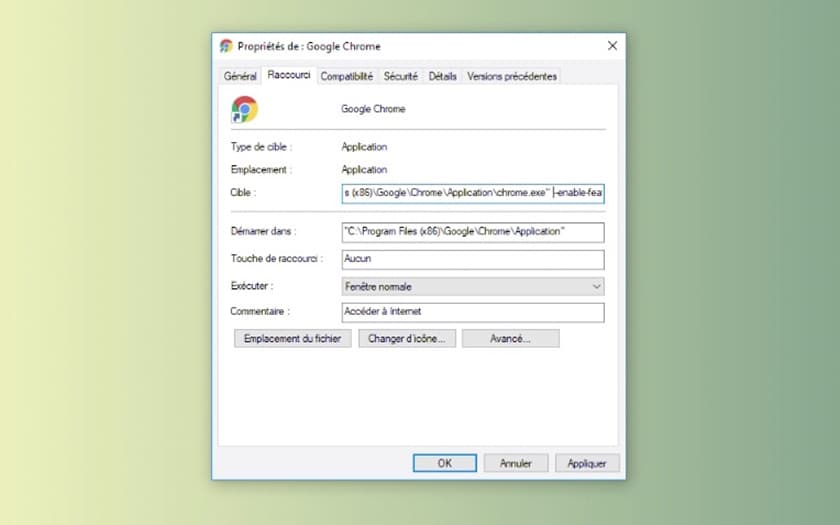
- Copy and paste the entire following code after the content of the Target field followed by a space
--enable-features="dns-over-https<DoHTrial" --force-fieldtrials="DoHTrial/Group1" --force-fieldtrial-params="DoHTrial.Group1:server/https%3A%2F%2Fcloudflare-dns%2Ecom%2Fdns-query/method/POST
- Click Apply
- Launch Chrome by clicking on this shortcut
- Check that DNS over HTTPS is activated by consulting the https://1.1.1.1/help page
Note that this tip will take you through Cloudflare’s free DNS servers . Have you successfully activated these secure DNS on your PC? Share your feedback in the comments.