Android is a world of possibilities, mainly due to the large number of applications available on Google Play and the performance of the operating system itself, which currently allows us to carry out practically any task we do with the computer, including office tasks through Microsoft Office for Android or even video editing.
However, all this flexibility comes at a price, the storage space. With each app that we add to our device, be it a tablet or a smartphone, we are removing a portion of space, with which sooner or later our team will no longer be able to install more applications.
Fortunately, we have the possibility of moving applications to an SD card available, with which we can free up a large amount of space and reuse it to install more apps. In this article we will tell you about the advantages and disadvantages of moving applications to the SD card, as well as how to do it.
Contents
Why move apps to SD card
The main reason for moving applications to the SD card is for almost all users always the same: Reclaim space to be able to install more applications in the main memory of the smartphone or tablet. This is because many applications take up a lot of space, and even more so if we add their data and cached data to them. An example of this is for example Spotify, or Google Maps.
How to move apps to the SD card
There are basically two popular methods of moving apps to SD cards. Manually through the tools offered in the configuration of the phone or tablet in the “Applications” section, or by installing an external application such as “AppMgr III (App 2 SD)” which will do all the heavy lifting for you. The U.S.
The manual method
Step 1: To move applications to the SD card manually, we move to “Settings” and then click on the “Applications” item.
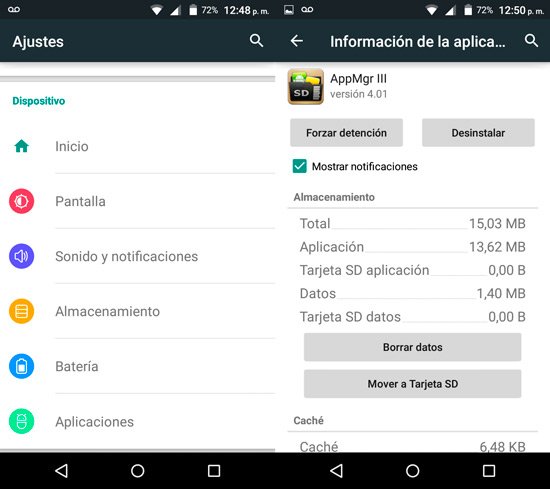
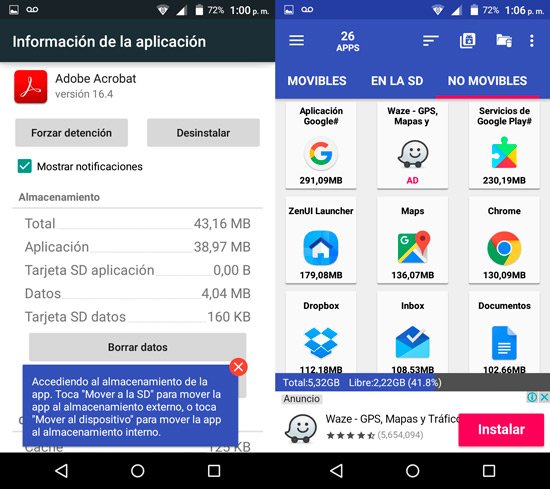
Step 2: There we click on the application that we want to move to the SD card and on the page that opens we click on the “Move to SD Card” button.
It should be noted that not all applications can be moved to the card by this means. In the case that we cannot move an app to the SD card, we can try the following method.
Move an app using AppMgr III
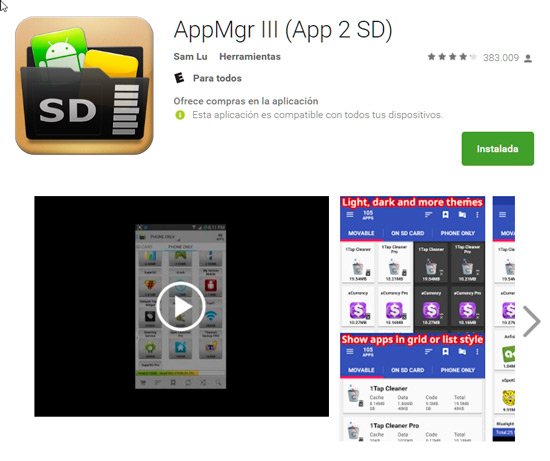
AppMgr III is basically an application manager that allows us to move apps to the SD card without problems and very quickly. To install AppMgr III on our Android, all we have to do is click on this link and follow the instructions offered by the system.
Once AppMgr III has been installed in our system, we execute it, after which a new window will appear with three tabs: “Movable”, “In the SD” and “Not movable”. Names that correspond to your task. In the “Movable” tab, the tab that interests us, we will find a list with all the apps that we can move to the SD card.
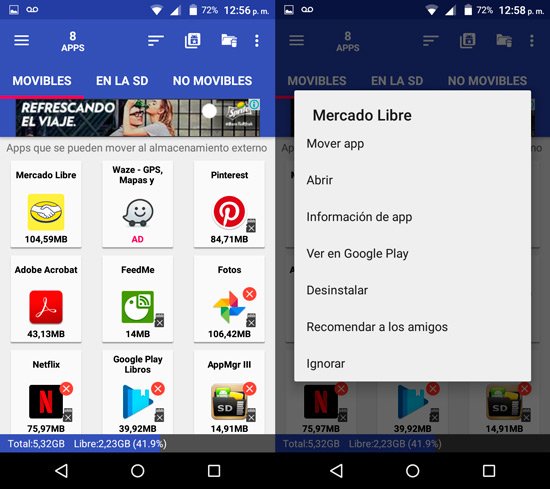
The only thing left here is to click on any of them, and in the box that appears, select “Move apps”, after which AppMgr III will begin to do its task.
It should be noted that it is not convenient to move apps such as Services, Live Wallpapers, account or device managers, widgets or other apps directly linked to the system.
Cons of moving apps to SD card
The con of moving applications to the SD card, according to the most renowned specialists, is that we will have to wait for the SD card to be mounted to be read by the operating system, which could take a few seconds, in which we will not be able to use any app that has been moved to the SD card.