Perhaps Android needs a little inspiration to better exploit the space offered by the large screens of tablets (or even computers, considering the existence of emulators such as Andy, Bluestacks or AmiDuOS). Perhaps the first step is to learn something about desktop operating systems such as Windows, Linux or Mac …
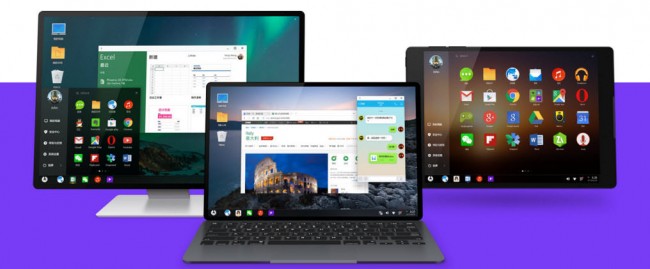
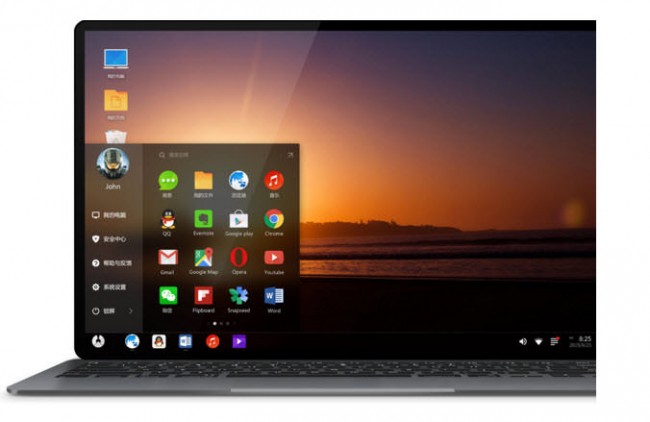
Phoenix OS is an example of this sounding good. This personalized Android system, available as ROM for a couple of Android tablets and as “executable” for the PC, leaves aside the classic Android mobile interface and proposes the functionality of a PC, with a desktop and its taskbar, button Startup and application management through windows. It comes with its own built-in web browser and even a file browser with drag and drop support. Come on, something very similar to what we have seen in the popular Remix OS alternative.

Although Phoenix OS does not include the Play Store application store, the user can manually install the APKs of the applications and games that they want (they can possibly install the Play Store through their respective APKs). It comes with a Chinese app store, but the language is probably difficult for many to download or know what apps are offered there.

Run Phoenix OS
Phoenix OS is available as a ROM for Nexus 9 and 10 tablets (it can be easily installed with ADB and Fastboot software, using a couple of commands) and also as an executable for the PC. In the latter case, the user must load Phoenix OS on an empty USB memory with a capacity of at least 4GB. Then you must configure your PC to boot from this USB memory. The procedure in Windows would be something similar to the following:
* Connect an empty USB memory with a capacity of at least 4GB to the PC.
* Download the Phoenix OS (x86) ZIP file from the developer’s website ( phoenixos.com/download_x86 )
* Download the “Burning Tool USBMaker” software from the same page mentioned.
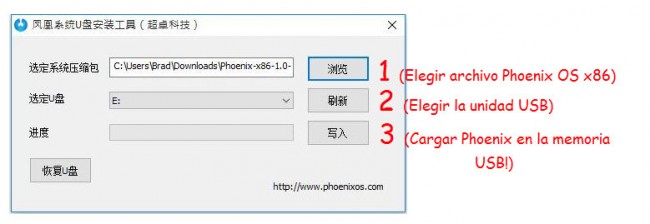
* Run the USBMaker-XXXexe file and load or burn the Phoenix OS (x86) system to the USB memory as indicated in the image:


Source: Liliputing.com
* At the end of the recording process, USBMaker will display a termination notice.
* Finally, it will be necessary to configure the PC to boot from the USB memory. Commonly this is done from the PC boot mode, which is entered by pressing the “F10” or “Esc” key just after turning on the computer. Which key should be used will depend on the brand of the main PC card. Only configured this the PC will be able to boot from the USB memory and run the Phoenix OS system.
If the PC has UEFI type booting, it will also be necessary to deactivate the «Secure Boot» system from the indicated boot mode. In Windows, this is checked by typing in the search box msinfo32 . After pressing Enter, in “System Summary”, locate the line “BIOS Mode” and verify what type of boot it is. If this line does not appear or nothing is indicated, the computer probably does not have UEFI boot and there is no need to worry about it.
This Android executable can “live” without problems on your USB memory. You can run it on one or the other PC in the way indicated above and use your applications, record games, data, etc. (the data will be saved in the same USB memory, not in the PC). Of course, you should bear in mind that, apparently, this system can only run on PCs with 64-bit processors.
About Phoenix OS
Phoenix OS is software based on the Android-x86.org project, by the Chinese company Beijin Outstanding Technology, established in December 2014 and formally known as Phoenix Studio, which is currently dedicated to developing Android-related software .
More information : phoenixos.com
How to install and use Archon Custom Runtime (run APK on Chrome PC)
How to install an APK from or «on» the PC
How to put BlueStacks in full screen and change the resolution
Receive updates: SUBSCRIBE by email and join 10,000+ readers. Follow this blog on Facebook and Twitter.