The security of computers connected to the global Internet is one of the most pressing modern problems that has arisen as a result of the activation of both hacker groups and many network services that do not hesitate to collect information about users for the purpose of its further use, and not always harmless.

As for local networks (home and corporate), they are usually much better protected from external threats. But the internal ones remain, and here the situation largely depends on how this network is configured. System administrators have powerful tools at their disposal to track any suspicious network activity.
Contents
Why do you need to hide a PC on a local network
Users of home networks, as a rule, do not own such tools. When network discovery is enabled, all PCs connected to the same router (regardless of whether they are wired or wireless) will see each other in the explorer, having access to remote folders and files. On the one hand, this is good because it simplifies the exchange of data. On the other hand, you probably want some data not to be available to others, even if they are members of your family. In such cases, you can act in different ways. For example, disable network discovery, but then the remote access option will be unavailable. Fortunately, Windows has a more graceful solution – hiding your computer from being visible in other PCs’ Explorer, although the access itself will remain. Moreover, there are several ways to perform such an operation,and today you will get to know them face to face.
Changing the network profile
The easiest way to hide your computer on a local network is to change a parameter such as a network profile. By default, or as a result of someone’s actions, it can take the value “Private network”, while your PC will be available to all other computers within the local network. Changing your profile to “Public Network” will make your computer invisible. True, the result of such an operation does not appear instantly, and until the moment of rebooting, your PC will still be visible on all remote computers.
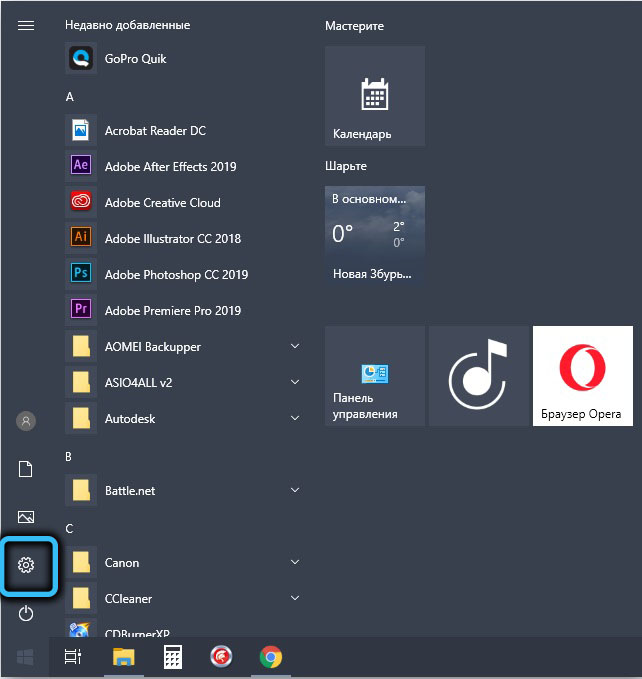
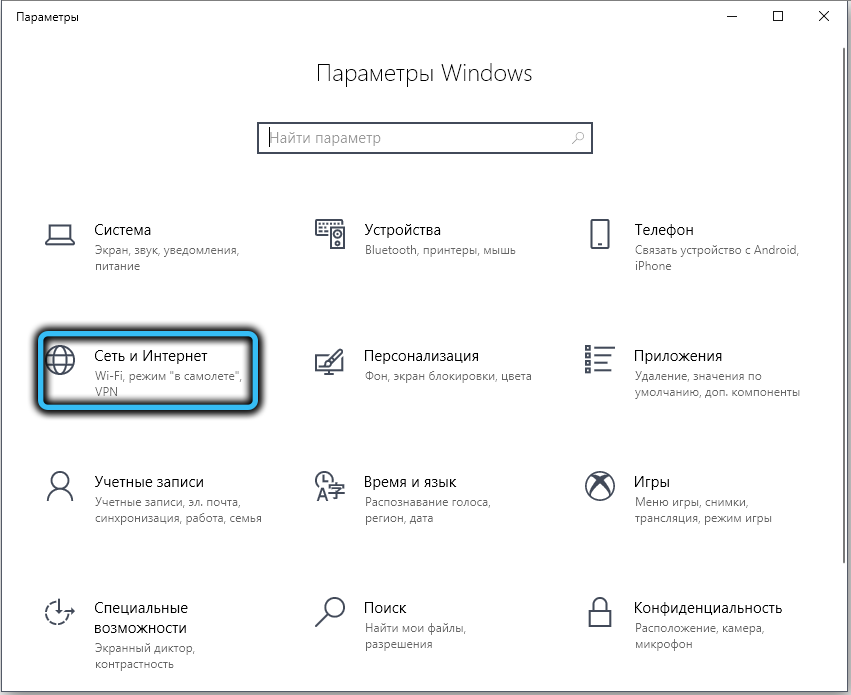
Note that changing the properties of a network profile is not the same in different versions of Windows. This is especially true for Windows 10, where recently the connection profile can be changed according to a simplified procedure – in the “Settings” select the “Network” tab, go to the “Network and Internet” item and click on the “Properties” button.
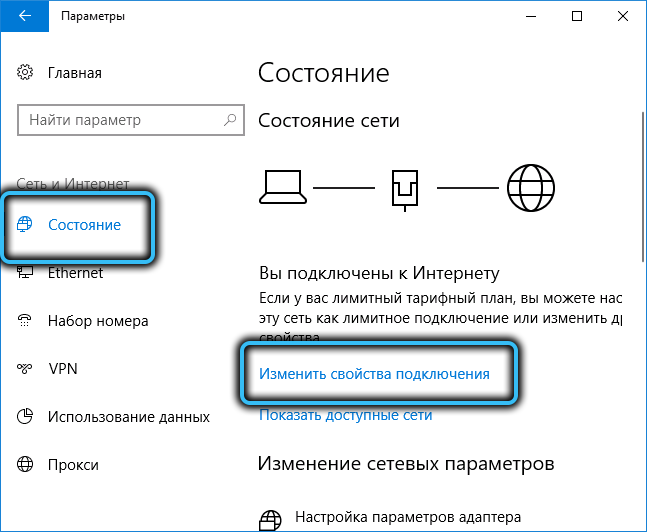
In the new window, click on the “Status” tab, in which we select the line “Change connection properties”. All that remains is to set the selector to “Public Network” – then your computer will become invisible.

There is also an alternative method, depending on the type of connection – wired (via an Ethernet cable) or wireless via Wi-Fi.
In the first case, click on the network connection icon located in the notification area, and in the window that opens – on the “Network and Internet settings” item.

A new window will open, select “Ethernet” in the left pane menu, and in the right block click on the network connection, the availability of which we want to change.
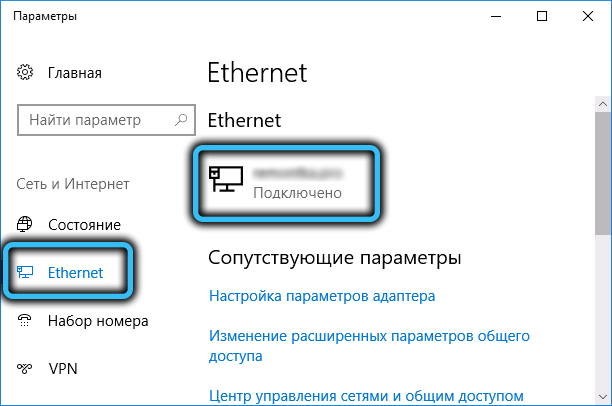
The last window will open with a switch that needs to be set to the “Off” position, and then the profile type will be set to “Public”. After confirming, the changes will take effect immediately, without the need to restart the PC.

If you have a wireless connection, then the whole procedure for turning off the display of the computer will be the same, with the exception of the item in which instead of “Ethernet” you need to select Wi-Fi.
In Windows 7, the procedure for changing the network type is carried out through the “Control Panel”, where you need to open the “All Control Panel Items” tab and then click on the “Network Control Center” item.
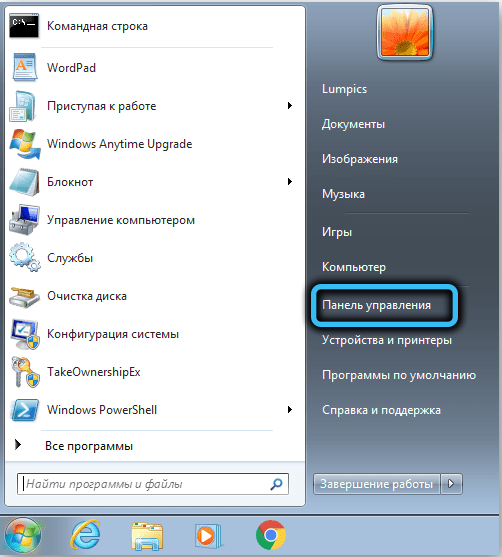
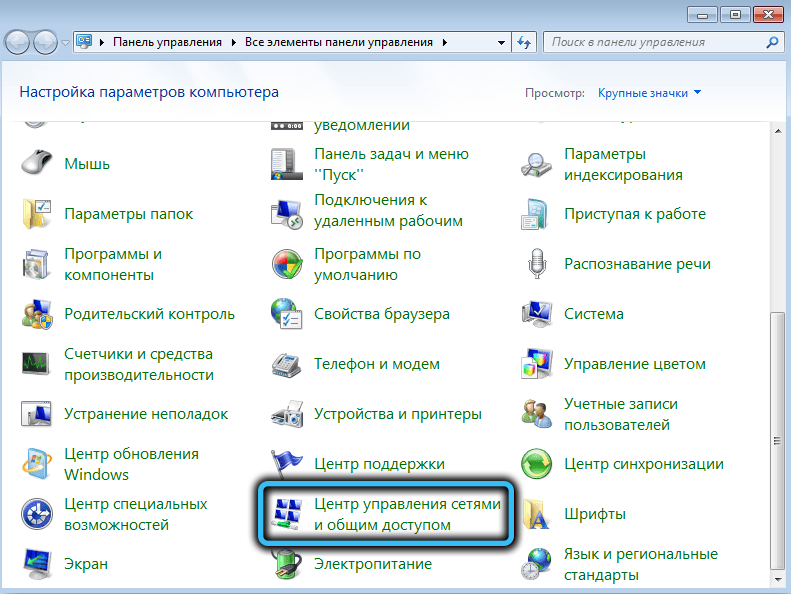
A list of available network connections will be displayed along with their type, click with the mouse on the type of the desired network connection and in a new window change it to “Public network”.
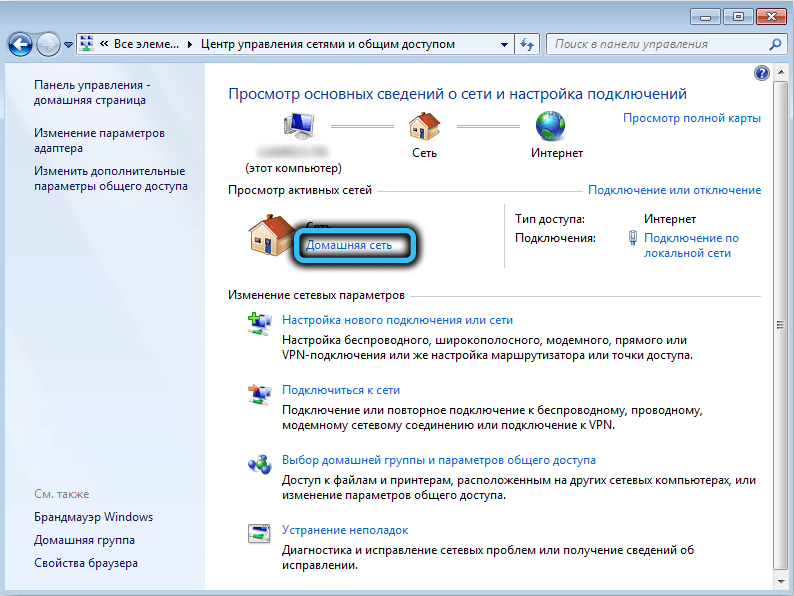

In Windows 8, “Private” appeared instead of “Home”, and “Enterprise Network” disappeared altogether. But here the focus with a click on the profile type does not work, so changing the parameter to the desired one is done by editing the registry.
To do this, press Win + R, enter regedit in the search bar, press “Run” and confirm by pressing Enter.

In the editor, go to the HKEY_LOCAL_MACHINE SOFTWARE Microsoft Windows NT CurrentVersion NetworkList Profiles branch, open the Profiles branch, which will list all available network connections.
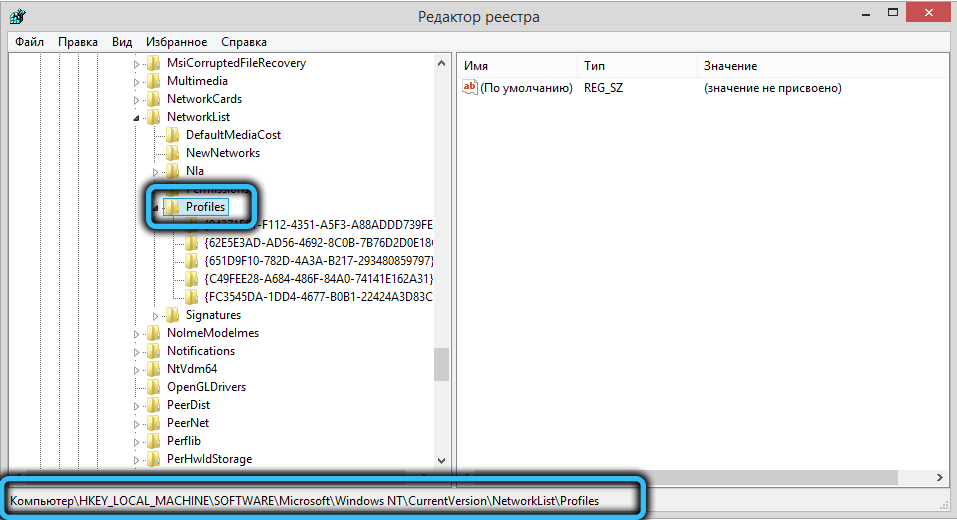
We are looking for our own, click on it, and in the right window, click on the Category parameter to change one to zero. A value of 0 corresponds to the public network.
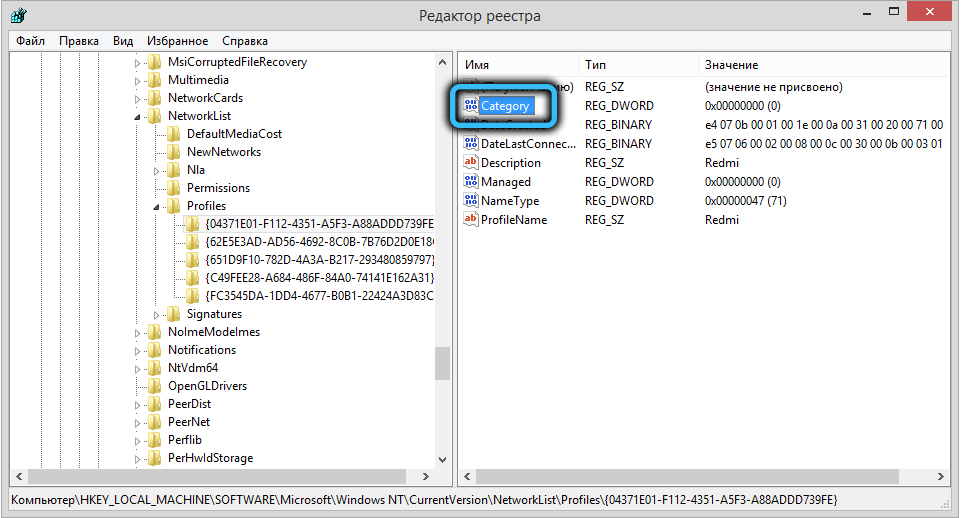
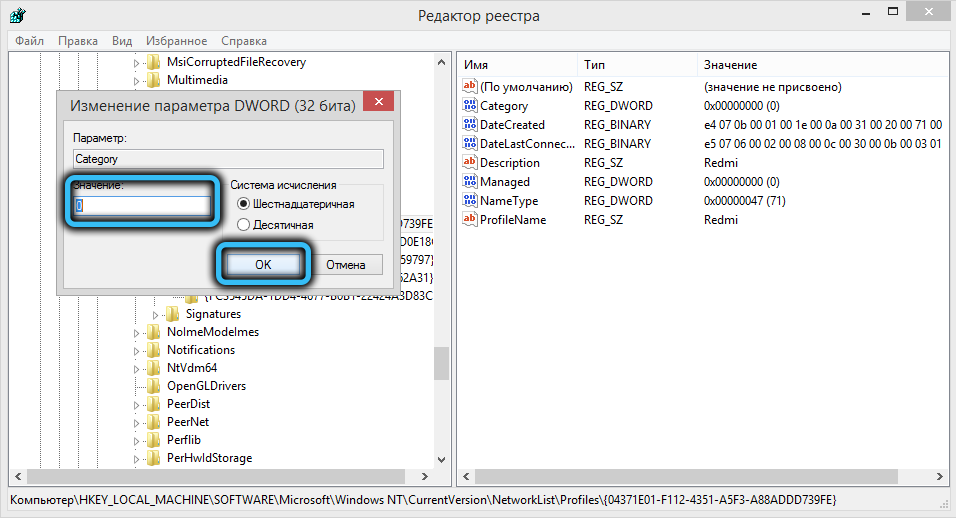
After confirming and closing the registry editor, you can check the profile status in the “Network Control Center”. If it remains the same, you need to restart your computer.
In Windows 8.1, all this can be done much easier, without changing the registry: click the Win + I combination, in the tiled interface, select the line “Change computer settings”, in the “PC Settings” window that appears, select the “Network” item, click on the name of our local network and set the switch to the “Off” position corresponding to the “Public” profile type.


The main disadvantage of this method is that in addition to the fact that your computer becomes invisible, it also loses the ability to access files and folders on other PCs. From a security point of view, this is the preferred method, but if you need access to network shares, you should choose alternative solutions.
How to hide your computer on the network by disabling network discovery
Another way to hide your PC from prying eyes is not to change the type of network profile, but to disable network discovery.
It is quite simple to do this:
- open the “Network Control Center” (as we described above);

- go to the tab “Change additional settings for sharing”;
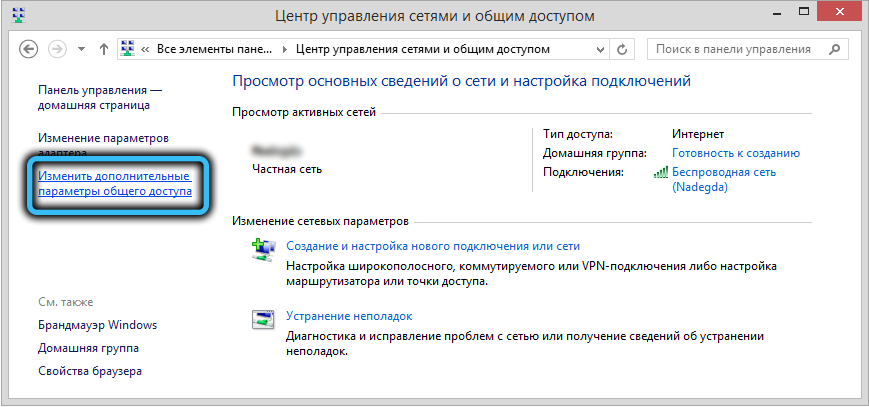
- in the new window, in the “Network discovery” block, put a check mark next to the “disable network discovery” item.
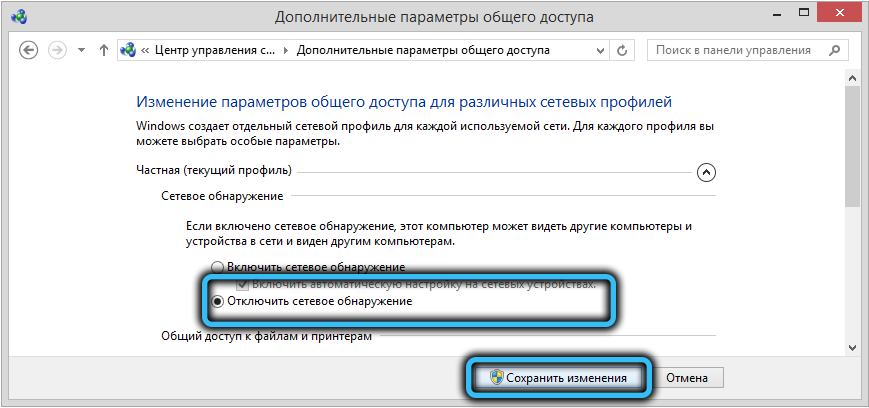
As you can see, this method is really simple, but it does not guarantee that the changes will take effect immediately. Moreover, restarting your computer may not be enough, that is, you will need to restart all PCs that are in the coverage area of the local (home) network.
How to hide a PC on a local network via the command line
From the point of view of time costs, this method is the best, but its only and important drawback is that you need to remember the command that you need to enter into the console. If you do not have problems with memorization, then this is the most preferred method, which is also good in that it only hides your computer in the explorer of other PCs, while maintaining access to public network resources.
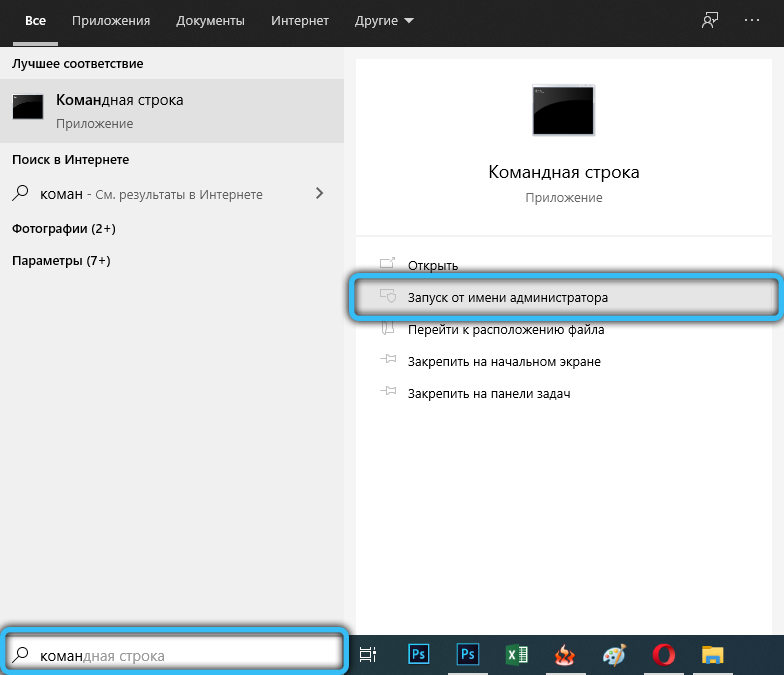
So, run the command line on behalf of the PC administrator and enter the net config server command with the / HIDDEN: YES parameter. We press Enter and restart the computer.
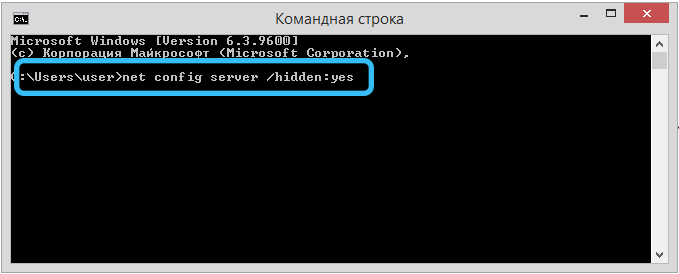
Here, as in the previous case, the remote PC can still see yours until it is rebooted. If you need to make your PC visible again, we perform the same actions, only with the / HIDDEN: NO parameter.
Finally, we note that, starting with Windows 10 version 1703, known by the update as the Creators Update, even if network discovery is enabled, other computers may not be shown. That is, here you do not need to do anything to hide your PC.