The topic of streaming is not fading away and the popularity of online broadcasts on video streaming services such as Twitch or YouTube is off the charts. Gaming and life-streaming is gaining momentum more and more, uniting millions of users around the world. This broadcasting format is interesting to many users, its attractiveness lies in the fact that everyone can always start streaming. You can broadcast in real time via the Internet for the purpose of entertainment or making a profit, by the way, rather big, if you attract a large audience to the channel. In a live broadcast with the ability to comment by users watching the stream, various actions are performed, it can be anything, for example, demonstrating applications, conducting training, showing game walkthroughs, etc.
For broadcasting in real time by streaming data, special software is used, the options of which imply video capture and processing if necessary. One of the popular programs used by streamers is XSplit, in the Broadcaster version it has wide functionality, including editing scenes in the preview mode, Chromo key, etc. Creating a high-quality stream involves, among other things, the correct setting of the software tool used.
Contents
What is this program
The organization of online broadcasts is a simple matter, but in order for the channel to be really interesting and the audience to multiply, you need to treat the creation of streams responsibly, for which it is necessary to use software that serves these purposes. There are many tools, but today we will focus on XSplit and consider what kind of program it is, as well as how to properly configure it for high-quality broadcasting.
XSplit is a professional decoder for online streaming on Twitch, YouTube and other video streaming services. The utility allows you to capture an image by broadcasting from a monitor screen, as well as webcams or game consoles, process the image and send it to the server. Using the program, you can select the resolution, video quality, frame rate and other available parameters.
Two versions of the software are available to users:
- XSplit Broadcaster, which offers complete streaming functionality.
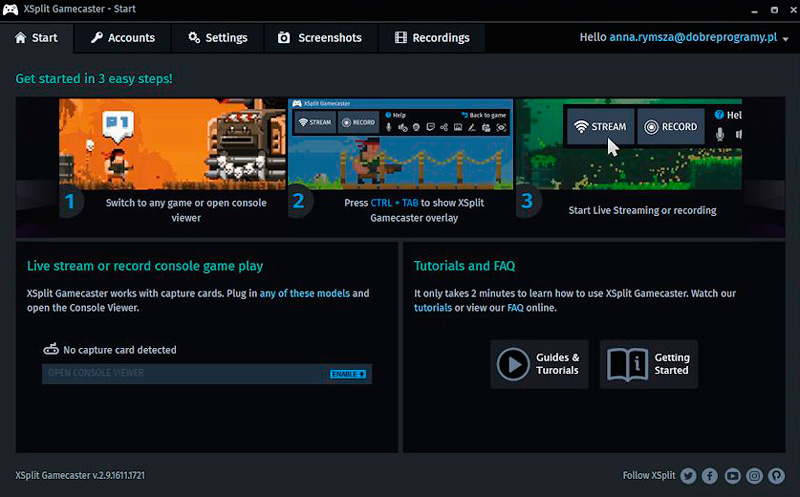
- XSplit Gamecaster, whose functionality is much simpler, only has the basic tools to start a live stream.
To use any of the program options, you need to purchase a license (for a period of 3 to 36 months), while there is an opportunity to test the software for free thanks to the trial version. Streaming to YouTube using the program requires a lot more system resources. So, if you want to broadcast using XSplit Broadcaster, it is important to meet the following minimum requirements:
- 6-8 GB of RAM.
- Intel Core I5 processor or higher.
- GeForce GTX 780 graphics card or equivalent.
For those who want to create high-quality broadcasts, it is recommended to buy a license, since it will not be possible to achieve high quality due to the limitations of the free version’s functionality. Of course, a trial is also suitable for testing.
Functionality and settings
Key features of XSplit include:
- Coding. The option allows you to select an encoder, set FPS, resolutions, aspect ratio, etc.
- Channels. Adding channels for broadcasting.
- Sources. The source is a camera, application, capture of a game, a specific area on the screen, etc.
- Scenes. Editing while streaming.
Adding a webcam
To display the image from the camera in the program, do the following:
- On the bottom panel of the main page on the left, we find the “Add” function.
- Choose from the drop-down menu “Devices (webcam, capture cards …)” – Video.
- We select the used camera.
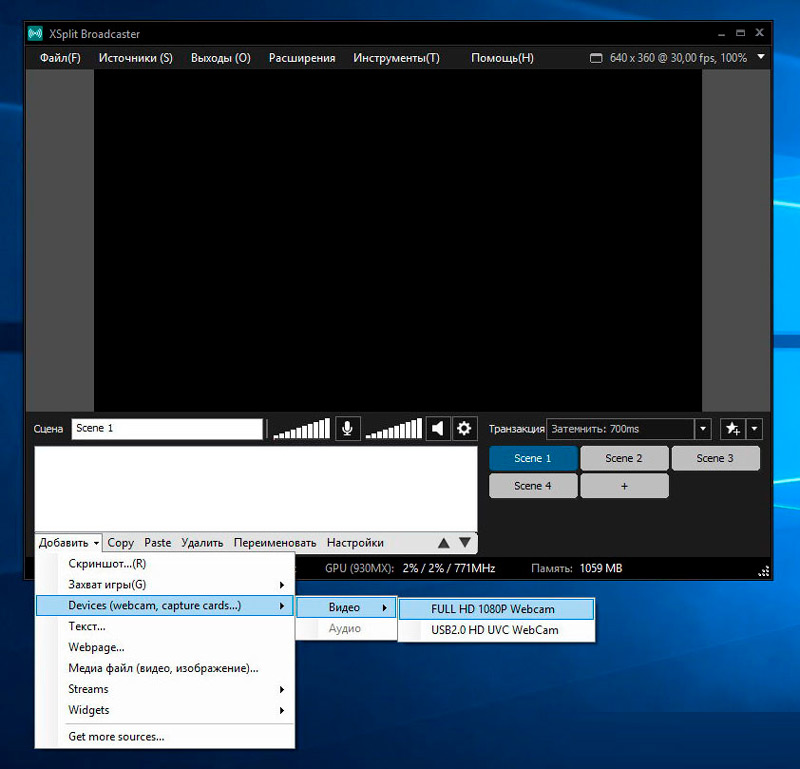
After that, the picture from the device will be visible in the program window.
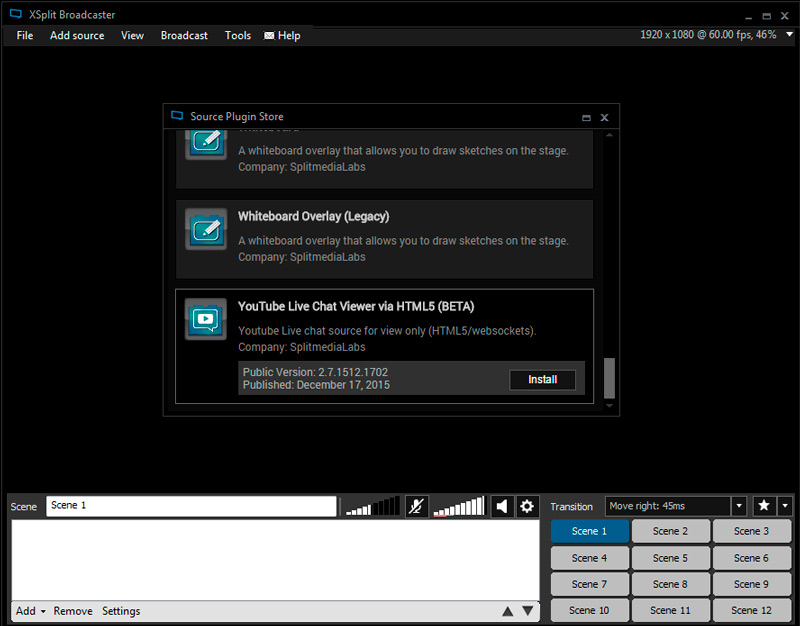
Add YouTube Chat to XSplit
To add YouTube chat to stream in XSplit, you need to do the following:
- At the bottom left, click “Add”.
- Choose from the menu “Get more sources …”.
- From the plugin store that has opened, among the list, we find the YouTube chat plugin, for which we scroll down, select YouTube Live Chat Viewer YTML 5.
- On the plugin page, click “Install” to install it in XSplit.
- At the end of the installation, press the “OK” button. The plugin is installed.
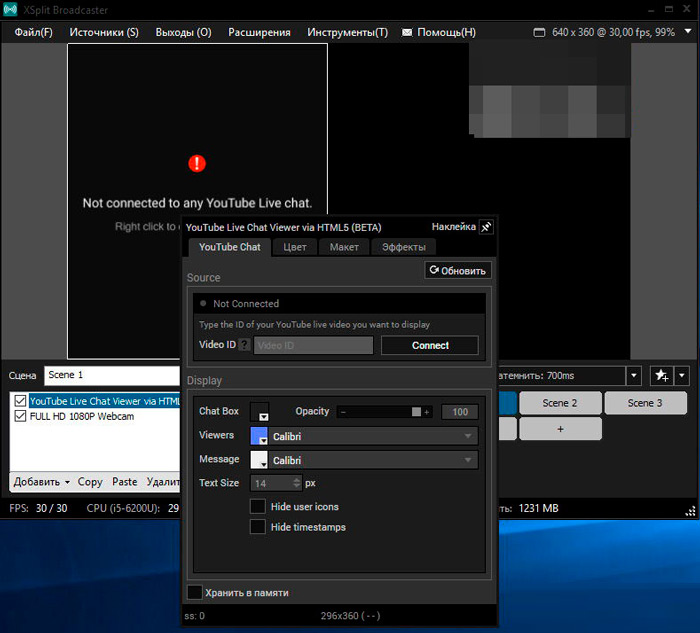
- At the bottom left, click “Add” again and select Widgets – YouTube Live Chat Viewer via YTML 5 (BETA), after which the chat should be displayed.
Now the chat requires configuration:
- Right-click on YouTube chat in XSplit in the window where it was displayed or at the bottom of the list of available sources.
- To display a chat from a video or broadcast, enter the corresponding URL in the Video ID field, press the “Connect” button, after which your chat will be visible in XSplit.
We find the Video ID as follows:
- We go to our YouTube channel, on the “Channel” tab, go to the “Status and functions” item, where you can check whether the ability to conduct live online broadcasts is active, turn it on if it is inactive.
- We go to the “Live broadcasts” tab, here the chat is displayed in the lower right part.
- Click on three vertically located dots in the chat area and select “Open chat in a new window” from the menu.
- After opening it in a new window, you will see its URL. You need to copy 10 characters following v =. They should be inserted in the YouTube chat settings in XSplit.
Microphone setup in XSplit
To specify a microphone, do the following:
- On the top panel, select “Tools” and go to the settings.
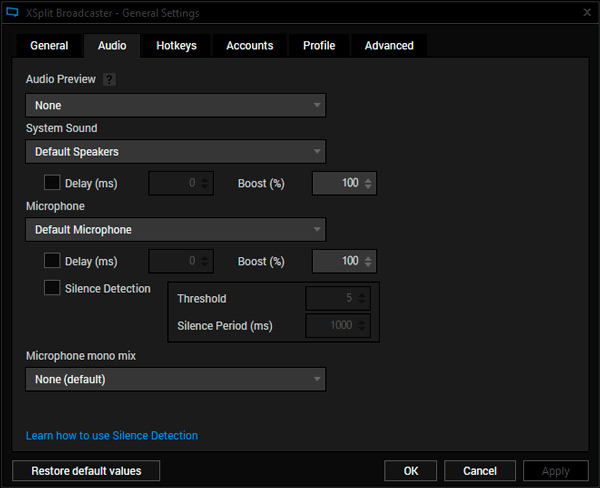
- Go to the “Audio” tab and in the “Microphone” block select the desired microphone, click “Ok”.
To make the sound clearer on the stream, it is better to lower the volume of the speakers, and set the microphone to maximum.
Adding your YouTube channel to XSplit
To broadcast on a YouTube channel, we do the following:
- On the top panel, select “Outputs” – “Set up a new output” – “YouTube Live”.
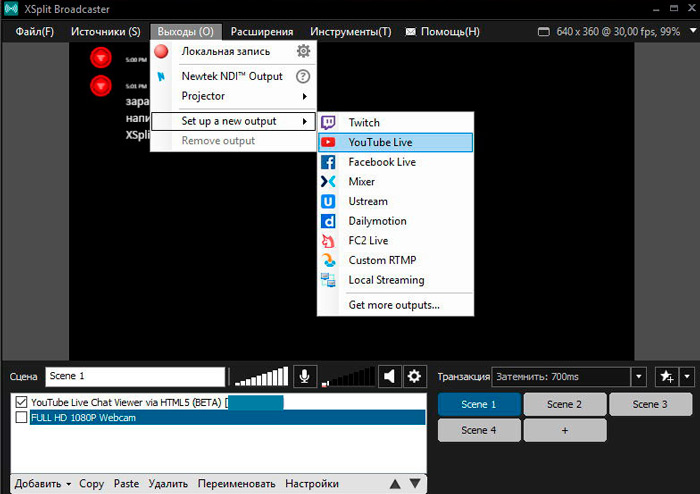
- In the settings window, click the “Authorize” button to log in to YouTube and bind to XSplit.
- We enter the authorization data and select our channel where the broadcast will be conducted.
- We agree to grant access to XSplit.
Stream setup with this program
After downloading and installing XSplit Broadcaster, you need to register an account, this option is available when you start the program. Now let’s look at how to use the software.
1. Preparing a YouTube channel
Going to the video hosting, and logging in (the ability to broadcast on YouTube is available only for verified accounts), we perform the following steps:
- Go to the “Creative Studio”, go to the “Live broadcasts” section, press the button to start the broadcast.
- If the option is inactive, then the section “Live broadcasts” is absent, you can enable it in the section “Channel” – “Status and functions”.
- We indicate the name, start time, description for the broadcast, bit rate, etc., save the changes.
- Go to the “Video encoder settings” tab, here you need to copy the name of the stream, which you will need when setting up in XSplit, as well as the server URL.
2. Setting up XSplit
Now the data taken from the YouTube channel must be specified in the program:
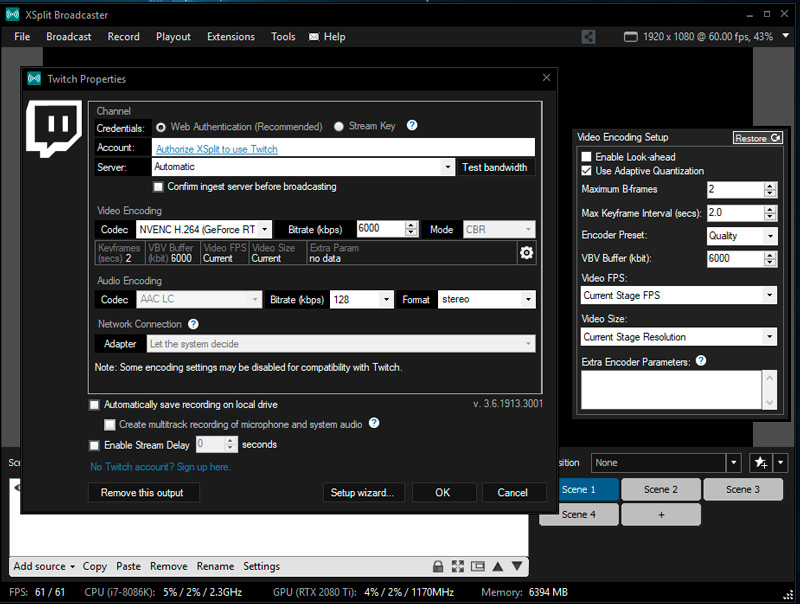
- Go to XSplit in the “Broadcast” tab – “Add channel” – “Custom RTMP”.
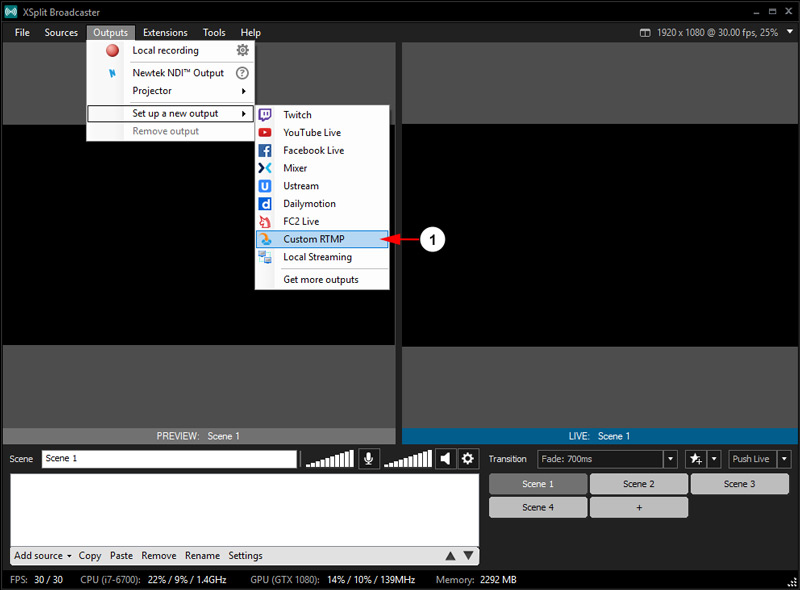
- Copy the server address and stream name from the channel settings into the corresponding program fields (“RTMP URL” and “Stream name”).
- Everything is ready for broadcasting, but you can also specify the bit rate, broadcast codec, privacy settings, etc.
- Now we select the data that we will send on the air. Click “Add source” and select the desired option. This can be a camera image, media files, game capture, screenshot, text, and other sources.
- We start the broadcast.
XSplit Broadcaster also assumes the simultaneous use of multiple sources on the desktop, resize images, superimpose one image on top of another. Control of each running source is available by clicking on it with RMB, from the menu you need to select the “Scene Source” section.
Free version limitations
As already mentioned, only the licensed version of the program offers ample opportunities for broadcasting, while the trial has reduced functionality. The trial version has the following limitations:
- The presence of the XSplit logo on the video in a resolution higher than 1280×720.
- You cannot broadcast stereo sound, only mono (AAC 96 kbps. Mono).
- The maximum number of scenes is 4.
- Skype camera and other restrictions are not added.
At the same time, the free version of the software is perfect for getting acquainted with the software and creating the first broadcasts.