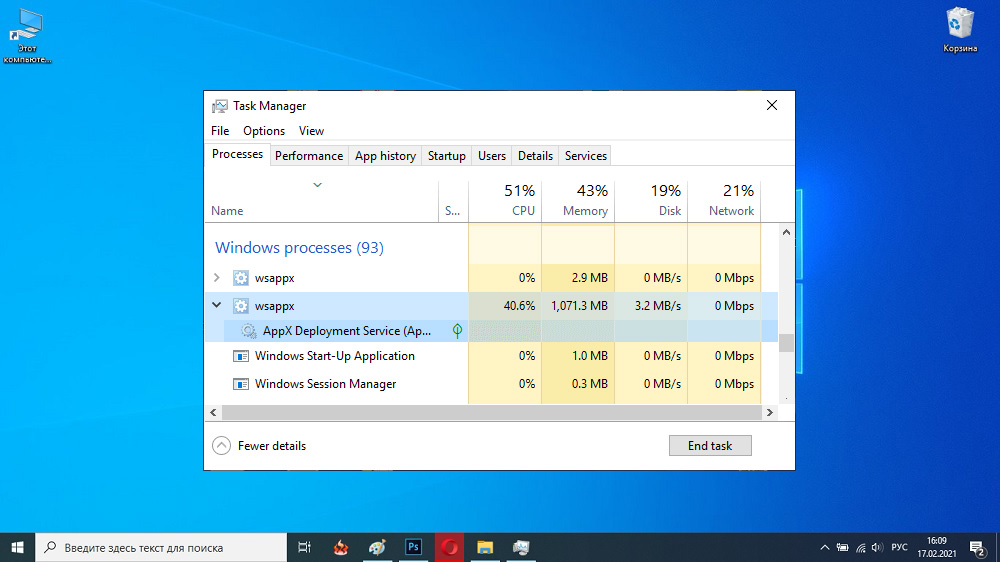
The system is constantly running processes responsible for various tasks and launched by the system or programs. If they function correctly, the user does not observe their work, and many of them are not even aware of. But as soon as the software fails, the search for a solution to the problem begins. So, when a loss of computer performance, which often occurs due to the load on resources created by processes and applications, the user turns to the “Task Manager”, where you can clearly see what exactly and how much load the disk, memory or CPU. WSAPPX is one such process that has been seen to consume a lot of PC resources. Most users do not know what it is, for what reason an excessive load on the part of the process is created and how to cope with it, so we will consider these issues in more detail.
Contents
WSAPPX – what is this process
Finding out what kind of process is causing the loss of performance, Windows 10 users can find WSAPPX responsible for some tasks in the software store. The system services that support the Windows Store for Tens, as well as the UPW (Universal Windows Platform), and that use the process, can be seen when it is deployed in the Task Manager. These are legal system processes that are not related to malicious software, despite the fact that they can heavily load computer resources. It is easy to verify their authenticity by location – trusted items will be located in the Windows system 32 system folder.
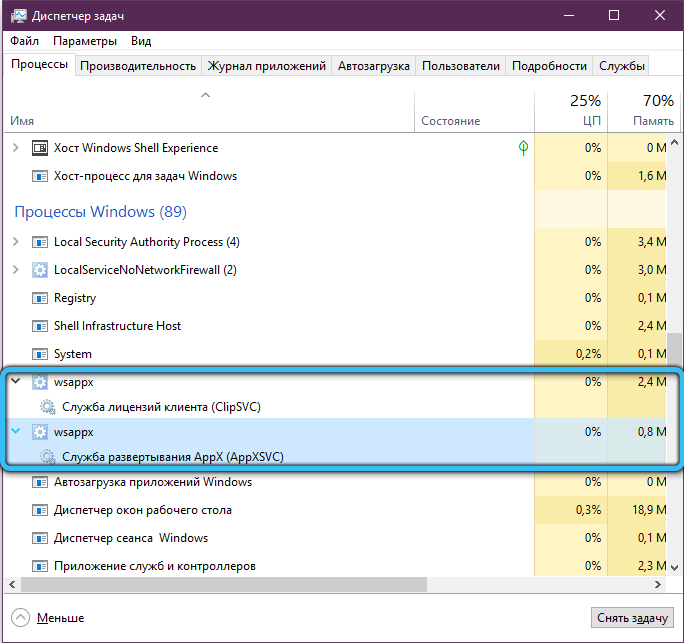
The process is matched by:
- AppXSVC deployment service, which manages the deployment of UWP software (.AppX format) and allows Windows clients to install, update, and uninstall Microsoft Store software. Its presence in the “Task Manager” is associated with the start of the Store or auto-update of the software, if there are corresponding updates on the Internet;
- ClipSVC client licensing service. The purpose of the service is to license commercially distributed Microsoft Store programs, so that the appx application cannot be launched on devices with another Microsoft account that is not related to the purchase and download of this software.
Why is the WSAPPX process overloading the system?
Usually WSAPPX loads the disk and CPU in Windows 10 during the period of active software operation, installation, updates, including the execution of background tasks, then the load is noticeably reduced and is close to zero. Then the consumption of resources is associated with the execution of individual tasks in the Store, which are started by the user or the system, so you just need to wait for the action to complete. But it is not uncommon for the process to consume too much, despite the fact that the user has not visited the store, has not downloaded or updated anything.
The reasons why WSAPPX overloads the processor and HDD if you have not started the Windows Store may be the following:
- the store, in the automatic mode enabled by default, performs updates for those programs that are already installed. Checking the Store for UWP software auto-update jobs is easy. You can also disable the option if you do not want the process to start on its own and load the disk and CPU;
- the software from the store functions in the background;
- animated program tiles (widgets in the Windows 10 Start menu) are activated, also consuming resources through the process. It is easy to disable them so that WSAPPX will reduce the load on the HDD and processor.
How to disable WSAPPX process
It will not work simply to deactivate the process in the “Task Manager” by forcibly terminating it, this may be followed by errors and malfunctions in the functioning of the operating system. Moreover, such a decision may be a temporary measure, since after a certain time WSAPPX will again appear among the ongoing processes. You should not prohibit the launch of services that use it. Let’s take a look at several ways you can disable the WSAPPX process or reduce resource consumption.
Disable animation widgets
You can reduce the load not only by turning off the process, but also by eliminating the causes, for example, deactivating live tiles in the Start menu will help, for which you will need to do the following:
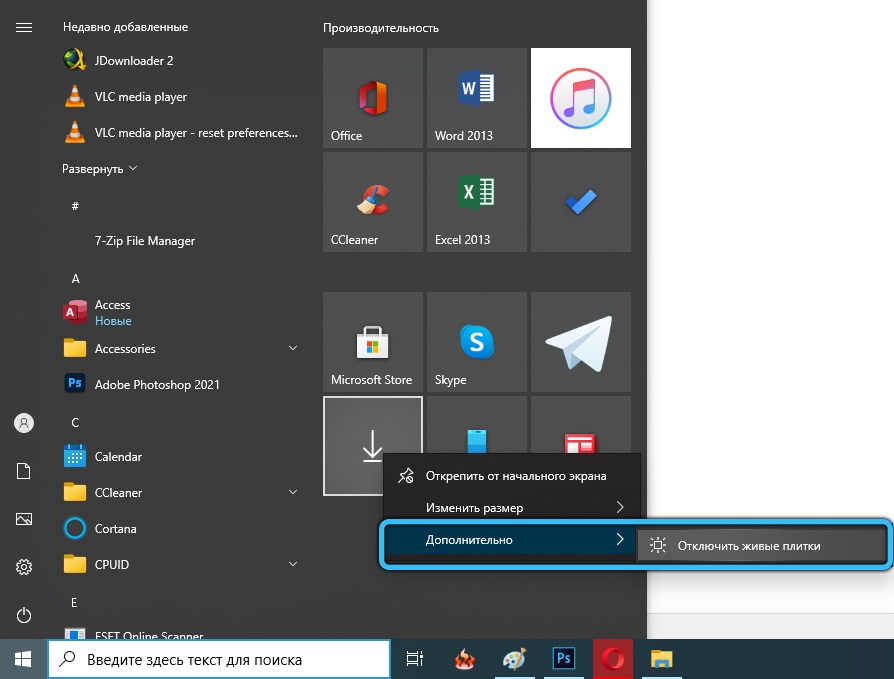
- in the “Start” menu, right-click on the tile, select the “Advanced” option – “Disable live tiles”;
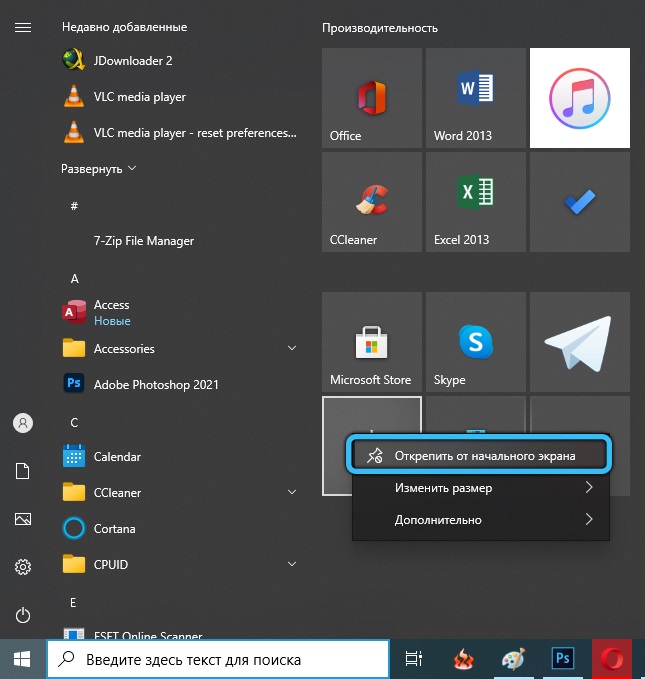
- if you don’t want to see a certain tile in the menu, click “Unpin from Start Screen”.
Disable automatic updates for apps in the store
To turn off the auto-update of the software, which causes the load, we perform the following actions:
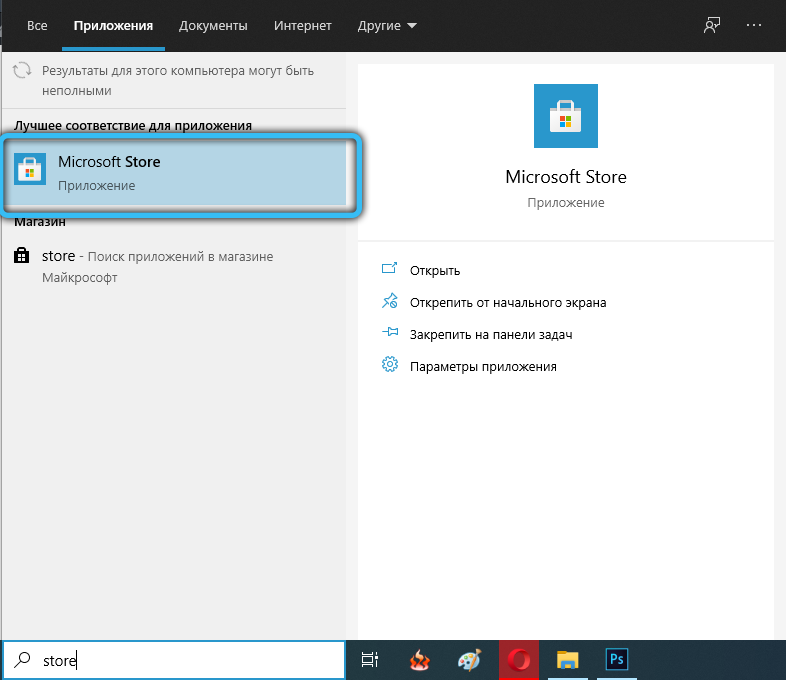
- go to the Microsoft Store, click the three dots in the upper right and go to the settings;
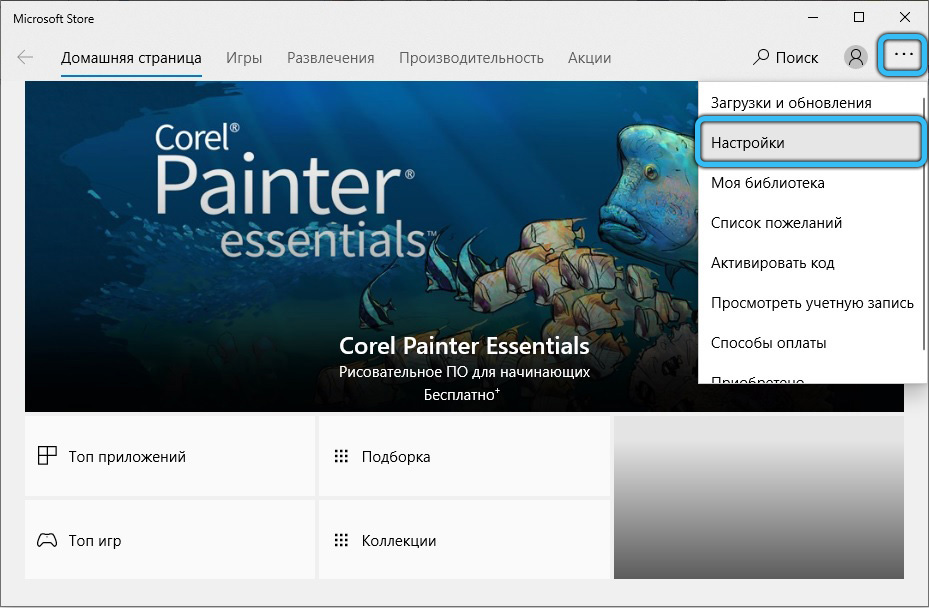
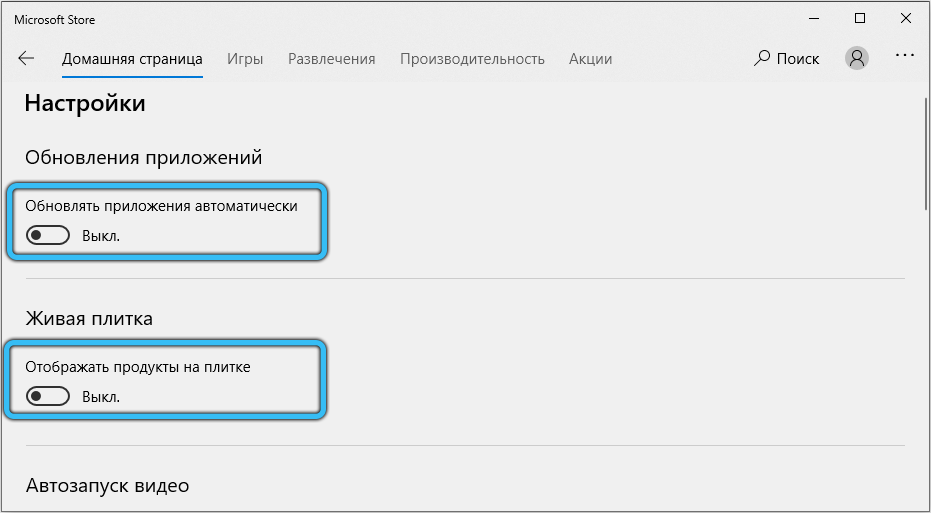
- set the “Update applications automatically” toggle switch to the off position (here you can also deactivate the display of live tiles for software products).
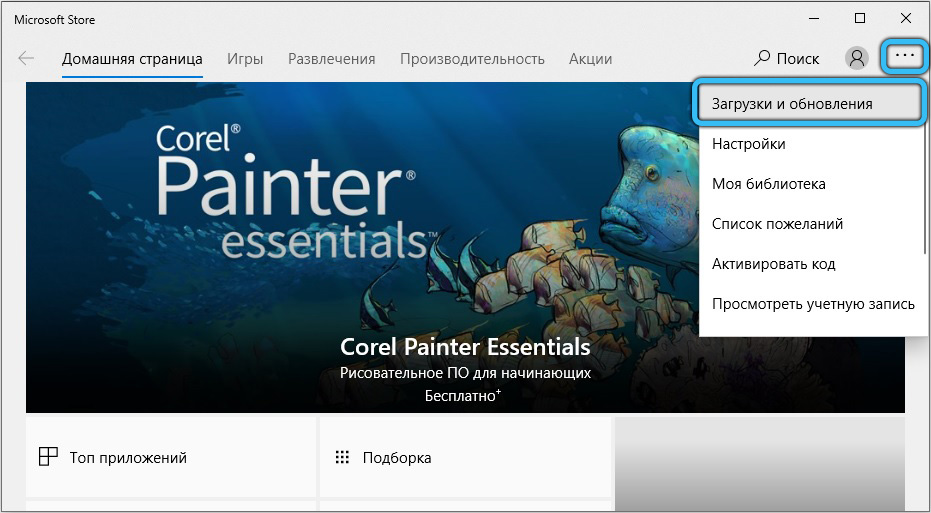
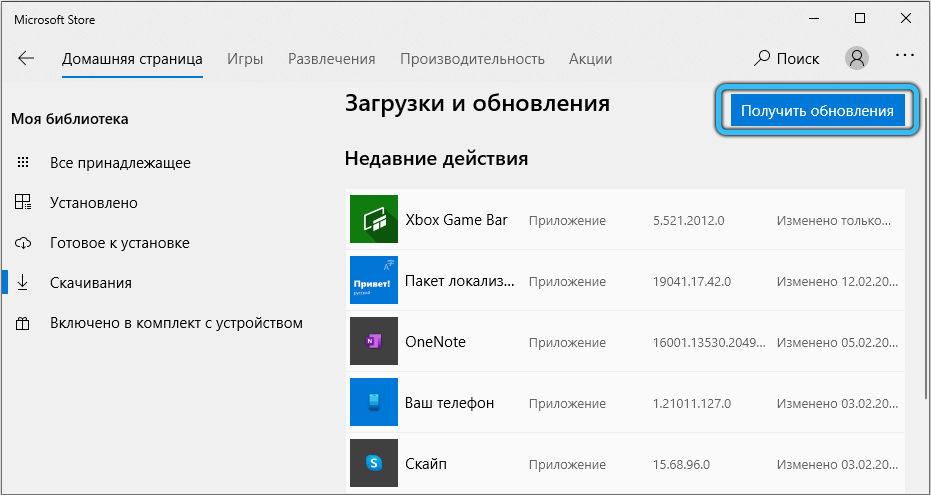
Now, when you need to update the software, you can go to the settings and select “Downloads and Updates”, where the ability to update programs is available if there are updates. So, the software will no longer be updated automatically, and WSAPPX will load disk, processor and memory at this time. Although the resources of the computer will be used by the manual update, this way you can choose when they will be used.
Disable Microsoft Store using Local Group Policy Editor
The editor allows you to deactivate both the store completely and its certain options. To complete the task:
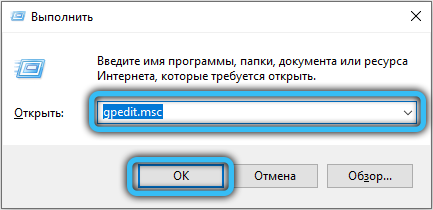
- open the editor, for example, using the Run console (Wi + R) and the gpedit.msc command;
- go to “Computer Configuration” – “Administrative Templates” – “Windows Components”;
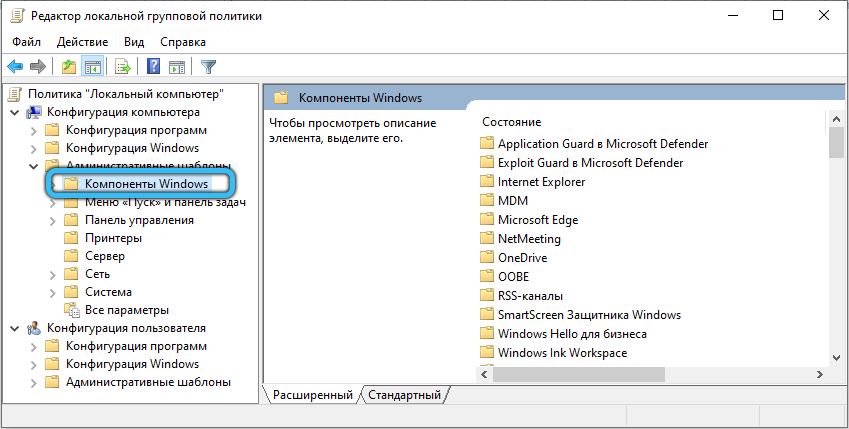
- we are looking for the “Store” catalog and in it by double-clicking (or RMB – “Change”) click on the item “Disable the Store application”;

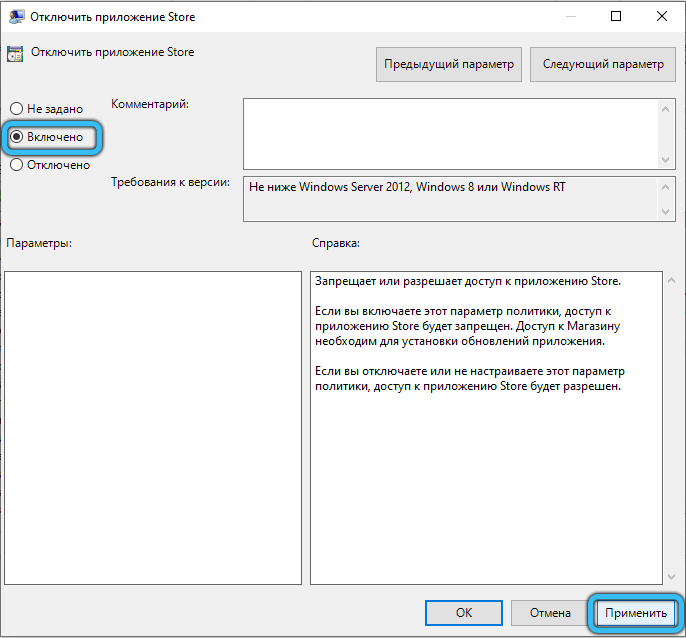
- in a new window, move the marker by selecting “Enabled”, then click “Apply” and “Ok”.
Disable Microsoft Store via Registry Editor
Before making any changes to the system registry, it is better to copy it, since careless user actions can lead to instability and even lead to a system crash. A copy will allow you to revert to a previous state in case of unsuccessful changes.
The method using the registry editor implies the following steps:
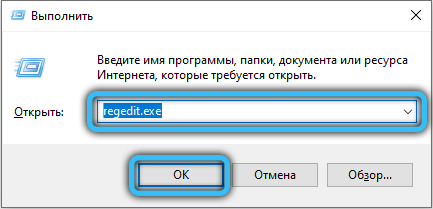
- go to the registry (open it via the Run console (Wi + R) and the regedit command);
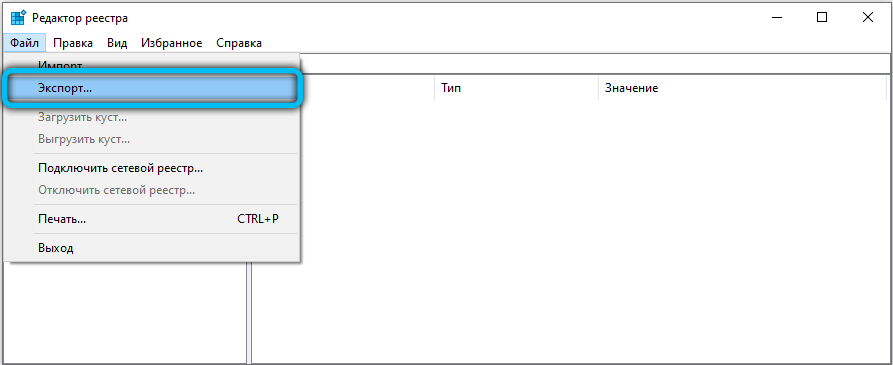
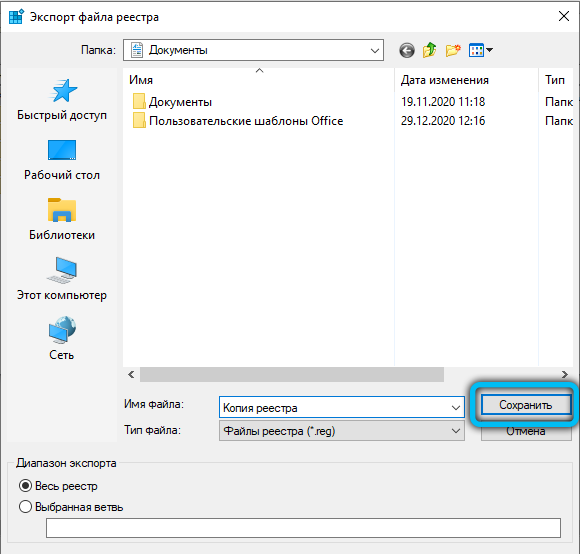
- make a copy of the registry, for which we press “File” – “Export”, set a name and save;
- now let’s start deactivating the store. Open the branch HKEY_LOCAL_MACHINE SOFTWARE Policies Microsoft;
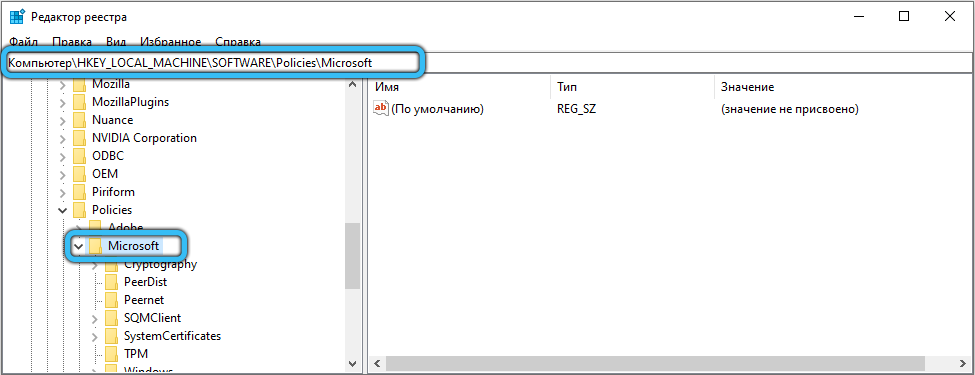
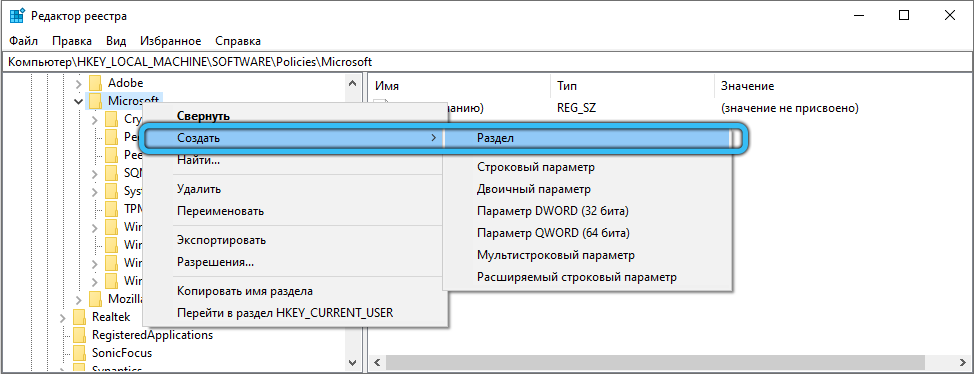
- open the Windows Store directory in this section (if it is absent, create it, for which we press RMB on Microsoft and select “Create” – “Section”);
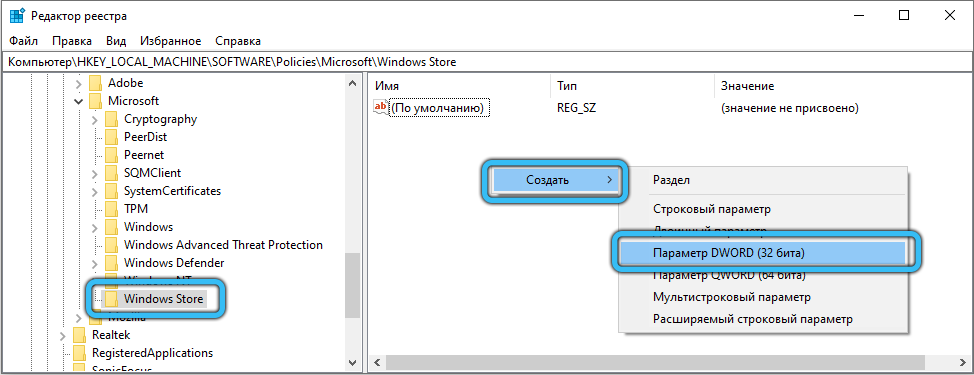
- now go to this directory and create a parameter called RemoveWindowsStore (press RMB in the free area – “Create” – “DWORD parameter (32 bits)”);
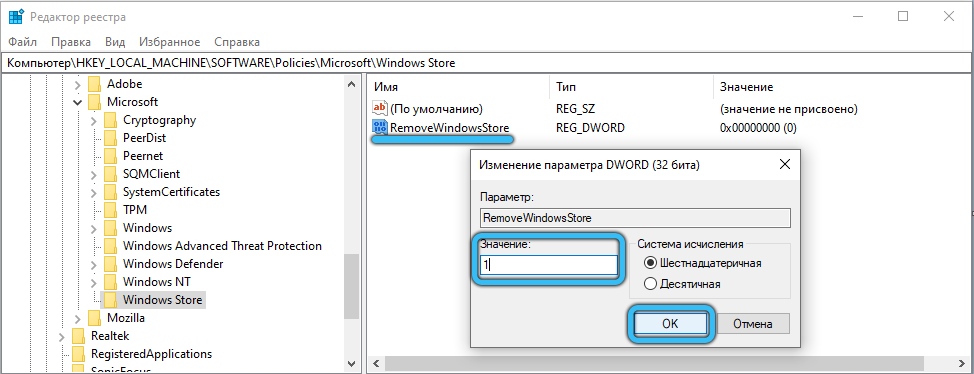
- press RMB on the parameter – “Change”, set the value for it to “1”, press “OK” and reboot.
Disable ClipSVC and AppXSVC
After the done manipulations ClipSVC and AppXSVC can be disabled:
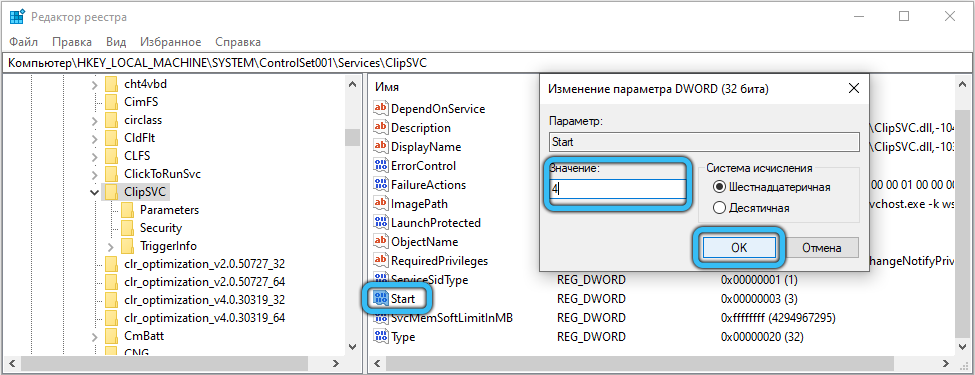
- in the registry editor, go to the HKEY_LOCAL_MACHINE SYSTEM ControlSet001 Services ClipSVC branch;
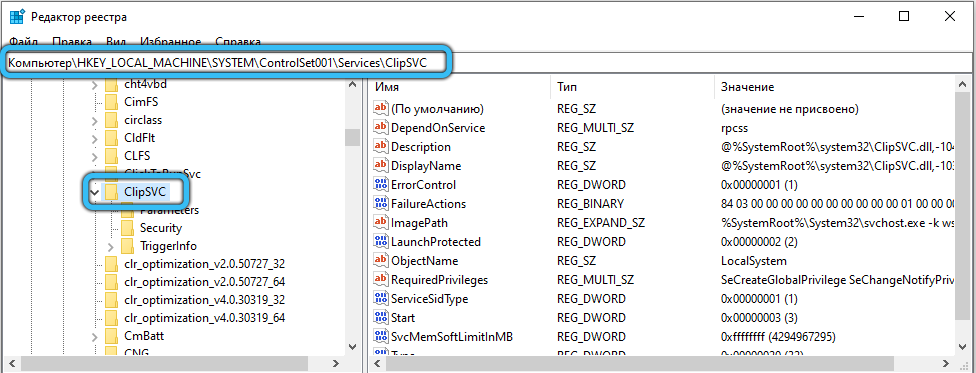
- here we find the Start parameter, double-click on it to open the window and change the value to “4”;
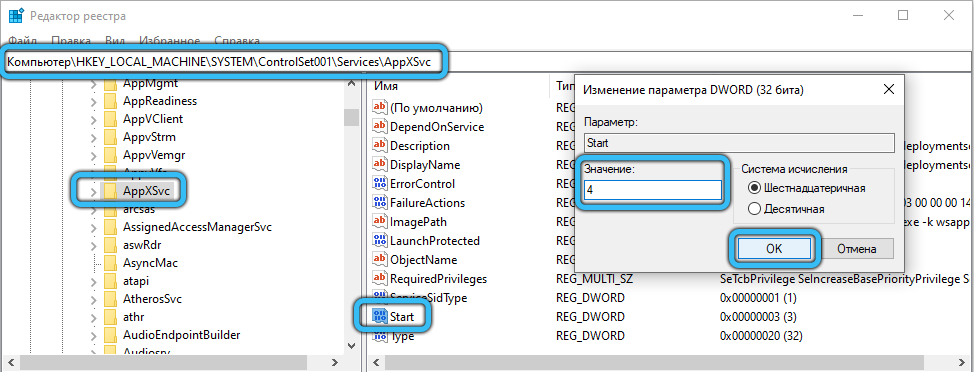
- now we perform similar manipulations for AppXSVC, for which we follow the same path (only in the Services folder, select AppXSvc);
- reboot to apply the new settings.
One method usually works by solving the overload problem. Separately, it should be noted that the resources are often loaded by proprietary software of computer manufacturers, delivered in the form of UWP applications. Programs can be deactivated or uninstalled if they are not needed.