Many users have heard of such a concept as a paging file. But not everyone knows what it is, what it is used for and in what situations it is necessary to change it.
In fact, this is useful knowledge. Especially in situations where PC resources are not enough to work with a large number of programs and applications.
First you need to understand the very essence of the paging file (FP), and only then study the instructions for increasing it.
Contents
What it is
The paging file is also called virtual memory by some. This is a special system file that resides directly on your hard drive. Its most popular and current operating system, Windows, uses it to compensate for the lack of RAM, which may not be enough for running and simultaneously running applications.
As many probably know, for the operation of various programs and applications running on a computer, RAM resources, that is, RAM, are used.
In simple terms, when the program is launched, it is read from the hard disk and, as it were, is temporarily rewritten to the RAM. All application data is also stored in RAM. Until the moment the program is closed.
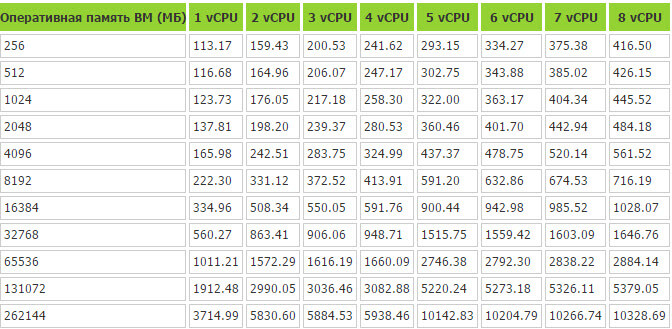
But RAM is not limitless, and it can run out of resources. The more programs and applications run at the same time, the more RAM is taken away. And if it is completely exhausted, then the very swap file comes into operation. It is also virtual additional memory.
This is a special system file that is hidden and contained on the hard disk. Due to it, it is possible to redirect the load from RAM to virtual memory. In fact, the FP replaces the RAM when the latter is full.
The operating system does not need to close other applications to make room for the next program to run. Instead, the program is thrown onto virtual memory, and then returned back if the need arises.
The operating system will decide on its own which programs to transfer to work through the paging file.
If we talk about modern PCs and laptops, then there is mainly an impressive amount of RAM. Because of this, FP is practically not used. But if the user notices how the application slows down and lags when loading, and the hard disk indicator blinks actively, this indicates a transition to the paging file and return from it. In such a situation, it makes sense to think about increasing the FP, or buying a new RAM with improved characteristics.
FP on Windows 10
The current version in the face of Windows 10 differs from its predecessors in terms of the paging file used in the computer system.
There are 2 such files at once. They have the following names:
- pagefiles.sys;
- swapfile.sys.
By default, they are located in the root directory of the system drive C, and they can be found by activating the function of displaying hidden files.
There is a definite difference between the two files.
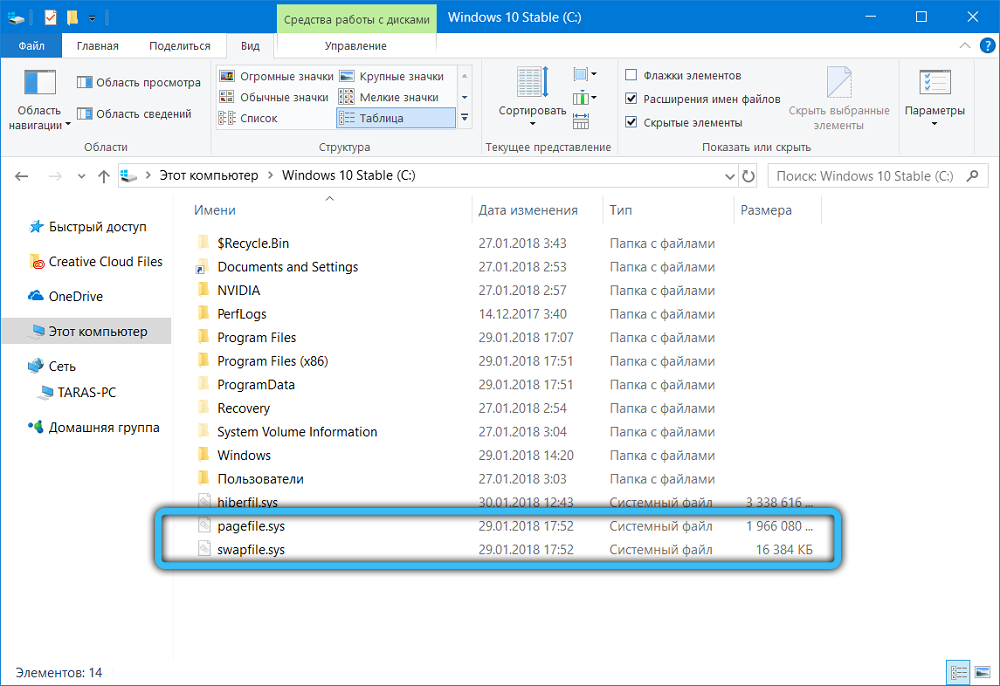
If pagefile is used to work with ordinary applications installed by the user himself, then swapfile directs its resources to maintain the operability of built-in applications in the OS, as well as programs downloaded from the official Windows store.
In this case, both files work in pairs. But if swapfile is usually several tens of megabytes in size, then its partner sometimes grows to several gigabytes.
Therefore, some users have a natural desire to disable this FP, which in theory will free up a solid amount of gigabytes.
But there are other situations when it is even necessary to increase the FP.
Optimal performance
In fact, Windows 10 or Windows 7 itself determines the optimal size that the paging file should have. The system decides how much it needs, and in most cases the standard indicators are sufficient. And if you have a PC or laptop with solid RAM, then FP is hardly ever needed.
But this still does not interfere with determining the optimal paging file size for different computers running Windows 10, as well as older versions of operating systems developed by Microsoft.
There is a step-by-step instruction on how you can do it yourself and pretty quickly.
- First, launch all applications that you can potentially use at the same time. For example, this is a text editor, some kind of Photoshop, a media player, a browser with 5-10 open tabs, etc. Include exactly those programs that you really need while working on your PC.
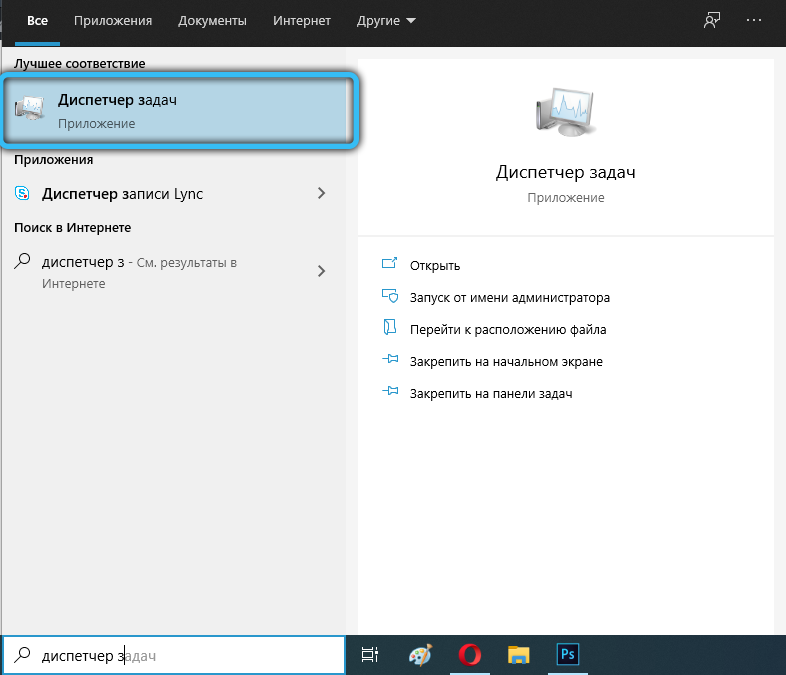
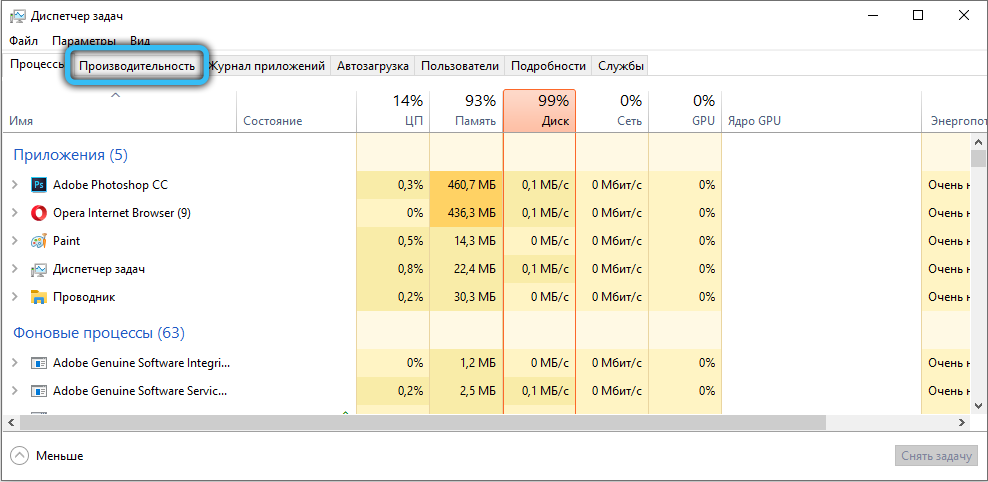
- Now open Task Manager, open the Performance section. See how much RAM is used for all the programs you are running.
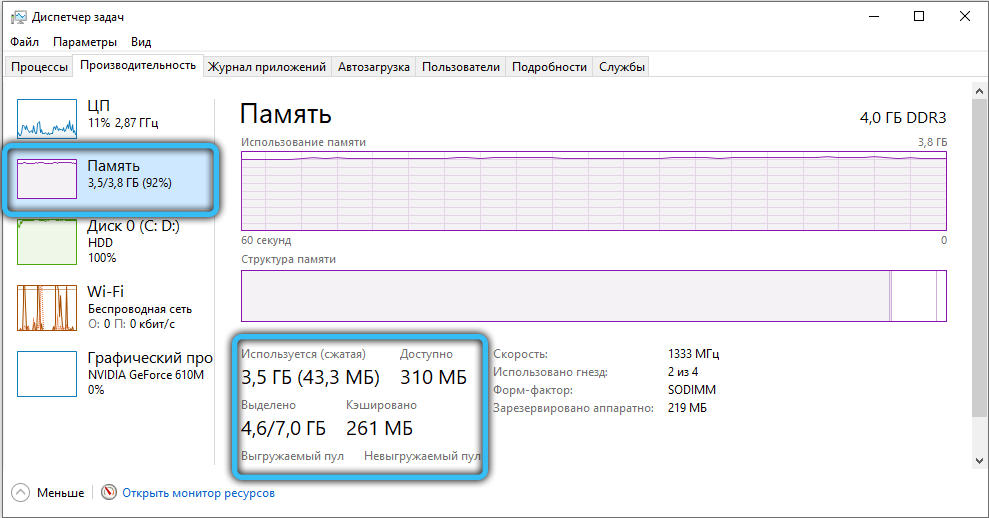
- Take the amount of RAM that is occupied and multiply this figure by 2. For example, when the RAM is 4 GB, and 3.5 GB is occupied, then 3.5×2 is 7 GB.
- Subtract the amount of your current RAM from the result obtained. In this case, this is 4 GB. Subtracting 4 GB from 7 GB, the output is 3 GB. This is the optimal indicator for the paging file.
If you receive a negative result during the calculations, you can do nothing at all. There is no need to change, increase or decrease FP.
If there is a lack of RAM, then increasing the FP will be the right solution.
Augmentation procedure
Now to the question of how you can increase the paging file size on Windows 10, and what you need to do to do this.
Plus, the procedure for changing parameters on Windows 7, which is also still a demanded version of the operating system, will be considered separately.
There is nothing particularly difficult in self-configuring paging files in Windows 10, despite the use of two files at the same time.
If you are using Windows 10 and you need to increase the paging file, you need to do the following:
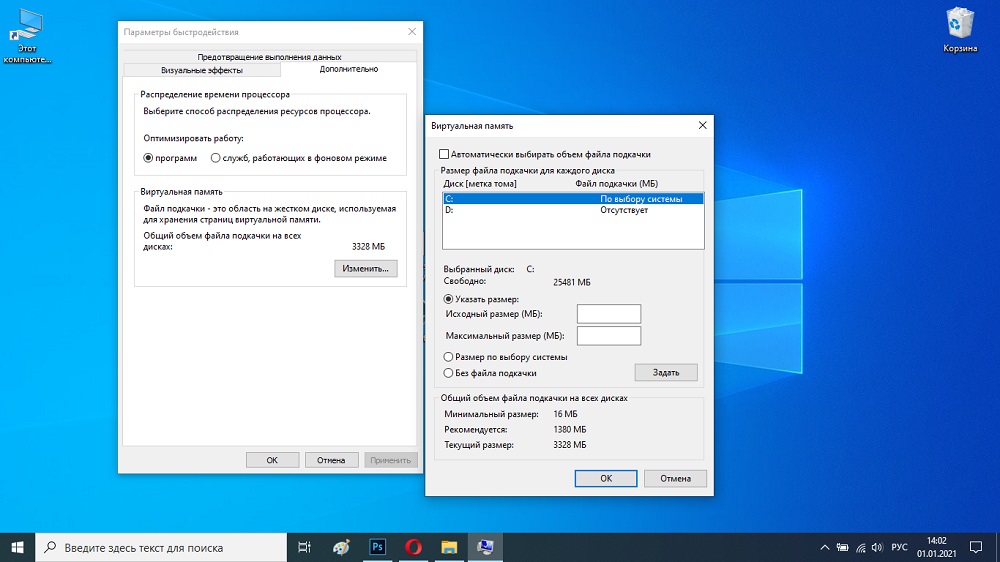
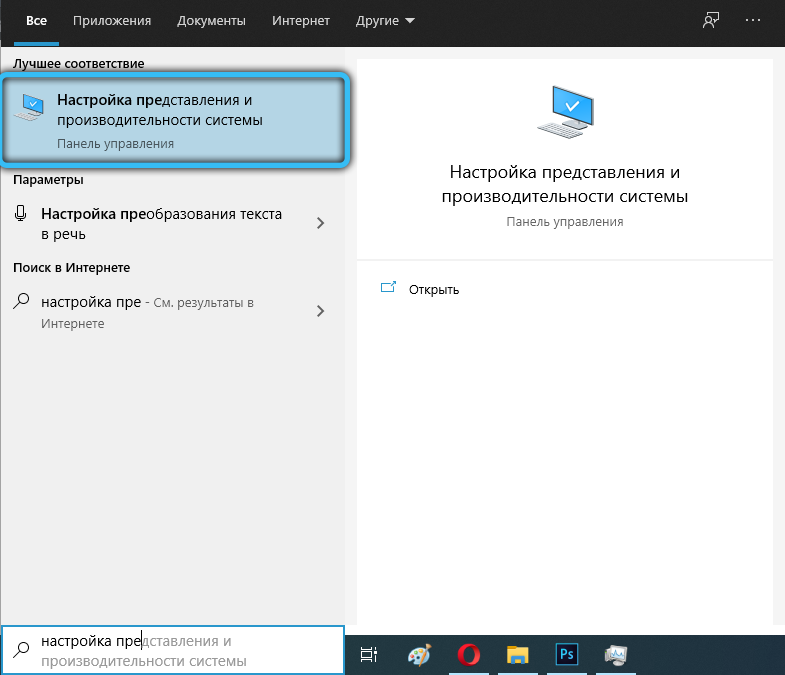
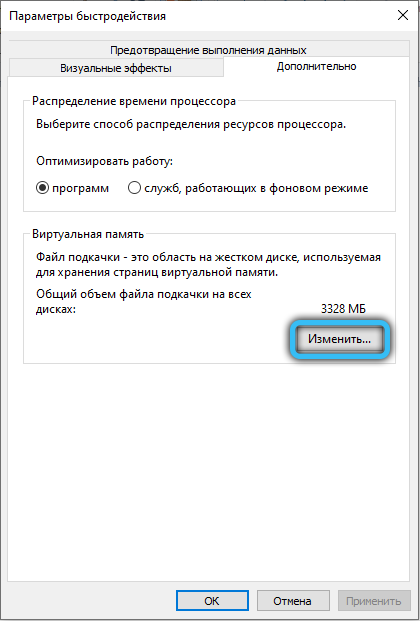
- Open the “Start” menu and find the corresponding application there, which is called “Customize the view and performance”;
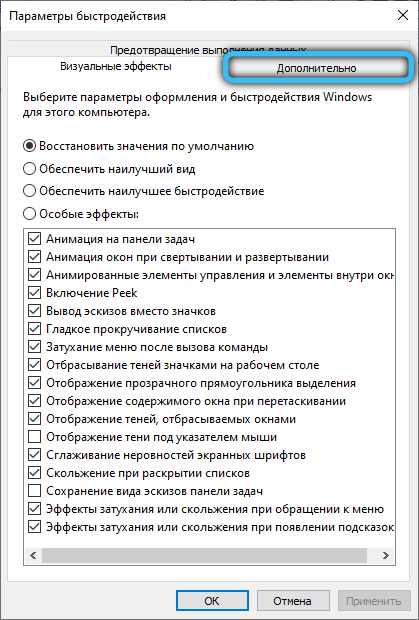
- Wait for the “Performance Options” window to appear and select the “Advanced” tab;
- Find the “Virtual memory” section at the bottom of the window;
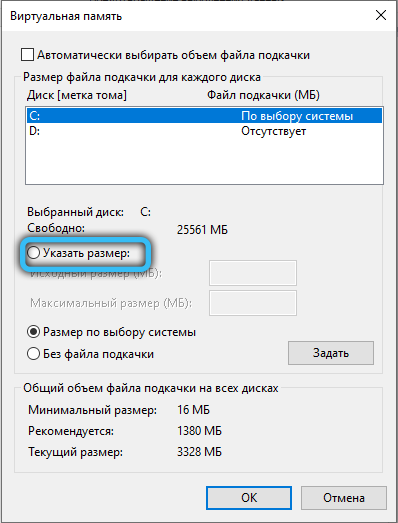
- Press the “Change” button. Here you need to uncheck the box that allows you to automatically set the volume for the FP;
- Highlight the system drive that appears in the list that opens. Click on the “Specify size” button;
A line with the original size will appear here, which is written in megabytes.
- The minimum and maximum value must be specified;
In the first case, it is at least 400 megabytes. - And in the second, where the maximum size is indicated, write down the indicators you need.
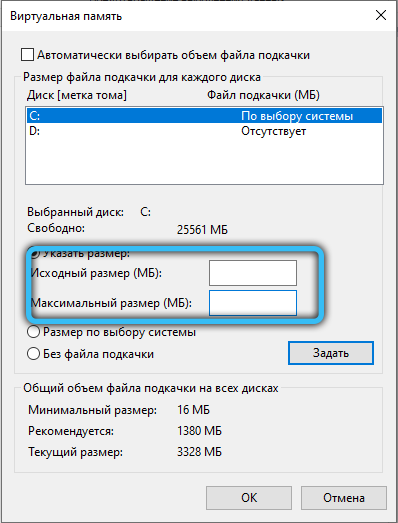
They must be written in megabytes. Do not forget that one gigabyte contains not 1000, but 1024 megabytes.
Upon completion of the settings, click on the “Set” button, and then on OK.
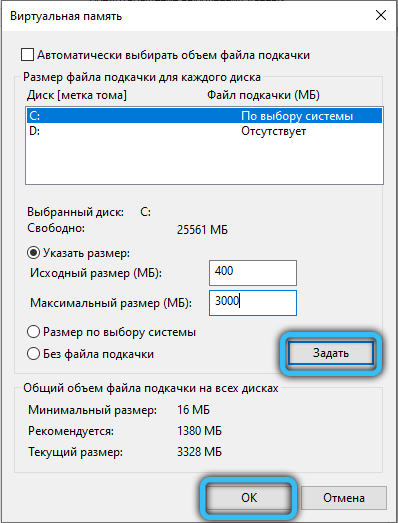
That’s it, now you know how to configure the paging file in the case of the Windows 10 operating system.
In theory, you can set any size that the paging file will have on Windows 10. But it is still not recommended to exceed the recommended values.
If you managed to add several hundred or thousands of megabytes to the current paging file, and from this Windows 10 began to perform significantly better and more efficiently, everything was done correctly.
The procedure for the question of how you can change the values of the paging file in Windows 7 looks a little different.
If you have Windows 7 installed on your computer and you need to make another paging file, then proceed from the following instructions:
- click on “Start”;
- find Computer, and right-click on it;
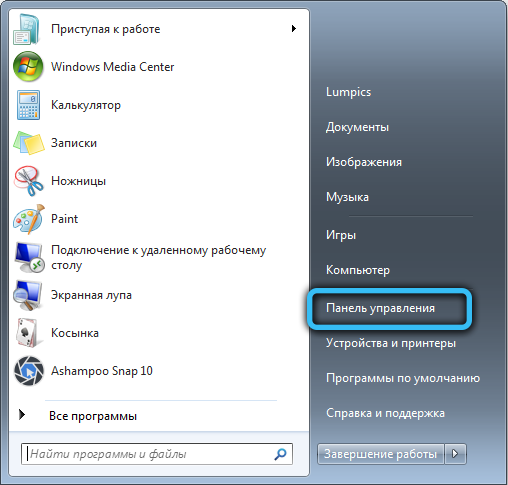
- in the context menu that opens, click on “Properties”;
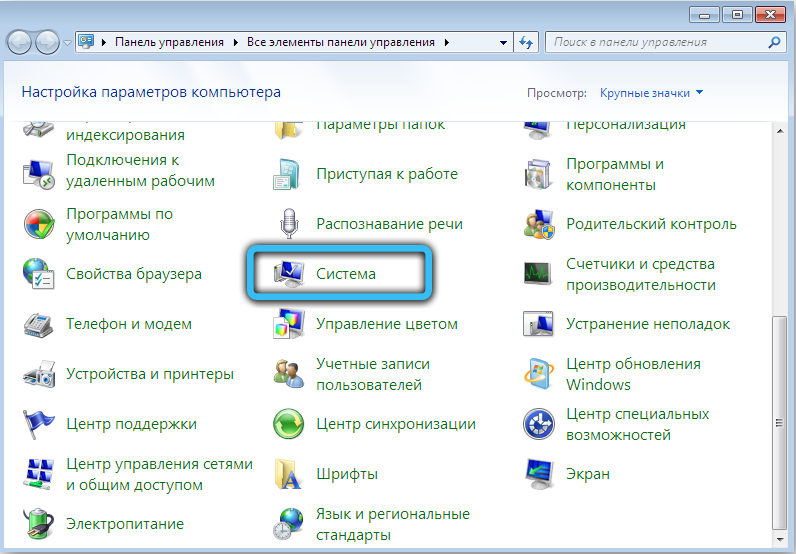
- a window will appear where you need to click “Advanced options”;
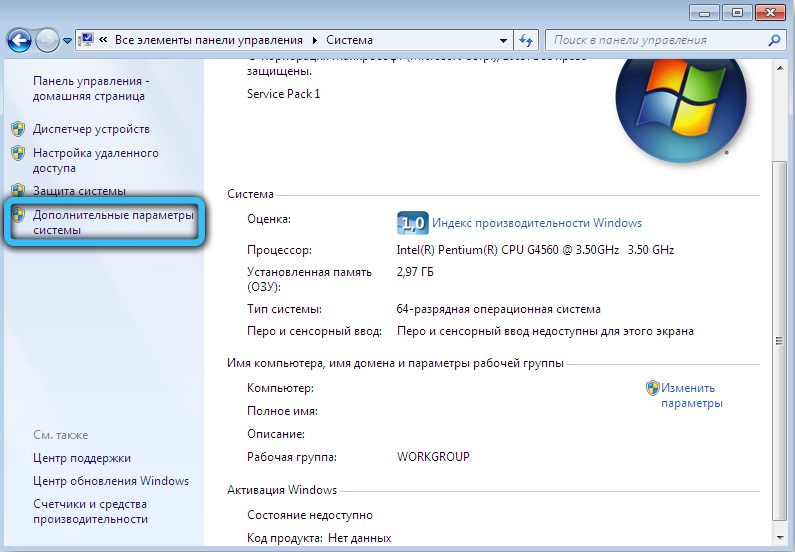
- specify the admin password or just confirm the action when prompted;
- open the “Performance” section, go to the tab called “Advanced”;
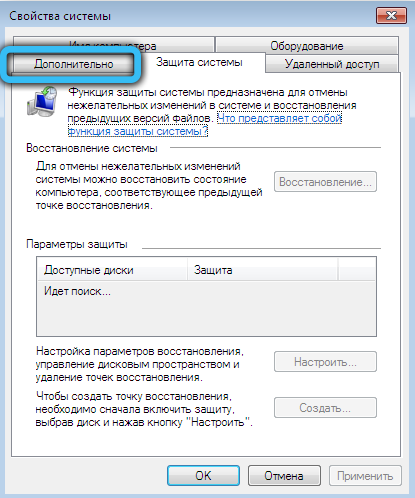
- click on the “Options” button;
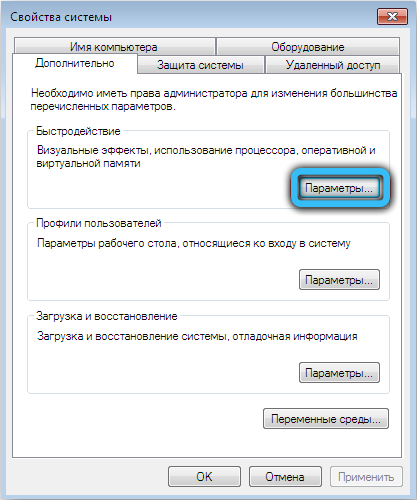
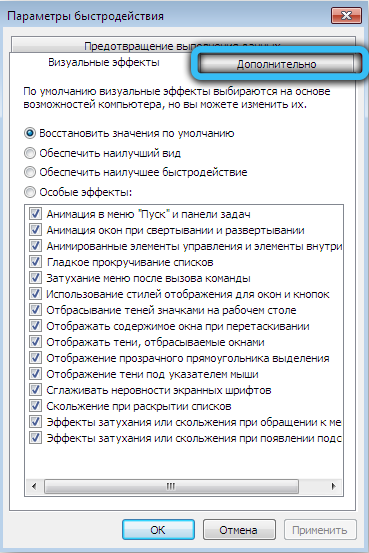
- again the “Advanced” tab;
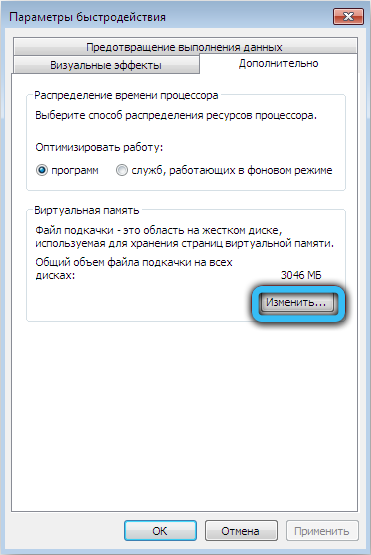
- in the “Virtual memory” section, click on the “Change” button;
- uncheck the automatic FP selection box;
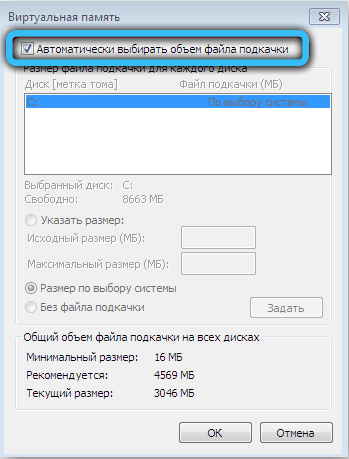
- in the section with the list “Disk” select the one where the paging file is located;
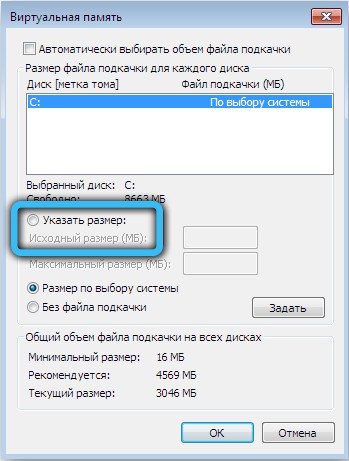
- in the field for specifying the size, search for the original and maximum volume;
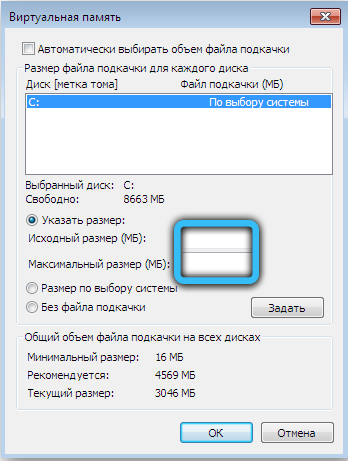
- then on “Install”, then the OK button.
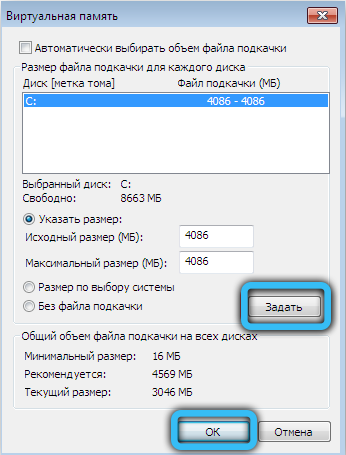
If you decide to install a larger paging file than was installed by default, then you will hardly need to restart your computer. But when this indicator decreases, a reboot is usually needed. Only after it, the changes made will take effect.
As you can see, it is not so difficult to increase or decrease the FP value. You just need to know where to go in a particular version of the Windows operating system, and correctly calculate the required number of megabytes.
Location
By default, the file in question is created and located on the system disk. In most cases, this is a drive named C.
But to increase the system performance, the FP can be transferred to another existing computer hard disk. Just keep in mind that we are talking about transferring to another disk, and not to another partition.
In the case of the current version of Windows 10, you need to do the following to transfer:
- in the application called “Settings” of the view, select the item “Advanced”;
- then go to the “Virtual memory” section and click on the “Change” button;
- if there is a check mark, remove it from the automatic selection of the file size;
- allocate the system drive;
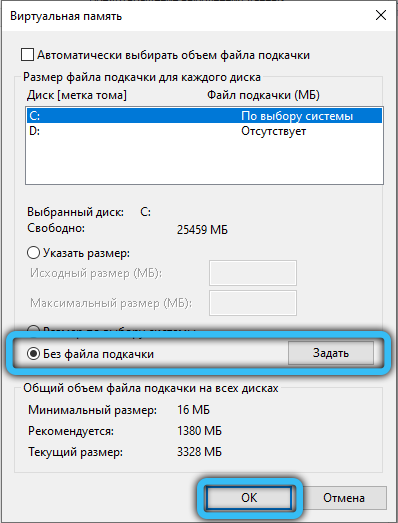
- click on the item “Without swap file”;
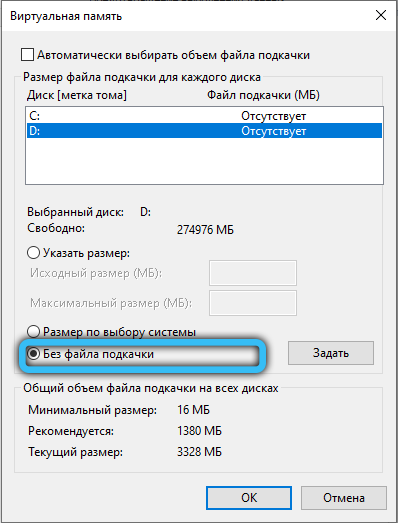
- now on the “Set” button, and then OK;
- in the same list, select another disk where you want to transfer the file;
- set the size;
- confirm changes;
- to restart a computer.
That is, the best option would be a hard disk drive (HDD) that does not have an operating system installed.
Disconnection
Disabling this file is no big deal. Simply in the settings, it is enough to check the box marked as “No swap file” in the section where the FP indicator is set manually, or at the discretion of the system.
But it is worth considering before making such a decision.
In fact, disabling the paging file is strongly discouraged. This can lead to unpredictable consequences. Most likely, a number of programs and applications will start to lag, slow down. And some of them will not be able to start at all.
Usually, this decision is made in situations where there is a lot of RAM, but there is practically no hard disk space. By turning off paging, several gigabytes can be freed up. But this is at best.
Therefore, a more correct solution would be to clean the disk of unnecessary data, use utilities to clear memory, cache, etc. But disabling the FP is performed purely at the user’s risk.
If, nevertheless, such a need arose, then it is necessary:
- open the explorer;
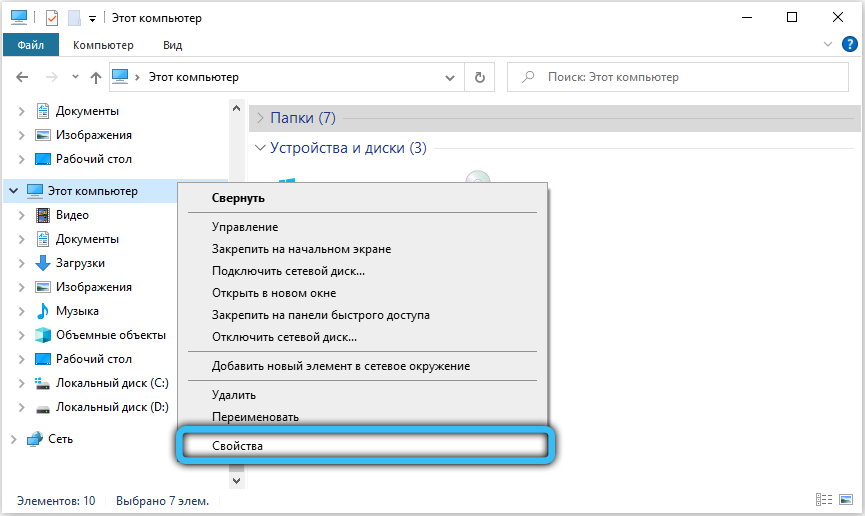
- right-click on the “This PC” application;
- open its “Properties”;
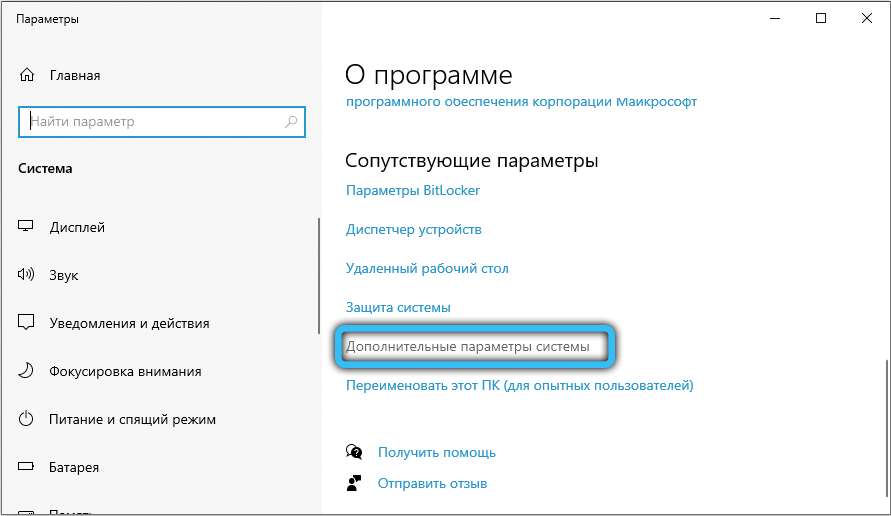
- enter the section with additional parameters of your system;
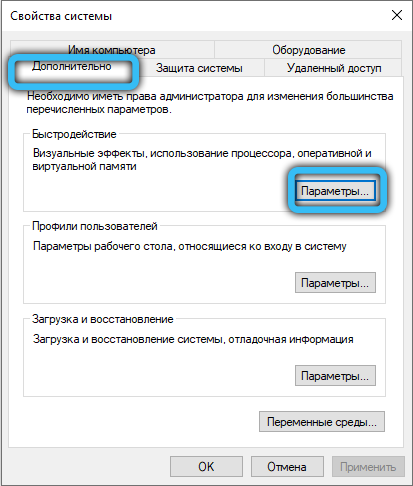
- open the next tab “Advanced”;
- go to “Performance”;
- click on “Parameters”;
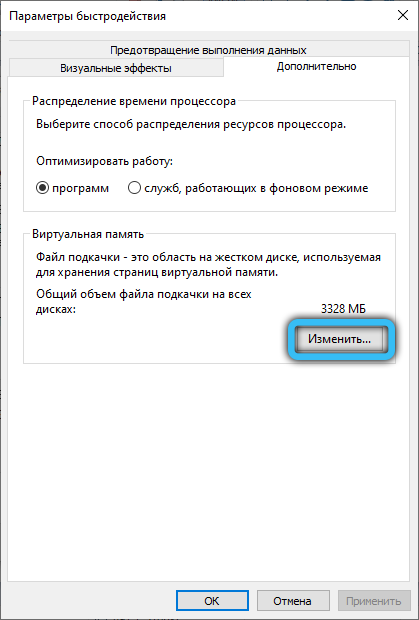
- in the new window that opens, click on the “Advanced” tab again;
- in the section about virtual memory, click on the “Change” button;
- uncheck the box with automatic detection of FP volume;
- check the box “Without swap file”;
- then on the “Set” button, and then click on OK.
As you can see, the paging file is rather ambiguous and largely loses its relevance on powerful modern PCs and laptops. But still, in some cases, it becomes necessary to replace it, increase, decrease or even disable it.
It is worthwhile to think carefully about how much it is really necessary to make changes to this characteristic. After all, usually the system independently determines the optimal values, and there is no need to adjust them.
Thank you for reading us!
Subscribe, comment, ask questions and tell your friends about our project!