In case of problems with software and hardware in the arsenal, Windows has utility utilities for diagnosing and fixing errors that not all users even know about. System tools cope with many tasks and often the use of third-party software is not required. Crashes in Windows occur for various reasons, and some of them can be triggered by the appearance of bad sectors on the hard disk, errors in files and file structure, violation of the logical structure, etc. You can solve the problem with this scenario using Chkdsk, a built-in tool OS that has existed since the days of MS DOS. The utility is still used today in any version of Windows, regardless of the assembly.
Contents
What is this program
The built-in system utility CHKDSK (check disk) is intended for servicing hard drives, it allows you to scan HDD partitions for errors, bad sectors and fix detected faults. This is one of the most effective system tools that allows not only diagnosing, but also restoring the integrity of the file system, as well as correcting logical and physical errors in the hard drive. The CHKDSK disk check can be performed even when Windows does not start, which is important if you need to eliminate critical errors that prevent the OS from starting.
The capabilities of the Check Disk utility software allow you to restore the disk structure, including fixing incorrect entry points of the Master File Table (MFT), which contains information about the contents of an NTFS volume. If it detects bad sectors, CHKDSK restores them if we are talking about incorrectly written data, or marks them so that the system no longer uses them when recovery is impossible and we are talking about physical damage to the disk.
Typically, users get to know what CHKDSK is and become familiar with the utility and its commands when they already have problems with the HDD and the file system. In some cases, the program even starts independently before starting the OS and begins the process of scanning disk partitions. But problems, even very serious ones, often do not appear at all while working with a computer device and can be detected, for example, when the user needs to change the volume of a partition or perform other manipulations of disk space.
You can run the program from under Windows or from the command line (in normal, safe mode, as well as using a bootable drive with an OS).
Startup procedure using the graphical interface
If the operating system is functioning normally, the CHKDSK utility can be launched directly from the Windows interface. Service start is slightly different for different OS versions. Let’s see how to run CHKDSK in Windows 7:
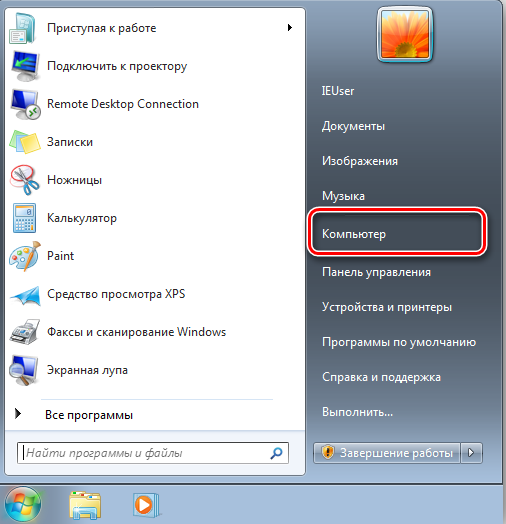
- Go to “My Computer” (on the Top Ten, the directory was renamed to “This Computer”).
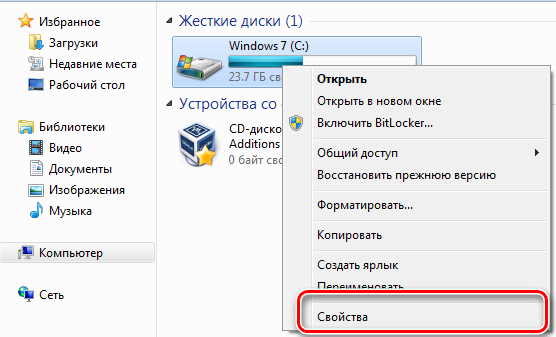
- Click on the one that you want to scan, RMB – “Properties”.
- On the “Service” tab, click “Check”.
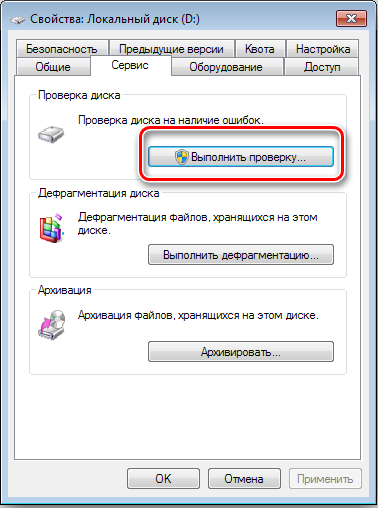
- In the window that appears, mark “Automatically fix system errors” and “Check and repair bad sectors”.
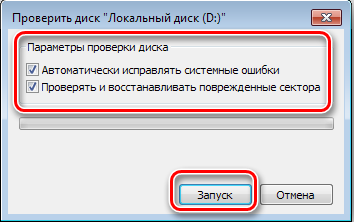
- We start the check by pressing the corresponding button, the process is performed automatically and takes a certain time, which depends on the volume and load of the volume of the internal drive.
When choosing a scan for the system partition, you need to schedule a scan or reboot the device right now. So, the C: partition (or whatever you have given for the system) will be checked at the next Windows start.
In Windows 10, you can call CHKDSK in a similar way:
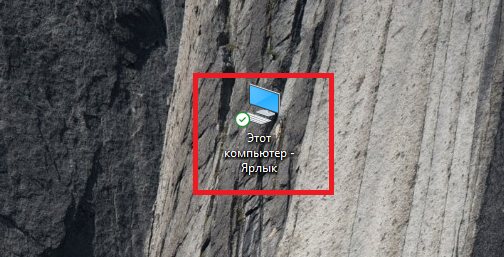
- Press Win + E or go to “This computer” by any convenient method (if this shortcut is not on your desktop, it is easy to fix it in the “Personalization” section).
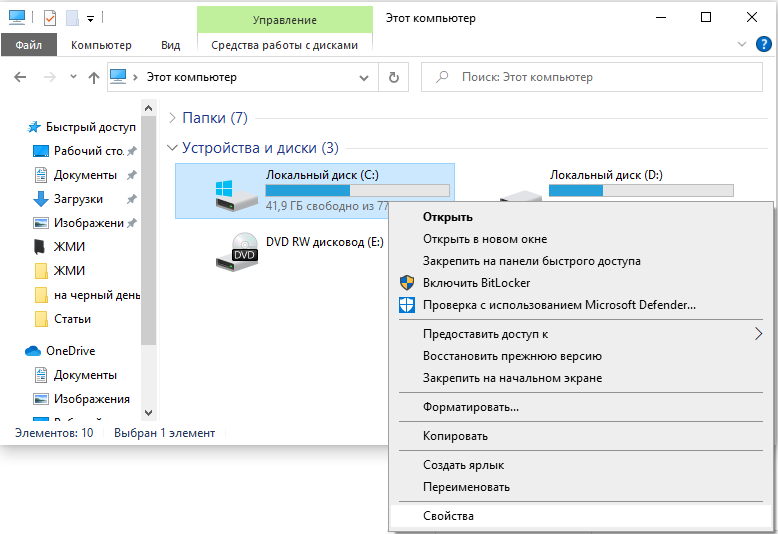
- Click on the drive being scanned, RMB – “Properties”.
- Go to the “Service” tab and click “Check”.
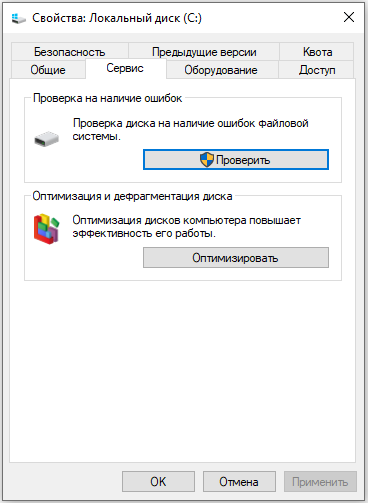
- In versions of Windows 10 and 8.1, when everything is fine with the file system, a window will open informing you that the check is unnecessary, and you can run the tool by clicking Check Disk. If there is a suspicion that errors are present, the window will also contain a button to start the process of scanning and recovering the HDD.
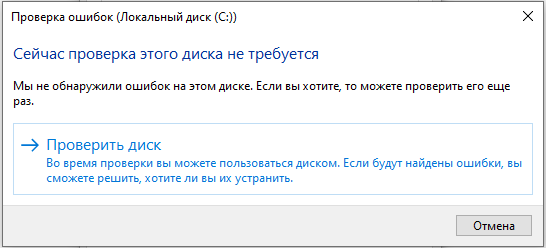
- It will be possible to restore the system partition after rebooting the OS.
Starting procedure using the command line
The following methods allow you to run the CHKDSK program from the command line. There are several options available depending on the situation.
Running Check Disk from the command line
The terminal should be opened as an administrator. This can be implemented using the “Run” console (Win + R), where you should write the cmd command and hold down Ctrl + Shift + Enter, and then confirm the intention, or in the Start menu called by RMB, click “Command line (administrator)”, or use the search. Next, we perform these steps:
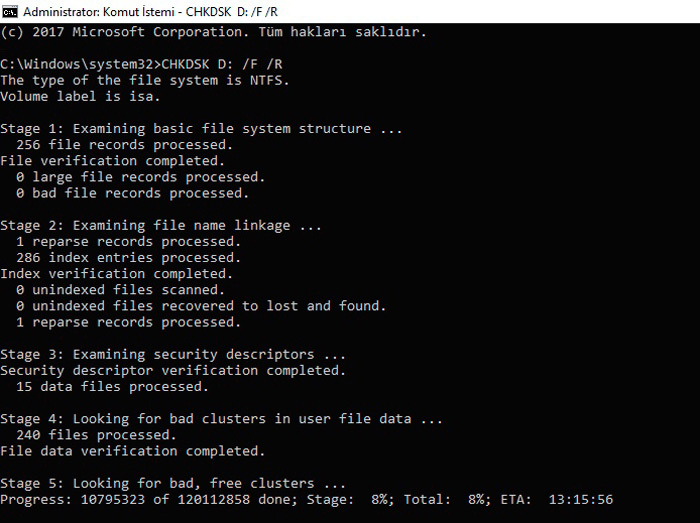
- In the terminal, enter the command chkdsk C: / r / f (the value “C: /” can be replaced, instead of it there can be the name of the section that is being checked).

- CHKDSK parameters mean performing actions with the specified section (C, D, E, etc.). So, the used value ” / r ” provides search for bad sectors and restoration of their contents, and ” / f ” performs the function of checking for errors and eliminates them when detected.
- If the scanned partition is a system partition, it will be scheduled to be scanned at the next OS start. Reboot (if we are talking about a non-system partition, the computer does not require a restart).
- When the OS starts up in automatic mode, a check will be performed, it will take some time.
- The final report will reflect the result of the check. The report will contain information about the identified problems and the elimination of problems.
Running Check Disk in Safe Mode
Often, errors that prevent the full functioning of the system are interconnected with damage to the hard disk, file system, etc., while the system tool can scan and fix HDD errors even in cases where Windows does not start. To do this, do the following:
- We boot into “Safe Mode”, for which we restart the device and press a certain key at startup (this can be F2, F12 or Del).
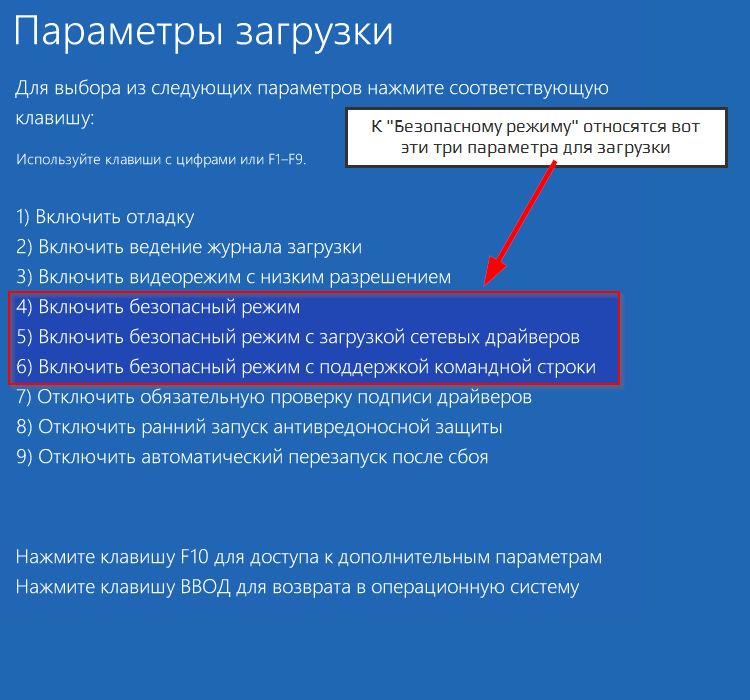
- Run the command line as an administrator (for example, through the “Start” context menu).
- In the terminal, write chkdsk / r / f and press Enter.
- We agree to the proposal to schedule a task and reboot.
- The procedure for the hard disk will start when the OS starts up. If problems are found during the scan, they will be corrected by the utility if they need to be fixed.
Running Check Disk from a bootable drive
Sometimes, in order to troubleshoot, you may need to run a scan in the Windows recovery environment, for which a bootable USB flash drive or disk with your OS version is provided (it is recommended to have such a drive in your arsenal, since in many cases, thanks to the OS recovery option, you will not have to demolish it). First, you need to change the startup order of devices by setting the priority for the removable drive in the Boot section in the BIOS. Starting from a flash drive (disk), we do the following:
- Select the language and keyboard layout, click “Install Windows”.
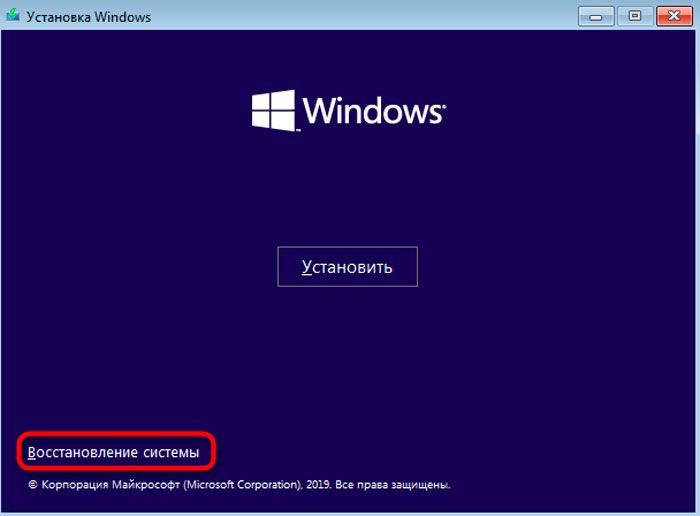
- We go to the “System Restore” section, then to the “Troubleshooting” subsection, then “Additional parameters”, where we find the “Command Line” tool.
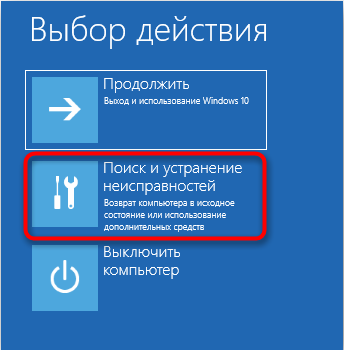
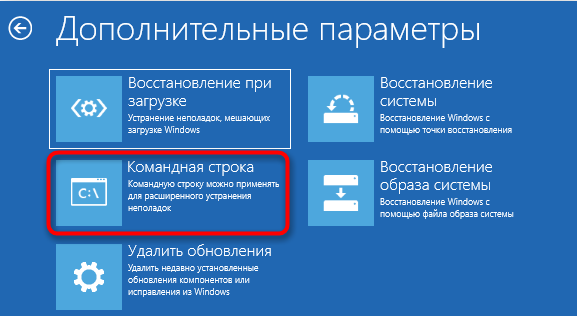
- In the console, enter the already familiar characters chkdsk C: / r / f and press Enter.
How to remove or restore CHKDSK from startup
In certain situations, with serious disk malfunctions or system failure, you can observe the regular loading of the utility every time the OS is started. Sometimes we are talking about the gradual failure of the HDD, so that the problem cannot be ignored. Autostart CHKDSK is easy to disable, although this is not a solution to possible disk malfunctions, and will rather ignore the problem that has arisen, but if the reason is a system failure, such a solution is justified. Let’s look at how to disable CHKDSK when starting Windows 7, 8, 10.
Method 1. Disable the service at the command line
To complete the operation, you need to do the following:
- We open the command line in administrator mode.
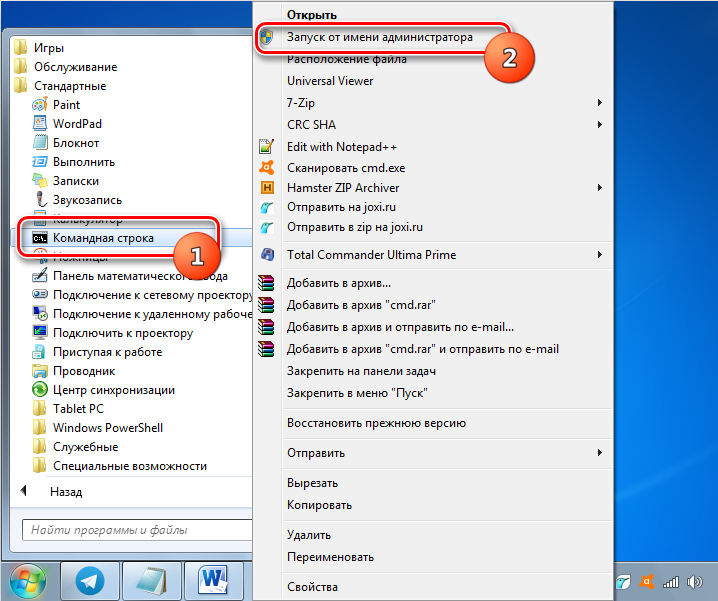
- In the terminal, set the chkntfs / x command with: (here the value “C:” is the section for which everything is started).
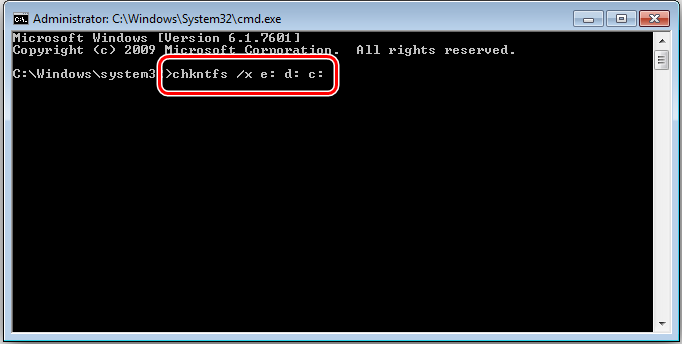
- If it is planned to disable scanning for other partitions, the command is supplemented with the letters assigned to them (for example, chkntfs / x with: d: e:) .
- You can return to the previous parameters using the chkntfs / d command .
Method 2. Changing the system registry settings
Remember that incorrect edits can lead to unpleasant consequences for the operating system, including its complete failure, so manual editing of the registry is not recommended for inexperienced users. Before making any changes, it is best to make a backup so that you can revert to the previous settings if something goes wrong.
The method involves performing the following actions:
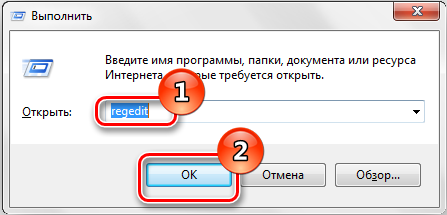
- We go to the registry editor (start the “Run” console by pressing Win + R and register regedit ).
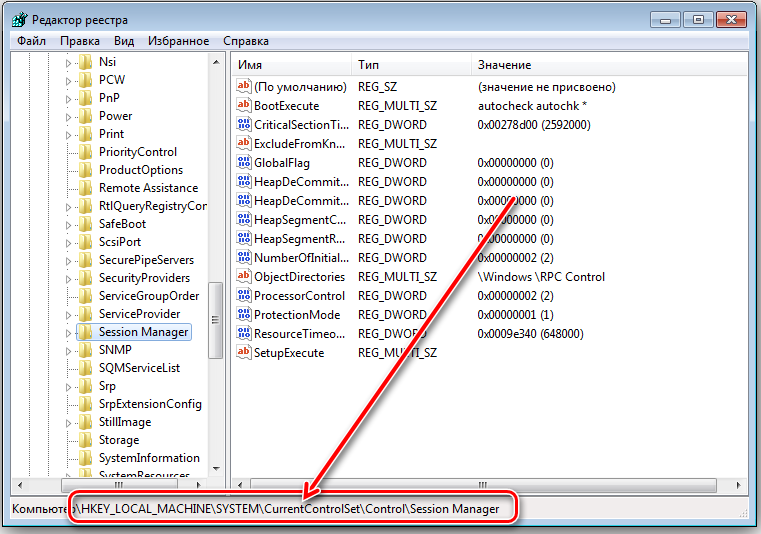
- We go along the branches HKEY_LOCAL_MACHINESYSTEMCurrentControlSetControlSession Manager.
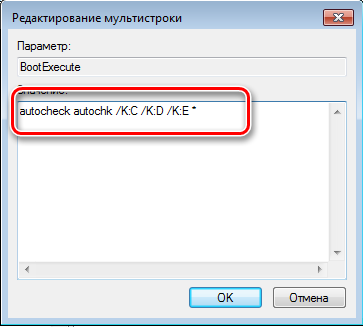
- Here we are looking for the “BootExecute” parameter and click on it.
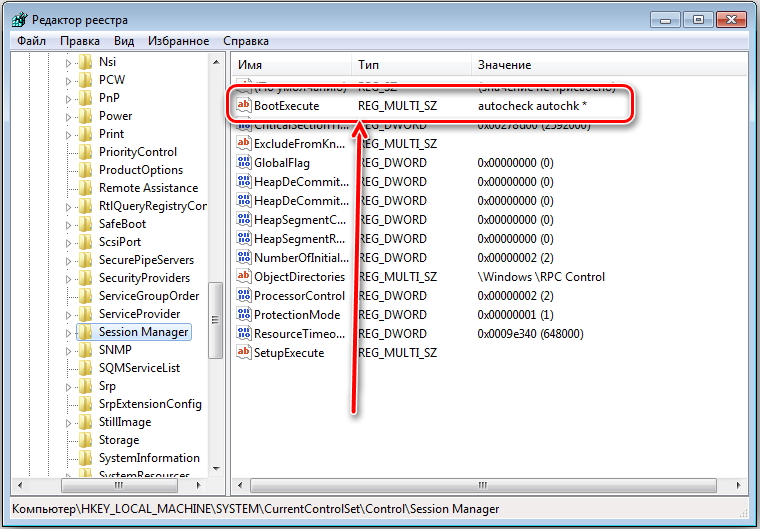
- The “Edit Multiline” window will open, where the value will default to autocheck autochk * .
- Add / k: C before the asterisk, it looks like autocheck autochk / k: C * .
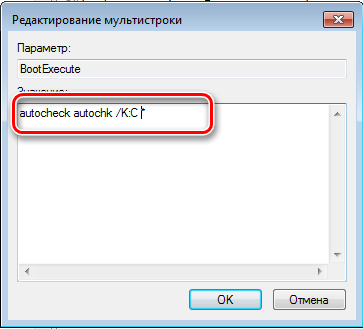
- If we stop checking for other volumes as well, add the letters assigned to them separated by spaces (/ k: C / k: D / k: E *) to the line.
The built-in Windows service CHKDSK allows you to identify and fix problems with the HDD, so it is advisable to use the utility if you suspect a violation of the integrity of the file system. Along with the SFC (System File Checker) system service, the Check Disk tool allows you to fix various crashes and is used to fix critical Windows errors.