Not all users know that turning off a PC can be done in different ways. Most simply use the “Turn off the computer” button, while the subsequent inclusion takes a lot of time and always returns Windows to its initial state, when only those programs that are present at startup are running.
Meanwhile, it is much more efficient to use hibernation mode, in which the computer turns off, but when it is turned on, it returns to the state it was in when the mode was turned on, with all your open programs and documents. To this end, the operating system writes the current session to a special file (Hiberfil.sys) located in the root of the system disk, and reads all the necessary data from it when it is turned on.

Of course, when using this function, turning on the computer will take longer than usual, but you will get the state of the computer in which it was at the time of turning it off.
Contents
How to enable hibernation in Windows 11
Before activating the feature, it is advisable to understand the differences between sleep and hibernation. If you select “Sleep” when you turn off your PC, it will not turn off, but will enter a low power mode. In this case, subsequent activation will not take much time, and the computer will be in the same state that it was when you clicked the “Sleep” option. From this we can conclude that it is better to use sleep mode for a desktop PC, since the problem of saving energy is not acute here. Another thing is a laptop, which, even in low power consumption mode, can completely discharge the battery overnight, so hibernation mode is preferable here.
Let’s look at the main ways to enable hibernation in Windows 11.
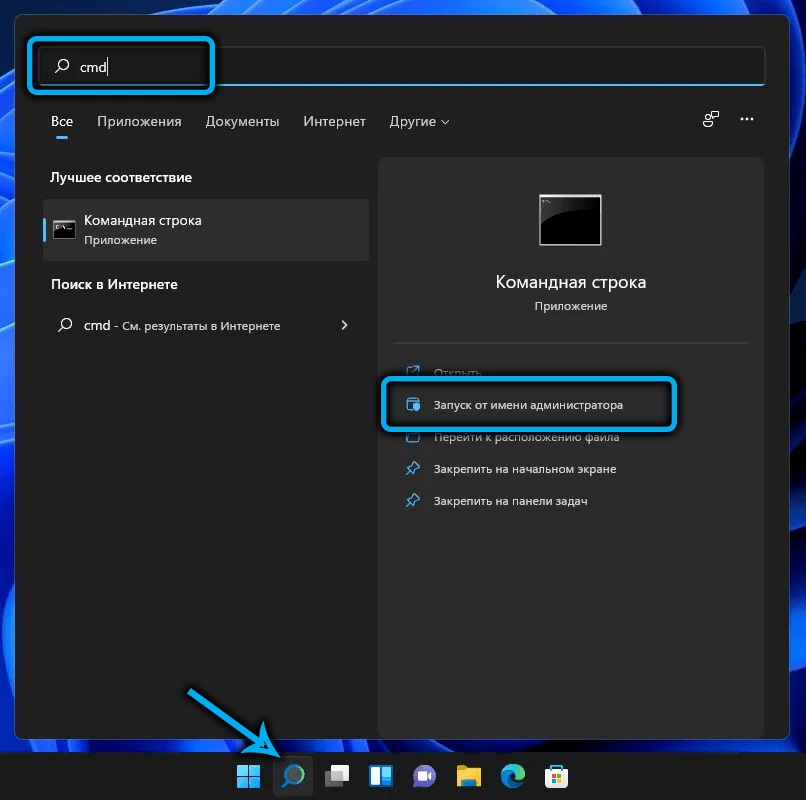
Using the command line
The simplest and most common method will require you to follow these steps:
- turn on the start button menu;
- in the list of applications that opens, look for the line Windows Terminal (Admin), always with administrator rights;
- if there are separate profiles for the command line or PowerShell, you can use them too, but also with privileged rights;
- enter powercfg-h on in the console, confirm by pressing Enter;
- exit the Windows Terminal.
Hibernation will be enabled immediately, without the need to confirm the operation or restart the computer.
The method is really simple and fast, its only drawback is that you need to remember both the command itself and its parameters.
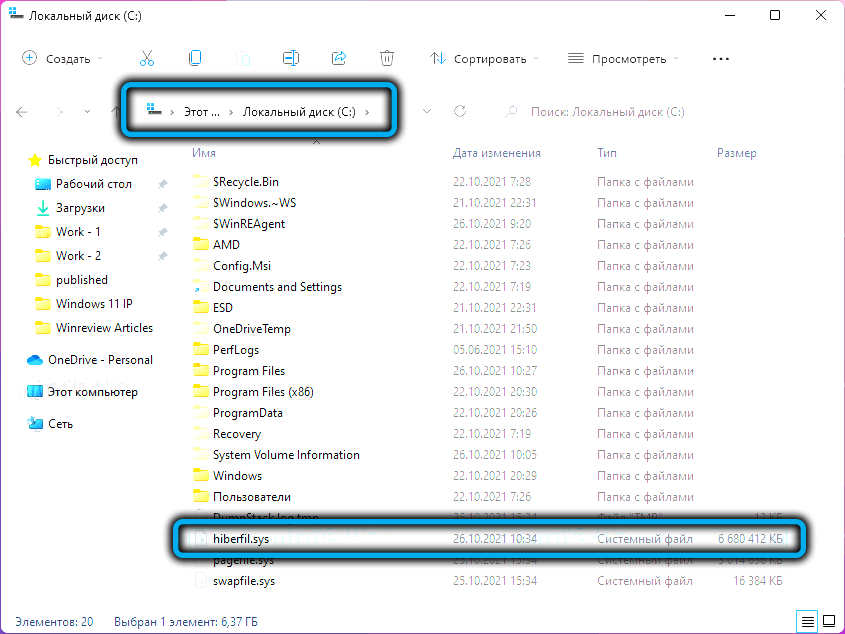
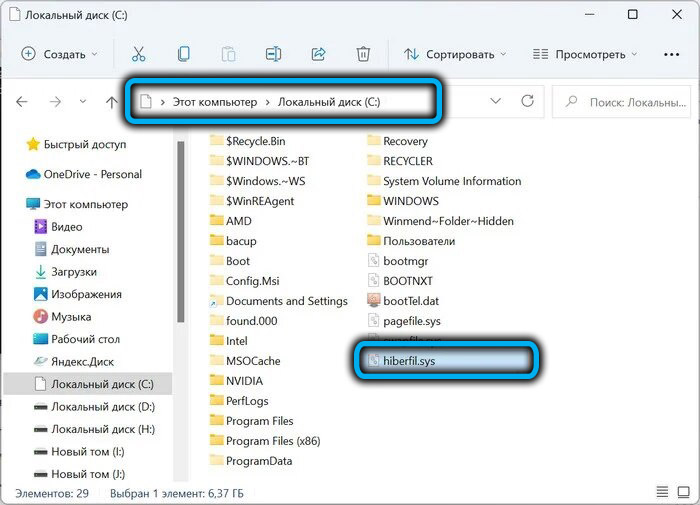
You can make sure that the command worked in Explorer: the Hiberfil.sys file should appear on the system disk in the root directory, which is absent when the mode is off.
Enabling hibernation in the system registry
This method can only be recommended to experienced users: editing the registry with the most minor errors is fraught with serious consequences. If you are confident in your skills, proceed:
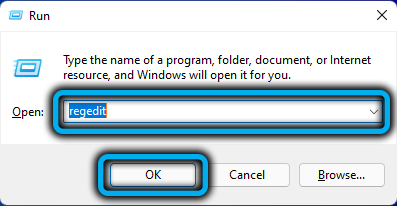
- press the Win + R combination to launch the Run console;
- enter regedit, confirm by pressing Enter;
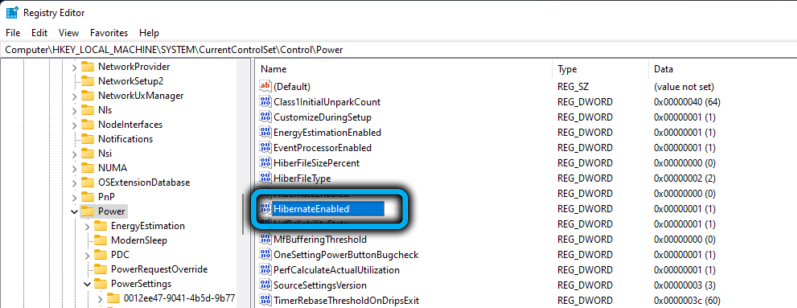
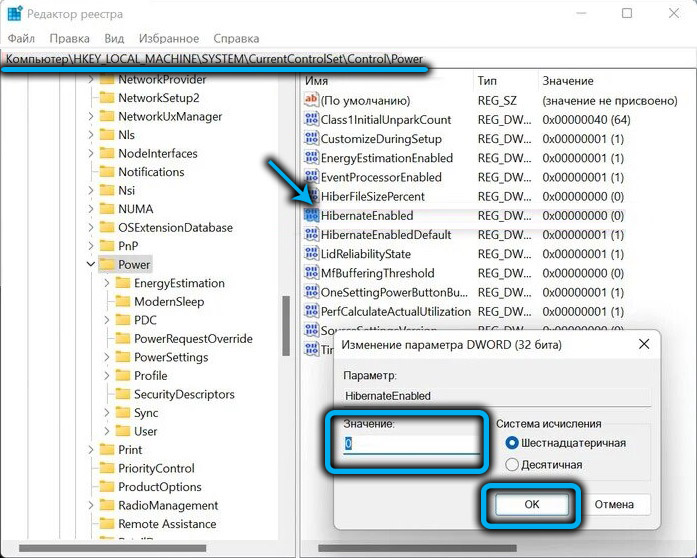
- open the HKEY_LOCAL_MACHINESYSTEM branch, and then the sub-branches CurrentControlSetControlPower;
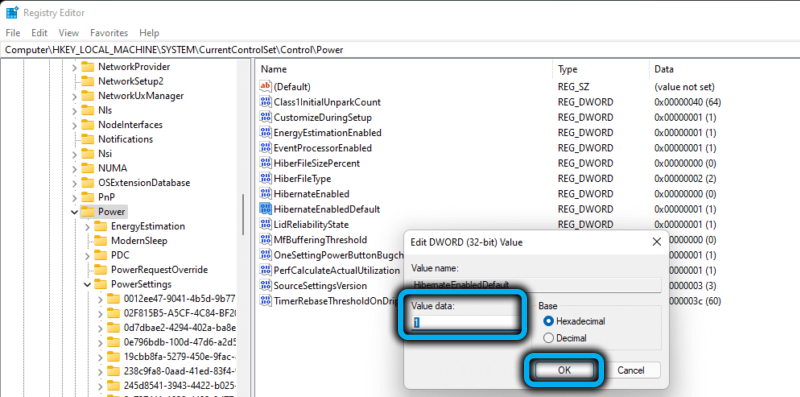
- open the HibernateEnabled parameter in the right block;
- set the value of this parameter to one;
- Click OK and close the Registry Editor window.
When using this method, in order for the changes to take effect, you will need to restart the computer, but in order for this option to appear in the shutdown menu, you must first perform one more operation.
Adding a Hibernation Item to the Shutdown Menu
Here is a step by step algorithm:
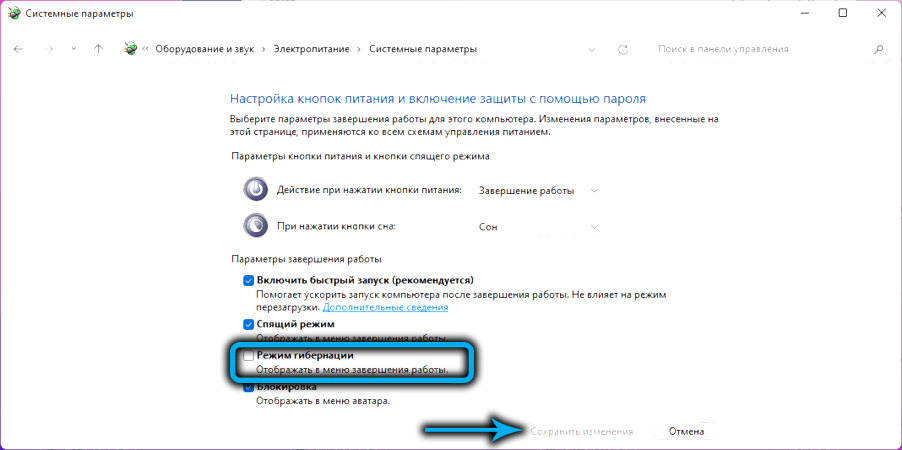
- call the Run console again, enter powercfg.cpl, press OK or Enter;
- The computer’s power settings window will open. In the left block, select the menu item “Actions of the power buttons”;
- in the next window, click on the line “Change settings that are not available”;
- activate the hibernation mode by checking the box next to this option (you must have administrator rights to perform this operation);
- click the “Save changes” button;
- close all open windows.
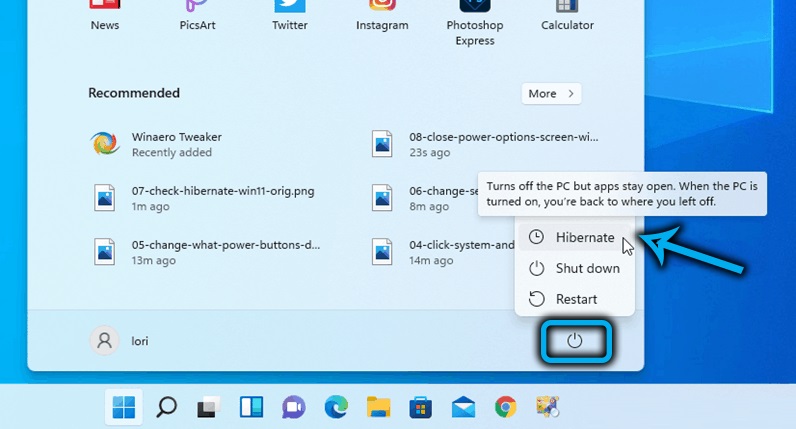
We check if this mode has appeared in the Start menu by pressing the power button.
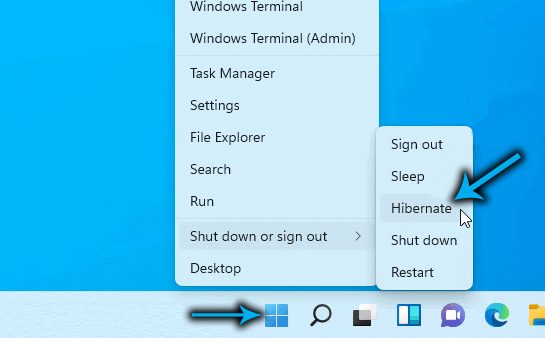
You can start hibernation in another way: by clicking on the “Start” button with RMB and selecting the “Hibernation” menu item.
Reducing the hibernation file size
As a rule, the size of the file in which the current state of the computer is recorded is quite large, and this value is directly dependent on the amount of RAM installed in the computer. Say, with 16 GB of RAM, the size of the Hiberfil.sys file can reach a value of the order of 7-8 GB, with 4 GB of RAM it will weigh about a gigabyte.
If there are no problems with memory, and there is not enough space on the system disk, there is a natural desire to reduce the size of the hibernation file. This feature is available in Windows 11. Moreover, you can not only adjust the size of Hiberfil.sys, but also make its size as small as possible, but sufficient to quickly start the computer. Or you can delete it altogether if the lack of space on the C: drive does not allow you to perform current tasks.
Let’s see how to find out how much space this file takes up:
- launch the Explorer with the Win + E combination;
- call the taskbar menu by clicking on three horizontal dots;
- click on the “Explorer Options” tab;
- in the window that opens, select the “View” tab;
- uncheck the box next to the “Hide protected operating system files” option;
- confirm our actions when a warning window appears;
- activate the option “Show hidden files, drives, folders”;
- confirm the changes by clicking OK;
- select the system drive (usually C), find Hiberfil.sys and look at its size.
Now consider how you can reduce the size of the Hiberfil.sys file:
- call the Start button menu (Win + X);
- click on the line Windows Terminal (Administrator);
- in the console window, enter the following command:
- powercfg hibernate size ##, where instead of ## we specify the new size of the hibernation file, measured as a percentage of the amount of RAM;
- confirm your actions by pressing Enter;
- close the Terminal window.
The parameter will take effect after the first press of the “Hibernation” button. To restore the default size of Hiberfil.sys, put 0 after the size word.
How to turn off hibernation in Windows 11
You can do this in several ways, as well as turn it on.
Using the command line
We recommend the method as the simplest, correct and reliable:
- launch the Run console with the Win + R combination;
- we type cmd, press Enter;
- in the terminal window, type the command powercfg-h off;
- close the command line window.
As well as at inclusion, the command will work instantly. At the same time, the hibernation file Hiberfil.sys should be absent in the explorer, since it will be deleted.
Using the Registry Editor
Here, the actions are completely similar to those that were performed when the mode was activated:
- launch the editor with the regedit command in the Run console;
- we pass along the same path;
- change the value of the HibernateEnabled parameter to 0;
- Click OK, close the Registry Editor.
Disabling hibernation through the Control Panel
This method is also quite simple, except for the need to remember the input command with parameters:
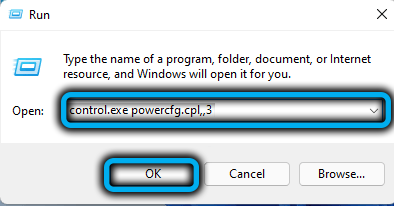
- call the Run console by pressing Win + R;
- enter the command control.exepowercfg.cpl,,3;
- in the window that opens, open the “Sleep” branch;
- for the “Hibernation after” parameter, enter a value equal to 0;
- we close the window.
Conclusion
This mode appeared in Windows XP, since then its functionality has not changed much. The described methods for activating hibernation work in Windows 10, and even in earlier versions of the Windows operating system.
It is important to understand that you will have to pay for the opportunity to continue working from the same place by increasing the time it takes to boot the system when you turn on the computer.
