We get RAW photos when we use professional and semi-professional SLR cameras. There are now smartphones capable of delivering this extension as well. It has several advantages:
- more accurately conveys colors;
- allows you to adjust the exposure;
- makes it easier to achieve artistic effect in non-standard lighting.

But at the same time, photos in this format are inconvenient to view – this requires special programs, for example, Capture One Pro, Lightroom, Photoshop, etc. In addition, in most cases it is impossible to print directly from RAW – you need to convert to JPEG, JPG or TIFF …
Method 1: batch convert
It is best to convert RAW to JPEG using special software that allows you to process a large number of photos at a time, for example, ShowExif. This is a free application that not only converts RAW to JPEG, but also displays all the data about the image and the camera itself. In this way, you can check the condition of a used camera before purchasing.

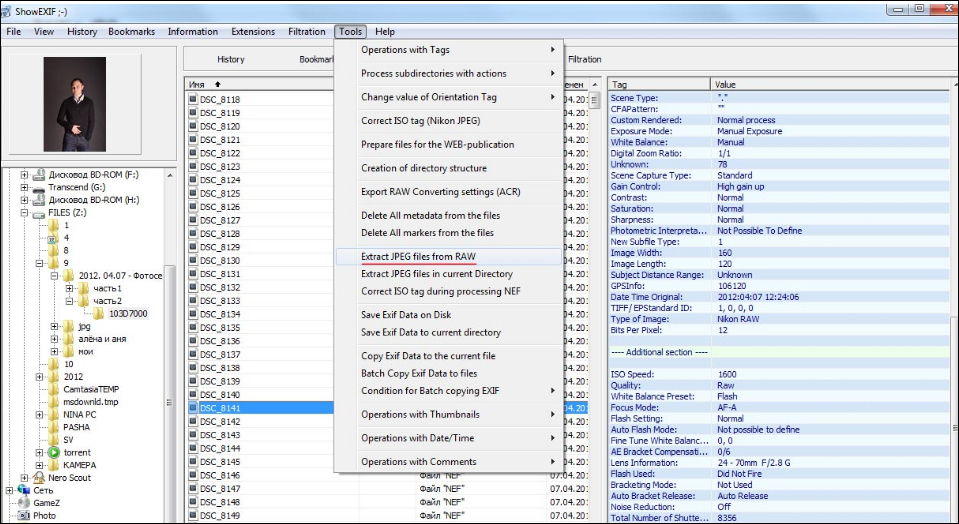
Converting photos from RAW to JPEG in ShowExif
After installing and launching the program, you will see a window in which on the left you are prompted to select the desired folder or file. After clicking on the photo, information about the image will appear in the list on the right: what settings were set during shooting, focal length, shutter speed, etc. To change the format, select the photos you need, select Tools – Extract JPEG files from RAW at the top and wait a little. Conversion speed, of course, depends on the processor, but it is usually very high.
A similar method is good when you need to remake the format without preliminary artistic processing, for example, to show it to someone.
Method 2: convert with Photoshop
If, before changing the extension, we need to do some correction of the photo, it is better to turn to a graphics editor. Photoshop has a special plug-in Camera Raw, which will open automatically, as soon as you drag the desired image into the working area.

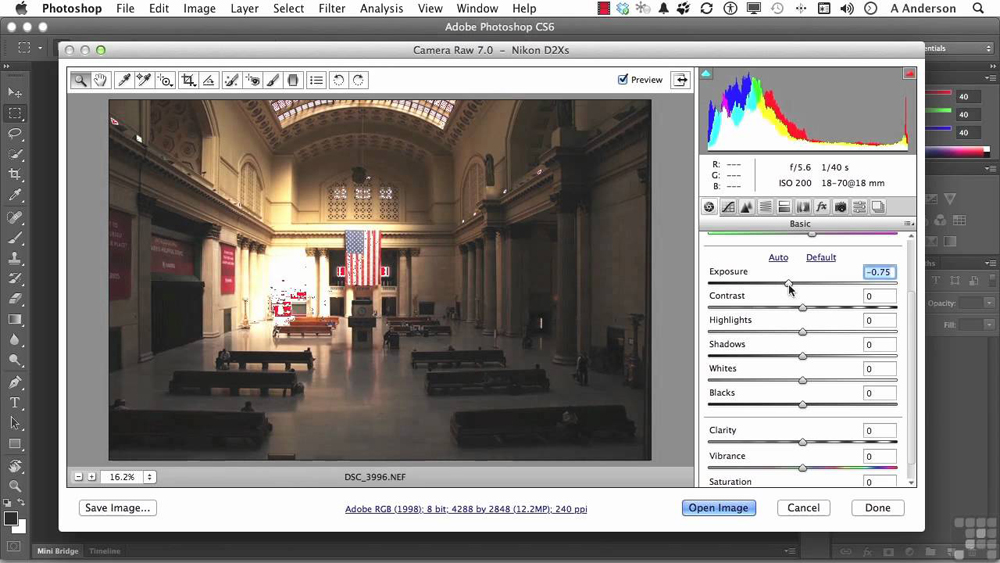
Camera RAW plugin for Photoshop
Here you will see the settings window. By moving the sliders, you can change temperature, exposure, white balance, brightness, contrast, adjust clarity, remove noise, make a photo in black and white, and much more. Upon completion of the necessary operations, click “Save As …” (Save As) and select the JPEG / JPG format for conversion.
This method is good when you need preliminary retouching or color correction, but it is very tedious with a large number of images.
Method 3: processing in Lightroom
Another popular imaging program is Adobe Lightroom, so it’s worth talking about how to convert RAW to JPEG in this application.

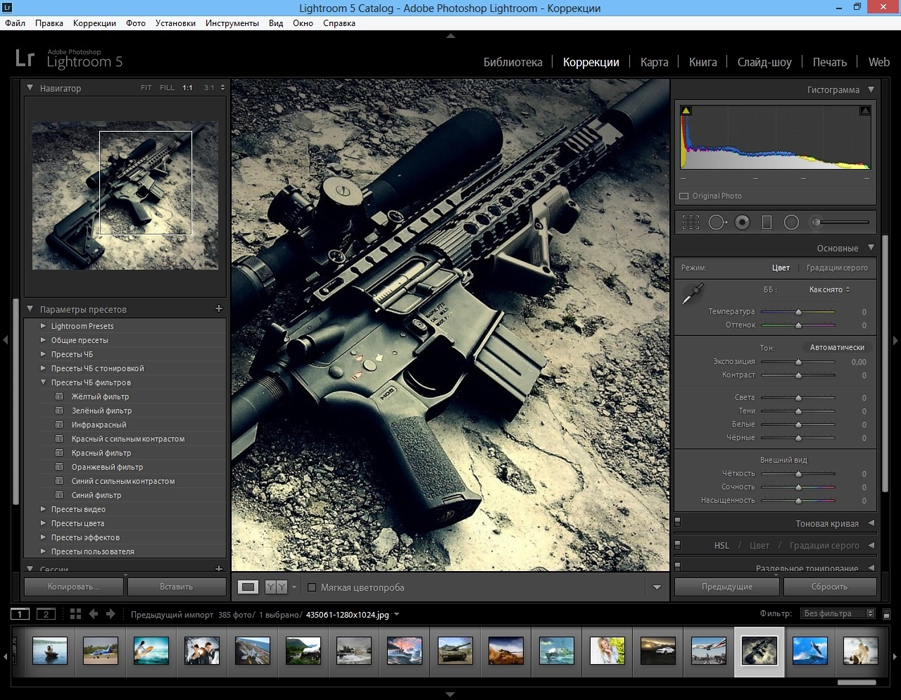
Lightroom window
Lightroom combines the possibility of correction with batch processing: the settings for one photo are applied to all others. It also has all the necessary tools and functions to tweak highlights and shadows, change contrast, brightness, make exposure compensation, convert colors to black and white, etc.
After the necessary manipulations are completed, press Ctrl + Shift + E, select the desired format from the list and click Export.
Please also share your experience of converting photos from RAW to JPEG: what programs do you use and why? Write about it in the comments.