Tightening the system requirements for Windows 11 was initially the subject of heated discussion – so many computers, even powerful ones, do not have features such as TPM 2.0 and / or Secure Boot. Today we will talk about secure boot (aka Secure Boot): what it is, what it is for, how to check for, enable or disable it.
Contents
Briefly about the purpose of Secure Boot
This term should be understood as a special protocol developed for testing operating systems at the time of their boot. It is part of the UEFI firmware code, and its activity is to verify the digital signature of the loaded OS components, including drivers, and if it is not found, the further start of the operating system stops with the corresponding error message.
Such a check prevents malicious code from being loaded along with the operating system, which can be introduced, for example, into drivers. The most famous example of such an infection is the Petya ransomware virus, which was actively distributed on the network in 2017.
Since we are not talking about signature checking and other tricks used by antivirus programs, the Secure Boot module itself is compact enough to be included in UEFI.
This approach also has disadvantages – it is compatibility at the level of operating systems. In the Windows family, support for secure boot has been implemented since the G8, and some OSes of the Linux family (Fedora, Debian, CentOS, Ubuntu, etc.) also have it.
But only in Windows 11, the computer must support secure boot at an unconditional level, like the TPM 2.0 module implemented at the hardware level. However, at the software level, the need for these functions is implemented only optionally, at the stage of system installation. In normal operation, the computer may well do without them.
How to find out the presence and status of Secure Boot
If the Secure Boot feature is missing or inactive on your computer, you simply won’t be able to upgrade from Windows 11 to Windows 11. So the first thing you need to know is how exactly you are doing with this chip. This can be done in several ways. For example, using the system utilities built into Windows 10 (hereinafter, we assume that we will update or perform a clean installation from Windows 10):
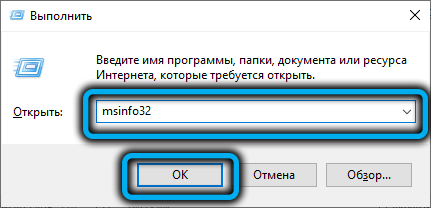
- call the Run console by pressing Win + R;
- we type in the input window the command msinfo32, press Enter;
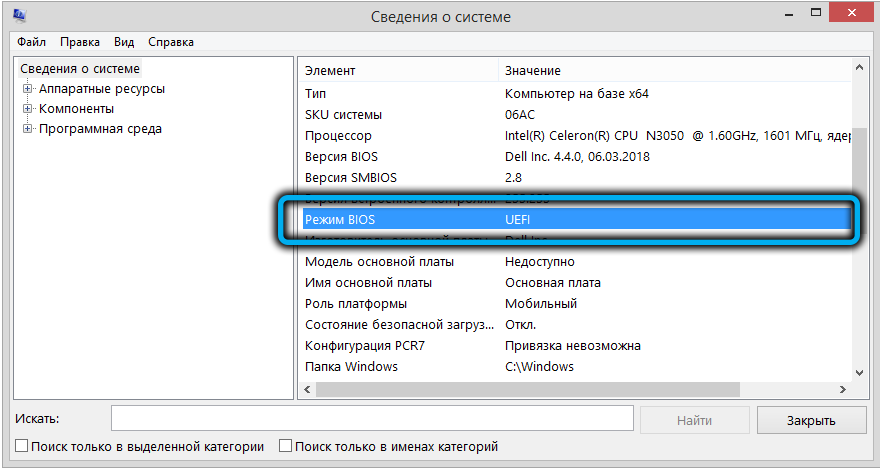
- a window will open with basic information about the configuration of your computer;
- we look at what is indicated in the “BIOS Mode” parameter – UEFI or Legacy, in the latter case, this mode can be native or software emulated;
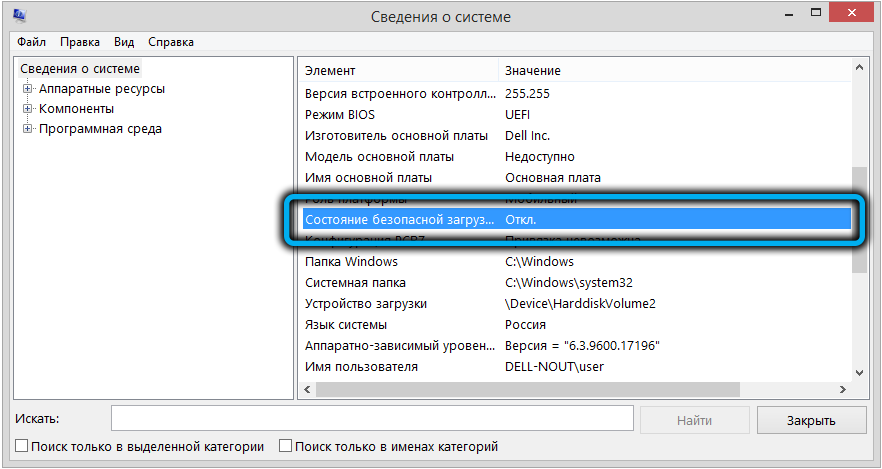
- the next parameter of interest to us is “Secure Boot Status”, it can be enabled or disabled. The very presence of the mode is important to us, indicating that you have no problems with meeting system requirements in the Secure Boot parameter.
If the BIOS Mode is Legacy, then the Secure Boot Status will indicate that this mode is not supported. This is not a sentence if you have legacy BIOS emulation enabled in UEFI, which is sometimes done to ensure compatibility with older software. In this case, the emulation function (most often it is abbreviated as CSM) must be turned off, and the problem will be solved.
If we are talking about an outdated BIOS, then the situation is hopeless, that is, you will have to upgrade or resort to other tricks not recommended by Microsoft.
How to enable secure boot to install Windows 11
So, if you have made sure that secure boot is present on your computer, you can proceed to activate it. There are two ways to enable secure boot: through the “settings” of Windows 10, and when the PC boots. Consider both options – they are equivalent, although the first is much simpler.
Enabling Secure Boot through “Settings”
The sequence of actions should be like this:
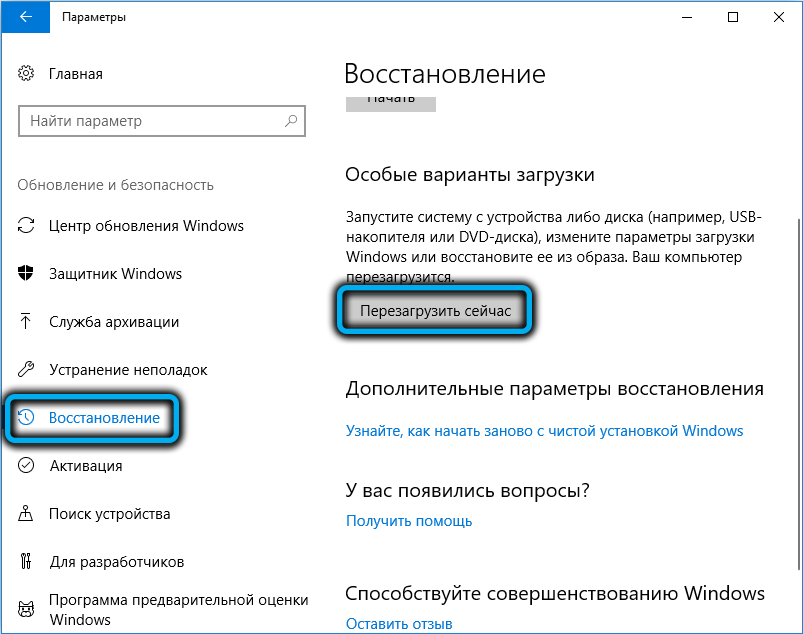
- launch the “Settings” application;
- select “Update and security”;
- click on the menu item “Recovery”;
- in the right block we look for the section “Advanced launch”, click on the button “Restart now”;
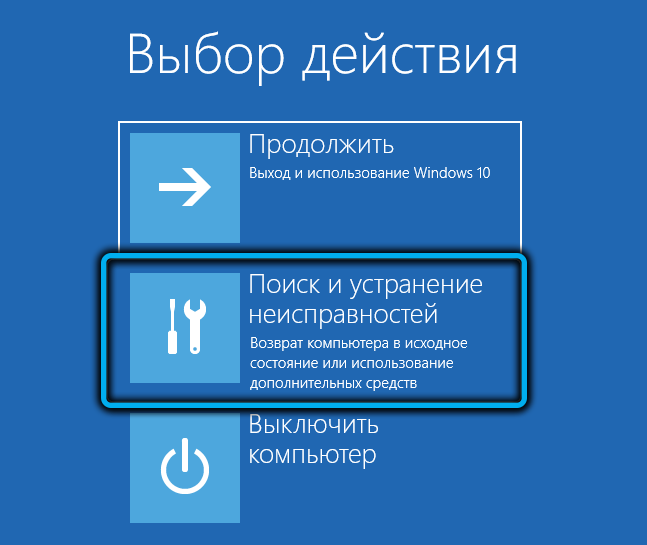
- when loading on the action selection screen, click on the “Troubleshooting” tab;
- on the “Diagnostics” screen, select “Advanced options”;
- click on the tab “UEFI firmware settings”;
- on the next screen, click the “Restart” button;
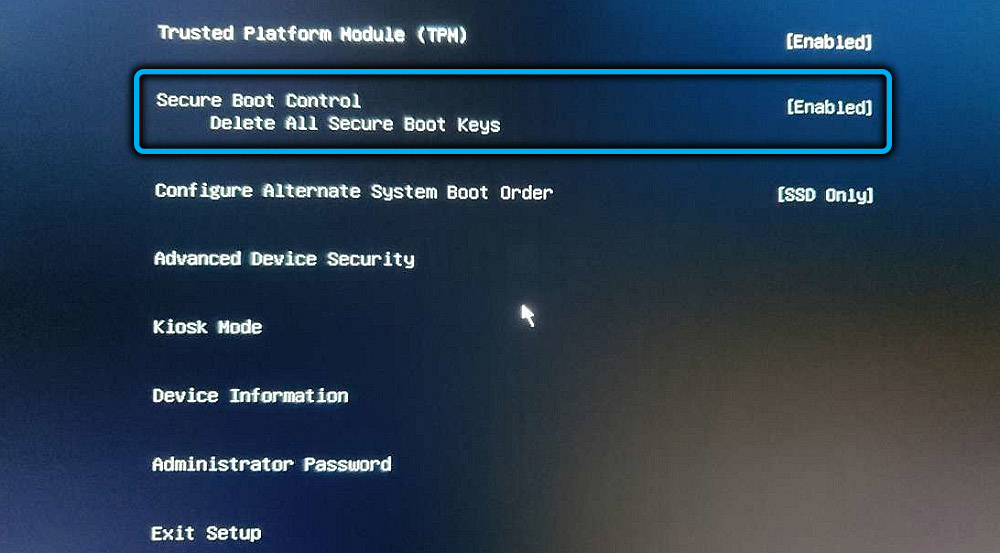
- when the system boots, select the Secure Boot Control option;
- set the parameter value to Enable, confirm the choice;
- exit the settings with confirmation.
The PC will restart with Secure Boot enabled. If the Secure Boot Control setting is missing, it’s likely that secure boot is not supported here.
Enable Secure Boot at Windows Startup
First of all, we need to get into the UEFI user interface – different chipset manufacturers implement settings in their own way, there is no single standard here. The most commonly used keys for this are Delete and F2, but other function keys can also be used.
Usually this information is displayed on the startup screen when the system boots, but it flickers so quickly that it is often impossible to read anything. You can find this information in the documentation, paper or online, indicating the model of the motherboard.
For convenience, we provide a table that shows the keys used by the leading Motherboard manufacturers to enter the BIOS:
| Manufacturer | Keys |
| HP | F10/Esc |
| Dell | F2/F12 |
| Acer | Delete/F2 |
| Lenovo | F1/F2 |
| Asus | Delete/F2 |
| Samsung | F2 |
| MSI | Delete |
| Toshiba | F2 |
So, after turning on the power of the computer and the splash screen appears, press the desired key 2-4 times IP, wait for the UEFI user interface to load. There are no strict standards here either, so the composition of the UI menu can be organized in different ways, although the semantic load of the firmware will be approximately the same.
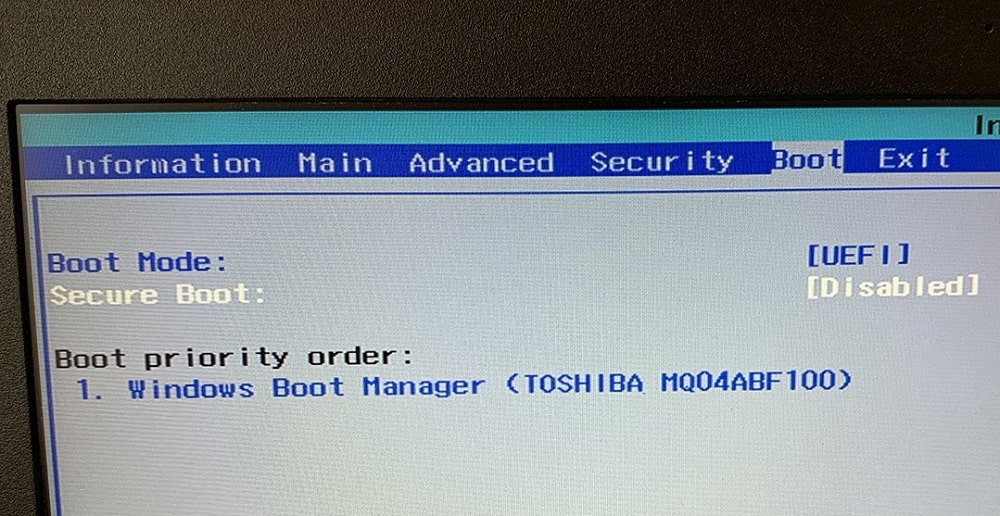
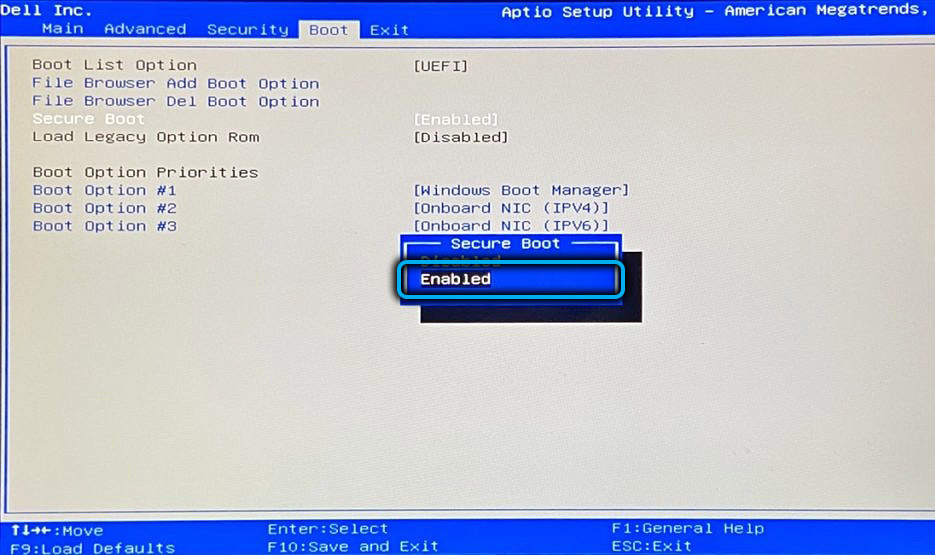
We need to look for a setting that includes secure boot, that is, containing the phrase Secure Boot. Most often, this option is located in the “Boot” section, but in your case it may be another location, for example, the “System Configuration” or “Security” section.
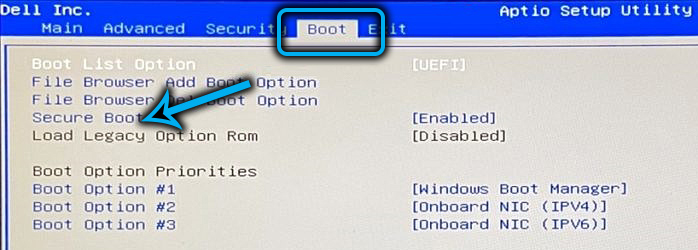
If your search was unsuccessful, most likely, the parameter itself needs to be activated somewhere, but only the proprietary documentation of the motherboard or the Internet will help here. In the latter case, you need to determine the model of your MP, for example, using the built-in msinfo32 utility, which we already mentioned in the System Information section.
Having found the Secure Boot option, it remains to activate it by setting the value to Enabled and exit the UEFI settings while saving the changes made.
Disabling Secure Boot
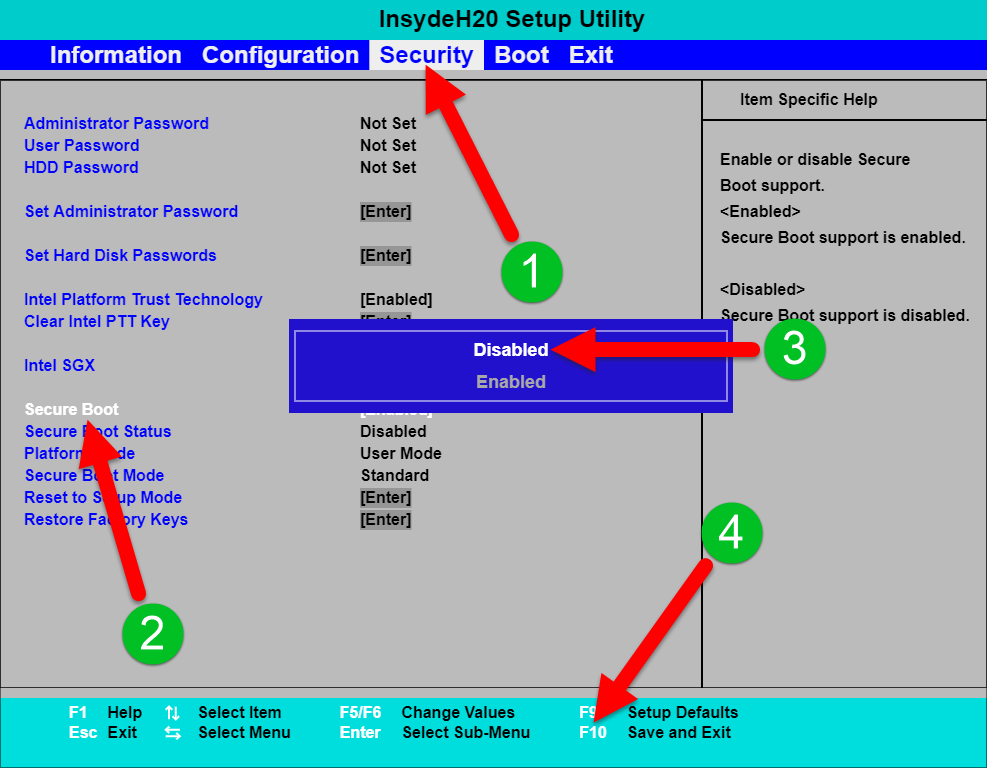
If you have a “ten”, you may need to install minor versions of Windows or Linux. With the Secure Boo option enabled, you won’t be able to do this. Secure Boot can also interfere with the operation of some video adapters or other hardware, especially if this equipment is not digitally signed and will be determined as unreliable during boot. The OS boot itself will be interrupted.
So in these cases, Secure Boot needs to be deactivated. There are also two ways to disable the Windows Secure Boot feature, through the “Settings” and through the UEFI settings. All you need to do is follow the instructions above, and at the final stage change the value of the Secure Boot parameter to Disabled.
Conclusion
Enabling Secure Boot is a simple task. Can Windows 11 run without this feature? Quite, it is really needed only when installing the operating system. But the network is already laying out ways to bypass such a check when installing the OS, and these methods can also be used for those computers whose BIOS does not support secure boot.
