The emphasis on security is a feature of the last two versions of operating systems from Microsoft. The desire to take control over web traffic so as not to burden computers with third-party antivirus software seems to be commendable. Just not everyone likes it. Some consider Windows Defender an inferior antivirus, others believe that this OS component is too expensive in terms of system resource consumption. One way or another, there are a lot of people who want to disable Defender, but it’s not so easy to do.
There is simply no “correct” way to completely deactivate the built-in antivirus – no one can guarantee the normal operation of Windows 11 after such a step, because it depends on a number of related factors. And if you have an amateur assembly, obtained somewhere in the open spaces of the torrent resources of the network, then even more so.
Still, it is worth considering the most convenient methods for deactivating Windows Defender.
Contents
Partially disable Microsoft Defender
Perhaps the most legal way to completely disable the standard Windows 11 antivirus is to use the Group Policy Editor. But since this tool is not available in Windows Home, it will not work for this version of the OS.
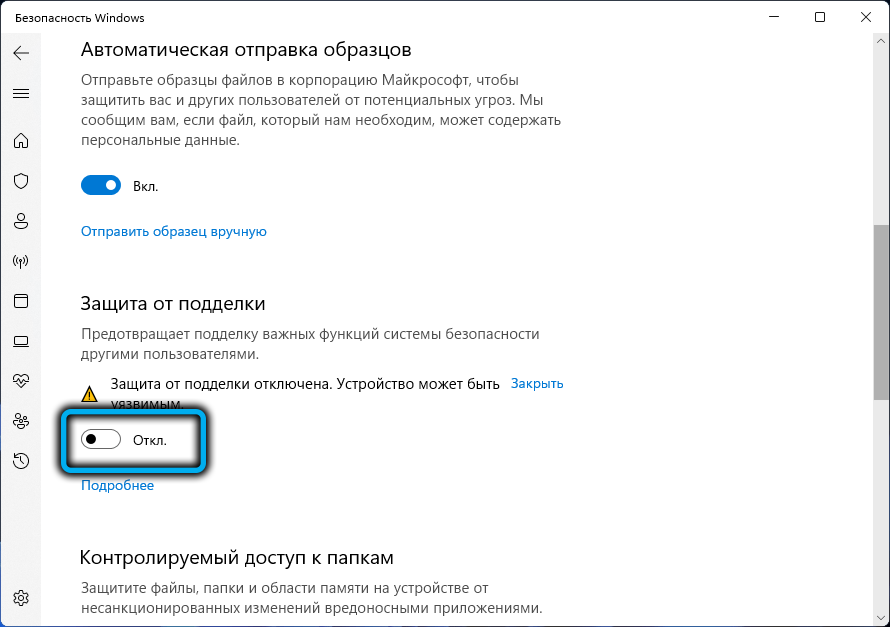
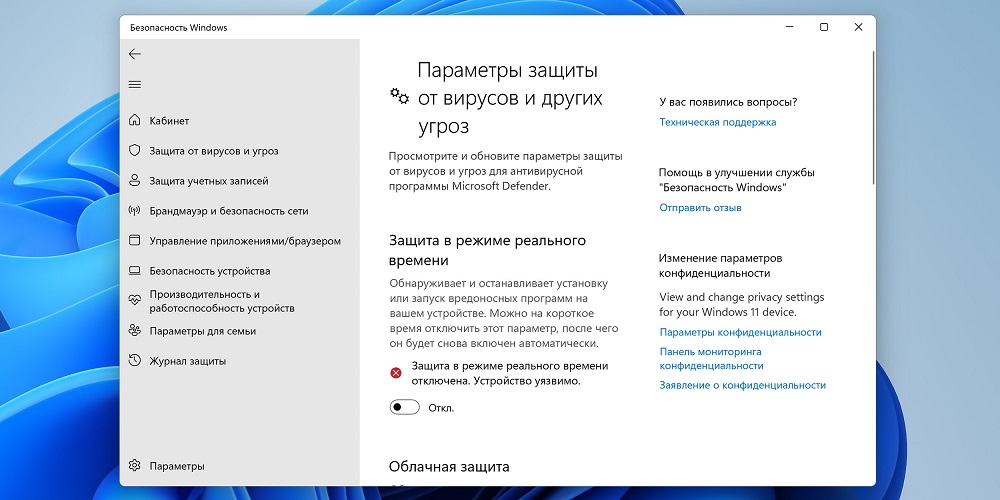
But if you are solely concerned with firewall resource consumption, you can try temporarily disabling some of the features of Windows Defender 11, namely Real-time Protection, as well as a less important component, Anti-Tampering.
Both functions constantly load the PC, monitoring the functioning of all running programs and checking all files and data downloaded via the Internet. Disabling them is done as follows:
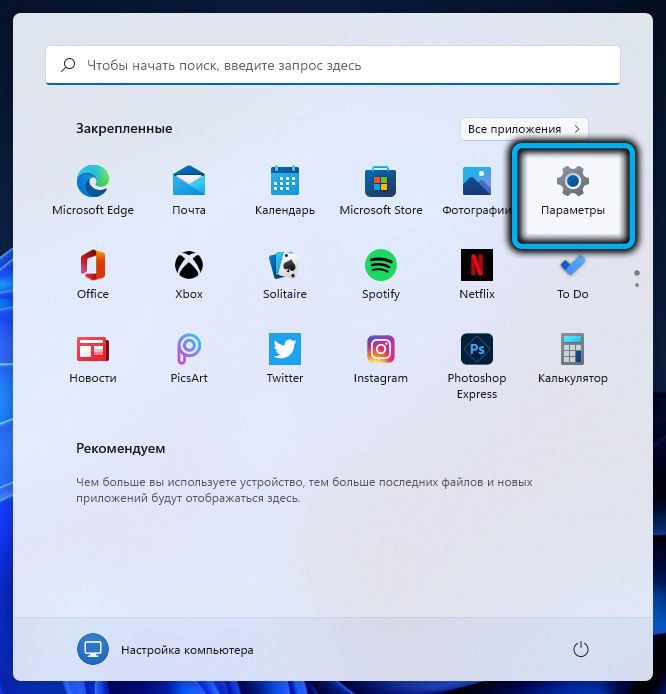
- open “Settings” (using the combination Win + I or using the traditional method, the “Start” menu);
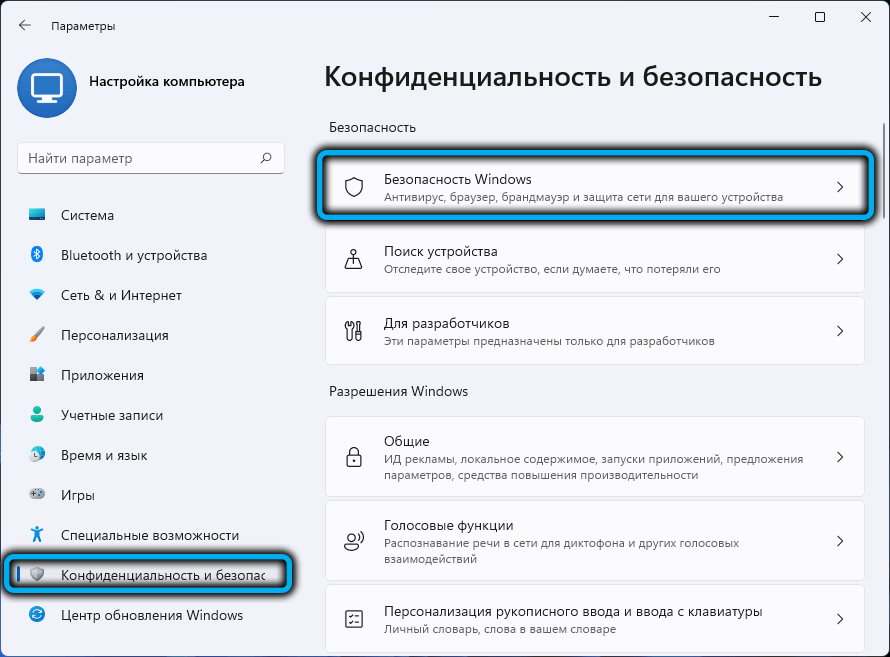
- open the tab “Privacy, protection”;
- expand the item “Windows Security” in the right block;
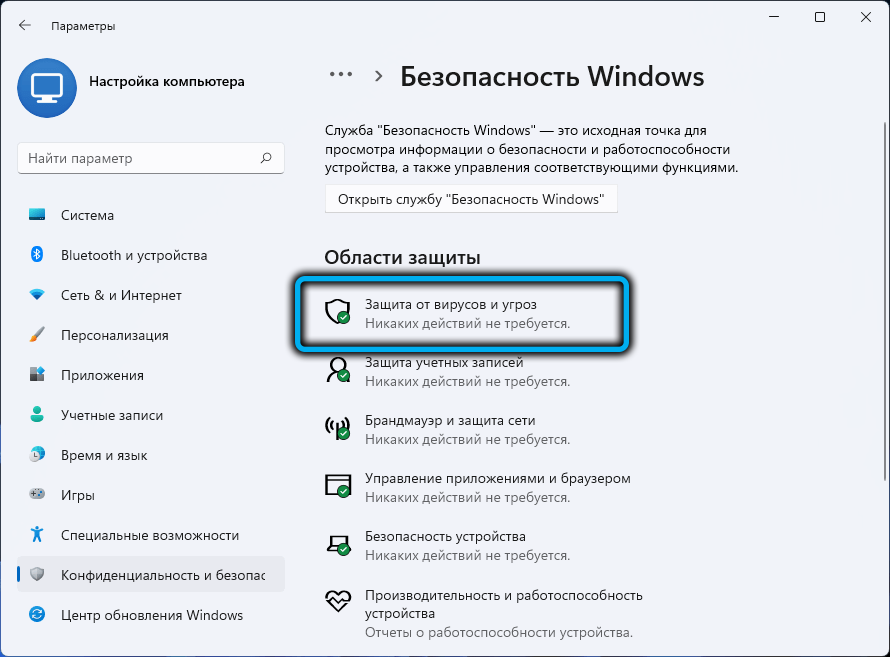
- at the top of the new page, click “Open service …”;
- in the left block, click on the tab “Protection from viruses …”;
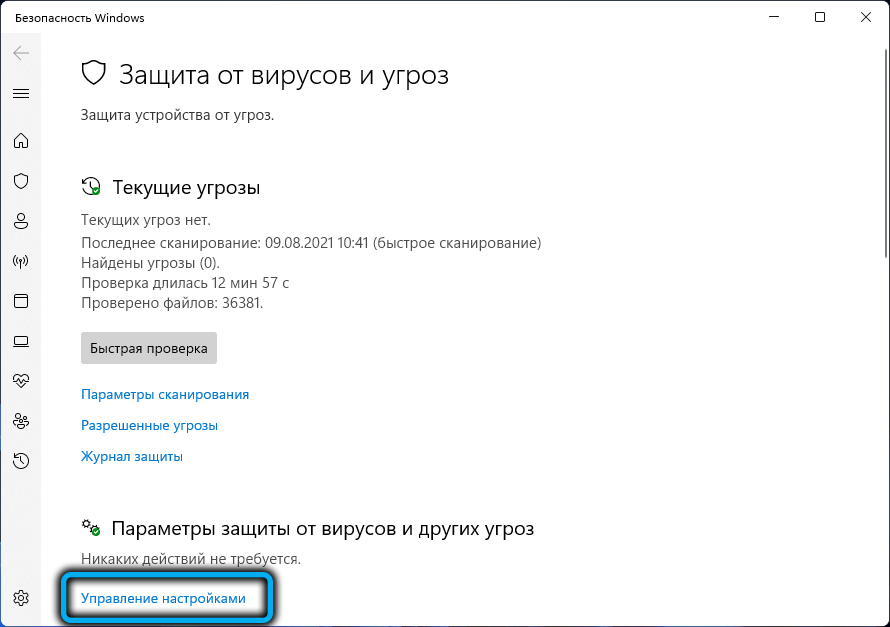
- on the right, select the link “Manage settings”;
- it remains to disable the option “Protection in mode …”;
- we do the same with the “Protection against forgery” option.
Additionally, you can deactivate the functions “Cloud protection”, and at the same time – “Automatic sending of samples”.
.
Completely disable the built-in Defender through the Group Policy Editor
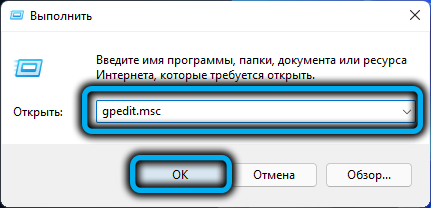
The method is only suitable for the Pro or Enterprise version. Launch the editor in the Run console (Win+R) by typing gpedit.msc and confirming with Enter. If the system gives an error like “gpedit.msc not found” – you are out of luck, you have a home version of the operating system.
Otherwise, consider a step-by-step algorithm on how to disable Windows Defender 11 using the GPU editor:
- deploy branch
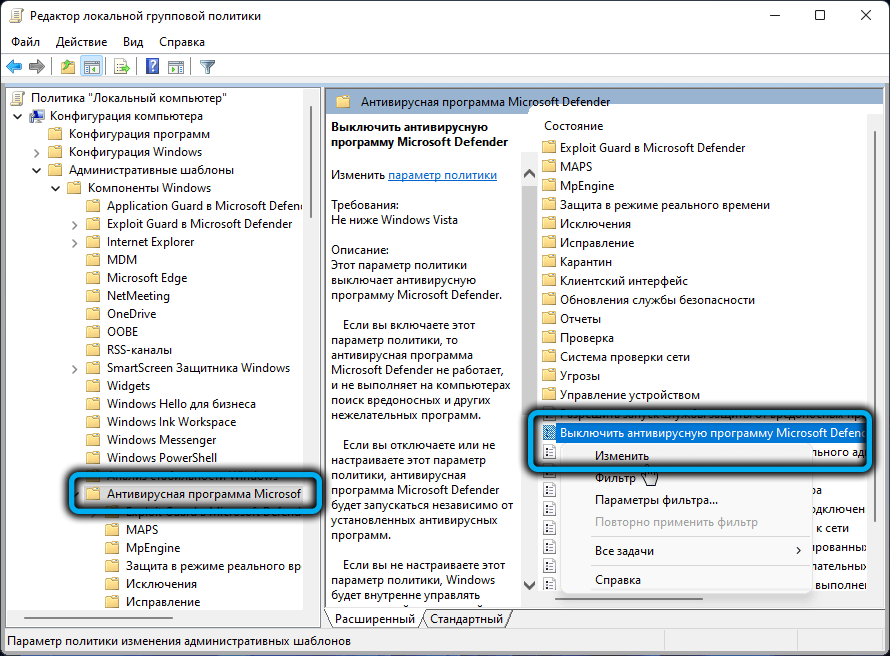
«Конфигурация компьютера/Административные шаблоны/Компоненты Windows/Антивирусная программа MicrosoftDefender» - on the right, double-click on the line “Turn off the anti-virus program …”;
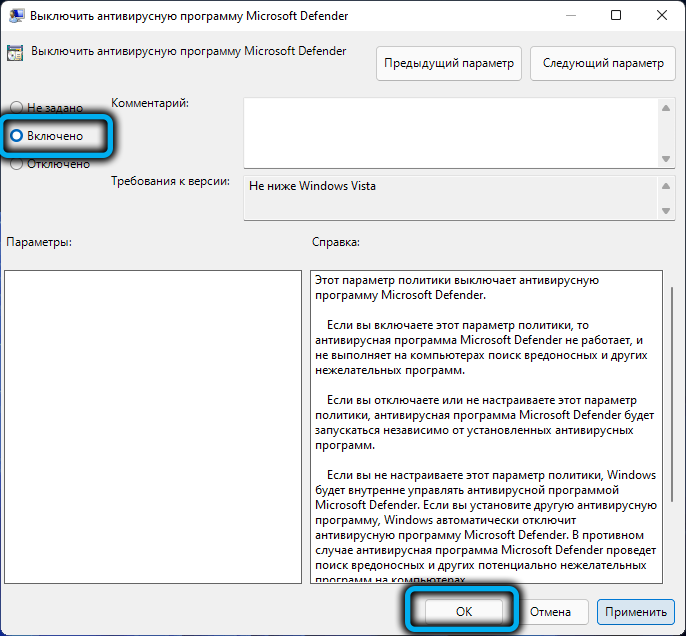
- set the switch in the new window to the on position, confirm by pressing OK;
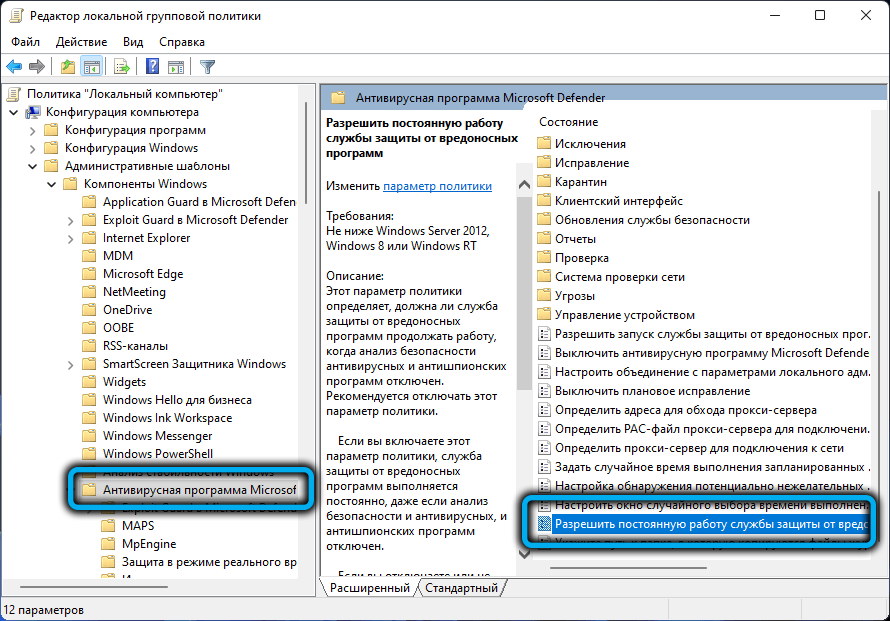
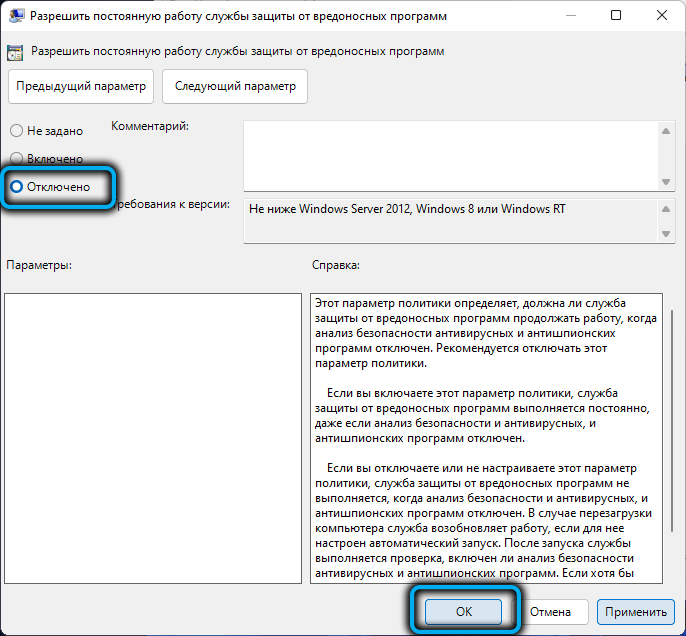
- the next policy that interests us is “Allow Malware Defender to run all the time”, but here you need to enable the “Disabled” option;
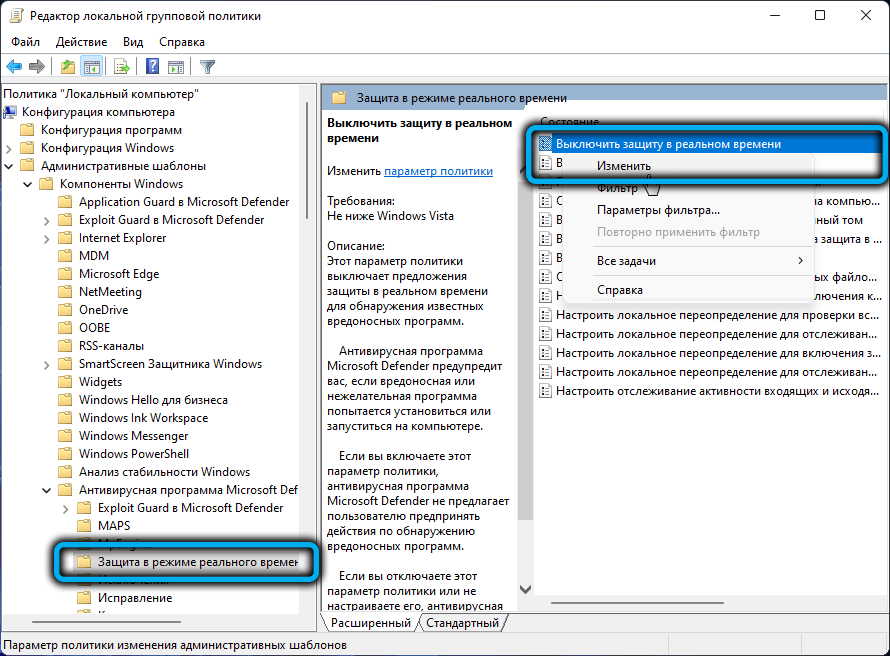
- we return to the left block, in the branch “Anti-virus program …” click on the line “Protection in real mode …”;
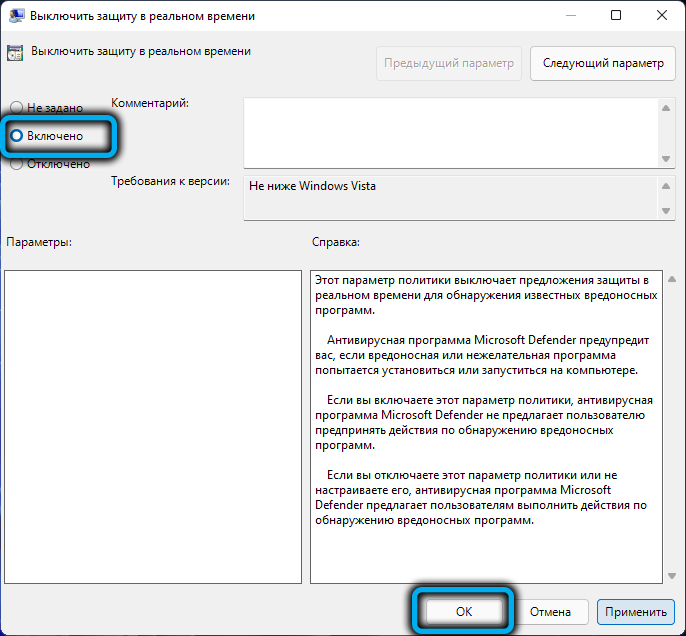
- on the right, double-click on the line “Turn off real-time protection”, disable the option by moving the switch to the “On” position.
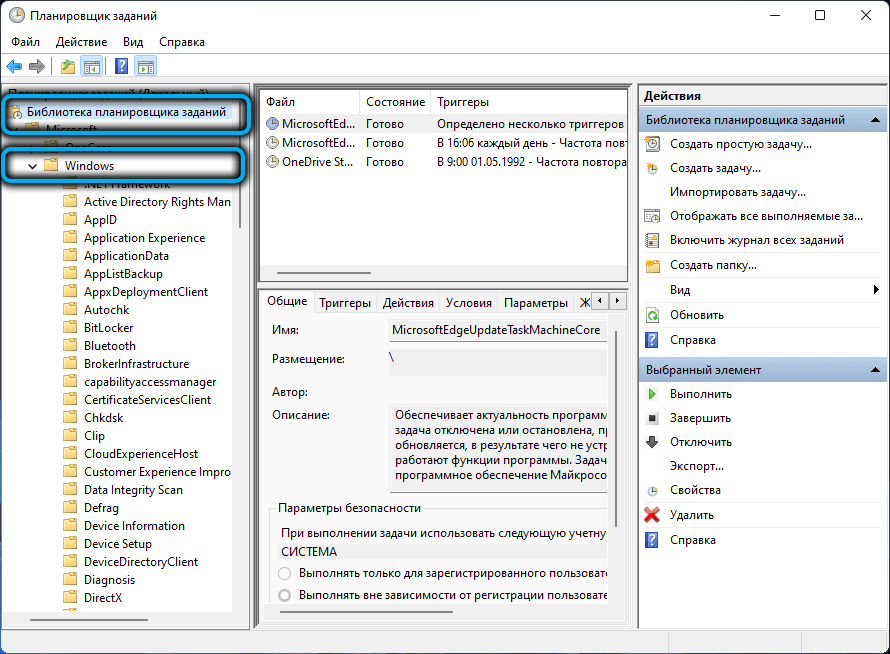
The steps taken allowed us to disable the built-in antivirus, but we also need to deactivate the tasks associated with it, for which we do the following:
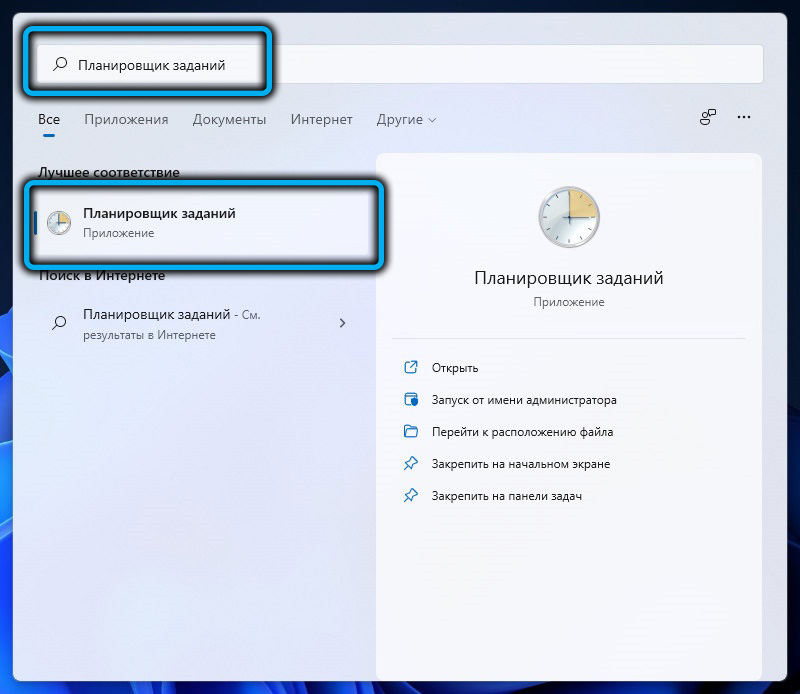
- open the Run console again;
- we type the taskschd.msc command, not forgetting to press Enter or OK;
- in the left block, select the “Task Scheduler Library” branch;
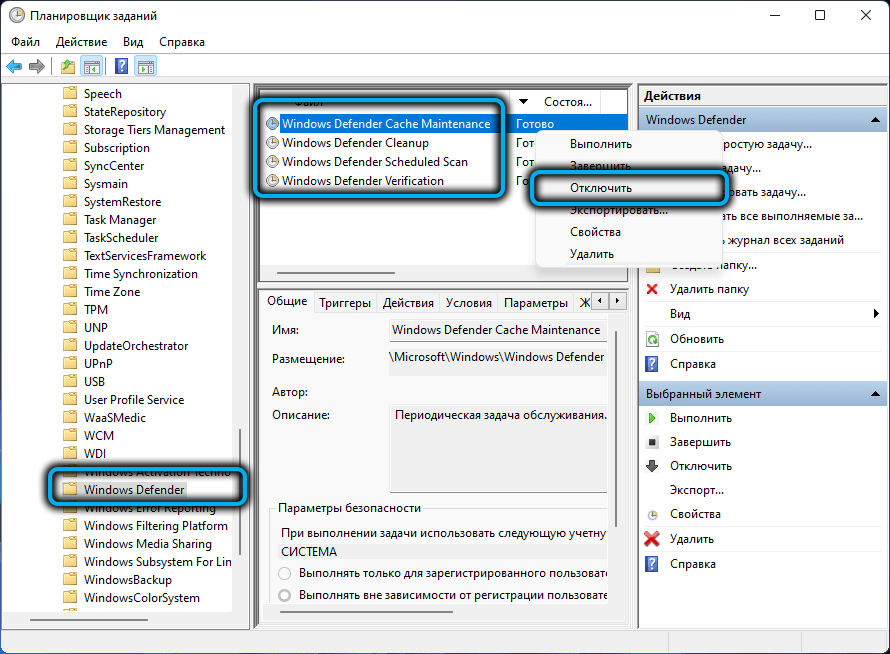
- open the Windows sub-branch, click on the Windows Defender line;
- a window with a list of parameters will appear on the right, right-click on each and deactivate the parameter by moving the switch to the disabled position;
- close the policy editor.
We reboot the PC, enjoy the result.
How to disable Windows 11 antivirus using the registry
This method is more complex and responsible, but universal. Initially, the registry key in Windows 11 associated with Defender is blocked even for users with administrator rights. But the situation is fixable if you run the editor in privileged mode.
To do this, follow the instructions below:
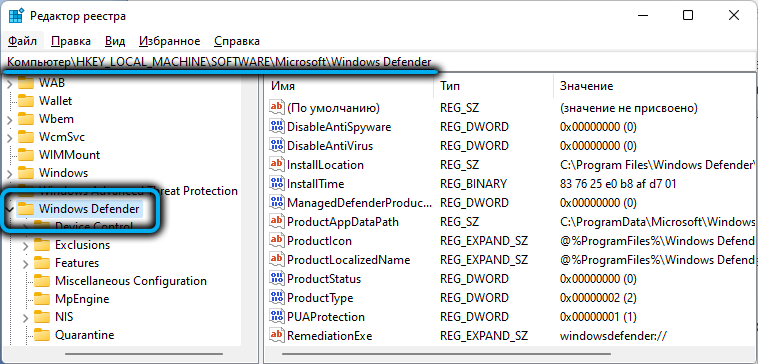
- launch the “Run” console, type the regedit command, check the “Run as administrator” option, click OK;
- go to branch
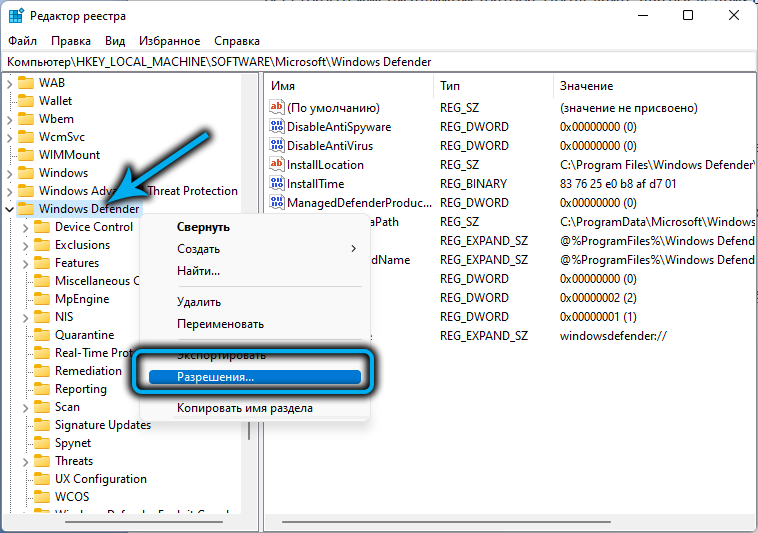
HKEY_LOCAL_MACHINESOFTWAREMicrosoft - make a right-click on the “Windows Defender” highlight;
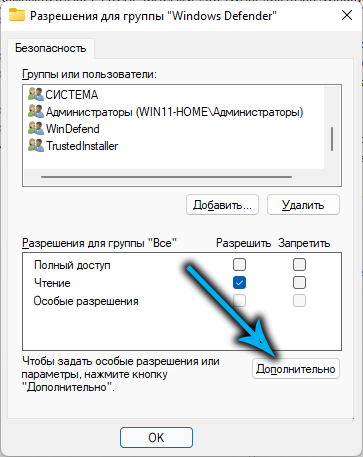
- select the item “Permissions …”;
- click on the “Advanced” button;
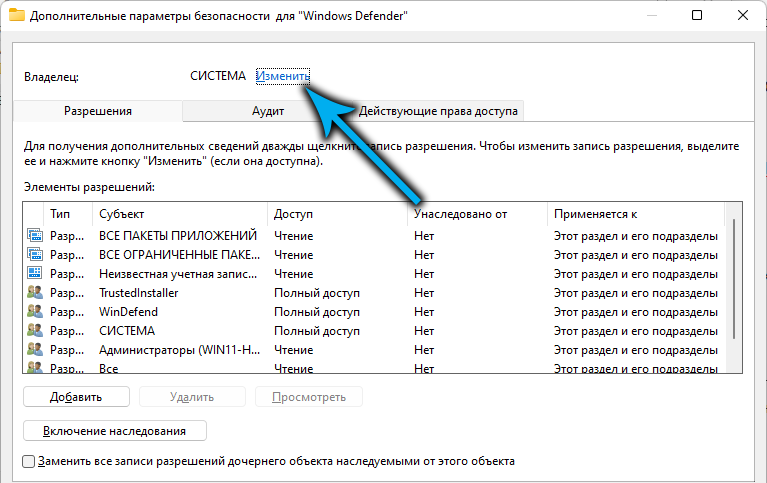
- select the “Edit” link;
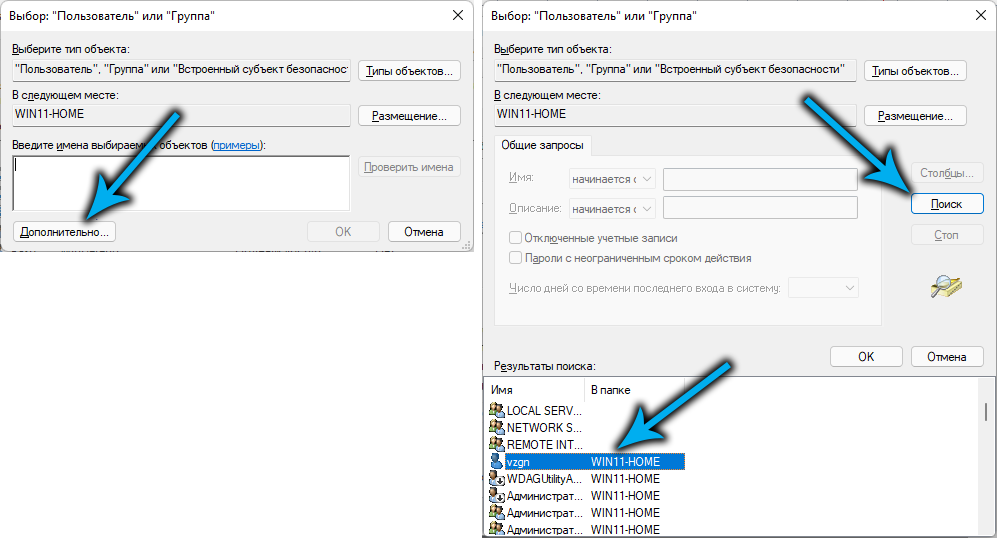
- another window will open, in which we again click on the “Advanced” button;
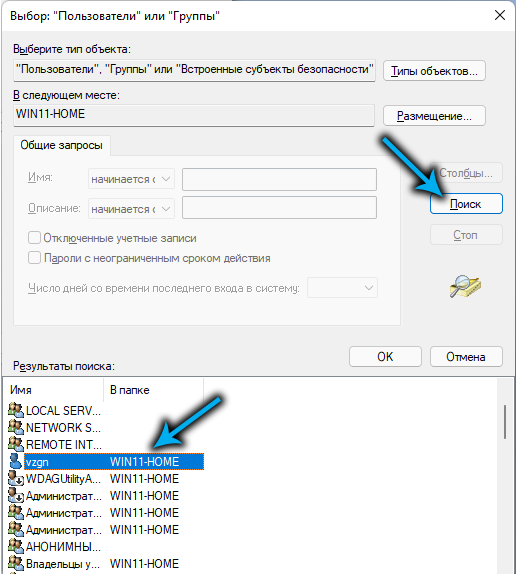
- on the right, click the “Search” button, in the list of search results that opens, double-click on the line related to the PC administrator account;
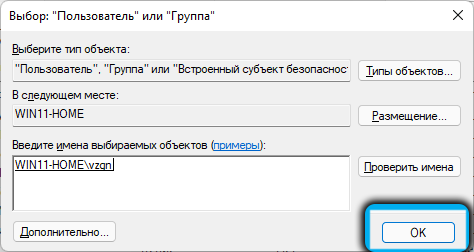
- in the next window, click OK;
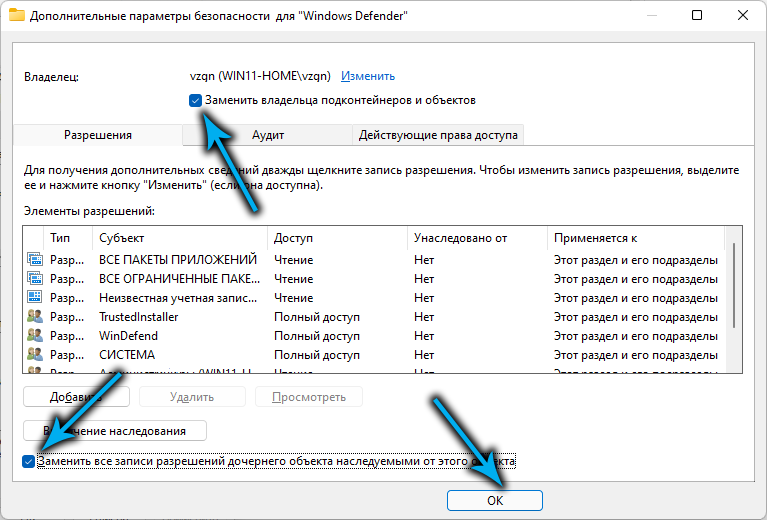
- check the boxes next to the parameters “Replace owner …” (located at the top) and “Replace all entries …”, click OK;
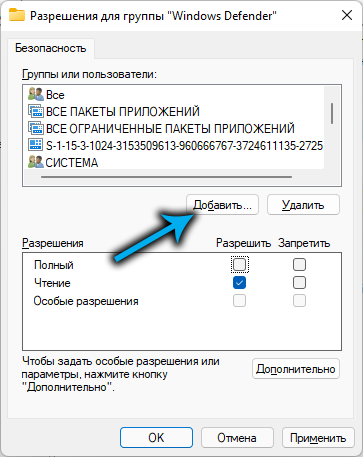
- we return to the window “Permissions for the group …” click on the button “Add”;
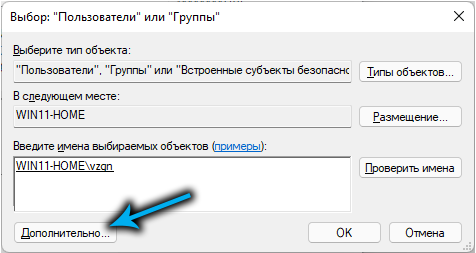
- click the “Advanced” button;
- click “Search” again and select a username with administrator rights;
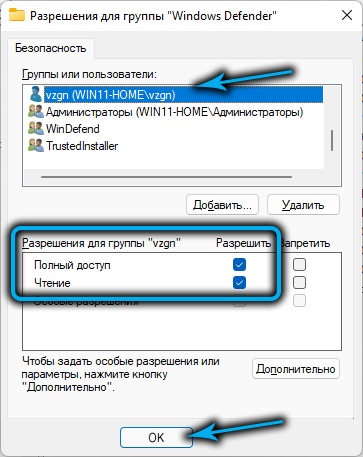
- in the very first window, select this account and assign read / full access rights to it by checking the boxes in the “Allow” column, click OK;
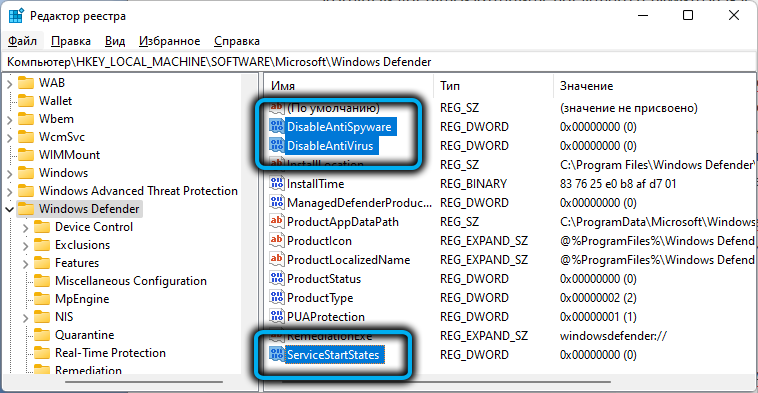
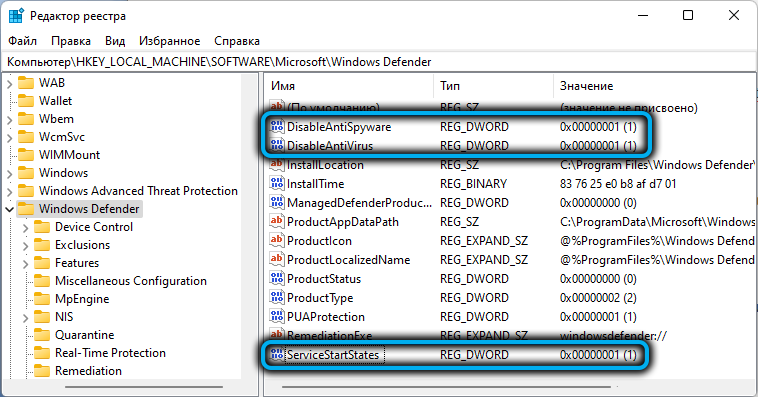
- all we have done is get permissions to edit the specified registry branch. Now let’s look at how to remove the Defender using the registry. To do this, create three new parameters in the Windows Defender branch (ServiceStartStates, DisableAntiSpyware, DisableAntiVirus), if they are not in the window on the right;
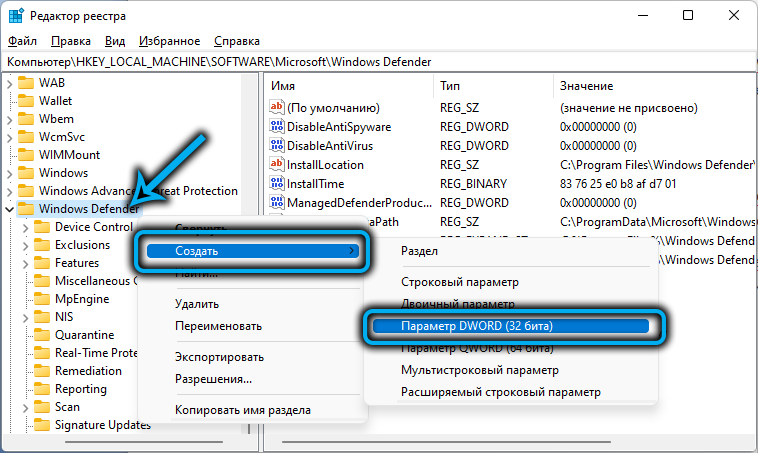
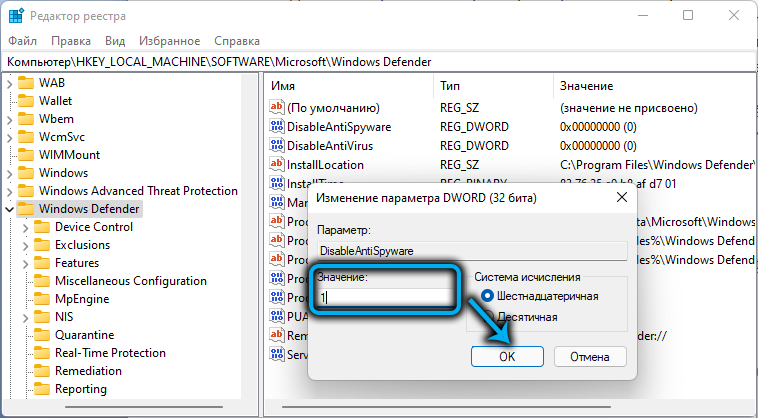
- the setting is created in the standard way: right-click on the subkey of the Windows Defender registry, select the option to create a 32-bit DWORD value, assign it the desired name and a numerical value equal to 1 (for all three parameters);
- close the editor, restart the PC.
As you can see, actually editing the registry is not a very complicated operation, the main thing is getting access to edit the protected partition.
How to Completely Disable Defender Using Safe Mode
The essence of the method is to set a ban on access to the Defender, and this can only be done by booting into safe mode.
The fact is that the built-in antivirus is a regular program, the launch of which can be blocked by means of the operating system itself. But this will have to be done for all accounts existing on this computer, including those with administrator rights.
Step by step algorithm:
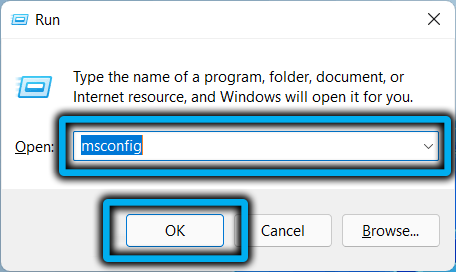
- in the Run console (Win + R), type the msconfig command, press Enter;
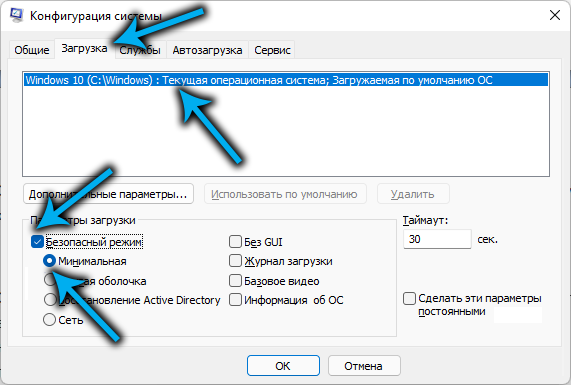
- go to the “Download” tab, put a checkmark next to the “Safe Mode” option with loading in the minimum configuration, click OK, restart the PC;
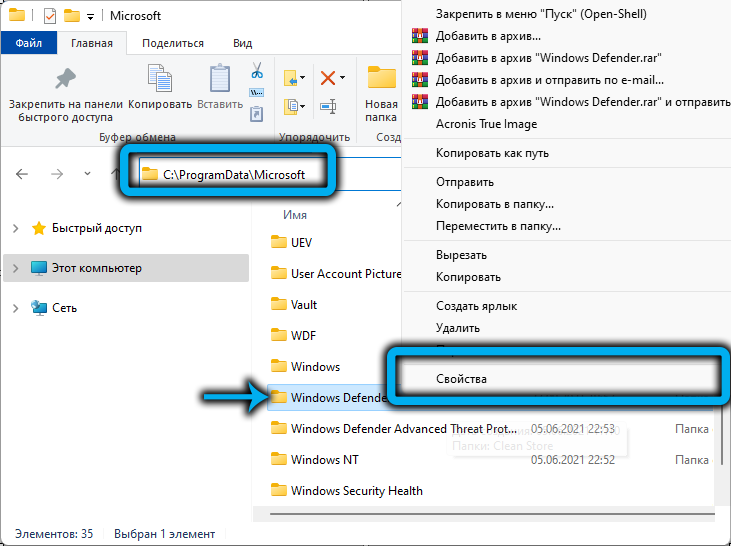
- open Explorer, go to the ProgramDataMicrosoftWindows Defender directory located on the system drive;
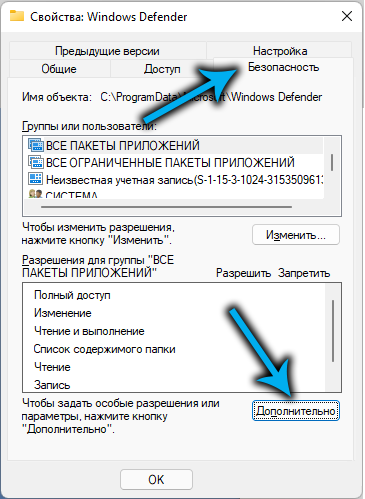
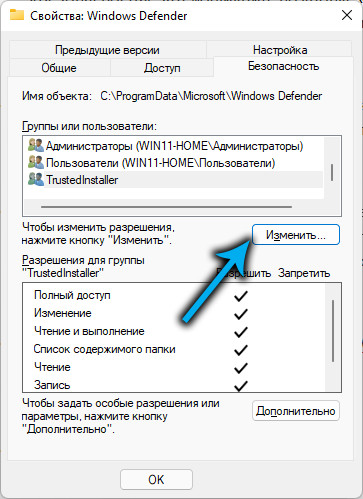
- right-click on the Windows Defender directory and select “Properties” in the context menu that appears;
- make the transition to the tab, “Security”, click on the button “Advanced”;
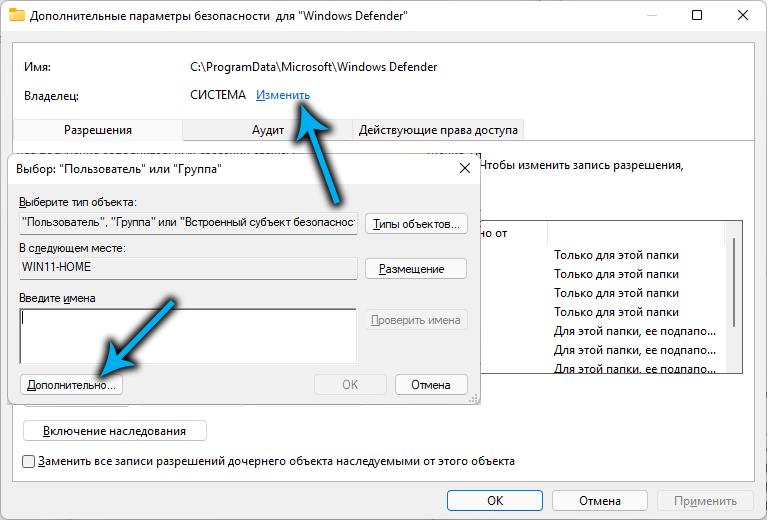
- in a new window, click the “Change” button (near the inscription “SYSTEM”), then “Advanced”;
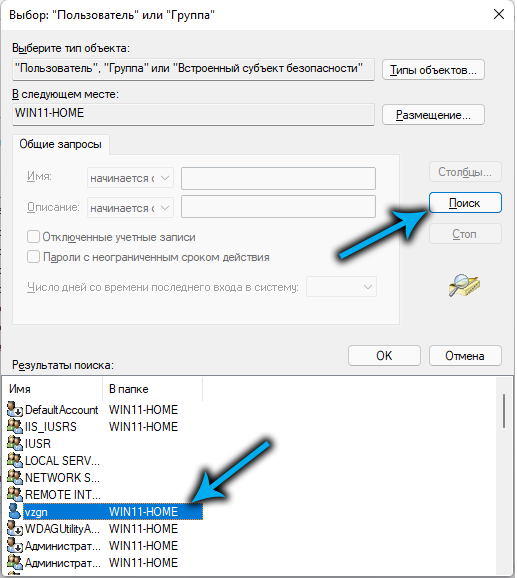
- in the next window, click “Search”, select the PC administrator account by double-clicking on this line;
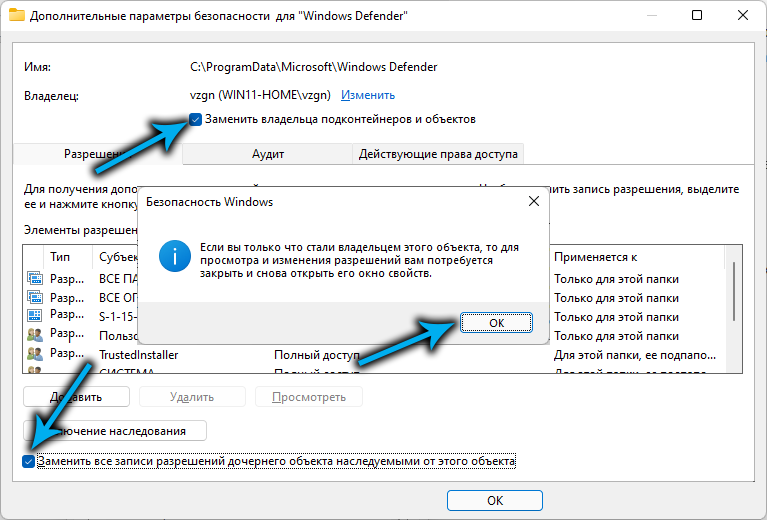
- check the boxes next to the options “Replace owner …” (located at the top) and “Replace all entries …”, click OK twice;
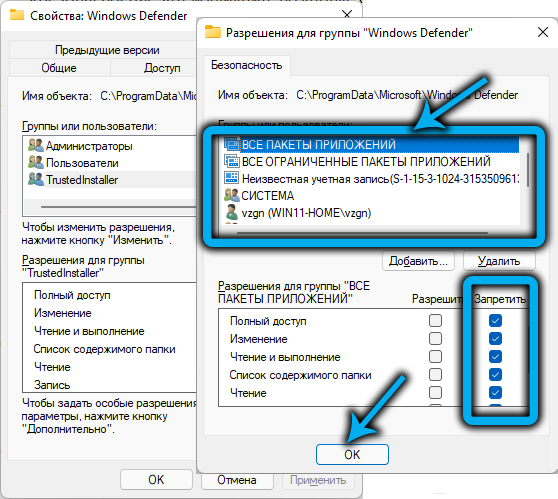
- close all open windows up to the Windows 11 Defender properties window, open the latter again, select the administrator entry, click on the “Change” button;
- select all the lines in turn in the “Groups or users” list by checking the boxes in the “Deny” column;
- restart the computer.
In this way, you can permanently (but with the ability to roll back) disable Windows Defender 11, but you should resort to it only if the previous methods do not work. If there is a need to activate Defender again, we do all the steps described above, checking the boxes in the “Allow” column at the very end.
Disabling the built-in antivirus by third-party programs
All the methods described above are quite time consuming and require special care when performing each step. But there is an alternative solution – the use of third-party utilities that allow you to perform the same operation in just a few clicks.
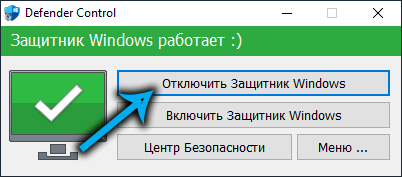
Consider how to turn off Windows 11 antivirus with Defender Control:
- download the utility from the official site (Download button at the bottom of the page);
- unpack, install. After the first launch, select the Russian language (Menu button, Language item);
- to deactivate Defender, just click the “Disable Windows Defender” button, the corresponding red text will appear at the top of the program window, and the monitor icon will be colored red with a white cross in the middle;
- if you need to turn on the Defender – click the button below, the red color will change to green.
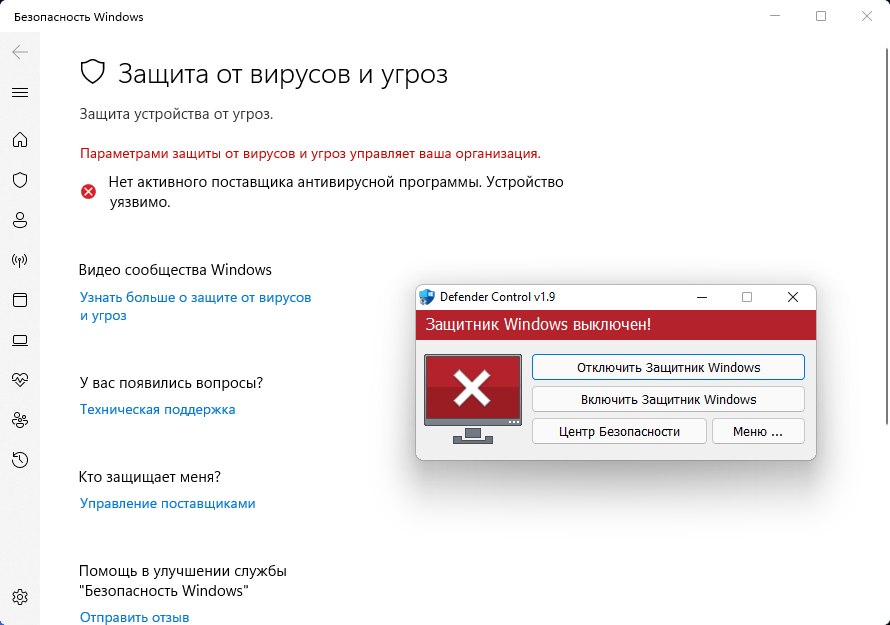
No computer restarts are required.
Conclusion
Of all the proposed methods, the use of third-party software can be called the easiest and most convenient – especially since turning off Windows Defender is a reversible operation, and the utility itself takes up a minimum of disk space. Principal opponents of installing such software will have to, as they say, “sweat”.
