With the advent of disks with a capacity of more than 2 TB, PC users are faced with the problem of inability to use additional storage space. These are the limitations of MBR partitions, a format that has served faithfully since 1983. Could anyone have guessed then how much the volume of physical memory would increase?
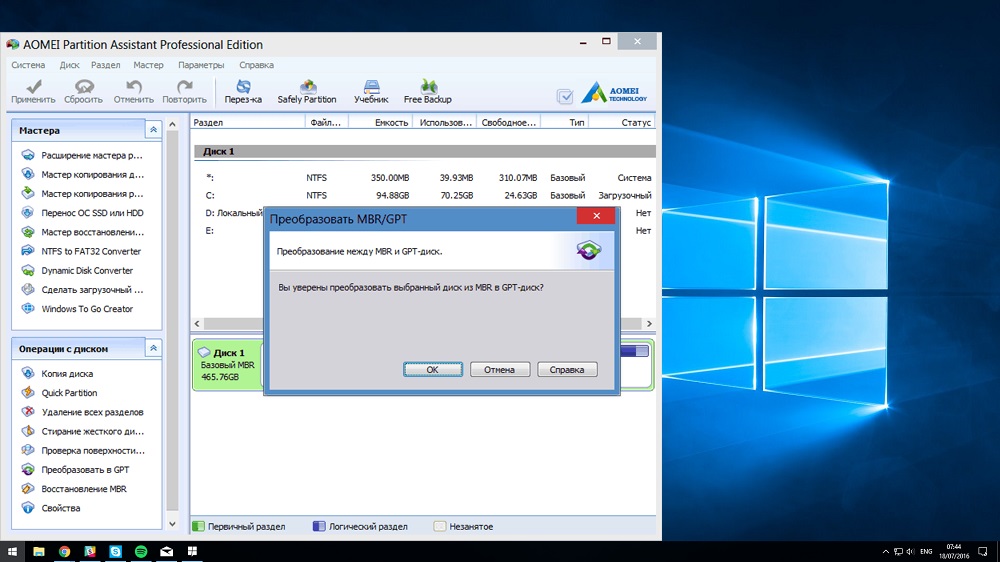
The developers had to react to this. This is how the GPT partition table was introduced, removing this limitation, which is now 9.4 zetabytes. For how long is not a topical question yet. The new partition table structure turned out to be incompatible with the good old BIOS. It requires motherboards with UEFI BIOS to support it.
For the end user, there are additional issues that might make him think about converting MBR disks to GPT and vice versa. There are several ways to solve it, which we will talk about today.
Contents
Converting to MBR using the command line
The command line may not be applicable in all cases. The fact is that this is a method with complete loss of data, so if we are talking about the system disk, then it is only useful when reinstalling Windows. But why might such a transformation be necessary?
Converting GPT to MBR is necessary when installing Windows 7. If you do not do this, you will receive a message about the impossibility of continuing the OS installation due to an inappropriate partition format. As for non-system disks, conversion to the old format is possible at any stage, but you need to think carefully about its feasibility.
Let’s see how to change GPT to MBR via the command line:
- on Windows, the command line console is started by the cmd command. If you need to do this at the stage of installing the operating system, then you must press Shift + F10 at the stage of selecting partitions;
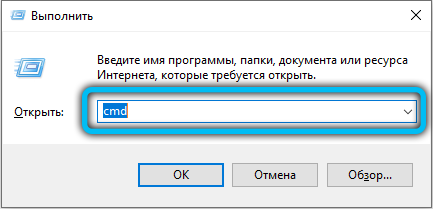
- when the terminal window appears, type diskpart and confirm by pressing Enter. The utility for working with disks will start in a separate window;

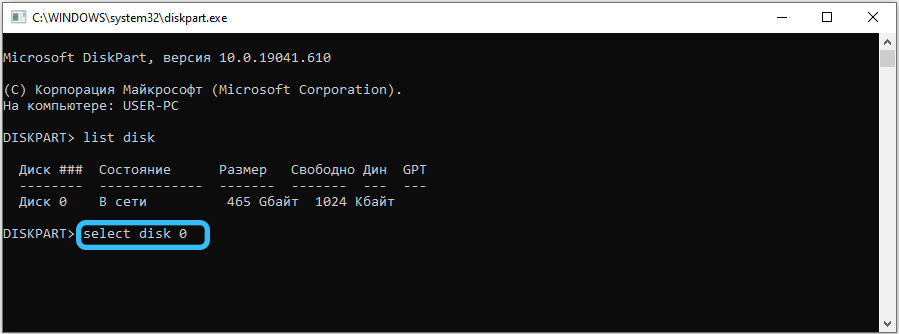
- to display a list of physical disks present in the system, type list disk;

- as a rule, the drive on which the OS is installed is numbered 0, the rest of the disks are numbered in order of growth;
- now we type select disk №, indicating to the utility which disk is to be converted;
- to see what partitions are on the disk, use the detail disk command;

- if you want to change the format of the entire disk, enter clean. It should be borne in mind that all existing partitions will be destroyed;

- if this option does not suit you, select the partition with the select volume command and then use delete volume. In this case, the data will be deleted only on the specified volume;
- now we proceed directly to the transformation. To translate the partition (disk) into the desired format, type convert mbr and wait for the command to complete;

- to exit Diskpart, type Exit, the same command is used to close the command line.
If you performed the conversion when installing Windows, it will continue from the place where you started the command line. If this is the stage of creating partitions, you can start creating partitions to replace the lost ones by clicking the “Configure Disk” button.
How to convert a GPT disk to MBR using Windows built-in tools
Now let’s look at how to change a GPT disk to MBR, if required on a working version of Windows. On the “top ten” such reformatting is impossible, since this version of Windows runs exclusively under the UEFI BIOS. BUT on the “seven” and Windows 8.1 the method is working, but also with a limitation – it can only be applied to a non-system disk.
How to convert a GPT disk to MBR on a running system:
- run the “Run” console (Win + R), type diskmgmt.msc, confirm by pressing Enter;
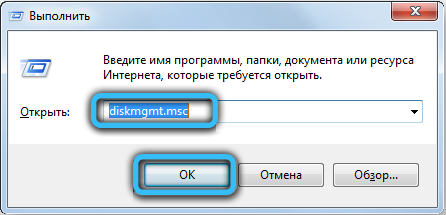
- the standard disk management utility will start. Select the disk to be converted to MBR format;
- now we need to delete all sections present on it (by right-clicking on the next section and selecting the “Delete section” menu item);
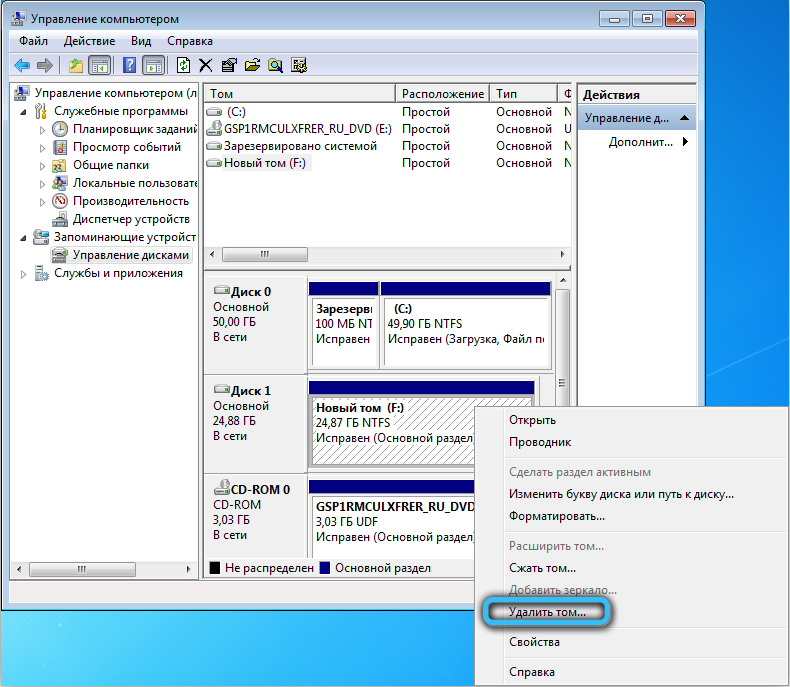
- after that, right-click on the name of the disk that you want to convert, and in the context menu that appears, select the line “Convert to MBR disk”.

As in the previous case, after converting the disk, you can start partitioning it, if necessary.
Converting MBR to GPT
As for the reverse transformation, it can be done with the mbr2gpt utility. And only in Windows 10, but here this opportunity is provided only from version 1703.
It allows you to start the transformation procedure at any stage. And, what is important – no data loss. You can run the utility both during the installation of the “dozens” and during system recovery. At the same time, if the initial installation was performed in Legacy mode, then further loading will be performed in UEFI mode.
The utility is located in the System32 repository of the Windows system directory. It is most often used when installing “tens” in the process of migrating from earlier versions, when an error appears that the installation cannot continue due to the fact that the system disk uses the MBR partition table. When using mbr2gpt.exe, there are several important restrictions that need to be observed. Firstly, the disk intended for transformation must be a system disk, and secondly, it should not contain more than three partitions. Thirdly, it should not have extended partitions marked in green when using the Disk Management utility. In most cases, these conditions are true, but the last two limitations are easy to fix by removing the extended partition.
So let’s say you have Windows installed in Legacy mode using the MBR partition format. In this case, it is possible to convert MBR to GPT without data loss using the following algorithm:
- start the command line (at the stage of selecting a section when installing Windows – press Shift + F10);
- we type mbr2gpt / validate, confirm by pressing Enter;

- if as a result of the command execution the message Failed appears, you need to re-run the utility indicating the number of the physical disk: mbr2gpt / disk: № / validate, where № is the number of the disk, in the overwhelming majority of cases – 0;

- upon receipt of the message Validation completed successfully, you can proceed directly to the conversion;
- to do this, enter mbr2gpt / convert (if we specified the disk number, then you need to use the / disk: № option);
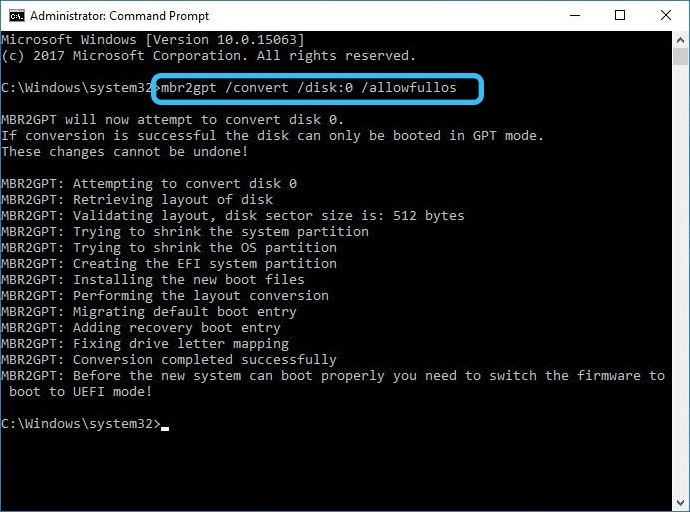
- wait for the conversion to complete and exit the command line emulation mode.
As a result, the conversion will take place without loss of data, while a partition will be created on the media, which will contain the EFI bootloader (usually the utility uses the “System Reserved” section for this if it is available and of sufficient size).
If the conversion was performed during the installation of Windows 10, click the “Update” button, as a result of which the partition configuration will be changed to the current one.
Using third-party software to convert between GPT and MBR
You can also convert GPT to MBR and vice versa using third-party programs. There are not so many known of them, and the advantage of this method is the ability to carry out the conversion without losing data. Built-in Windows tools allow you to do this only in the cases described above, that is, only in the top ten and only when converting to GPT.
MiniTool Partition Wizard
Although there are many utilities that specialize in working with disks and their partitions, not all of them are able to transform partitions from one format to another. And those that allow you to do this without losing data are very few. Among them, first of all, it is worth noting in the MiniTool Partition Wizard. Among the advantages of the utility that allowed it to become mega-popular are ease of use, the possibility of free use, as well as the speed and quality of performing tasks defined by the user.
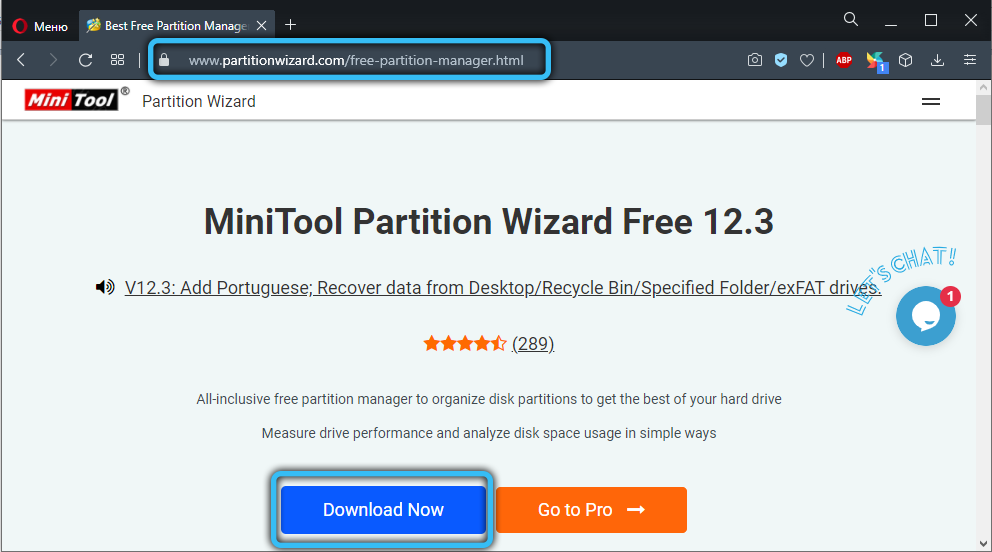
The program is available in two versions:
- a regular executable executable that can be used on an already installed system;
- as a bootable image. It can be burned to a flash drive and used as a LiveCD. It is clear that this option should be used when installing Windows.
Let’s describe the option using the boot version – it’s a little more complicated.
Steps to convert GPT to MBR without data loss:
- download the image and write it to a USB flash drive;
- insert removable media into a PC or laptop, reboot;
- you first need to change the boot order in the BIOS, or use the Boot Menu call, which is called by different key combinations for different BIOS versions;
- when the utility interface is loaded, select the disk to be converted by simply clicking on its icon (select the entire physical disk, not one of its partitions);
- on the right in the menu, select the item “Convert GPT to MBR”;
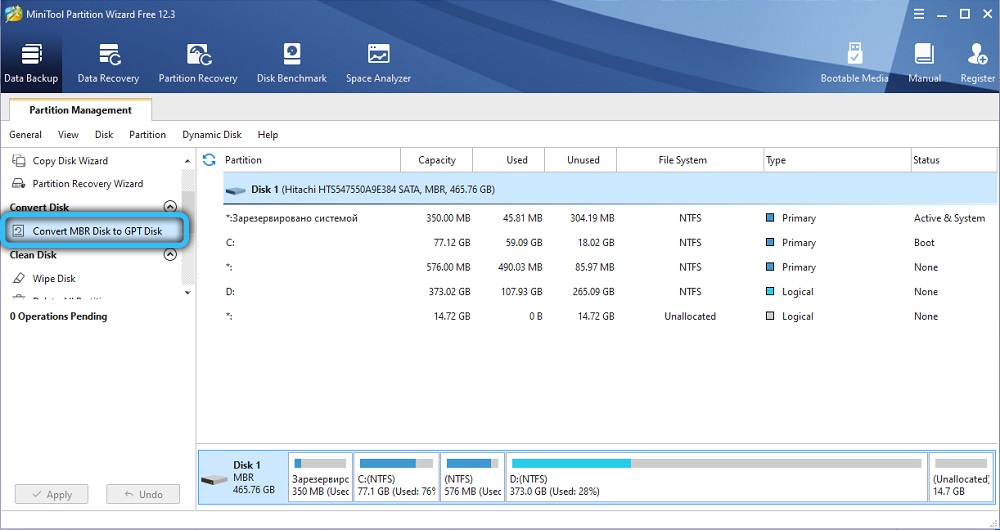
- to start the conversion, you must click the Apply button located above. The utility will ask you to confirm your actions (possibly several times). We confirm and wait for the end of the transformation.
It is not excluded that the utility will refuse to perform the conversion, referring to the fact that the selected disk is a system disk, and the partition table cannot be transformed. In this case, you can change the disk format from GPT to MBR as follows:
- click on the section “Reserved by the system”, while making sure that its volume is sufficient (usually the system reserves up to 300 MB, it will be enough for our task);
- delete the selected partition by clicking on the Delete Partition button and confirming our actions by clicking “Apply”;
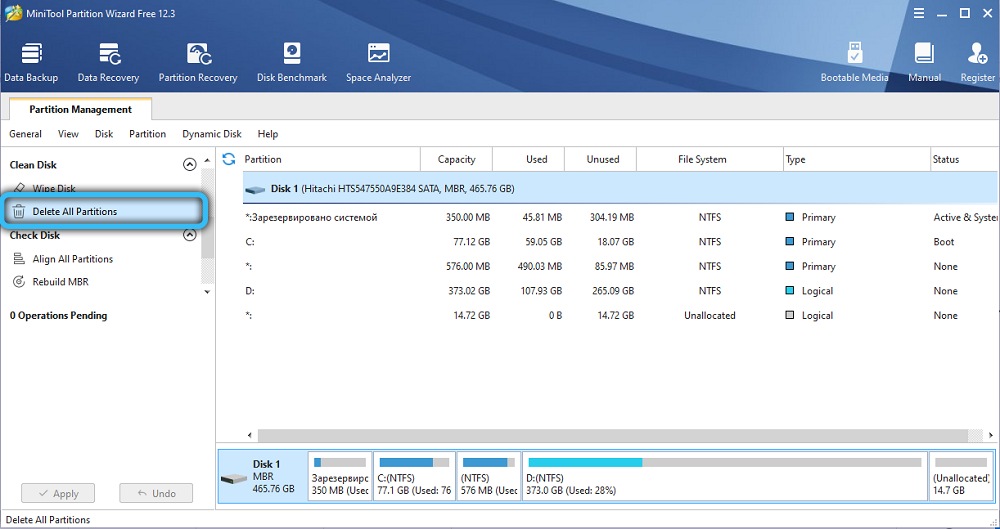

- now we repeat the above steps – select the entire disk, click on the “Convert GPT to MBR” tab.
With this method, you can get a disk with an MBR boot record with the partitions saved. Now you can start installing Windows in a regular way.
Using the utility in the form of an executable program is the same, except that there is no need to write MiniTool Partition Wizard to a USB flash drive in the form of an image.
Acronis Disk Director
In terms of popularity, this utility is not inferior to the software from MiniTool. Moreover, Acronis’ disk management software is included in most LiveCDs today. True, only a version in the form of a bootable image is available, that is, you can use Disk Director only when reinstalling / restoring Windows. However, the transition from GPT to MBR and vice versa in most cases is required precisely when migrating from one OS version to another.

Let’s describe the sequence of actions:
- download the image, write it to a USB flash drive;
- if necessary, we back up important data from drive C to D (if available) or to cloud storage;
- boot from removable media after changing the boot priority in BIOS or using the boot menu;
- in the main menu of the utility, select the item “Basic disks”;
- to convert in both directions, we need to delete the reserved Windows partition (usually its size is 100 MB), for which we mark it and select the “Delete volume” menu item;
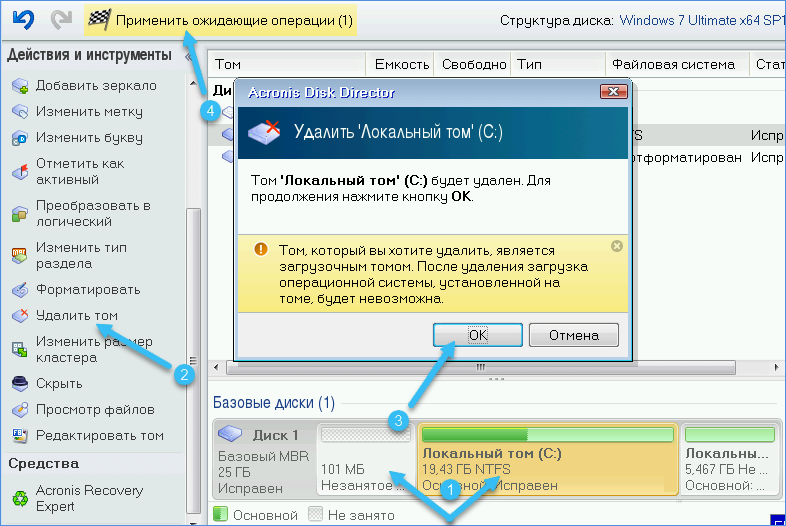
- then remove the C drive in exactly the same way;
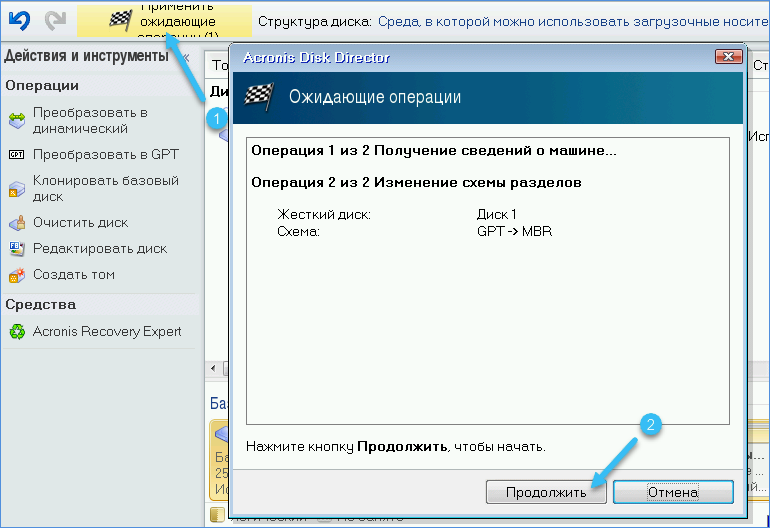
- click on the “apply” button and wait for the specified volumes to be deleted;
- it remains to right-click on the disk and select the option we need from the context menu. For example, “Convert to MBR”;
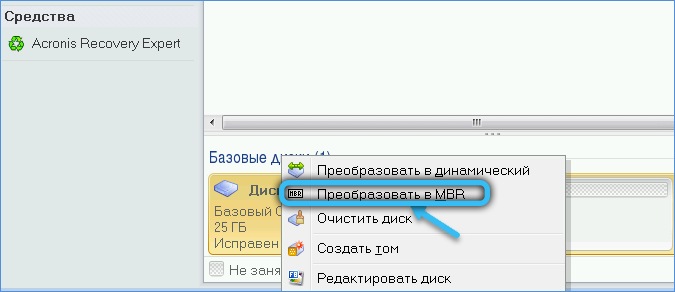
- after a few seconds, the procedure will be completed and you can proceed with the Windows installation in the usual way.
So, we have seen all the popular ways to install GPT on disks with MBR or perform the reverse conversion. Using built-in Windows tools is the preferred method and does not require searching and downloading third-party utilities. But in some cases its use is impossible due to existing restrictions, and then one cannot do without popular disk utilities.
If you have a need to change the format of the sections, and at the same time you have encountered problems that are not described in our article, please state them in the comments – perhaps this will help get rid of the same problems for our other regular visitors.