Kali Linux is another Linux-based operating system. Its distinctive feature is that this OS was developed for testing the security of systems, but most users use it for hacking, since it has all the necessary utilities and tools for this. Since unauthorized hacking is illegal and unethical, use Kali Linux solely for security auditing. Kali Linux can be installed on a USB stick. In addition to the fact that it is just convenient, there are a number of other advantages, more on which below. In this article, we will take a closer look at how to install Kali Linux on a USB flash drive. Let’s get started. Go!
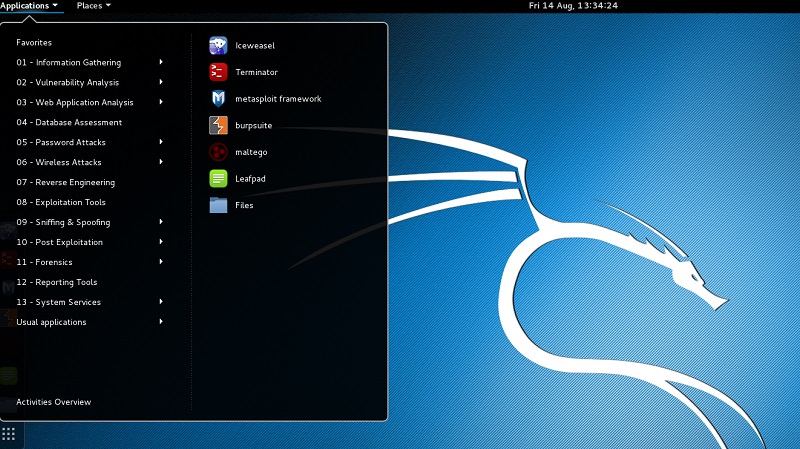
So, what are the benefits of installing Kali Linux on a USB drive:
- You will be able to use all the hardware on your computer to its fullest.
- Get better performance when compared to a virtual machine.
- Any changes do not affect the computer in any way.
- You have the opportunity to boot Kali Linux anywhere, on any computer.
The process of installing an OS on a USB drive is not much different from the most common installation on a hard drive of any Linux-like operating system. The only difference is that you cannot create multiple partitions on a USB flash drive.
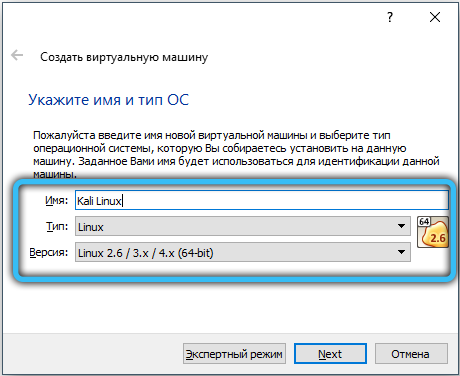
Now let’s go directly to the analysis of the entire procedure. First you need to create a new virtual machine. In the “Type” section, select “Linux”, and you can specify any version, it doesn’t matter, the main thing is to match the bit depth.
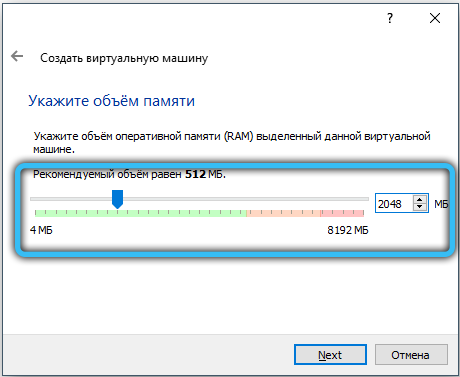
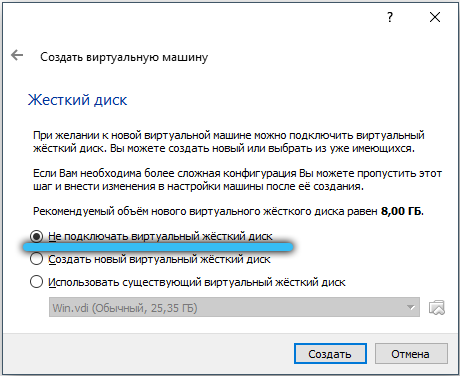
At the next stage, check the “Do not connect the virtual hard disk” item and click on the “Create” button and then “Continue”. After that, start the newly created virtual machine. A window will open where you will be asked to select a boot disk. Specify the path to the Kali Linux image.
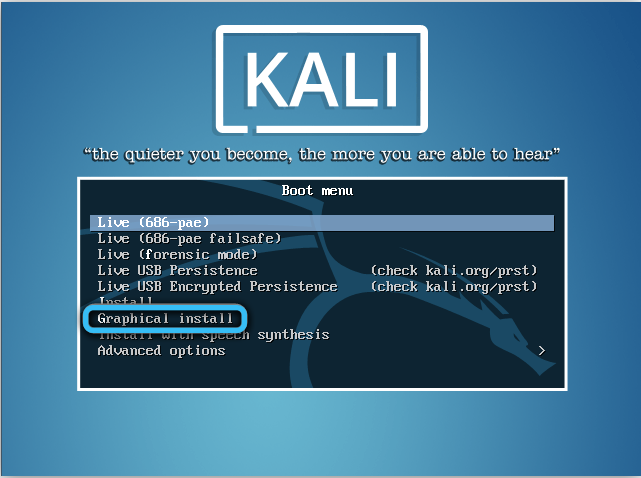
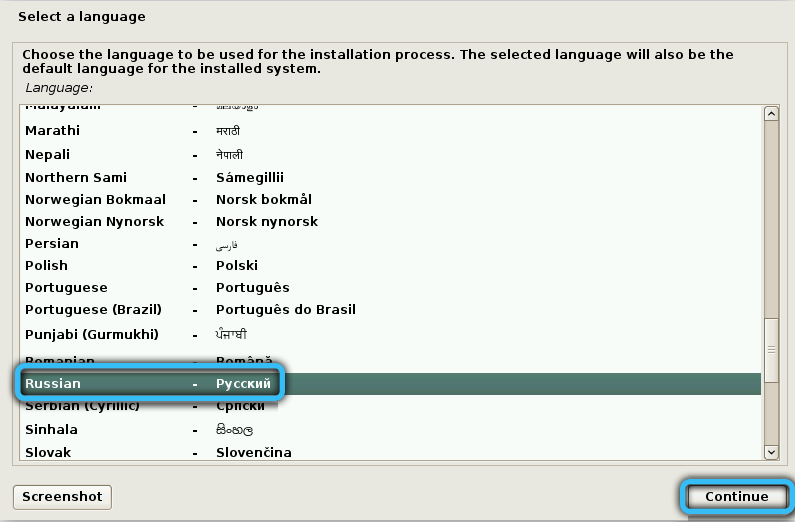
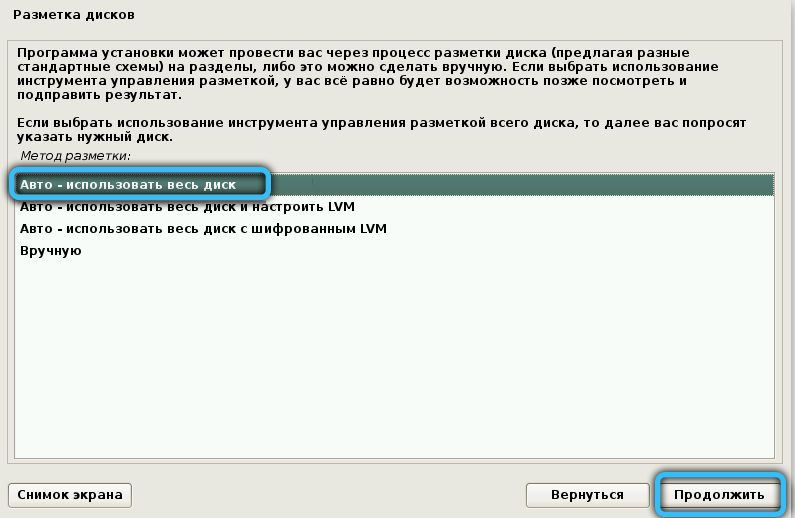
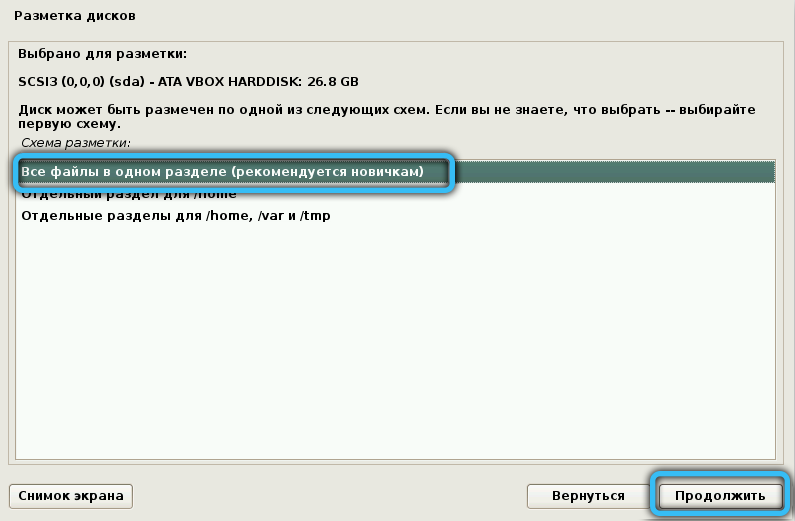
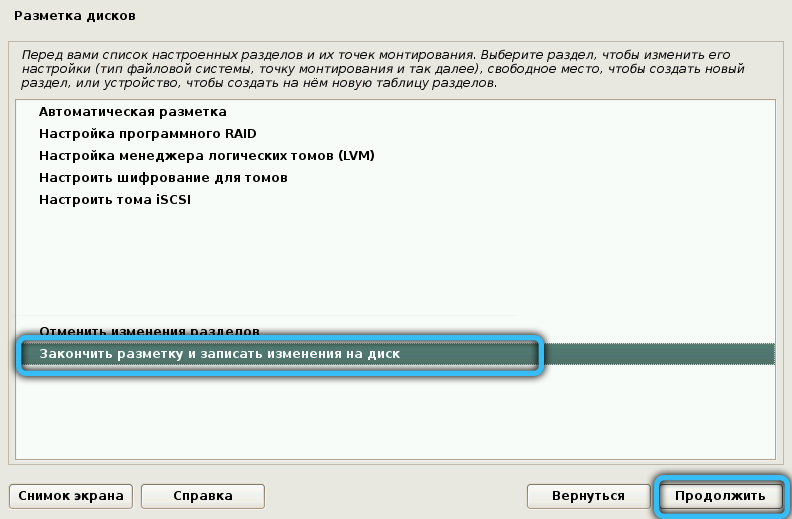
When the boot menu appears on the screen, insert the USB flash drive into your PC. If the flash drive is not detected, reconnect it via another USB port. Select “Graphical install” from the boot menu. Then everything happens quite simply and clearly. First select the language and then select the disk partitioning method. Since you have a USB flash drive, check the “Auto – use the entire disk” item. Specify “All files in one section (recommended for beginners)” as the partitioning scheme, and then select “Finish partitioning and write changes to disk”. Confirm your choice and click on the “Continue” button. It remains to wait until Kali Linux is written to the USB drive. When finished, confirm the download of the required items and complete the installation procedure. After restarting your computer, your flash drive will be completely ready for use.
To run Kali Linux from a flash drive, you must first go to BIOS and configure booting from a USB drive. Once in the BIOS, go to the “Boot” tab and set the highest boot priority for your flash drive. If it does not appear in the list, find the “Secure Boot” item and set the value to “Disabled”. When “OS Mode Selection” appears, select “CSM and UEFI OS” there. Set “Fast BIOS Mode” to “Disabled”. Save your settings and reboot. Now open the BIOS again and set the priority for your flash drive, now it will be displayed for sure. Press F10 to save the settings. Ready. It is possible to boot from a USB stick without any problem.

There are other ways to install this operating system. Let’s see them in more detail.
Rufus
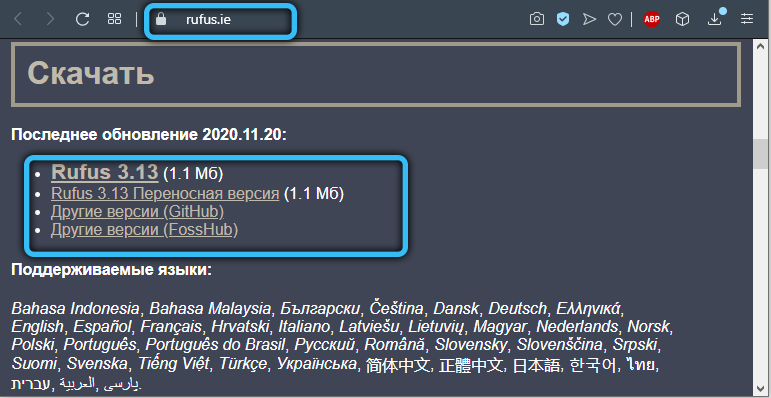
A program with this name is widely used to create USB installers. It is with its help that we can easily prepare a full-fledged working operating system on our flash drive. To do this, we will perform a number of such actions:
- using the official website as a source, download the program to your PC and launch it;
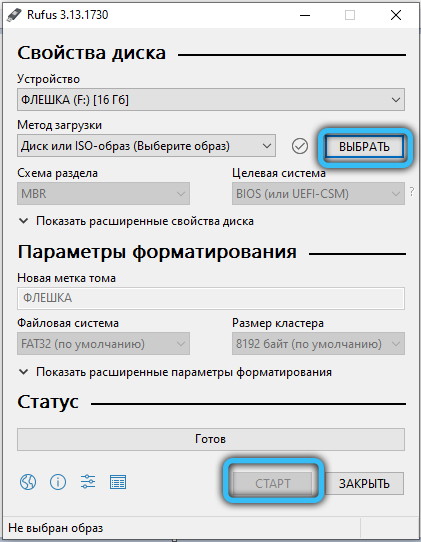
- the main window will give us access to such a menu item as creating a bootable disk;
- we write the path to the ISO image we created;
- click on the “start” button, and then confirm our intentions by clicking on “ok”.
As soon as the recording is over, we will have a ready-made flash drive with Linux for further work.
Win32 Disk Imager
Another interesting option for creating a bootable OS image on a separate USB flash drive. We will act in this case according to the following scenario:
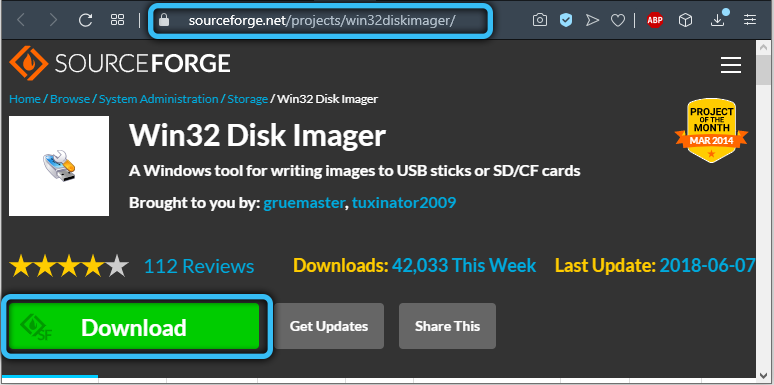
- Download the Win32 Disk Imager program to your device and start its work.
- We find the “Image File” field, in which we write the path where our OS image is located.
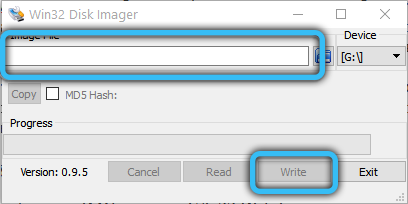
- After pressing the Write button, the process of writing the program to the drive indicated by us begins. It usually takes within 5 minutes.
- Going to the USB stick, we will be able to notice the 3 created sections.

- A section called “Persistance” will be needed in order to store all changes with our version of the operating system. However, we still need to prepare it, because it is not marked yet.
- Install a small program on your PC – MiniTool Partition Wizard. After downloading it from the official resource, launch it.
- Next, click on the unallocated section and click on the Create button. In the message that appears, click on OK.
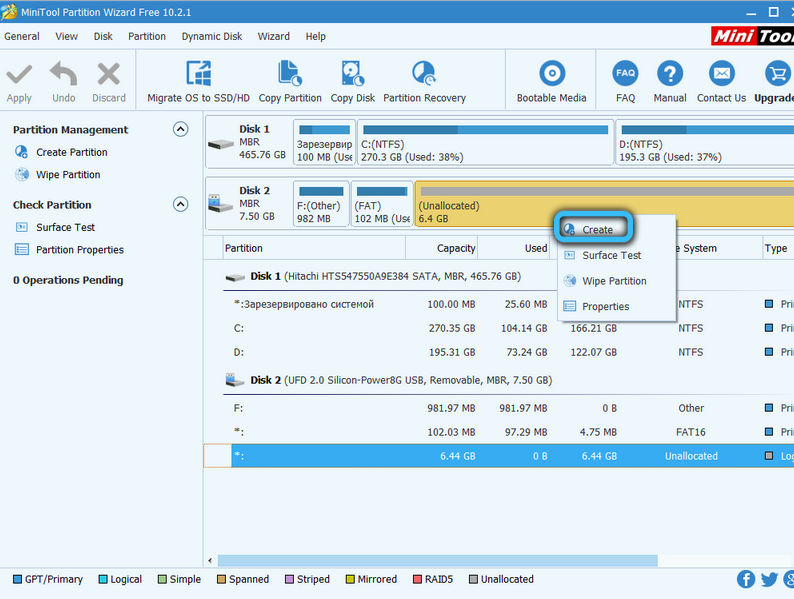
- An item with the name Partition Label will appear in front of us – you need to put Persistance in it.
- Next, go along the Create As – Primary path.
- Let’s find the File System field – here you need to select Ext3 for this operating system.
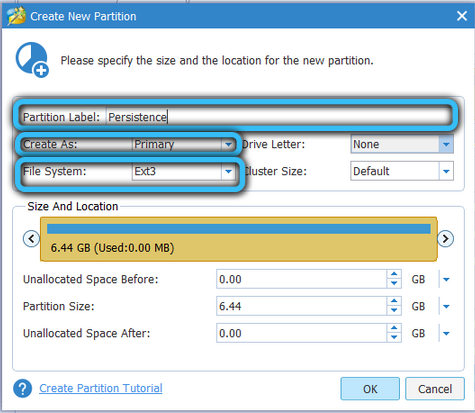
- We save the changes.
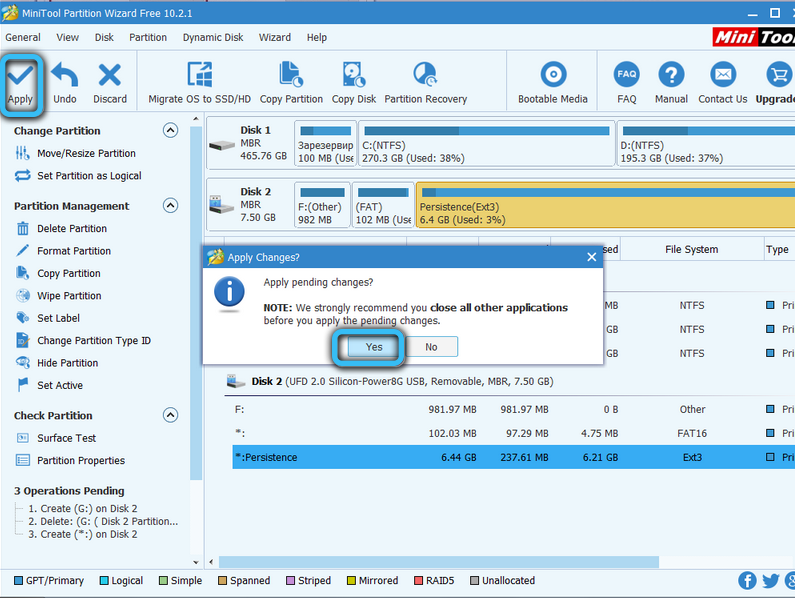
At the output, we have a USB flash drive with a ready-made Kali Linux OS for use.
Universal USB Installer
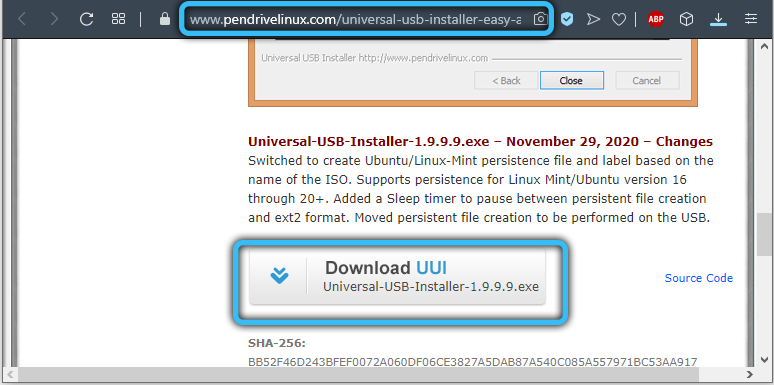
It is necessary to consider another option for preparing the drive to work with Kali Linux, so that the user has a choice. The Universal USB Installer utility will help us quickly create an OS distribution and use it for our own purposes. First you need to download it, preferably from an official source. Now we take the following steps:
- We launch the utility.
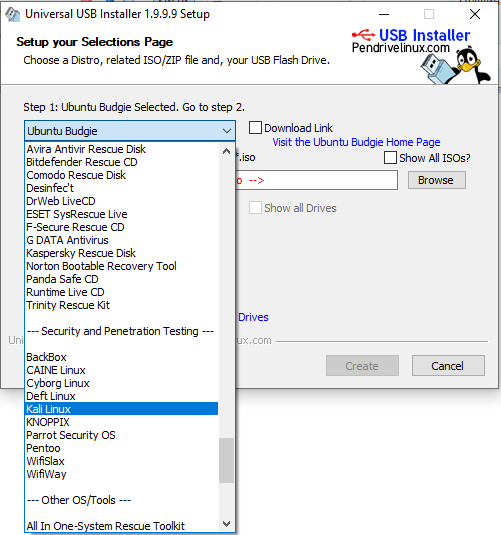
- We indicate in the Step1 field that we need an image specifically for Linux – Kali.
- The next step will be to show the path that leads to our image.
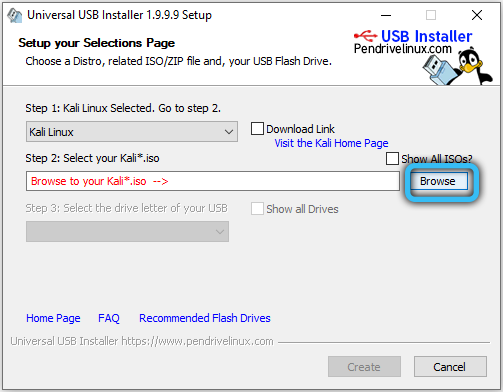
- Now we select the USB flash drive, and also see that a checkmark is placed in the Format field.
- Click on create to start the distribution creation process.
As soon as the recording is over, the OS image will be prepared for further work. It remains only to allocate space on the flash drive for the Presistance section. To do this, we again need the MiniTool Partition utility. We click in the explorer on the designation of the removable drive and select the Move / Resize item in it. Now we can move the slider to make room for the section. Then we proceed in the same way as in the scenario described above. To get started, you just need to boot from your flash drive.
Now you know how to burn Kali Linux to a USB stick. As you can see, this is quite simple. Write in the comments if you managed to cope with this task, share your own experience with other users and ask any questions you are interested in on the topic considered.