The Microsoft Virtual Assistant is a useful tool built into the operating system. In version 11 of Windows, the importance of Cortana is significantly reduced – the assistant is also integrated, but not active by default. Those who want to use the feature can freely activate it, but many users, on the contrary, want to disable or completely remove Cortana, which is also easy to do. We will consider how to ensure interaction with the assistant, as well as how to remove it from the computer.
Contents
Which countries are supported by Cortana
The smart assistant is available in multiple languages (English, French, Chinese, Portuguese, Japanese, Spanish, Italian, German).
Optimized Cortana for 13 countries such as:
- China.
- Australia.
- Brazil.
- Canada.
- USA.
- Great Britain.
- France.
- Germany.
- Japan.
- Italy.
- Spain.
- India.
- Mexico.
In other countries not included in the list, the assistant is officially unavailable. Since Russia is not among the supported countries and the virtual assistant does not speak Russian, you will have to change the region in the system settings to interact with it. But keep in mind that when you change the language settings, certain software or functions adapted to your language may stop working.
How to install Cortana on Windows 11
Microsoft no longer imposes digital assistant services on users, but leaves the option to use this feature. Cortana in Windows 11 is disabled by default and can be restored if necessary.
Voice assistant activation
If you are not concerned about privacy and have a desire to connect an assistant, you can do this in many ways.
How to enable Assistant in Windows 11:
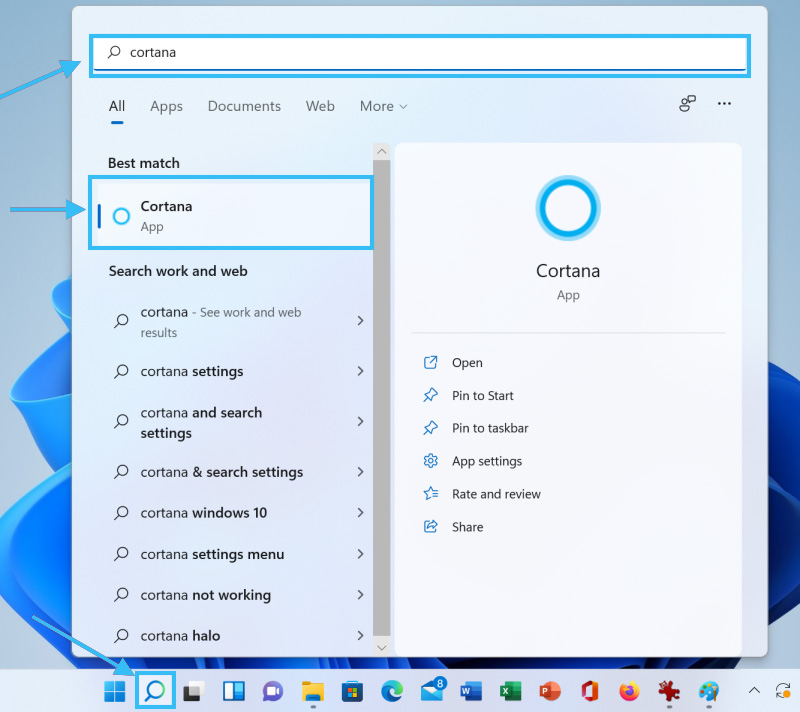
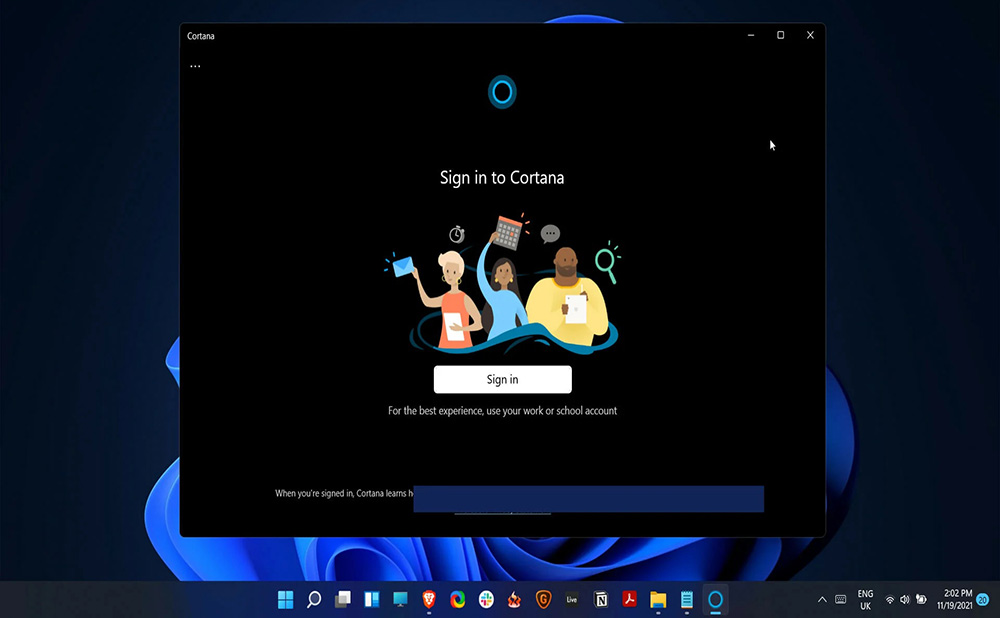
- in the search for the Start menu, enter the query “Cortana” and select the assistant among the matches found;
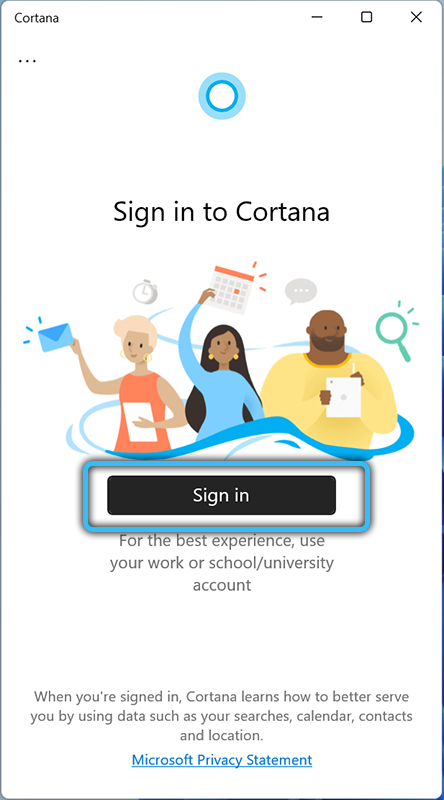
- in the downloaded application, select “Login” and log in using Microsoft account data for authorization;
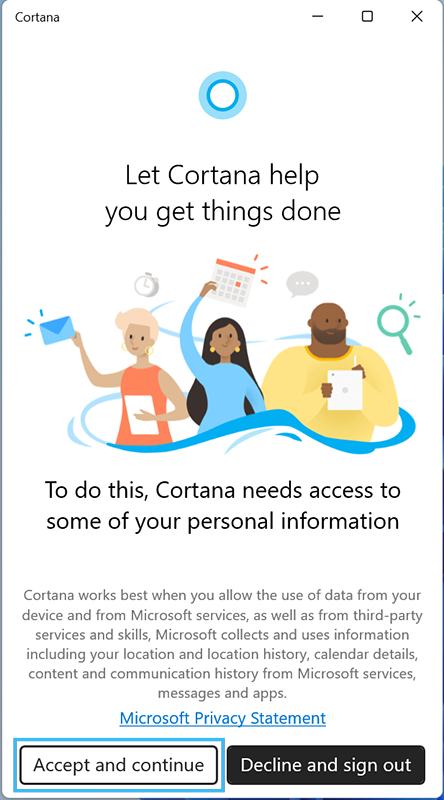
- Click “Accept and Continue”. The application will start.
Activation in system parameters:
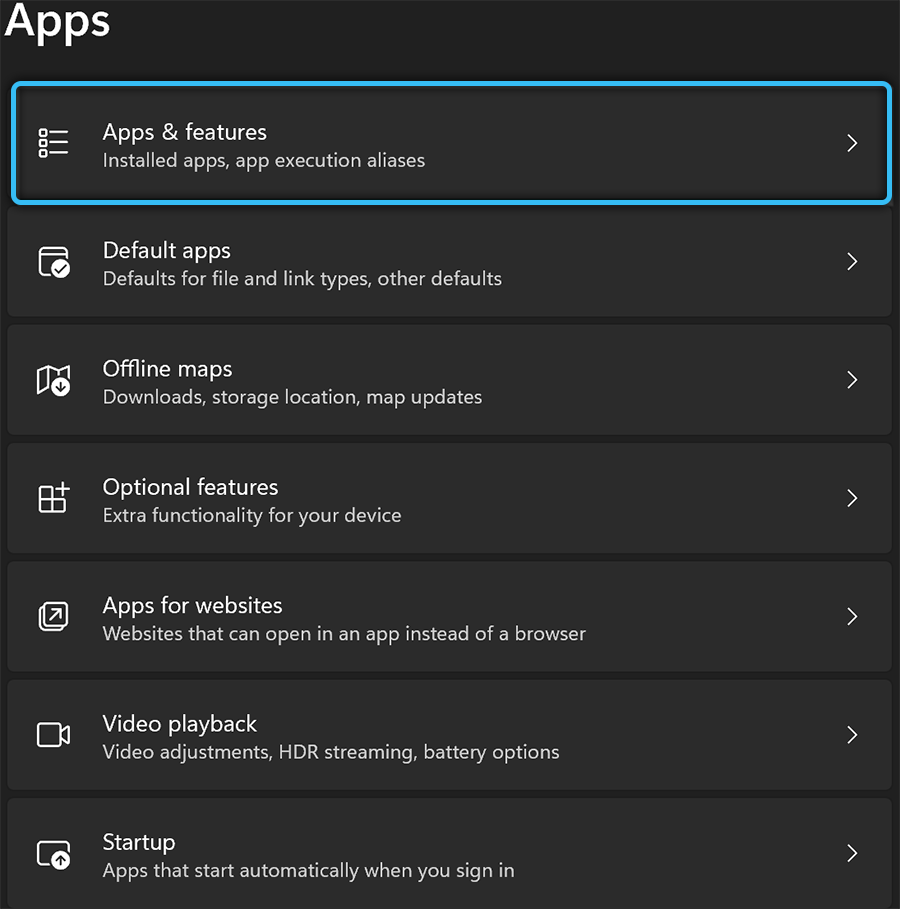
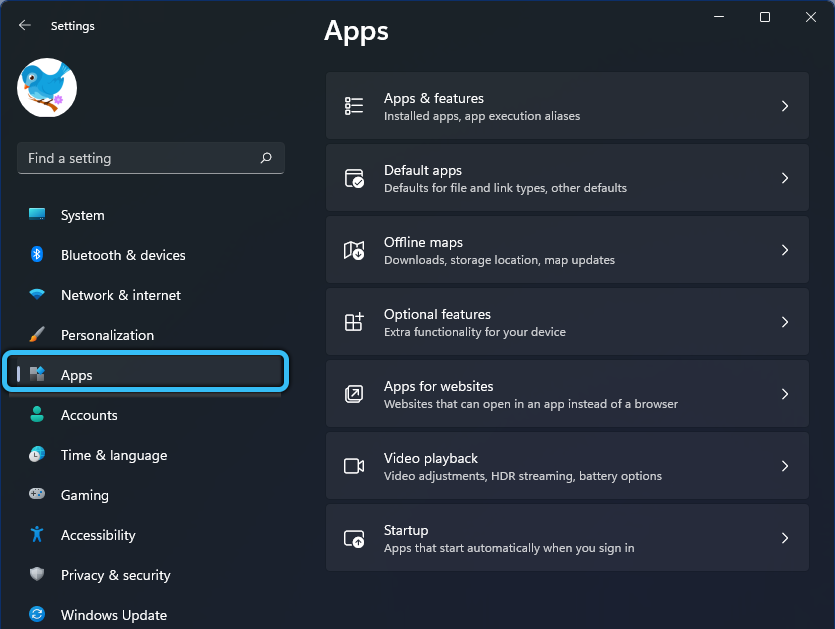
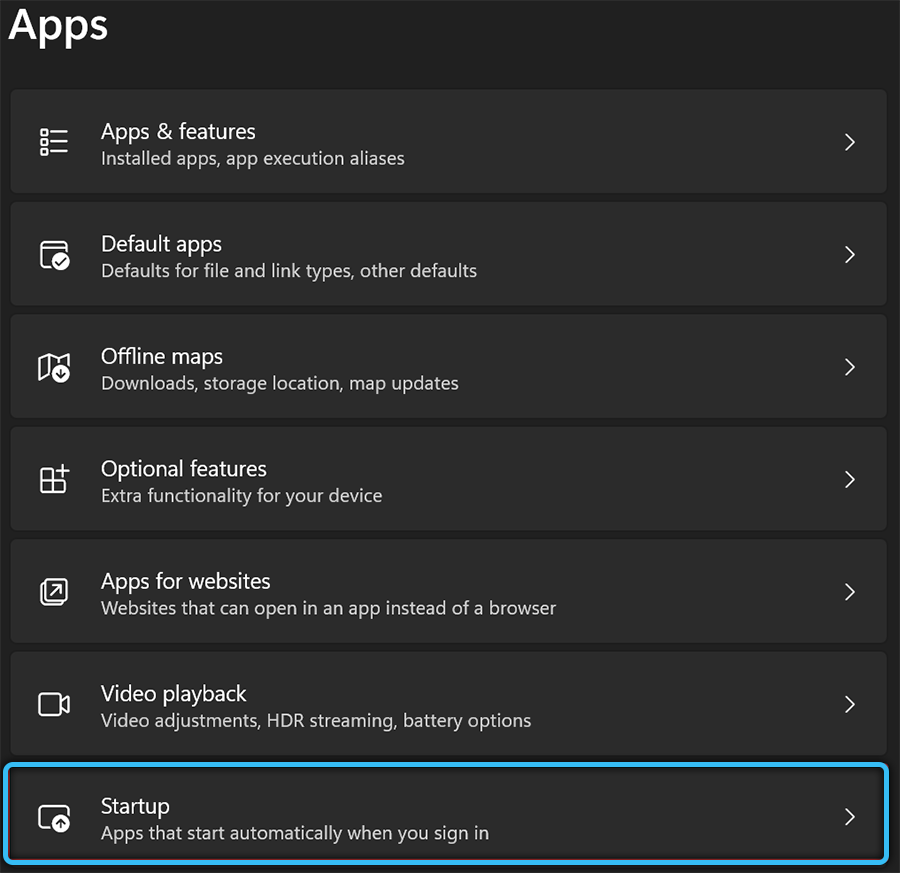
- open the system settings (Win + I), go to “Apps” (“Apps”), then “Apps and features” (“Apps & features”);
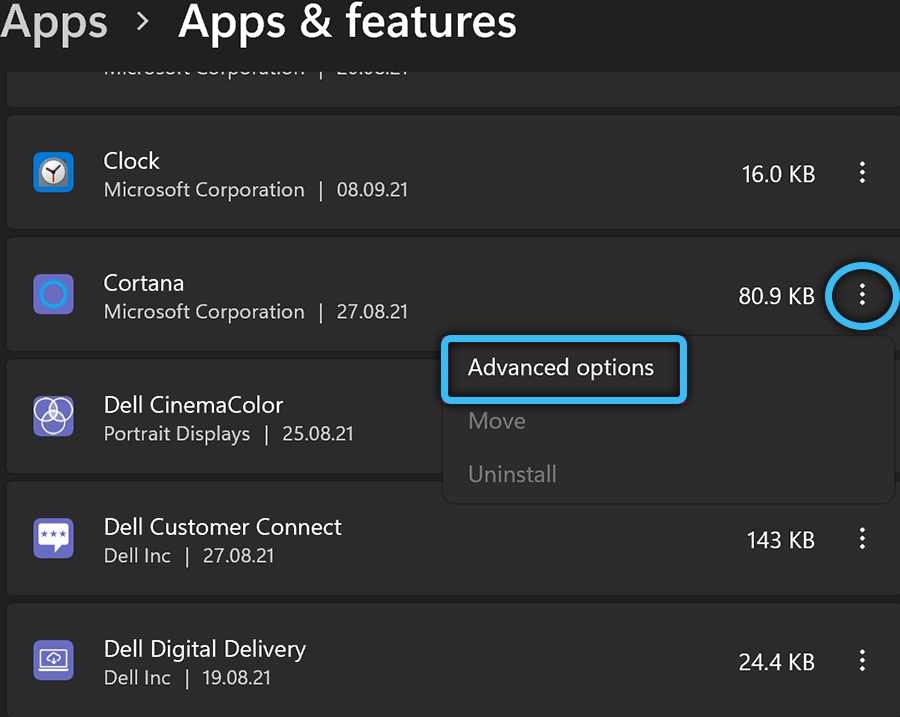
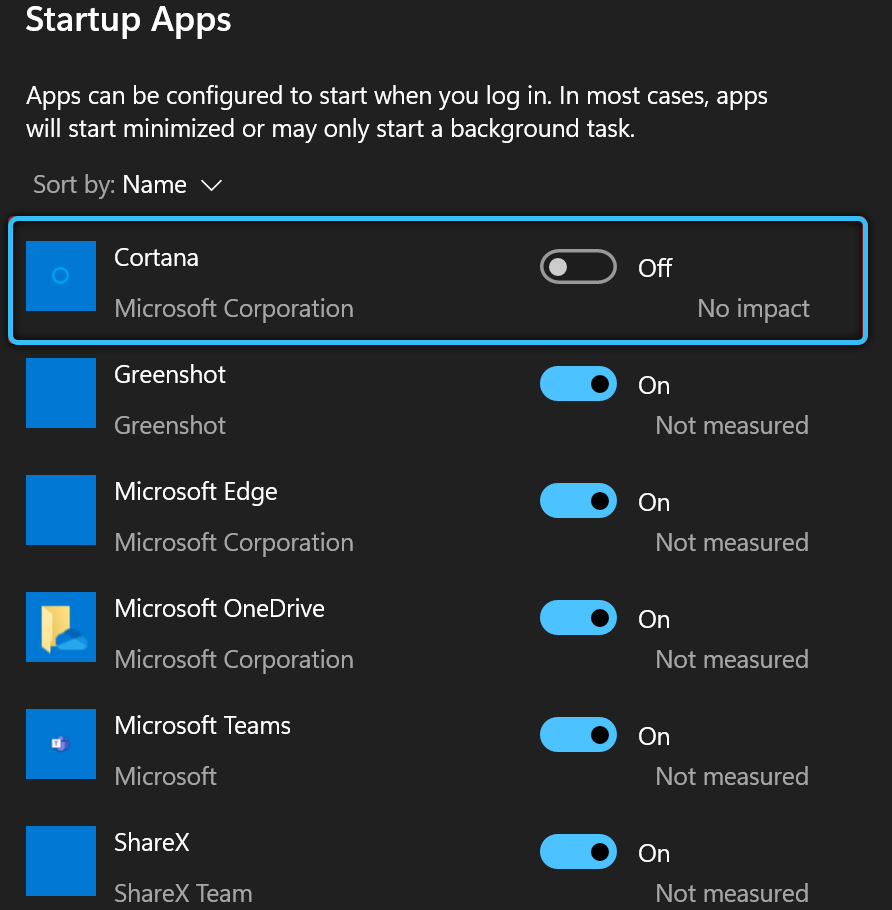
- find Cortana and go to advanced options;
- move the switch to the active position near the item “Run at login”.
The current task tracker also allows you to activate Cortana:
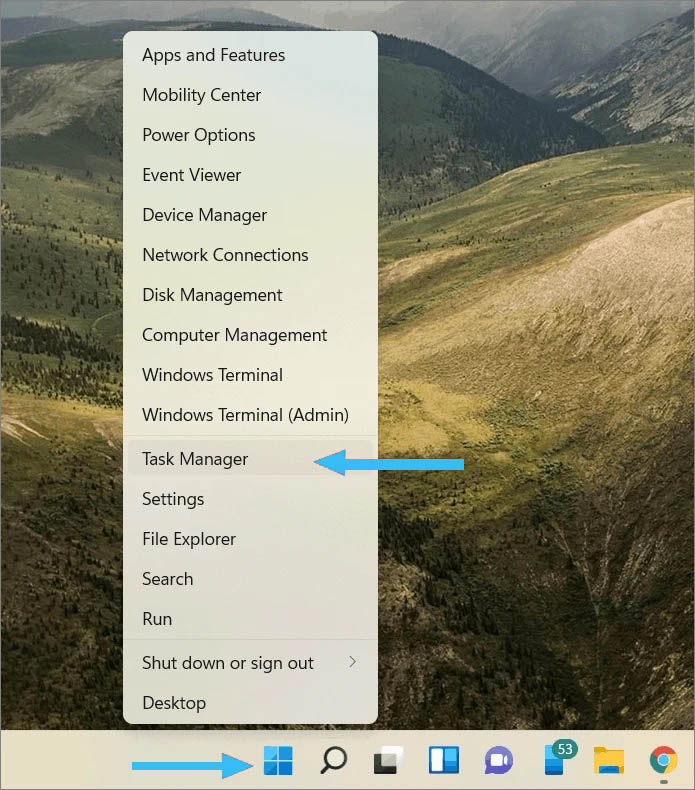
- launch the Task Manager snap-in in any convenient way, for example, using the key combination Ctrl + Shift + Del or Ctrl + Shift + Esc;
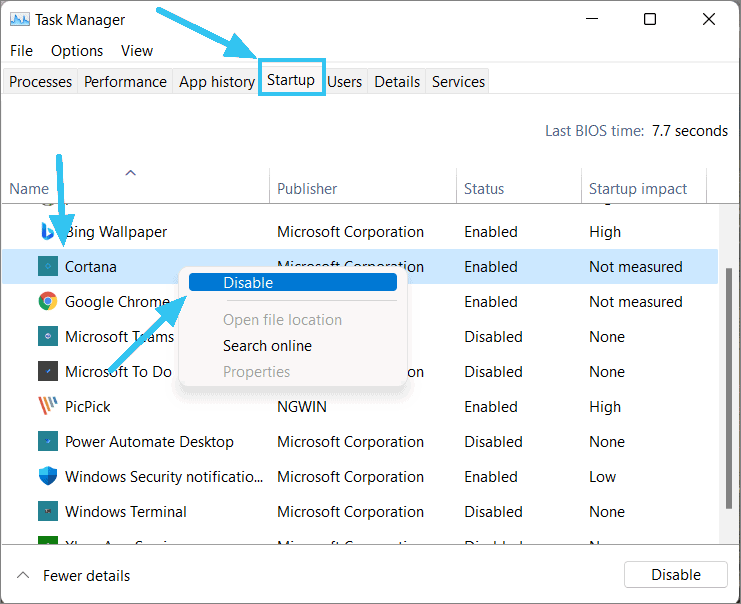
- go to the “Startup” tab;
- Right-click on the Cortana line and select the enable option from the menu.
If you decide to restore the assistant on your computer, you can activate the previously deleted function by following the same path, but by performing the opposite action (depending on the deactivation method, for example, change the value or switch the toggle switch to the on position).
Install from the app store
Even though you have completely removed Cortana from the system, it is easy to get it back by reinstalling it from the official Microsoft app store:
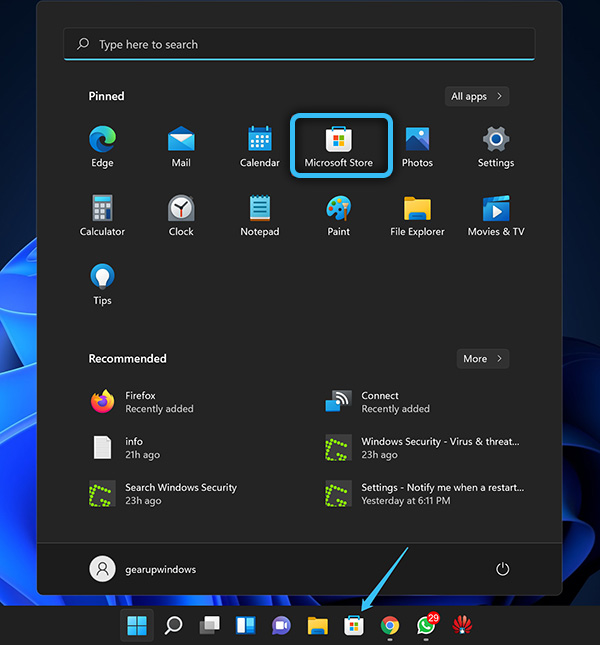
- go to the Microsoft Store page;
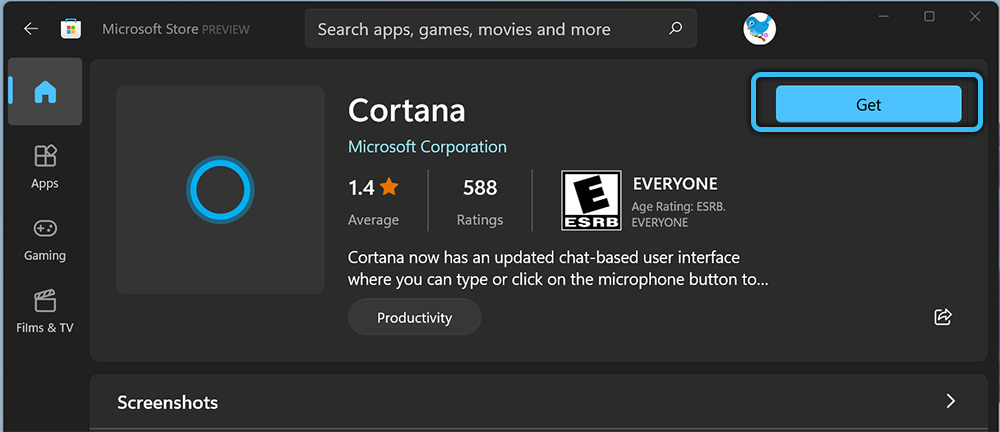
- next to the Cortana product, click the blue Get button;
- then the software is installed in the standard way.
How to uninstall Cortana in Windows 11
Although the feature is not too intrusive in Windows 11, many users want to get rid of the voice assistant due to the inappropriate use of it, given the high resource consumption. There are several ways to disable or remove Cortana from the system. Let’s take a look at options to do this.
You can deactivate the voice assistant using regular system tools, while some methods require the user to have certain skills.
Disable in system settings
To disable the assistant, do the following:
- go to the settings (Win + I), where in the section “Applications” (“Apps”) select “Apps and features” (“Apps & features”);
- in the search line of this subsection, we request “Cortana” and next to the found assistant, press the menu button (three dots), after which we go to the advanced system settings by clicking on the corresponding item (“Advanced options”);
- for the “Run at login” item, disable Cortana, as a result of which the assistant will no longer start by default when you log in.
In the task manager
An alternative solution is to disable it through the well-known Task Manager snap-in:
- open the system tool, for example, using the hot keys Ctrl+Shift+Esc;
- on the “Startup” tab, we find Cortana among the available objects that start with the OS, and disable the assistant by clicking the “Disable” button.
Using the Group Policy Editor
Deactivating a function using a service is done as follows:
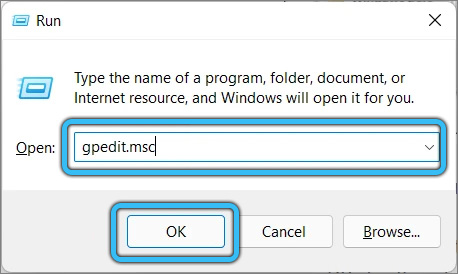
- open the Run console (Win + R) and use the gpedit.msc command;
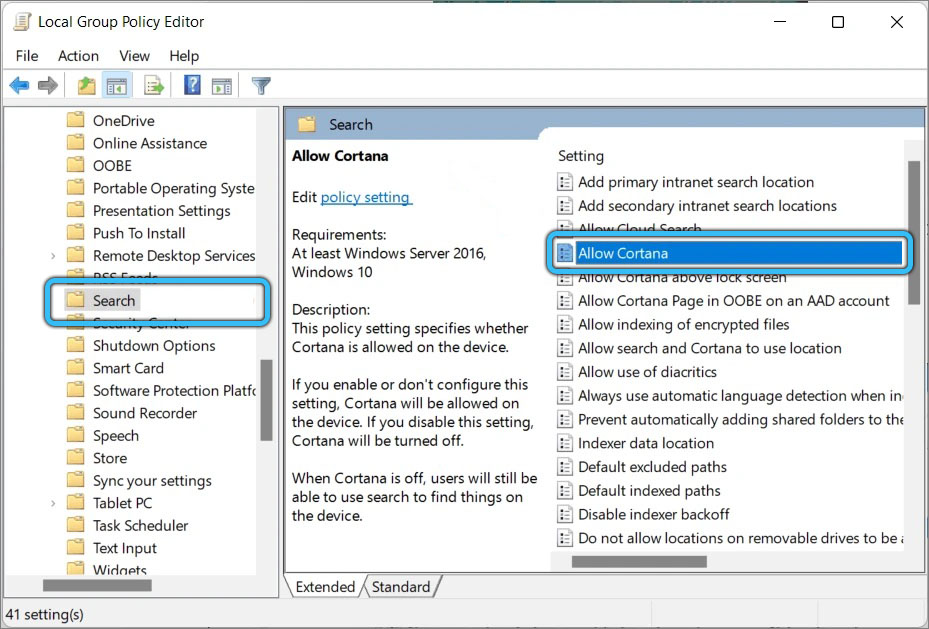
- we go along the branch “Computer Configuration -” Administrative Templates “-” Windows Components “-” Search “;
- double-click on “AllowCortana” to open the window for changing the settings;
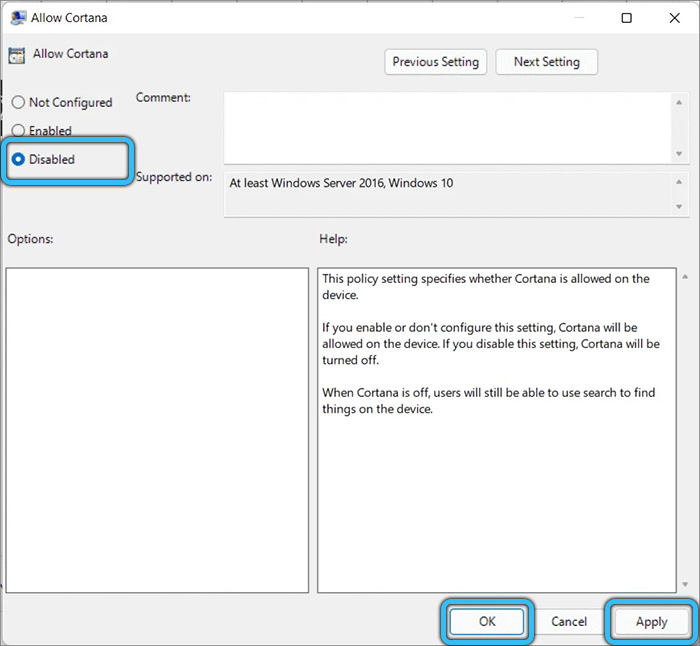
- in the new window, select the state mode “Disabled” (“Disabled”) and click “OK”;
- reboot for the changes to take effect.
Through the registry
The method is designed for a confident user with experience with the system registry.
To complete the task, you will need to do the following:
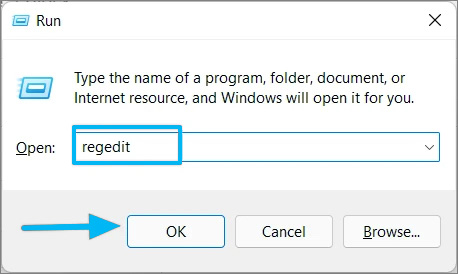
- using the Run console (Win + R) and the regedit command, go to the registry editor;
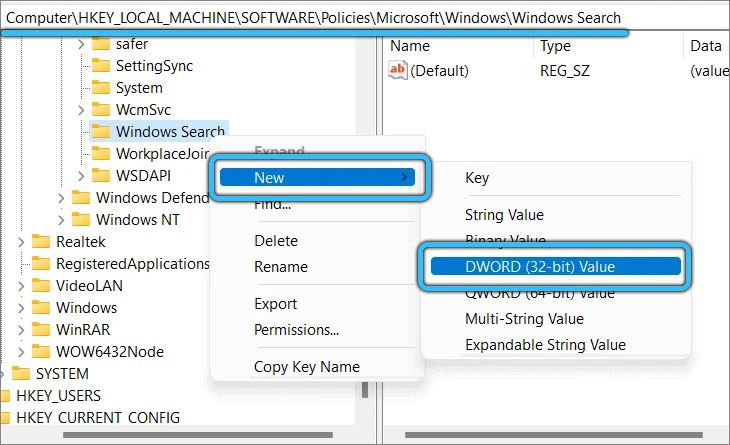
- go along the path HKEY_LOCAL_MACHINESOFTWAREPoliciesMicrosoftWindowsWindows Search;
- on the right side of the editor, right-click in the free area, select “Create” – “DWORD value (32-bit)”. If there is no Windows Search folder, you need to make it, and then create a new parameter in it;
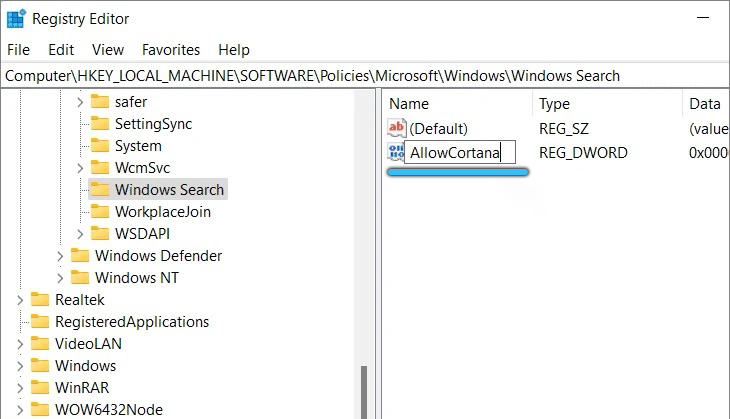
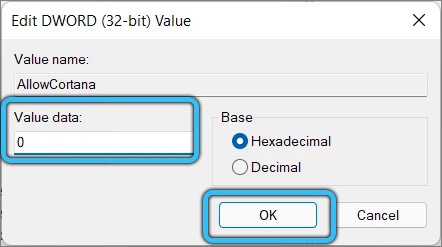
- give the parameter the name “AllowCortana” and set its value to “0”, click “OK” and reboot the system. Assistant disabled.
If you choose to return the feature, you will need to follow the same path, now setting the AllowCortana setting to “1”.
Using administrator rights and appropriate commands
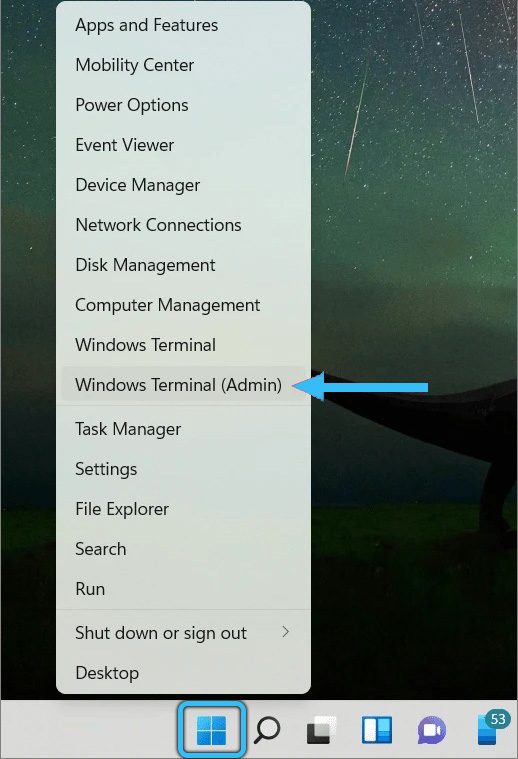
It is also possible to completely demolish Cortana using a terminal with administrator rights and the appropriate commands. You can complete the task in the following way:
- open PowerShell – press the Windows key and find it in the search by selecting the option to open as administrator (or find it from the Start menu);
- write the command Get-AppxPackage -allusers *Microsoft.549981C3F5F10* | Remove-AppxPackage and press enter to remove the assistant for the entire OS;
- if you need to remove Cortana only for the current profile (relevant when the computer has several users and each of them has its own profile in the system), use the command Get-AppxPackage -allusers Microsoft.549981C3F5F10 | Remove-AppxPackage.
After completing the procedure, the assistant will no longer be among the installed software, in startup and the Start menu. But, even if you get rid of the voice assistant on your computer forever, you can change your mind and return Cortana by installing it. How to do this, see above.
