Linux operating systems offer their users great opportunities for creating websites, storing them on a server, and testing them. Many have probably heard that proper configuration of Apache and MySQL allows you to conveniently work with servers. It’s time to get acquainted with LAMP, which unites them all, and also understand how to install and configure a LAMP server in Ubuntu.

Installing LAMP allows you to create a web server.
Contents
What is LAMP?
LAMP is not a program, as one might think at first, and not a server. This abbreviation hides a stack or a set of server-side programs: Apache, MySQL, PHP. Hence the name – the first letters of each of these programs. The first letter is taken from Linux.
Learn more about the components.
- Apache is a free HTTP server.
- MySQL is a powerful, also free database management system. Used on many sites.
- PHP is a programming language. Various web applications are often written on it.
All of this software is useful and almost indispensable for hosting websites on the web. It remains to learn how to install and use it.

Installing LAMP
The LAMP is installed in several ways. Since this is a complex of programs, you can download each of them separately, but it is more convenient to do it together. It’s easier to use Tasksel for this:
sudo tasksel install lamp-server
Tasksel is a special tool installed on Ubuntu, with which it is easy to load various software packages into the system. During installation, the system will ask you to enter a password for MySQL. It is necessary to do this.
Deleting
You can also remove the entire stack with one command:
sudo tasksel remove lamp-server
All components will be installed: PHP 7, Apache, MySQL. For more convenient work, programs are added to startup. If you want to change this, do it through the settings: System – Settings – Launched applications. There, just remove the LAMP components.
Installation and configuration
Still, most, probably, would like to immediately get at least a test, but configured working server. Then follow the instructions below.
- Install the required packages in the second way:
sudo apt-get install apache2 mysql-server php5 phpmyadmin
- We come up with and enter the superuser password in order to install MySQL on Ubuntu, then we do it again.
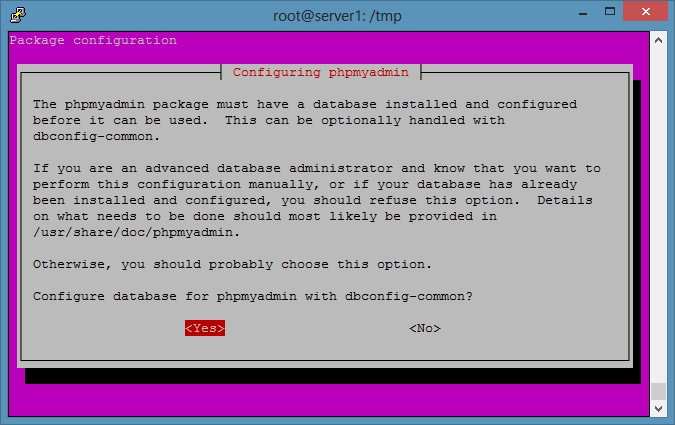
- The phpmyadmin configuration window is displayed. Here you need to specify that Apache will be used
- After that, you will need to read the information in a couple of windows and confirm the database setting. dbconfig-common is a special utility package that is used on both Debian and Ubuntu.
- The system will ask us to enter the password again. This needs to be done three times: to combine MySQL with phpmyadmin, to create a database, and to confirm.
- We check if the server is running. We enter “localhost” in the address bar of the browser. A message should appear: “It works!”.
- Now we enter “localhost / phpmyadmin” in the line, log in. Login: root, the password is the same as entered earlier.
Configuring the server and adding a website
Setting up a LAMP server is the most important part, as installing MySQL, Apache, PHP 7 on Ubuntu is easy. Next, you will need to work with the program code.
Link to phpmyadmin:
sudo ln -s / etc / phpmyadmin / var / www
Open and then edit the server configuration:
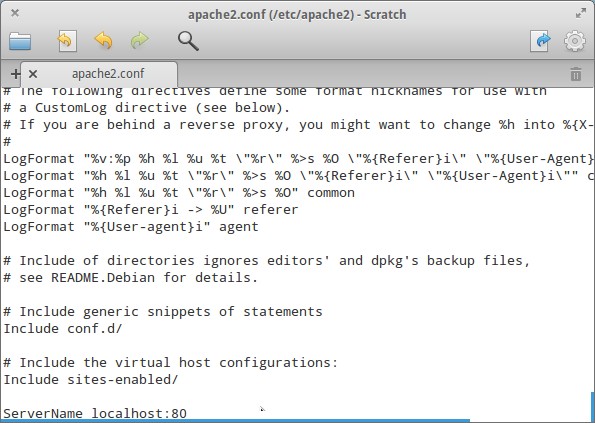
sudo nano /etc/apache2/apache2.conf

Add the line to the end:
ServerName localhost: 80
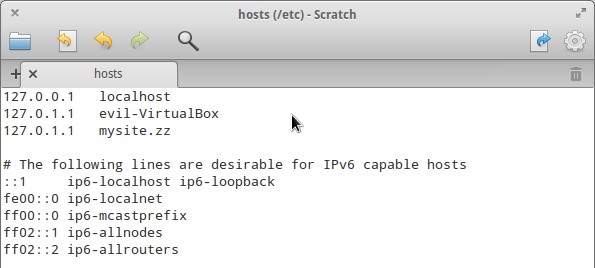
Open the hosts file:
sudo nano / etc / hosts
Add the line:
127.0.1.1 testsite.ru

We make a configuration file for a new site:
“VirtualHost *: 80”
ServerAlias testsite.ru www.testsite.ru
DocumentRoot /home/server/testsite.ru
“Directory home / server / testsite.ru /”
AllowOverride All
“/ Directory”
“/ VirtualHost”
Place this file with root rights here: / etc / apache2 / sites-available /
We activate the site:
sudo a2ensite testsite.ru
We restart the server:
sudo /etc/init.d/apache2 restart
Create a page for a website
We make the first page – the index.php file in the site folder (home / server / testsite.ru).
We enter there:
‹?
echo ‘Hello !!!’;
? ›
In general, you can enter anything you want, you just need to check the server’s performance.
We open our page through the browser: enter the web address into the line.
After that, we should see the cherished “Hello !!!” If this happens, then everything is set up correctly. Now you can put a complete website in this folder that will be tested on LAMP. The folder, as well as the site address, of course, can be changed.
Now you know that installing and configuring MySQL, Apache, PHP (LAMP) on Ubuntu is not as scary as it initially seems. These are just the basic features of the software. Over time, you will learn to harness the full power of programs.