To ensure data security in Windows, starting from Vista, profiles for network connections have been implemented. The user is given the opportunity to select the preferred connection option when connecting to the network for the first time, but if in the future it becomes necessary to change it, this can be done manually. What are network profiles and how to change from a public network location to a private one, or vice versa, we will consider.

Contents
Network type – what is it
The network profile, which is selected upon connection, is a set of settings for Windows services – Local Security Policy and Firewall. This is the same as the network type or network location. After the user selects one of the profiles, certain settings are applied to ensure the proper level of security. You can determine which network is better to choose based on the conditions under which the connection is made, that is, depending on the place where the device is located (home, office, shopping center, etc.), the corresponding profile should be activated.
To understand what to be guided by when choosing, first you should familiarize yourself with what types of networks exist and how they differ:
- A private network (up to the eighth version of Windows called “Home network”) is usually used at home, where there is a high degree of trust between devices, taking into account which the OS sets a low level of security, since there is no need to be very vigilant here. The profile assumes network discovery of devices that can communicate with each other and use shared files and printers. Selecting this option allows you to create home groups that include several devices controlled by an administrator who can allow or deny access to shared data or equipment.
- Worker also has a high degree of trust between devices controlled by the administrator, as in the case of “Private”, but there is a difference – it will not work to organize a homegroup. In the tenth version of Windows, the home and work networks were combined into one, and now the profile is called “Private”.
- Guest or public. This profile protects the connected device as much as possible from outside intrusion, since detection is disabled (a computer or other device is invisible for connections nearby). The devices do not have common data, therefore, this option does not provide for setting up a homegroup. The public network, as the name suggests, is often used in public Internet access locations (airports, shopping malls, cafes, and other public places).
- The domain network unites computers under a common security policy and provides centralized control and management. A common database is created for the domains, and there is also a domain controller to which the rest of the devices are subordinate. That is, the dominant computer determines what data will be available to other users, and is also able to restrict visits to Internet resources. This network location is often used in organizations.
You can see which network is currently applied in the Network Control Center. You can go to the service by right-clicking on the Internet access icon located at the bottom of the tray. Here in the tab “Viewing basic information about the network and setting up the connection” there is a block “View active networks”, which displays the used connections and their type.

By default, when you first connect, the operating system creates a public network, and the OS asks for confirmation, specifying whether you want to allow access to other computers and devices to detect your PC. If you want your device to become available to others, pressing the “Yes” button in the window with a question activates the private network, if you refuse to open access, Windows will connect the public one, with maximum protection against intrusion.
Because each network location is unique and designed for specific situations, sometimes changing conditions may require you to change the type of network location as well. This is easy to do, and if necessary, you can reactivate the old profile.
How to change network type on Windows 10
If you need to change the public network to your home network or vice versa, you can carry out the procedure in different ways. You can make such changes only if you are logged in under the administrator account, the rights of the user logged in under the guest account are very limited, this point should be taken into account.
Through Windows settings
The easiest way involves making adjustments to the system settings. To complete the task, you will need to do the following:
- We launch the Windows Settings window from the Start menu (as an alternative launch option, use the Win + I keys).

- Click “Network and Internet”.
- In the left menu, select State from the list, and then click “Change connection properties”.
- Here you can change the public profile to private, or vice versa, by checking the desired option.
- The method does not require a reboot, so just close the window.
For local Ethernet connections, in Windows 10, you can change the public network to a private one and vice versa as follows:
- Launch Windows Settings, select “Network and Internet” or click on the connection icon in the tray, and then click “Network and Internet Settings”.

- In the menu on the left, among the list, select Ethernet, and then click on the connection being made.

- Under the item “Make this computer discoverable”, switch the toggle switch to the desired position. When you need to change a public profile to a private one, set it “On”, and if vice versa – “Off”.

- The parameters are applied immediately, no reboot is required.
For a Wi-fi connection, we proceed in a similar way:
- Go to Windows Settings – Network and Internet or click on the tray icon and select “Network Settings”.
- In the left menu, go to the Wi-fi section and click on the active connection.

- In the “Make this computer discoverable” column, move the toggle switch to On or Off, depending on whether you want to make the network public or you need to use a private one.
Reset
Another method involves performing a network reset (the option is available here, in the Windows settings in the Status section), as a result of which, after restarting the device, you will be able to see a request from the system when connected and select the required option.
Changing the network through the configuration of the “Homegroup”
This method works only in one direction, that is, it implies changing the profile only to private. It is available in early versions of the “ten”. How to change the public network to the home network in Windows 10 by setting up home groups:
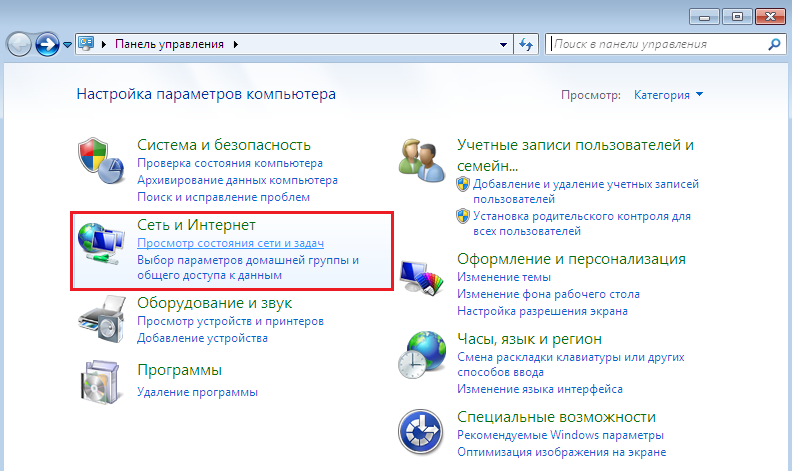
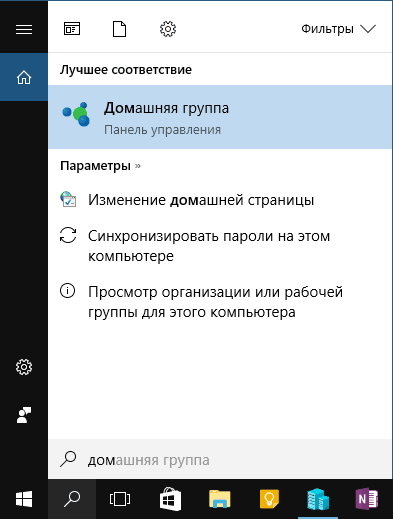
- We go to the Control Panel (from the Start menu or in any convenient way), select the “Network and Internet” section in the left menu of the window, go to the “Home group” (you can also find it through the search).
- Below the warning message that creating a group requires selecting a private profile, click “Change location”.

- A panel will appear as when connecting for the first time. Here we answer positively to the question of allowing the detection of this computer by other devices.

Changing the network through local policies
To implement this method, do the following:
- Open the local policy window through the Control Panel (Administration section) or by using the Win + R combination, call the console and enter the secpol.msc command.

- We go to the branch “Network list manager policies”, in the right part of the window we find the name of the active network and right-click on it to display the context menu, where we select “Properties”.

- In the window that opens, go to the “Network location”.

- If you need to set a private profile, in the “Location type” block, select “Personal”, and in the “User permissions” check “The user cannot change the location.”

- When you need to make the network public, in the first block select “General”, and in the second – “The user can change the location.”
- We press “Apply”, then “OK” for the changes to take effect.
Using Registry Editor
Without the appropriate knowledge and skills, it is impossible to edit the system registry, so the method can only be used by experienced users. Every careless action in the registry editor can lead to unpleasant consequences, up to a system crash. If you are confident that your computer experience is sufficient, proceed with:
- Open the Run console by pressing the Win + R keys, enter the regedit command to start the editor, and allow the application to make changes.

- We follow the path HKLM – SOFTWARE – Microsoft – Windows NT – CurrentVersion – NetworkList – Profiles.

- In one of the folders inside Profiles, opposite the ProfileName parameter, there will be the name of the network used.

- For the Category parameter, set one of the values 0 or 1 (0 – public network, 1 – private), for which we press RMB to display the menu and click on the “Change” item, change the value.


- Close the editor window and reboot the device.
Through PowerShell
Another tool for advanced users is the Windows PowerShell system utility, which is an alternative command line option. To change the profile using it, you need to do the following:
- We go to the service, for example, using the search. In the output, click RMB on the PowerShell service and choose to run as administrator, after which we allow you to make changes on the PC.

- To set up a private network in the console, write Set-NetConnectionProfile -Name “Ethernet 2” -NetworkCategory Private.
- To change to a public profile, write Public instead of Private.

To decide which network to choose when connecting, home or public, because there can be only one activated, you should take into account the conditions under which the connection is made. You shouldn’t assume that a public network will provide access to your device; on the contrary, by choosing this option, you let the system know that the connection is not under your control and you need to be vigilant. Choosing a private profile means that only devices that trust each other are connected, and Windows can loosen its grip.
If you need to open access to devices located in the house for exchanging data within the network, as well as for the purpose of monitoring and control (while the network will be protected from other devices until you allow access), then select the home network. In the case when this is not required, and the goal is to protect the device from prying eyes, it makes sense to activate the public network, as the system suggests. This option is also relevant for direct connection with the provider’s cable, since not only you are connected to the equipment of the service provider. You can change your profile at any time, you now know how to do it.