Microsoft Word is a text editor that is actively used by almost all PC users. It is he who allows you to create text documents, as well as view and edit them.
The “Ruler” element, which is necessarily included in the text editor, contributes to the correct editing of text files. Thanks to him, it is possible to set the necessary borders, tabulation, corresponding to the requirements.

However, in some cases, this element may be deleted, in this regard, it will be quite difficult to edit the document, so users are trying to find information on how to enable the ruler in Word.
Contents
Microsoft Word 2003
The ruler is a mandatory element of Word, therefore, having found its absence when opening a text file, you should do a few simple operations and return the necessary tool back.
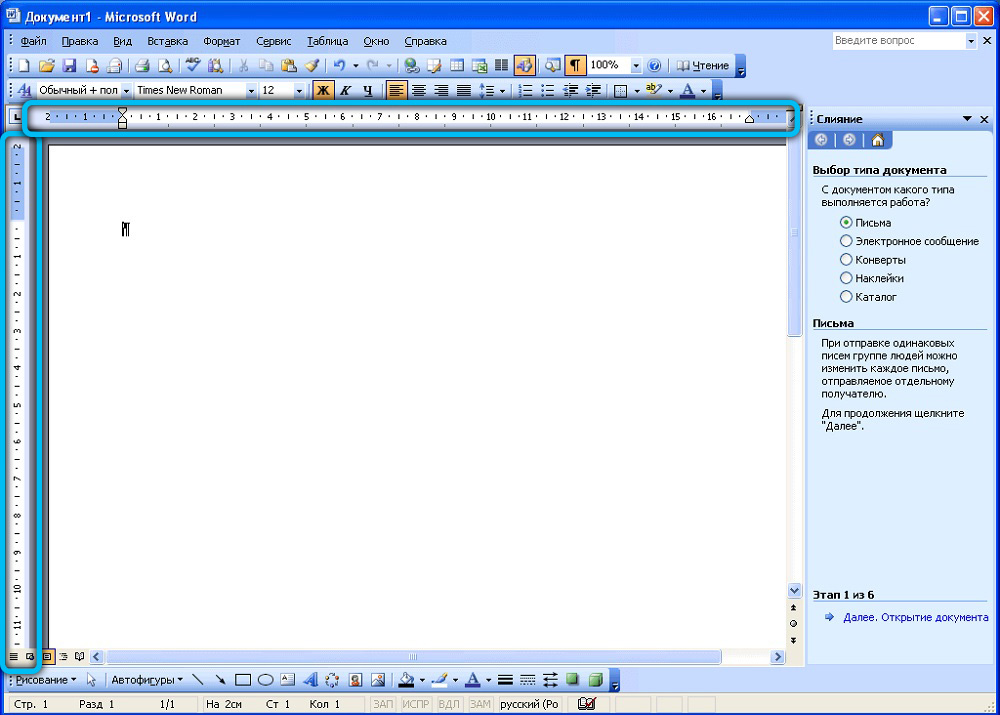
There are several versions of Word now, so the procedure may differ slightly from version to version. It is for this reason that the user must first find out which edition of Office is installed on the computer, and only then read the recommendations of experienced users on how to make a ruler in Word.
Order of inclusion in Word 2003
First, open Microsoft Office. If the functional element is really disabled, the user will see only a white margin, on which it is impossible to correctly determine the margins, the amount of paragraph indentation.
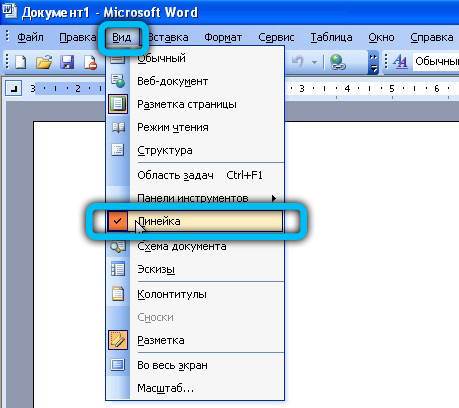
It’s easy to fix this problem by reading the information on how to open markup in Word.
Find “View” on the top menu bar. By clicking the left mouse button on it, open the drop-down list. Among the listed possibilities there is an item “Ruler”, which should also be clicked with the left mouse button.
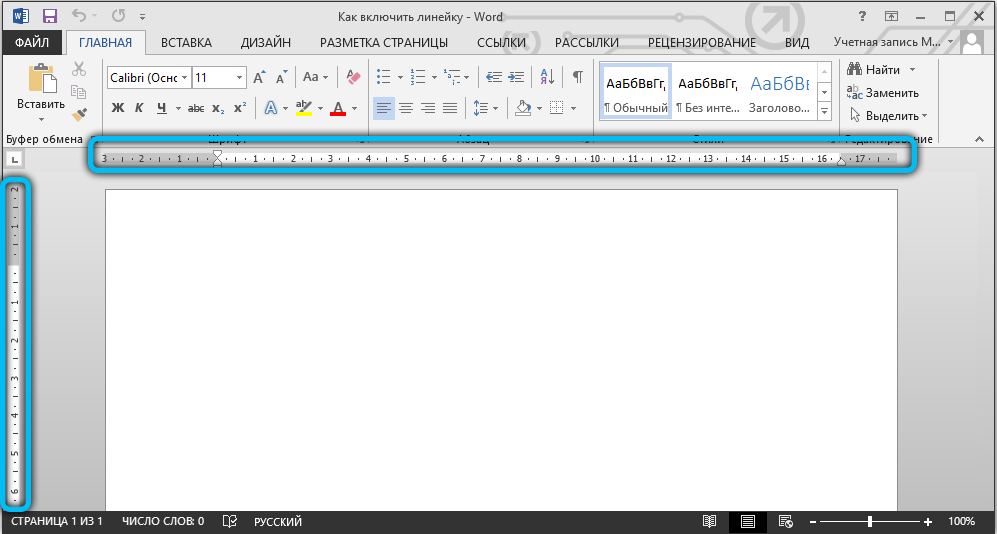
Immediately after this, the appearance of the open text file will change, because the desired element will appear in the upper part and on the left side, focusing on which it will be easier to perform editing.
Microsoft Word 2010
After installation on a computer, Microsoft Office 2010 opens without a ruler that allows you to control indents and borders. But if you take the necessary steps to install it, in the future the files will open with an additional function.
Order of inclusion in Word 2010
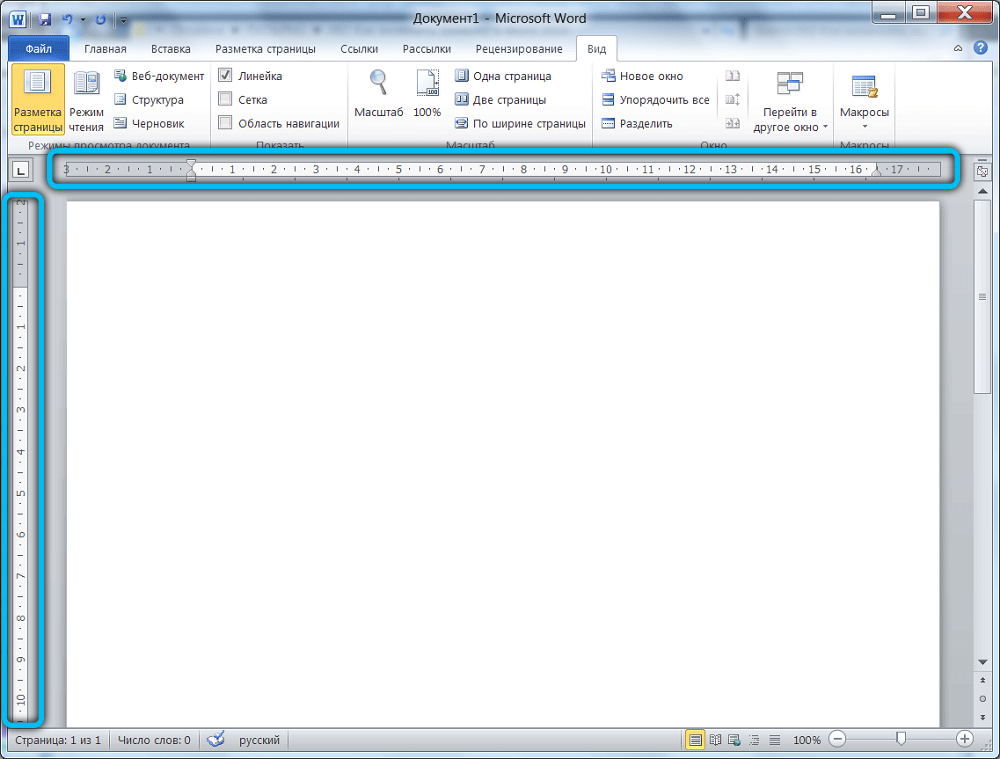
The procedure for adding a ruler in Word 2010 is similar to the procedure for the 2003 version. The only difference is the location of the searched submenus.
To display an additional line function, you should find the “View” menu in the upper toolbar, click on it. Below you will see a list of additional functions that are already activated or can be additionally included in Word 2010. Among them is the item “Ruler”, near which you need to check the box, confirming your desire to see the tool after each start of the text file.

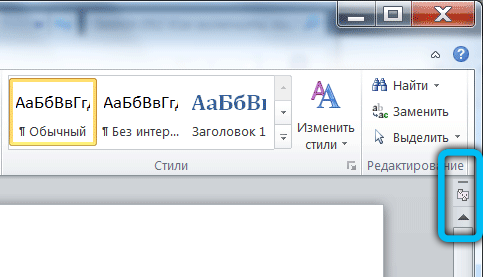
There is also a second solution to the problem. To do this, you should pay attention to the right side of the document, where the slider is located, which allows you to move the open document. In the upper part, directly above the slider, there is a small button, which is a small rectangle with divisions. By clicking on it, you can quickly open and close this additional function.
Microsoft Word 2013
The algorithm for turning on the line in this version of the program is not much different from the previous ones. However, the interface has changed quite a lot here, so some users may have difficulty finding this tool.
Order of inclusion in Word 2013
There are several ways to activate the required function. Therefore, we will consider each of them so that you can choose the most convenient one.
Open a document, find “View” in the top tab bar and navigate to it. You will see a menu with various editing tools, which is divided into several categories. The Ruler option is in the Display section. To enable it, just check the box next to it. After these manipulations, a horizontal scale should appear above your text.

Another method, which has already been mentioned in this article, is as follows: on the right above the scroll bar and just below the “Help” button (an icon with a question mark) there is a special “Ruler” button. You just have to click on it to call the corresponding function.
Microsoft Word 2016
The updates in this version are not so large, but in any case, in order to avoid mistakes, we have prepared a guide on enabling markup parameters.
Order of inclusion in Word 2016
Go to the “View” tab and check the box next to the “Ruler” item. After this action, two scales will appear in your document at once: one above the document, the other on the left.

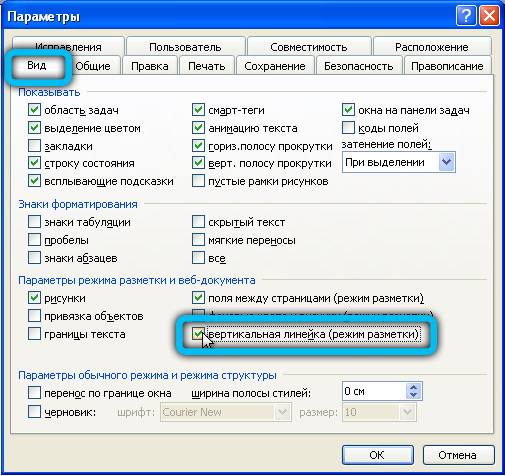
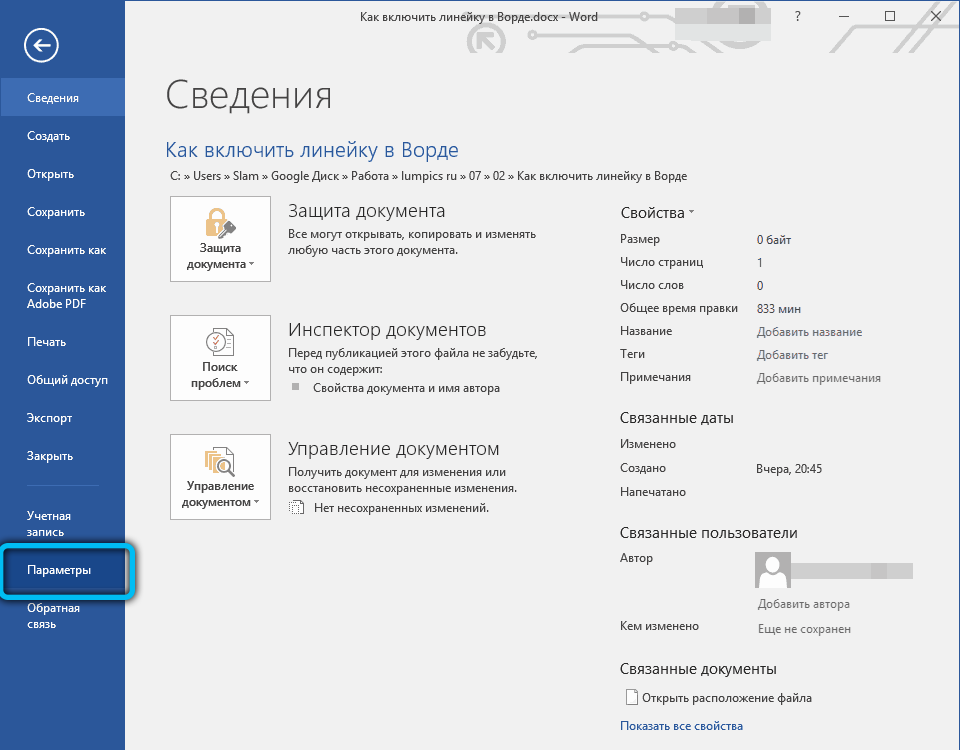
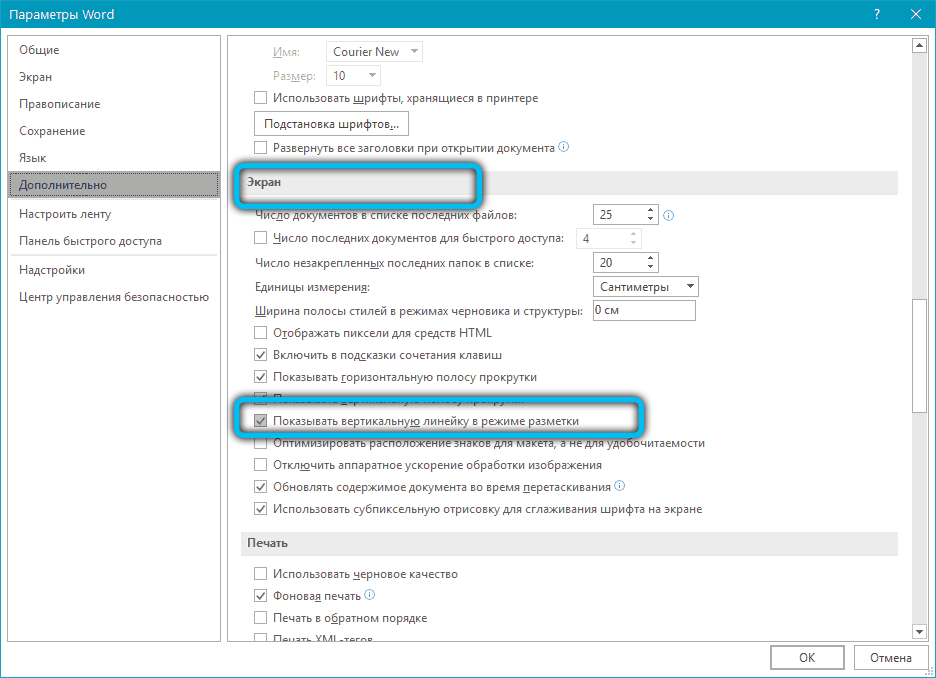
There are times when the vertical layout, despite the inclusion of the main option, does not want to be displayed. The reason lies in the settings of the program itself. Go to “File” → “Options” → “Advanced”, and then in the “Display” section, check the box next to the line “Show vertical ruler in layout mode” and save the changes with the “OK” button.
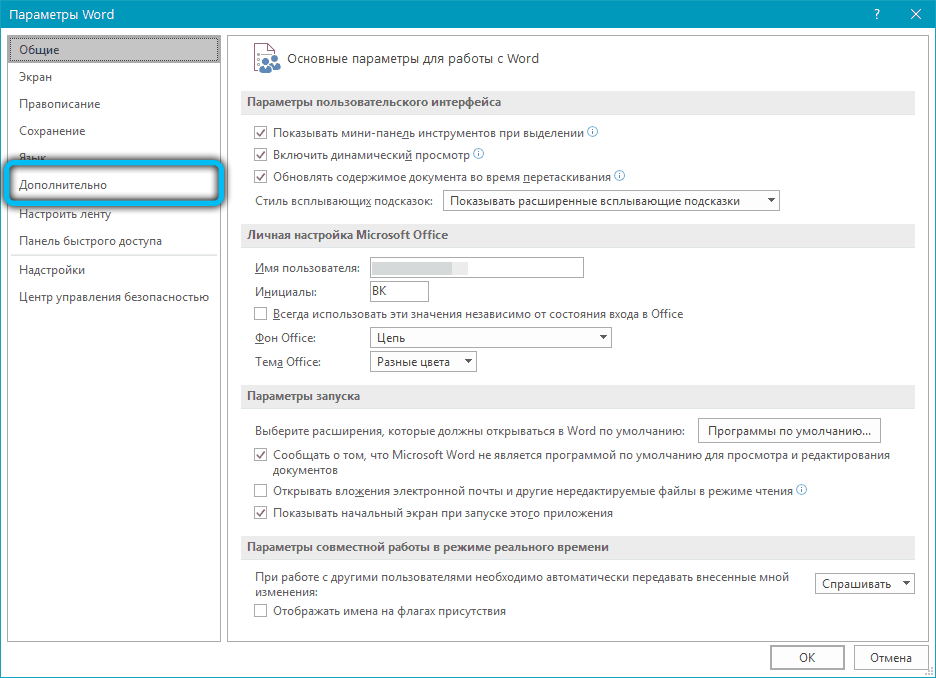
Naturally, if you do not need this parameter, you can turn it off according to the same principle. Please note that units of measurement are also set in this menu. Just click on the drop-down box and select the option you want.
Microsoft Word 2019
The latest and most current version of the program has a slightly modified interface. However, if you follow our instructions, you will not have any problems with activating the line.
Order of inclusion in Word 2019
The whole algorithm consists of just one step: after launching the application, go to the “View” → “View” section and select the appropriate tool on the work panel.

For macOS, the steps are the same: open the viewer and check the box next to “Ruler output”.
As for the popular web version of this program today, unfortunately, this important attribute is not displayed there.
As you can see, the problem with the lack of markup can be solved in just a couple of clicks.