The new version of the operating system from Microsoft offers a lot of innovations that you need to get used to. But man is so arranged that he prefers practical conservatism even to seemingly progressive changes: habit is a great thing!
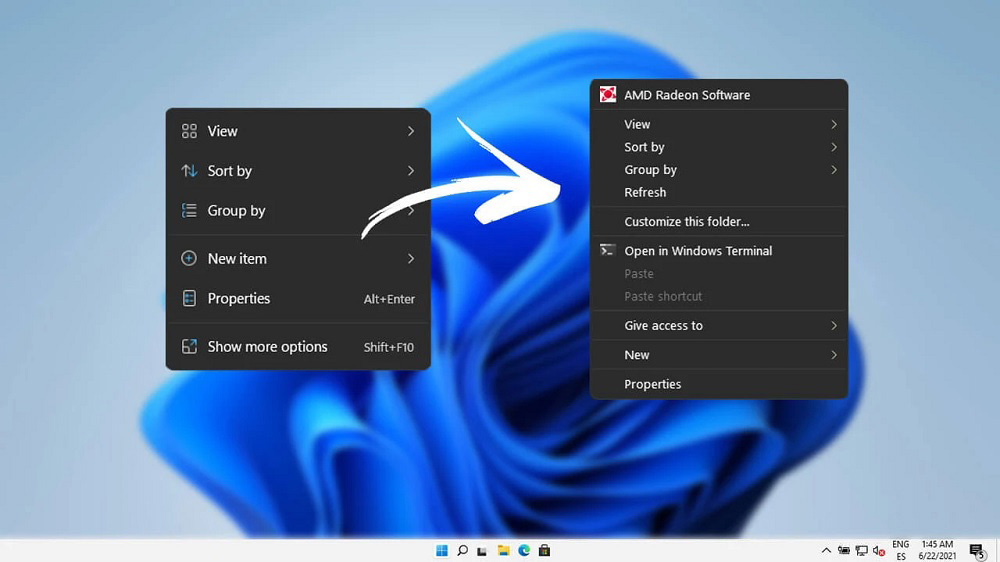
It would seem that such an insignificant element of work as a context menu should not cause any particular complaints – in Windows 11 it has a different, “acrylic” design, in the style of the interface of the updated OS. Yes, it looks nice, but the usual content of this menu has changed. For the purpose of unification, the developers have left in it only the most frequently used commands such as open, copy, delete and some others, depending on the type of object. Many other menu items are also available, but to display them, you must select the “Show additional parameters” item (it is located at the very bottom and can be called by the Shift + F10 combination). But users do not like to memorize numerous combinations, and clicking once more with the mouse is also work.
You may say – think, an extra second, but for a modern office, where many applications require frequent calls to the context menu, even a second can result in dozens of wasted time per day and many hours per month. And the average user feels nothing but annoyance if he knows that a specific operation can be performed in fewer actions.
So the return of the classic content of the context menu in Win11 is quite an urgent task for many. And it can be done in different ways.
Restoring the old Windows 11 context menu via the registry
Not the easiest way, but considered the most correct, is to enable the classic context menu in Windows 11 by editing the system registry. Note also that manual editing of the registry requires special care from the contractor, since any error or inaccuracy may affect the performance of the operating system.
So, we bring to your attention a step-by-step algorithm:
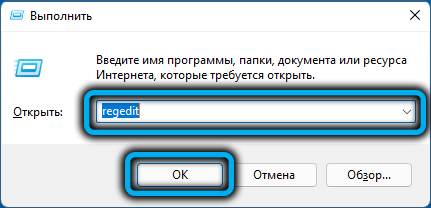
- starting the registry editor is almost the same as in previous versions of Windows – click the Win + R combination and enter regedit in the Run panel (you can right-click on the Start button and select Run in the menu that appears). We confirm the launch of the command by pressing Enter;
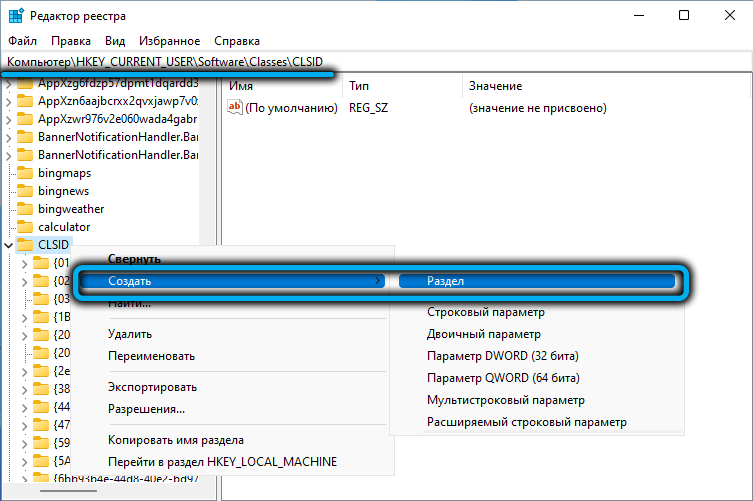
- we carry out a sequential transition through the branches
HKEY_CURRENT_USERSoftwareClassesCLSID - the CLSID branch must contain the {86ca1aa0-34aa-4e8b-a509-50c905bae2a2} section. If it is not there, you need to create it by right-clicking on an empty space in the section and selecting “Create”, and then – “Section” by entering the above value in the name field;
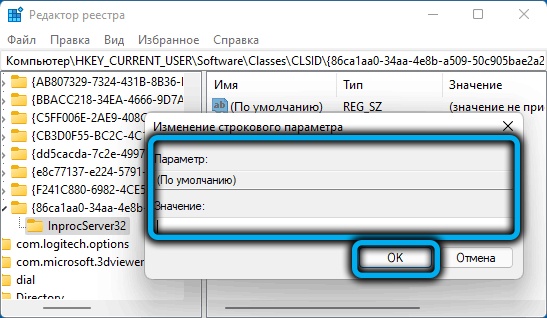
- inside the section, you need to create a subsection InprocServer32 (according to the algorithm you already know);
- after that it will appear in the left panel, click on it;
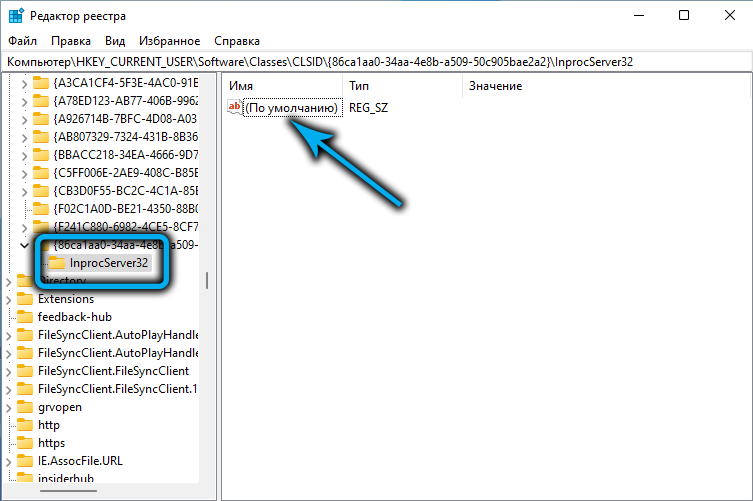
- in the right panel, make a quick double click on the name “By default”, and in the window that opens, click OK, without changing any parameters;
- close the registry editor.
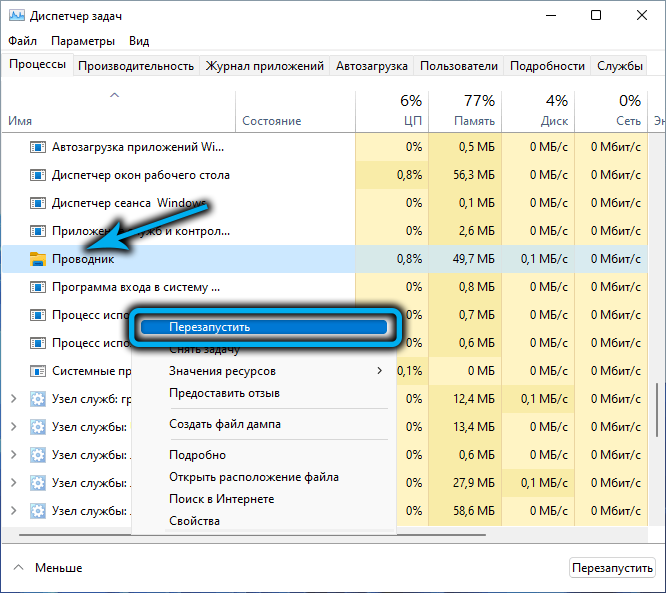
As a rule, the context menu in the old classic form will become available immediately. If not, you will need to restart the computer, although it may be sufficient and restarting Windows Explorer – this is faster, although you also have to tinker, because this can be done through the “Task Manager” (look for the “Explorer” line in the “Processes” tab, right-click and select the point “Restart”).
For those who do not like to “roam” through the wilds of the system registry, we can recommend another method, which consists in creating a text file (for example, in Notepad) with the following content:
 [HKEY_CURRENT_USERSoftwareClassesCLSID{86ca1aa0-34aa-4e8b-a509-50c905bae2a2}InprocServer32]
 @=""

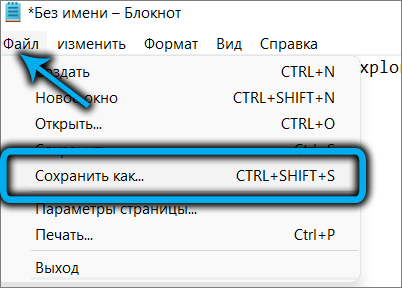
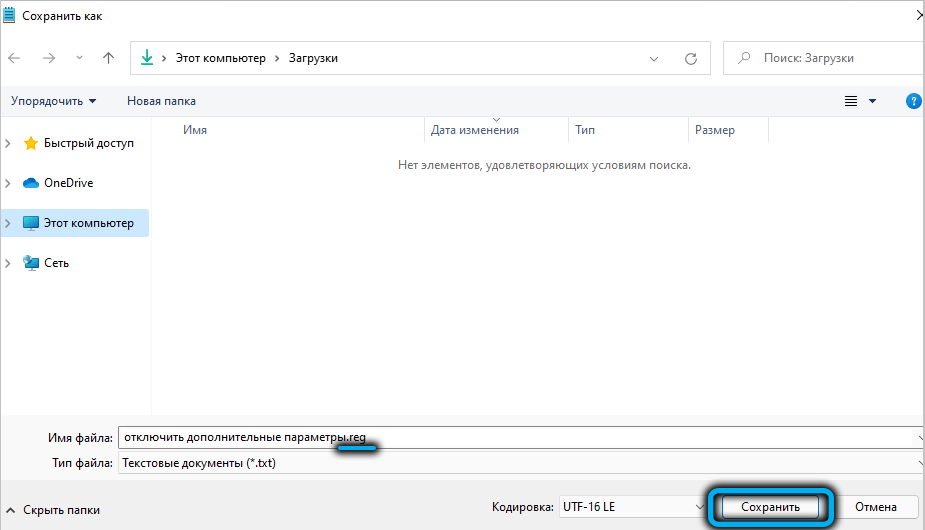
Then you need to save this file with the .reg extension (click in the main menu “File” – “Save As”, select the type “All files” and assign the file any name and the desired extension) and double-click on it – the data will be automatically entered to the register.
All that remains is to check if the registry edit worked. If not, restart your explorer and try again.
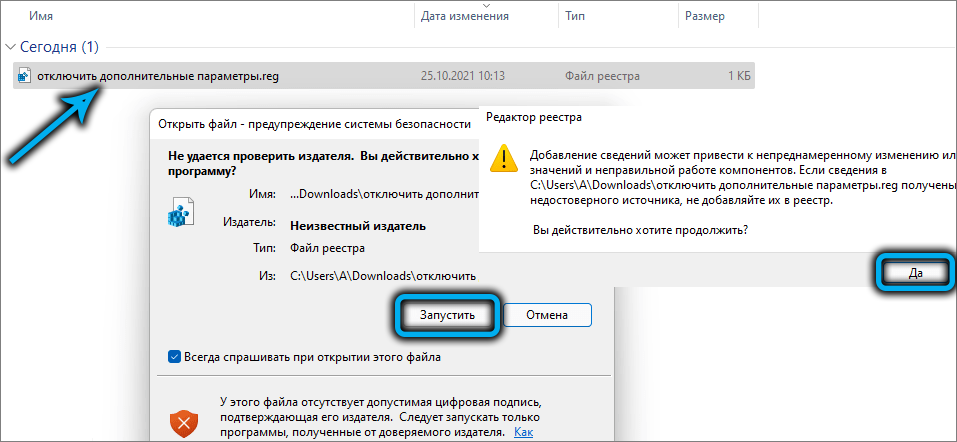
If at some point in time you need to return the native Windows 11 context menu interface, you just need to delete the {86ca1aa0-34aa-4e8b-a509-50c905bae2a2} partition.
Using the command line
An alternative way to bring back the classic context menu content in Windows 11 is through the Command Prompt, and this is the one preferred by many old-school sysadmins. You need to run the command line with administrator rights; you can do this in different ways. Let’s describe a method that is exclusive to the new operating system from Microsoft:
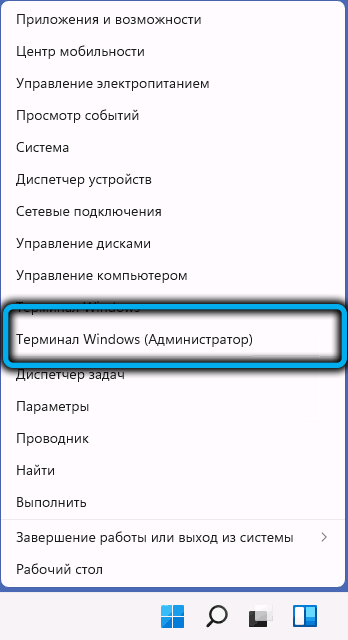
- call the context menu by pressing the “Start” button (or using the Win + X combination);
- select the line item “Windows Terminal (Administrator)” (this is a new Windows 11 tool, created specifically to facilitate the launch of the command line as an administrator, although you can run the Terminal with the rights of the current user);
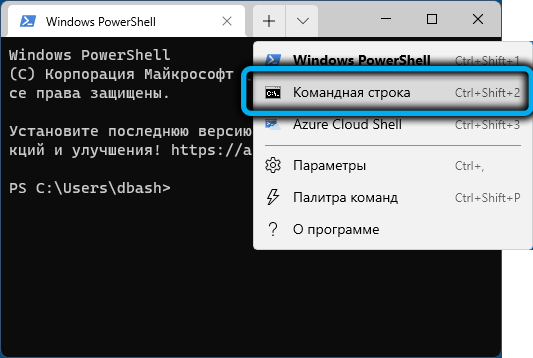
- a terminal window opens with the PowerShell tab open. In the upper pane of the window, click on the downward arrow, in the menu that appears, select the “Command line” item;
- a new terminal window will open, this time in command line mode and with administrator rights;
- we type the following line:
reg.exeadd "HKCUSoftwareClassesCLSID{86ca1aa0-34aa-4e8b-a509-50c905bae2a2}InprocServer32" /f /ve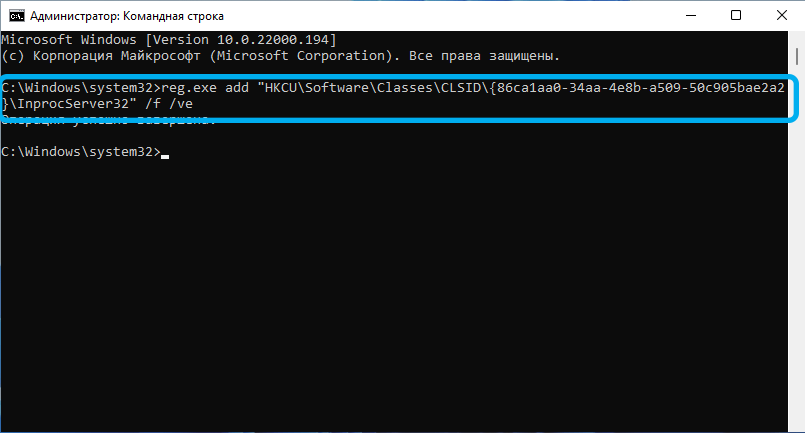
- confirm by pressing Enter;
- close the terminal window, restart the explorer.
Now, instead of the default context menu in Windows 11, we will have the old familiar look.
Using Win11 Classic Context Menu Utility
The third way to return the old familiar context menu is to use a specialized application distributed free of charge.
Step by step algorithm:
- download the utility from the official website https://www.sordum.org/downloads/?win11-classic-context-menu;
- unpack the archive;
- run the program (does not require installation), if the SmartScreen filter window appears, you must click the “Details” button and select the “Run anyway” option, confirming it;
- to disable the new context menu and change it to the classic one, click on the top button “EnableWin11 Classic …”;
- changing the button color from gray to green will mean that the setting has been successfully saved;
- press the “RestartExplorer” button.
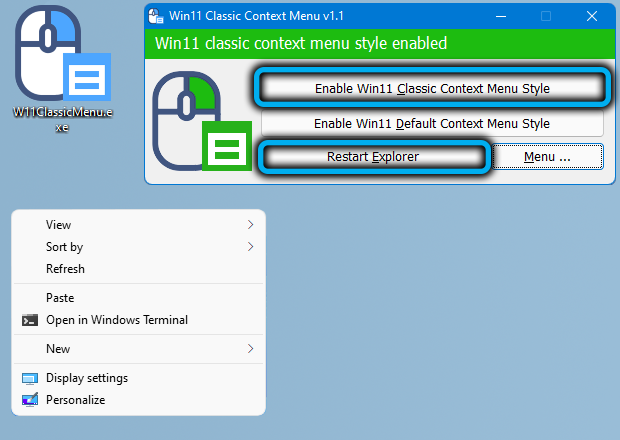
The second button is intended to return the original style of the context menu.
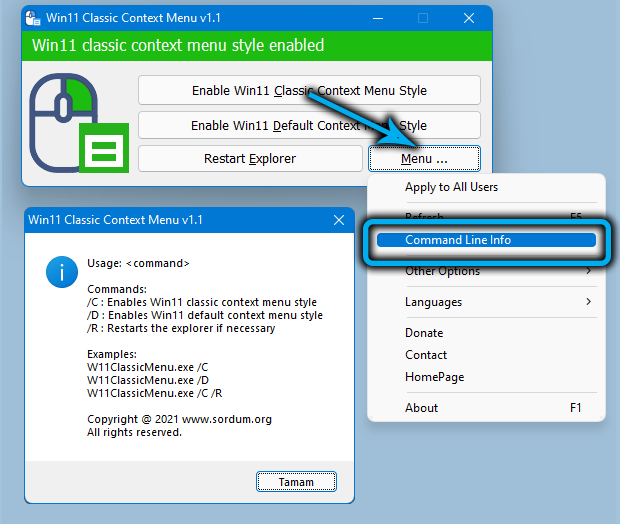
Those who like editing by means of text input of commands should press the Menu button and select the Command Line Info item – a window will open with a description of the command syntax, the execution of which enables / disables the classic style of the context menu in Windows 11.
However, for new users, such excursions into the past are unlikely to be useful, and experienced users eventually get used to the new design of the most popular operating system.