Windows logon authentication is a security feature introduced in the earliest versions of this operating system. And all this time, the applet that controls this function, or rather, the ability to enable automatic login without having to enter a password, is netplwiz. Some sources refer to the applet as control userpasswords2, which is basically the same thing. Start the service, uncheck the box, also traditionally called “Require username and password,” and voila – you were able to get rid of the annoying password prompt.

True, to perform such actions, you must specify the account name and, accordingly, the password to it, but this is a one-time operation. However, after Microsoft started promoting its account (MSA), to ensure automatic login, you need to enter not your account name, but your mailing address. The nuance is quite significant, but, of course, not for everyone.
The trick is that, starting from version “ten” 20H1, the checkbox may disappear from the applet window! This means that you will not be able to disable the password entry when starting Windows, which is an obvious disadvantage for an ordinary home user. Why this is happening and how to fix the situation, you will learn from this article.
Description and causes of the problem
The reason for the disappearance of the checkbox in Windows 10, starting with the 20H1 (or 2005) update, the first in 2020, is quite commonplace – Microsoft decided that almost all aspects of operating system user authentication should be taken over by the Windows Hello service. Therefore, by default, this service is registered in the login options, and it just does not provide for the use of netplwiz with its username requirement parameter. The reason is simple – an attempt to impose on MSA users, which involves logging in using Microsoft account credentials.
Leaving aside the discussion of this difficult topic, we note that Windows Hello is an applet that was not initially configured for password authentication. Its main functionality is entering a PIN code, a pattern, or using biometric procedures such as a fingerprint or face recognition.
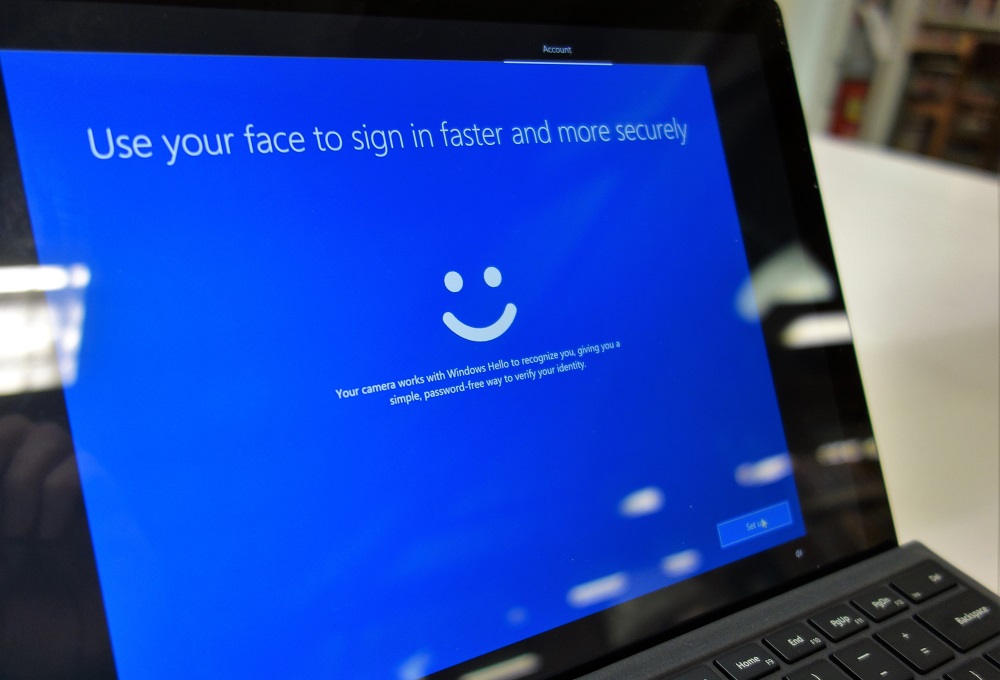
As for the upgrade to version 20H1, the result here may be unpredictable: for some, Windows Hello was turned on automatically, for others, the applet settings will be turned off.
A simple conclusion follows from this: for the notorious checkbox to appear, it is enough to disable Windows Hello. We will explain below how to do this. But there is one caveat: sometimes disabling a new applet does not help, and then the only way to fix the situation is to edit the system registry.
When will disabling Windows Hello not work, you ask? The answer is simple: this setting is only available if you sign in with a Microsoft account.
In other words, the operating system developer consistently and persistently encourages all Windows users to acquire an account. And at the same time, it does everything possible to protect MSA from hacking attempts. But it is unlikely that the switch that allows you to adjust the login method was hidden from local accounts on purpose – most likely, this is another programmer bug that will soon be corrected. If this does not happen, then you can really conclude that the actions of the Microsoft team were intentional.
How to turn off Windows Hello
So, what should you do if you do not have the checkbox that is the subject of this article in the netplwiz applet settings?
Considering all of the above, the answer is obvious: you need to check if the option to sign in to Windows 10 using Windows Hello is enabled.
If so, after disabling it, you will automatically be able to uncheck the “Require name entry …” option to automatically log in to the system.
Step by step algorithm:
- press the Win + I combination to enter the Options;
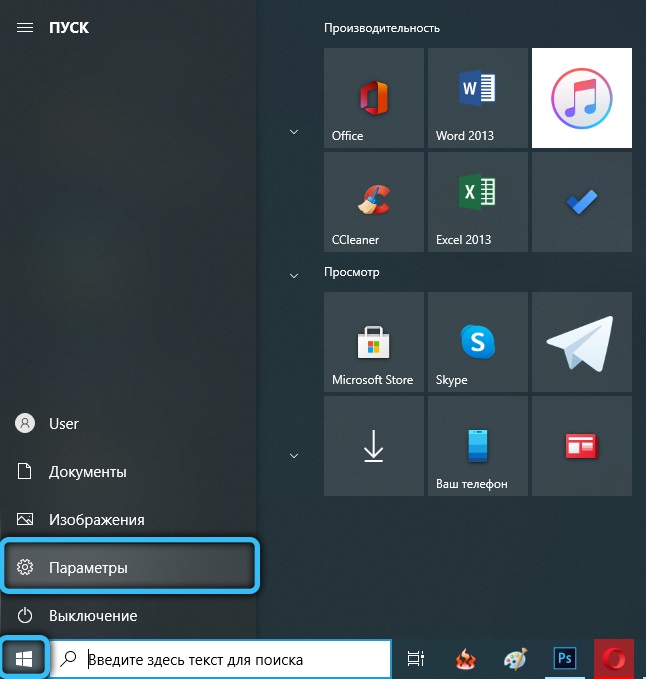
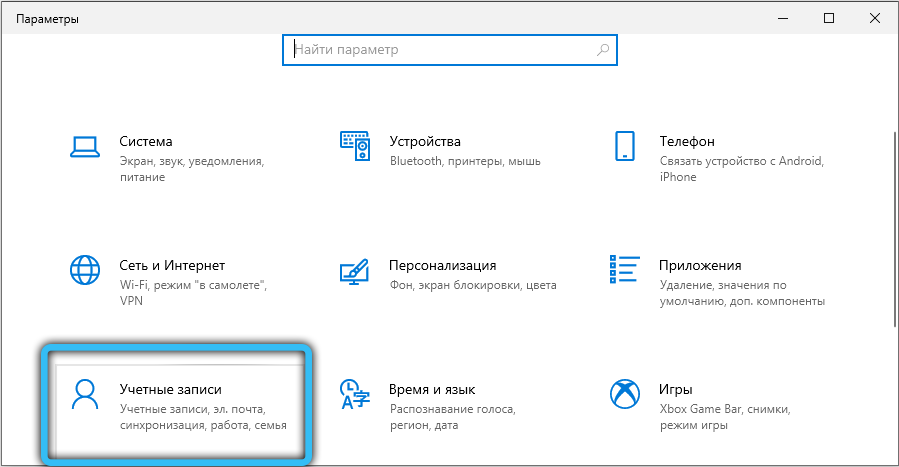
- in the “Accounts” block, click on the “Login Options” menu item;
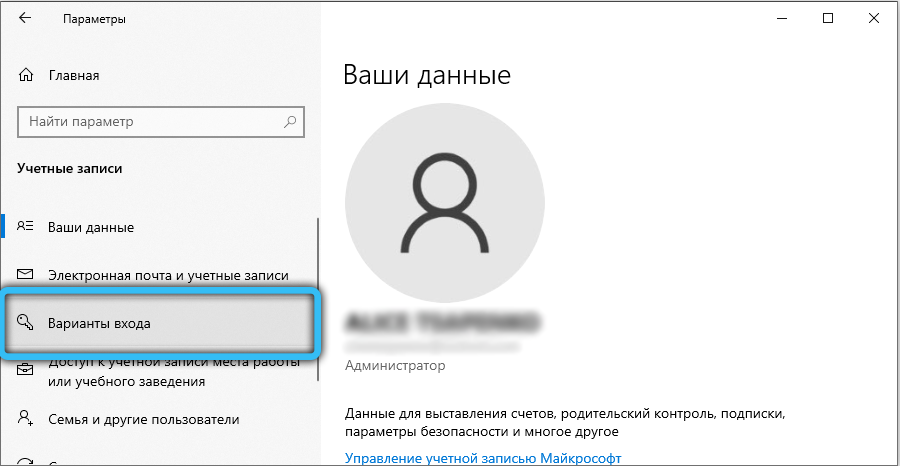
- in the right window, put the switch to the “Off” position, ignoring the recommendations of using Windows Hello to sign in with a Microsoft account.
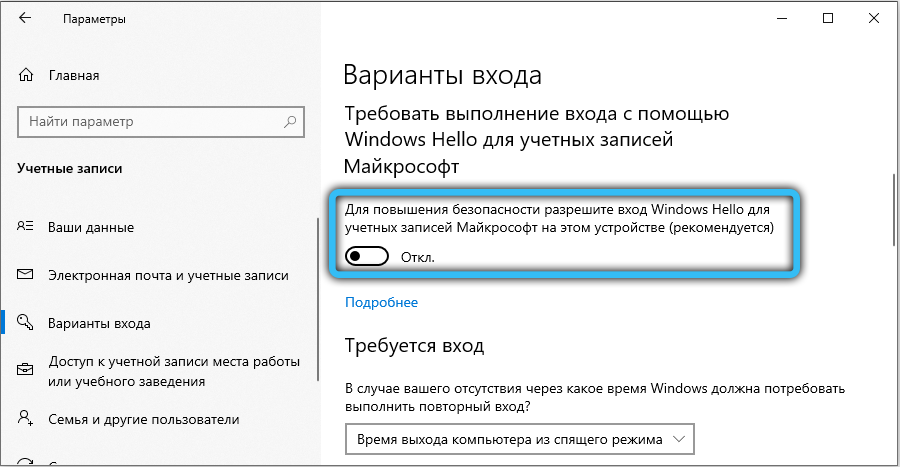
Note that you do not need to restart your computer after such actions – just run the control userpasswords2 applet, and the coveted checkbox will appear.
Editing the registry
If the above action did not help, you can go the other way, which will give a guaranteed result. And, as always, we note that editing the registry is a rather risky undertaking that does not allow errors. Otherwise, you will get a certain number of new problems with unpredictable consequences.
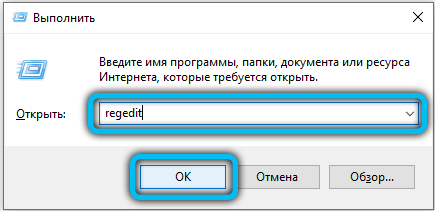
So, start the registry editor (regedit in the Run line) and go to the branch:
HKEY_LOCAL_MACHINESOFTWAREMicrosoftWindows NTCurrentVersionPasswordLessDevice.
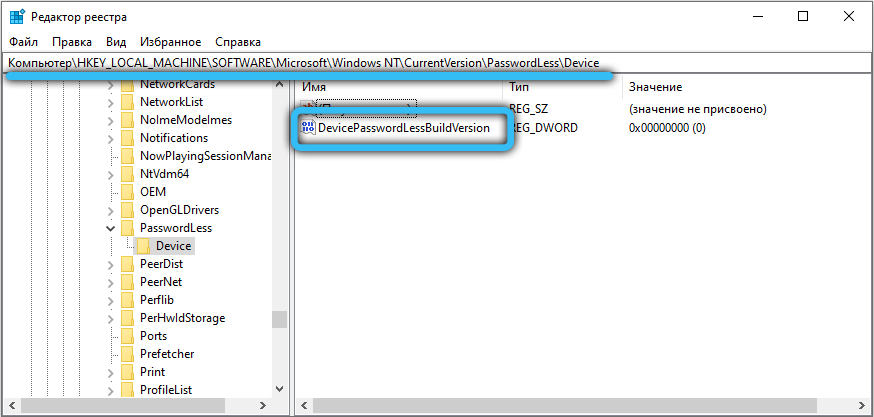
If DevicePasswordLessBuildVersion appears in the parameter list, click on it and change the value to 0 (most likely, there is 2, that is, Windows Hello is enabled).
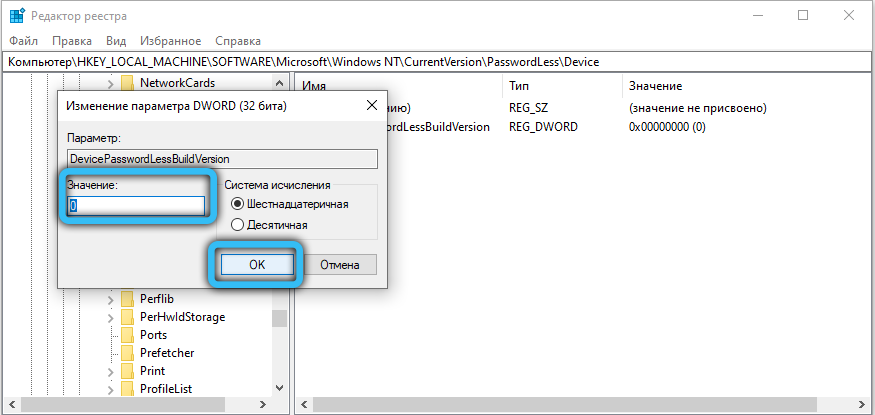
If there is no such parameter, we create it, for which we right-click on an empty space in the right block, select the Dword parameter, assign it the name DevicePasswordLessBuildVersion and put a zero in the “Value” field.
The same editing of the registry can be done in another way, without going into the editor. To do this, you need to run the command line, necessarily as an administrator, and run the following command in the console:
REG ADD "HKLMSOFTWAREMicrosoftWindows NTCurrentVersionPasswordLessDevice" /v DevicePasswordLessBuildVersion /t REG_DWORD /d 0 /f
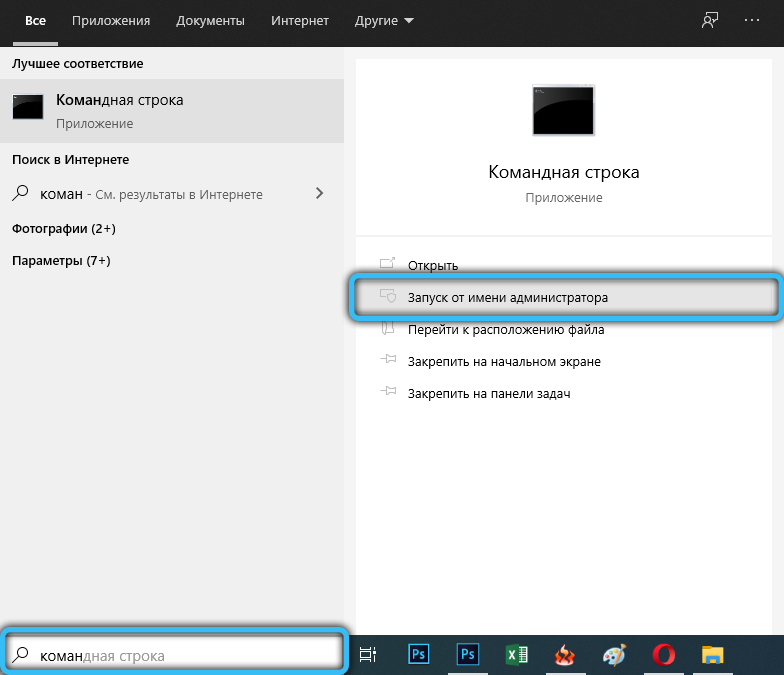

Using PowerShell, the command will look slightly different:
New-ItemProperty -Path "HKLM:SOFTWAREMicrosoftWindows NTCurrentVersionPasswordLessDevice" -Name DevicePasswordLessBuildVersion -Value 0 -Type Dword –Force
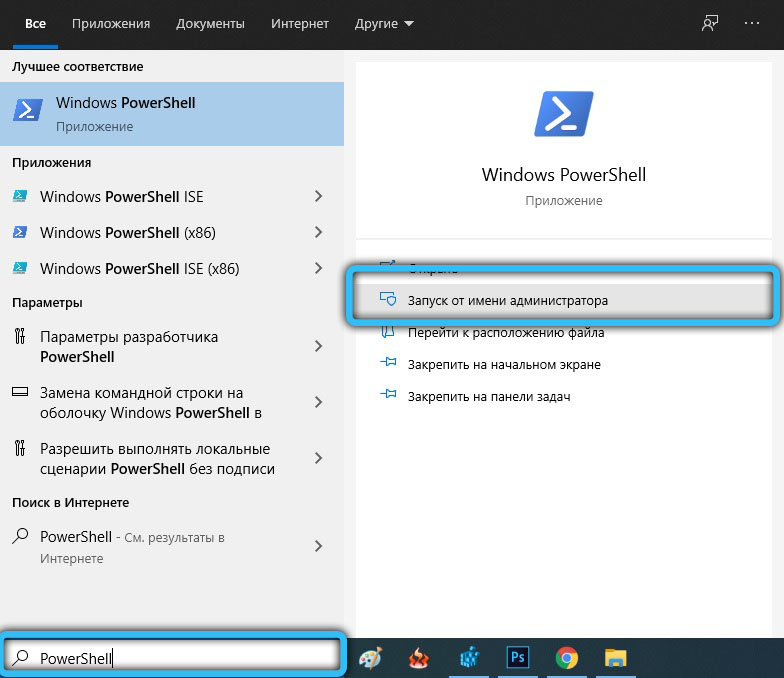
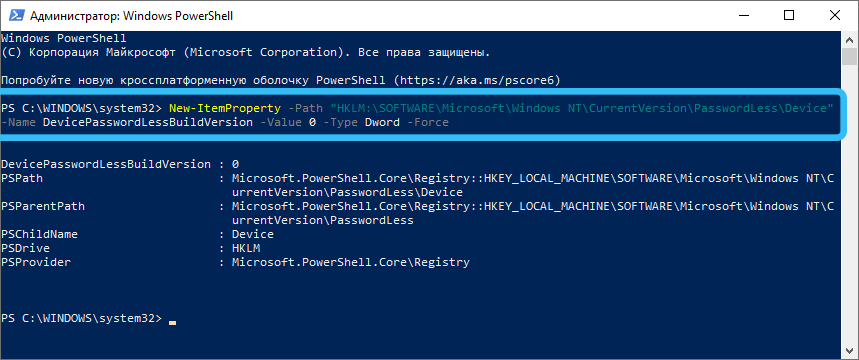
You can check the result:
- click Win + R and in the Run console, type the command control userpasswords2 or equivalent netplwiz, press Enter;
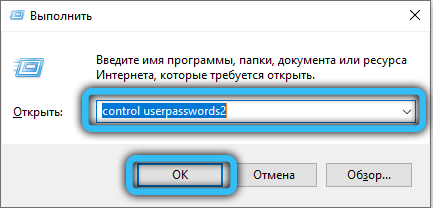
- click on the “Users” tab in the “Accounts” section and select yours;
- uncheck the “Require name entry …” option that appears;
- click on the “Accept” button;

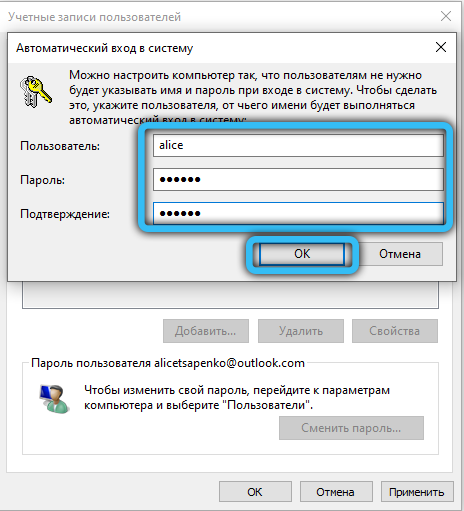
- enter your credentials in the window that opens (you will need to enter the password twice) and the next time you boot Windows, enjoy automatic login.
As you can see, the problem can be solved quite simply, and it concerns only those users who have switched to the top ten and do not refuse updates.